Icon Diploma Student

Learning to see with the eye of the heart

Posts from the ‘Uncategorized’ category

Grinding pure blue pigment from Azurite

azurite pigment

Grinding Azurite

This time last year, I bought a small lump of azurite from the Lapidary shop in Burslem, Staffordshire. I made a start at grinding it up in a pestle and mortar but since I didn’t need it at the time, saved the last stage of fine grinding to a powder with a glass slab and muller till later – ie now.

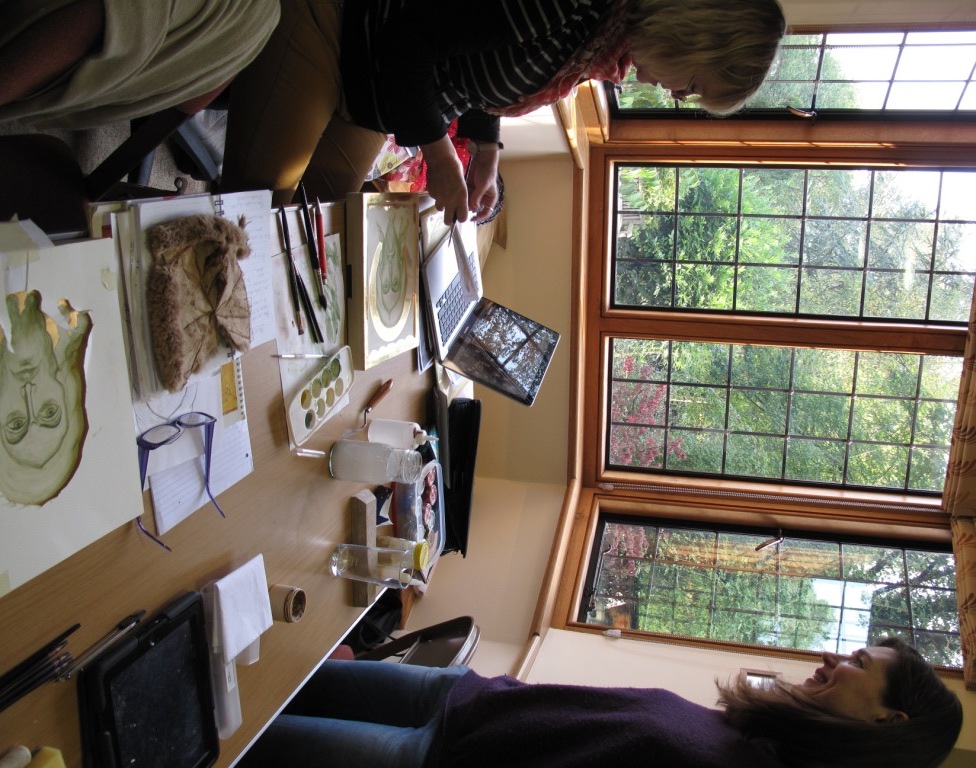
I am working on a triptych (see previous post) where I would like the two standing angels to be painted in a heavenly sky blue so it’s been back to the grindstone to extract this gorgeous colour.

Azurite rock

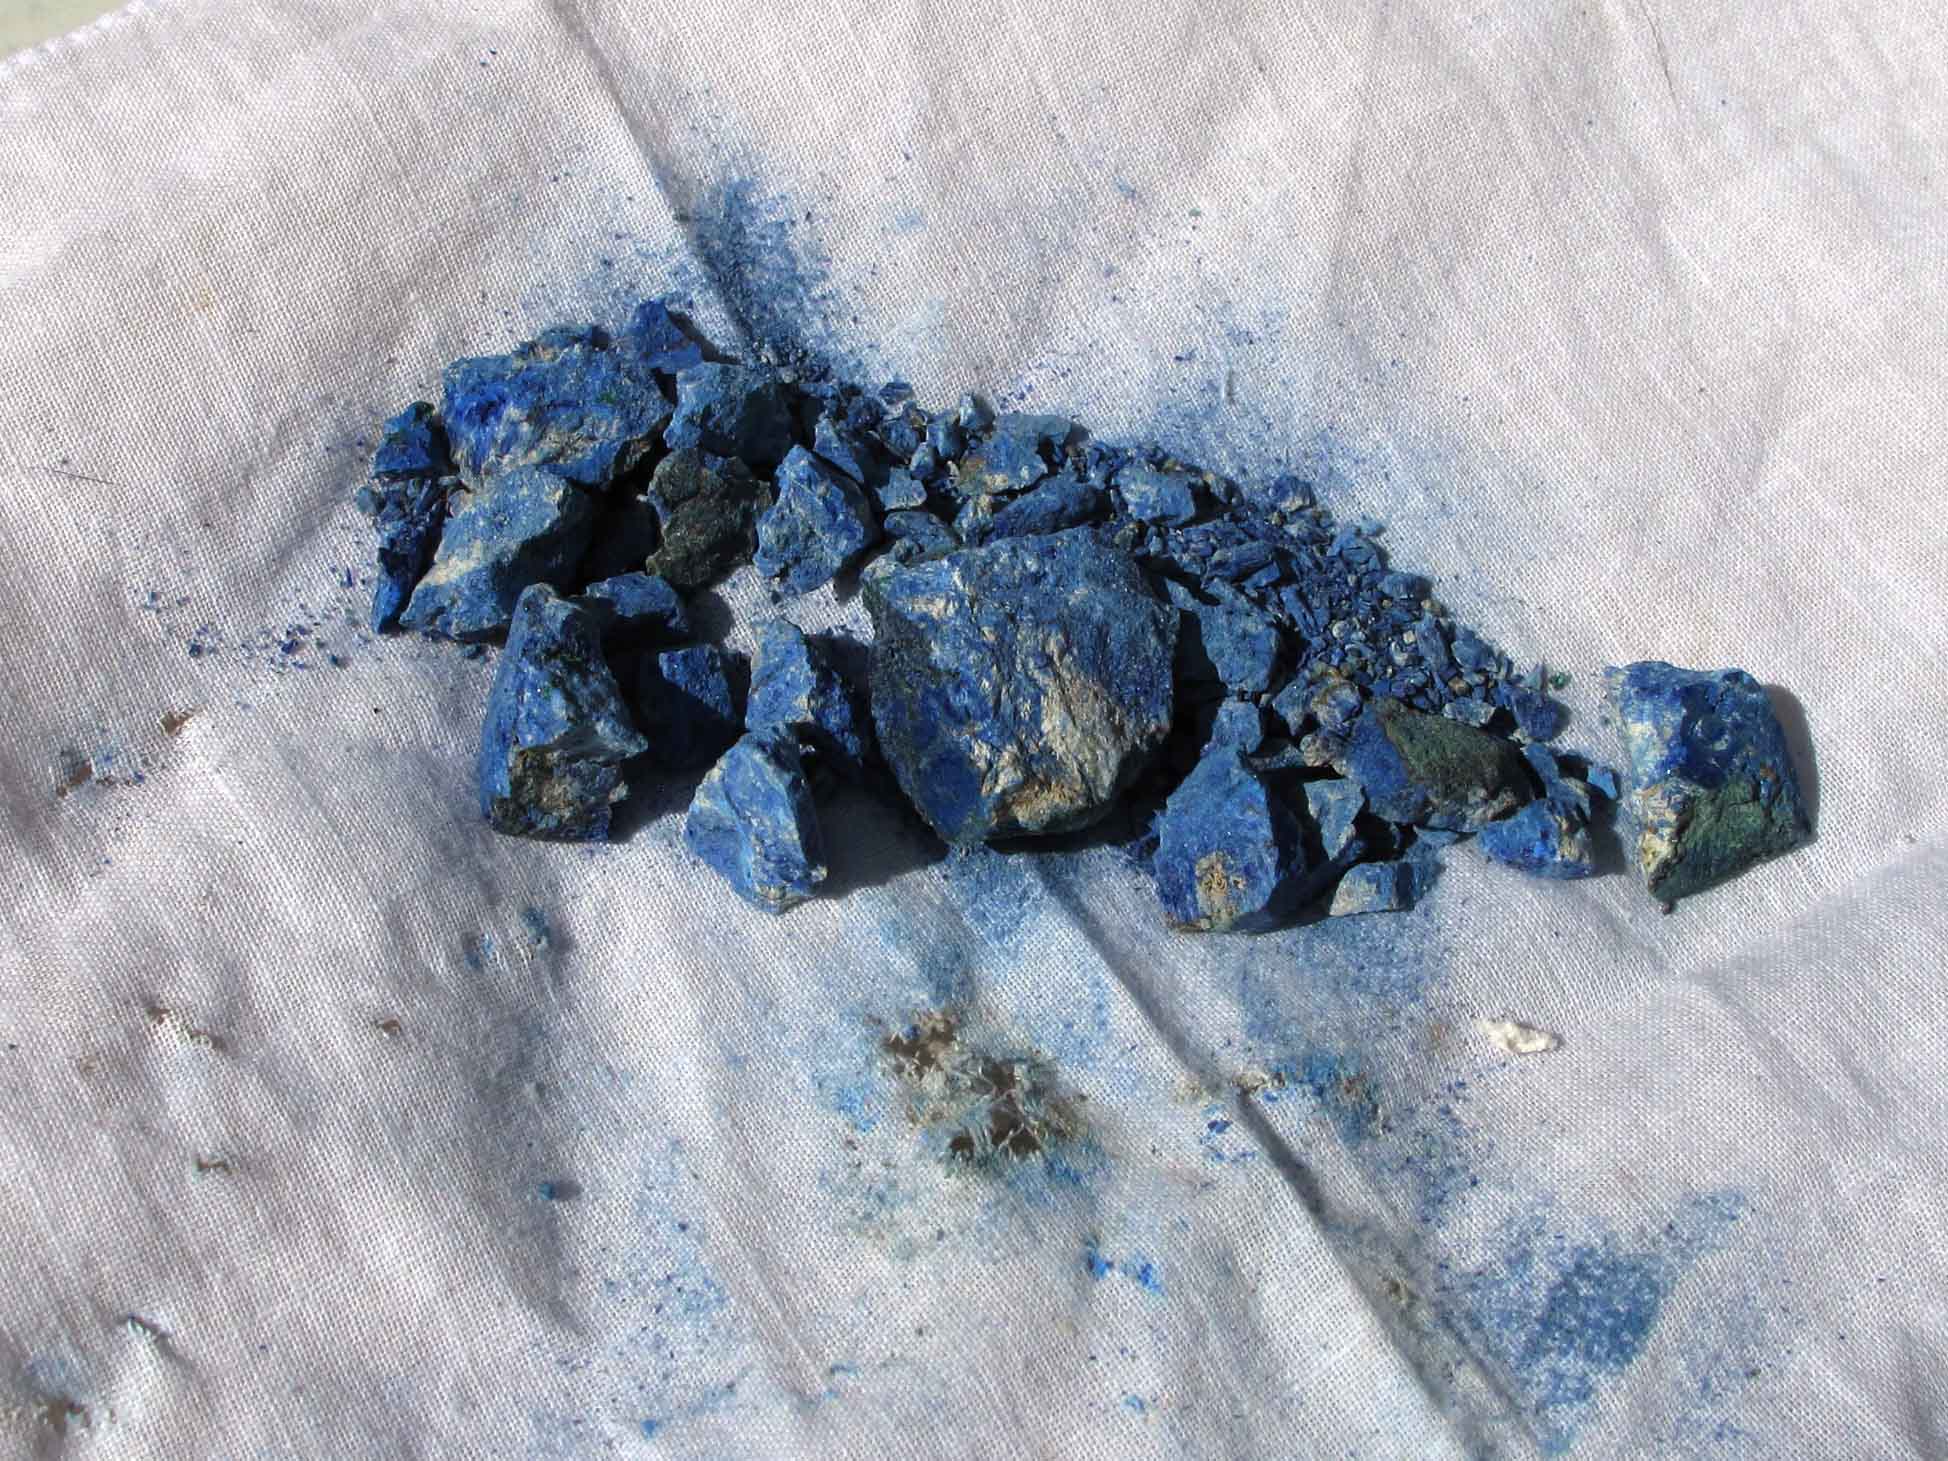
Lump of pure Azurite, approx 2cm cube

Aidan Hart, demonstrated how to grind Azurite during class last year which I filmed. You can watch the process over here  https://www.youtube.com/watch?v=y-FHvAxwg9w.  It is an amatuer video so not very good quality, but it captures the process.

Breaking up azurite

First crunch of azurite

This was last years work, crunching up the rock with a small hammer. It’s surprisingly enjoyable as you see the blue emerge.

I bought a slab and muller from Patricia Lovett at her Gilding and Traditional Illumination Skills workshop some years ago. It really has come into its own now as I still have malachite, haematite and chrysocolla to grind up.

slab and muller with azurite

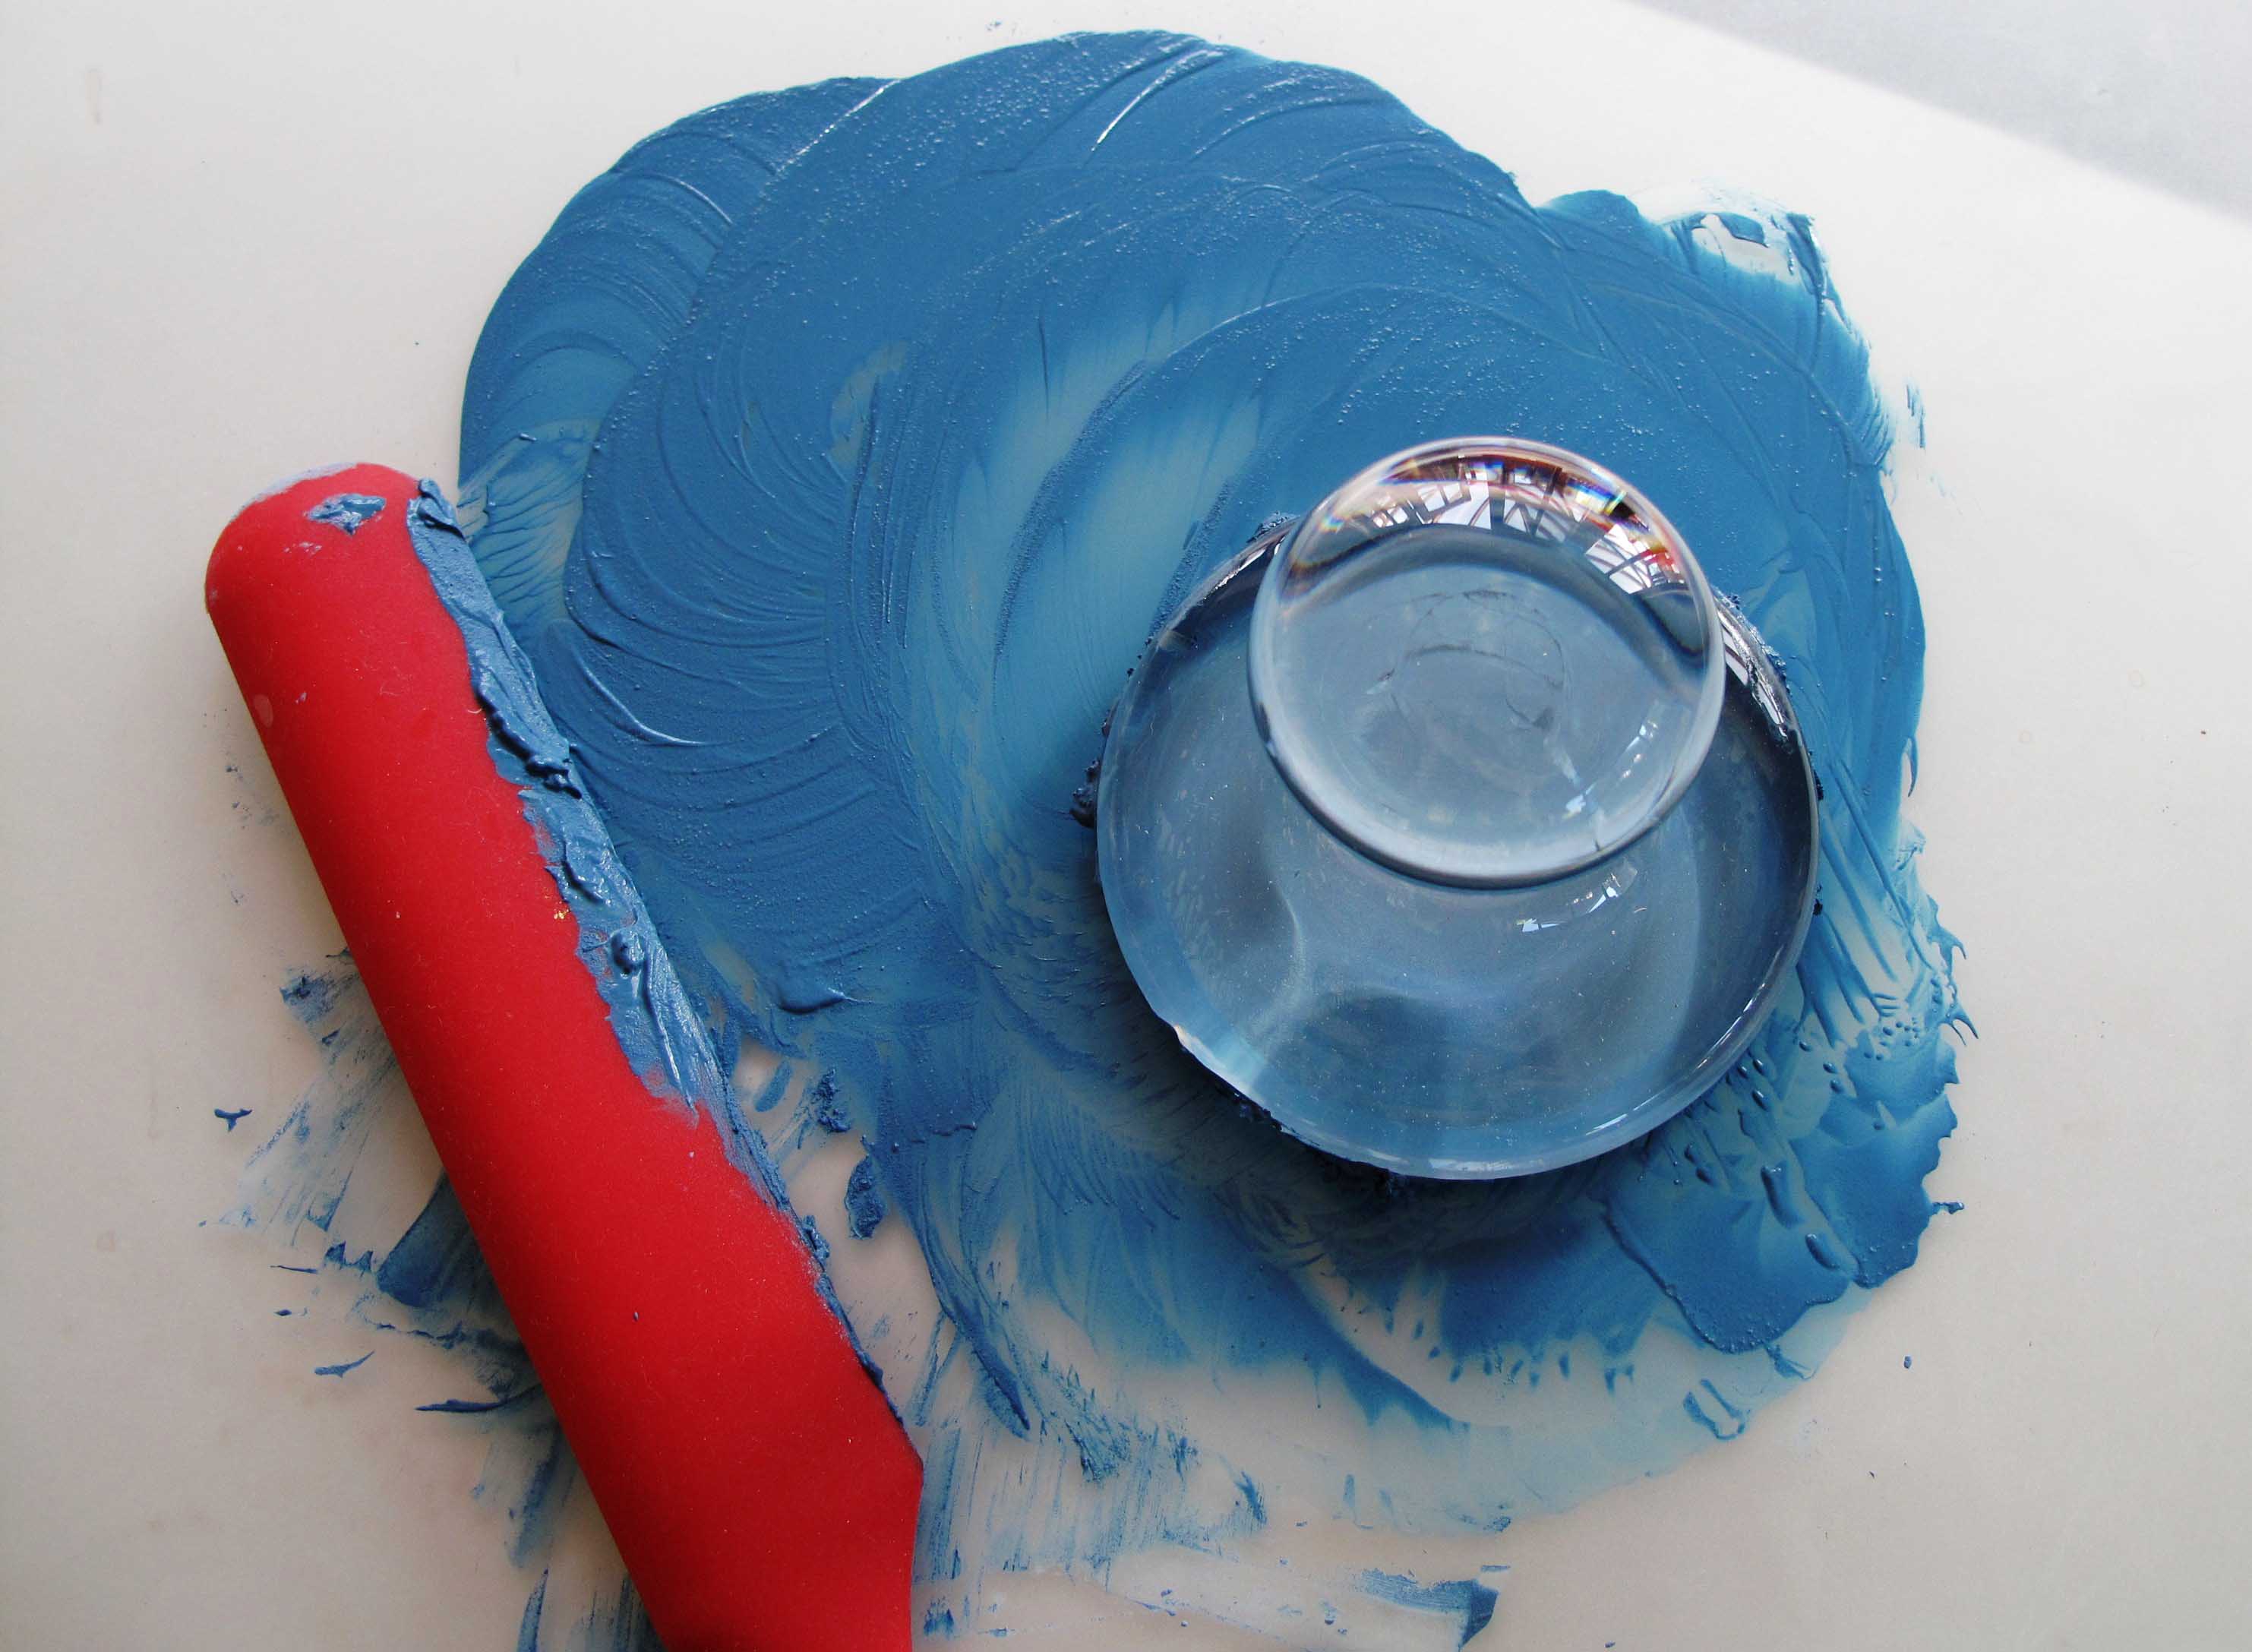
Use a glass slab and muller to grind up the pigment

I placed about a tablespoon of pre-ground up pigment on to the slab and added just enough water to make a paste then ground it up, clockwise and anti clockwise, scraping the pigment back into the middle until the paste glides smoothly under the muller.

Azurite paste and water

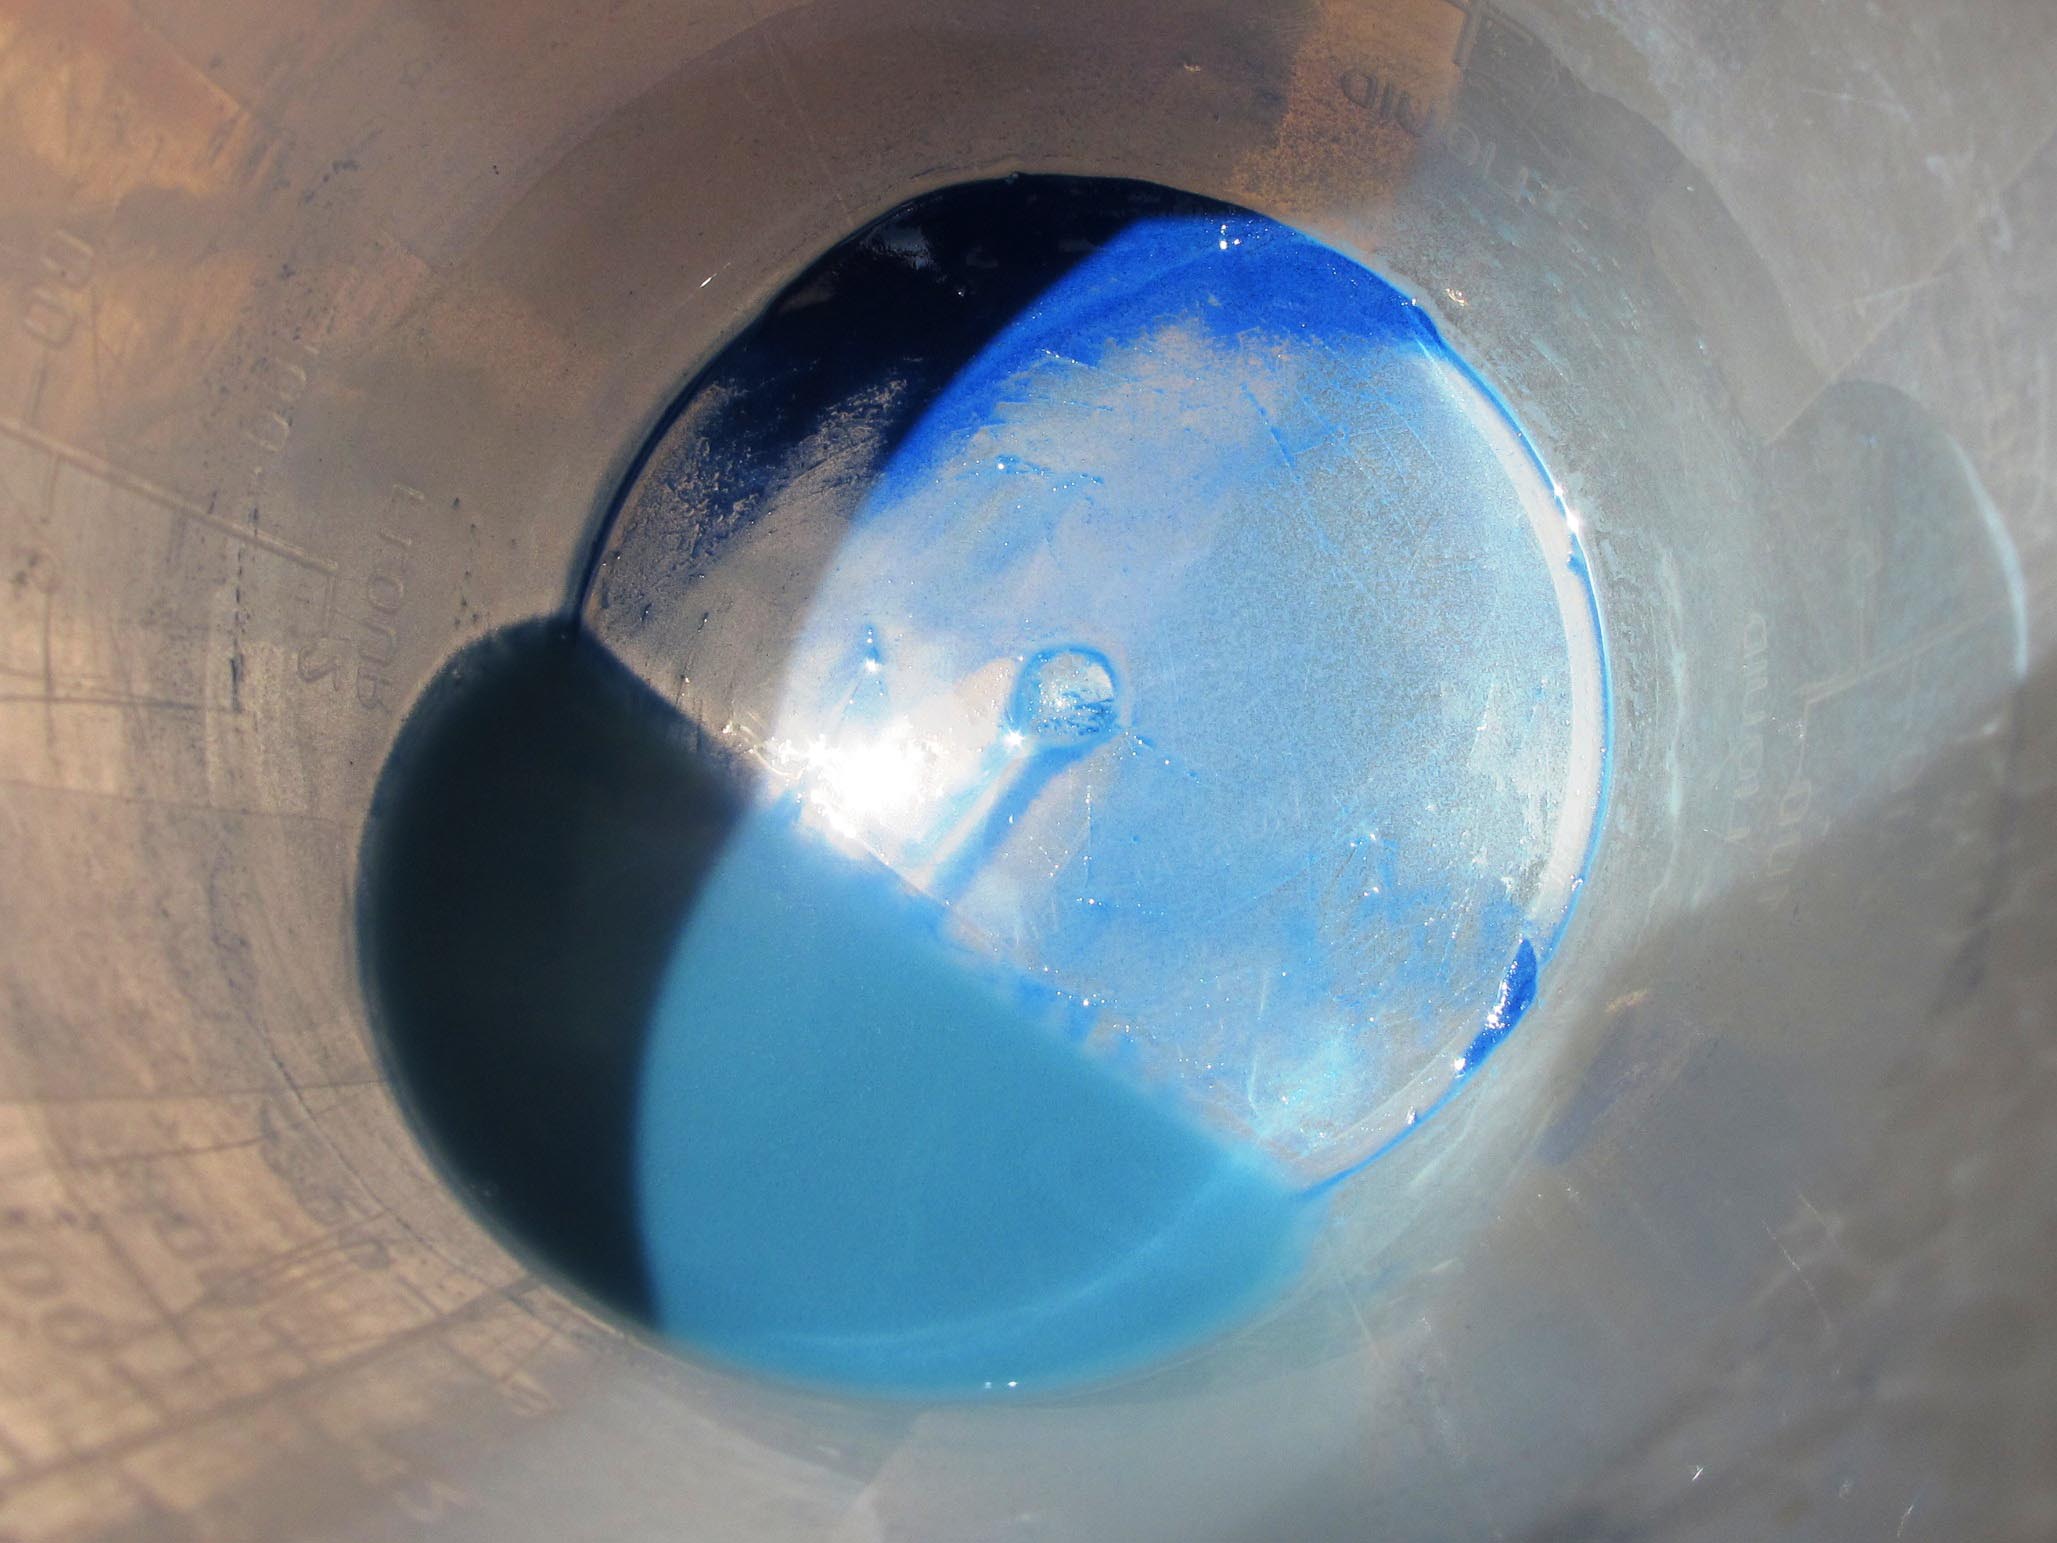
 Mixing with a little water makes the paste

Ray Kitten burmilla

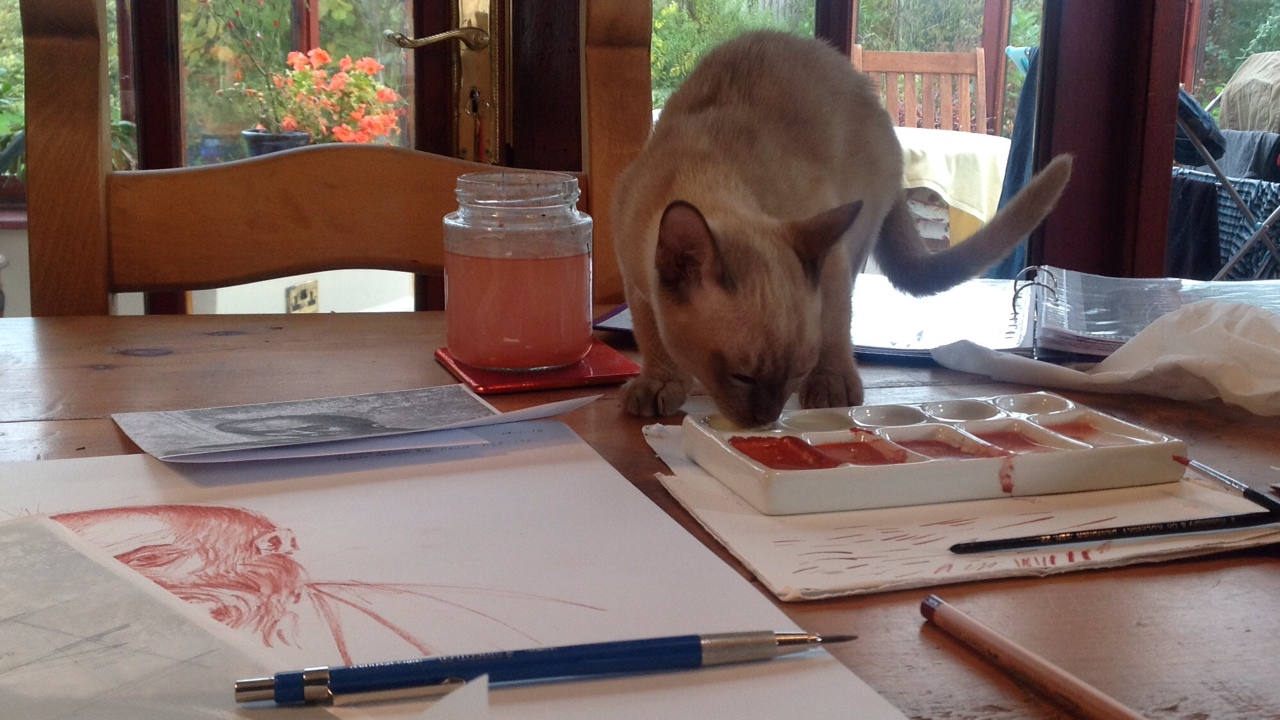
Ray offering a helping paw

mopping up the azurite paste

Mopping up every last bit of paste with a palette knife and mop brush

blue azurite in the wash

A variety of blues emerging as you wash or levigate the pigment

particles in the bottom of the jug

Large particles give a deeper blue

pigment drying in the sun

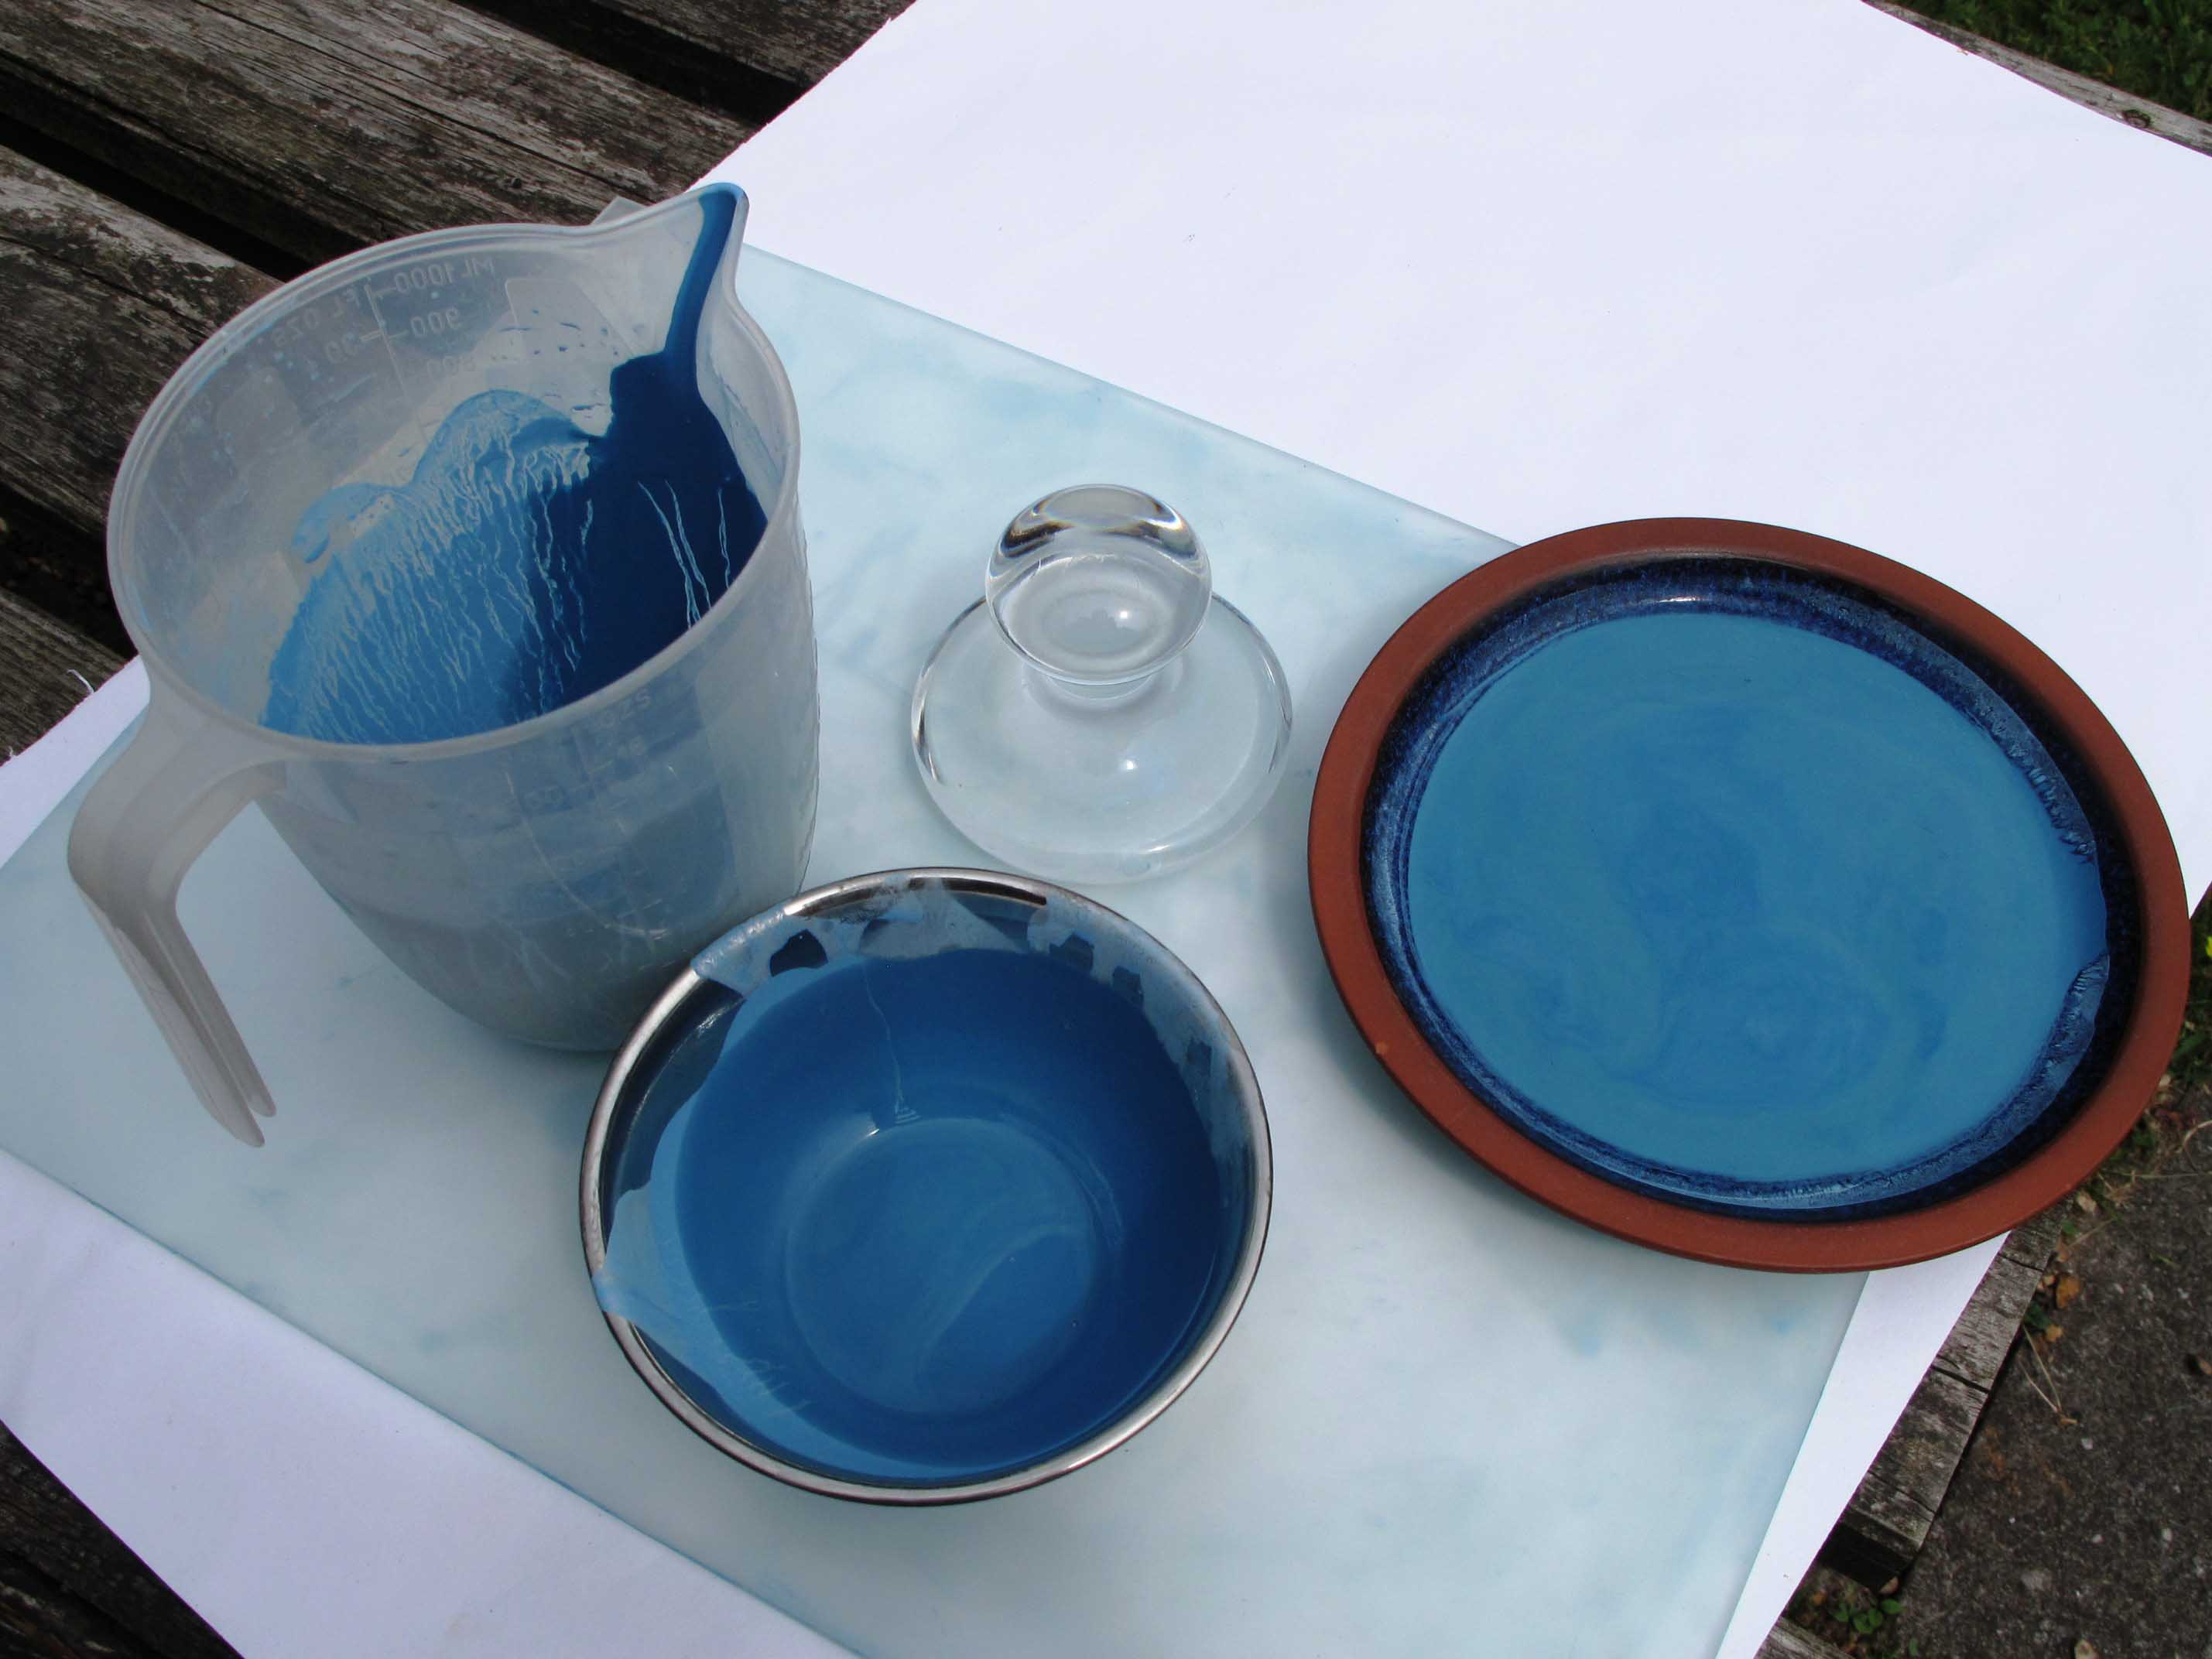
Drying out the azurite pigment in the sun

pigment in dry form

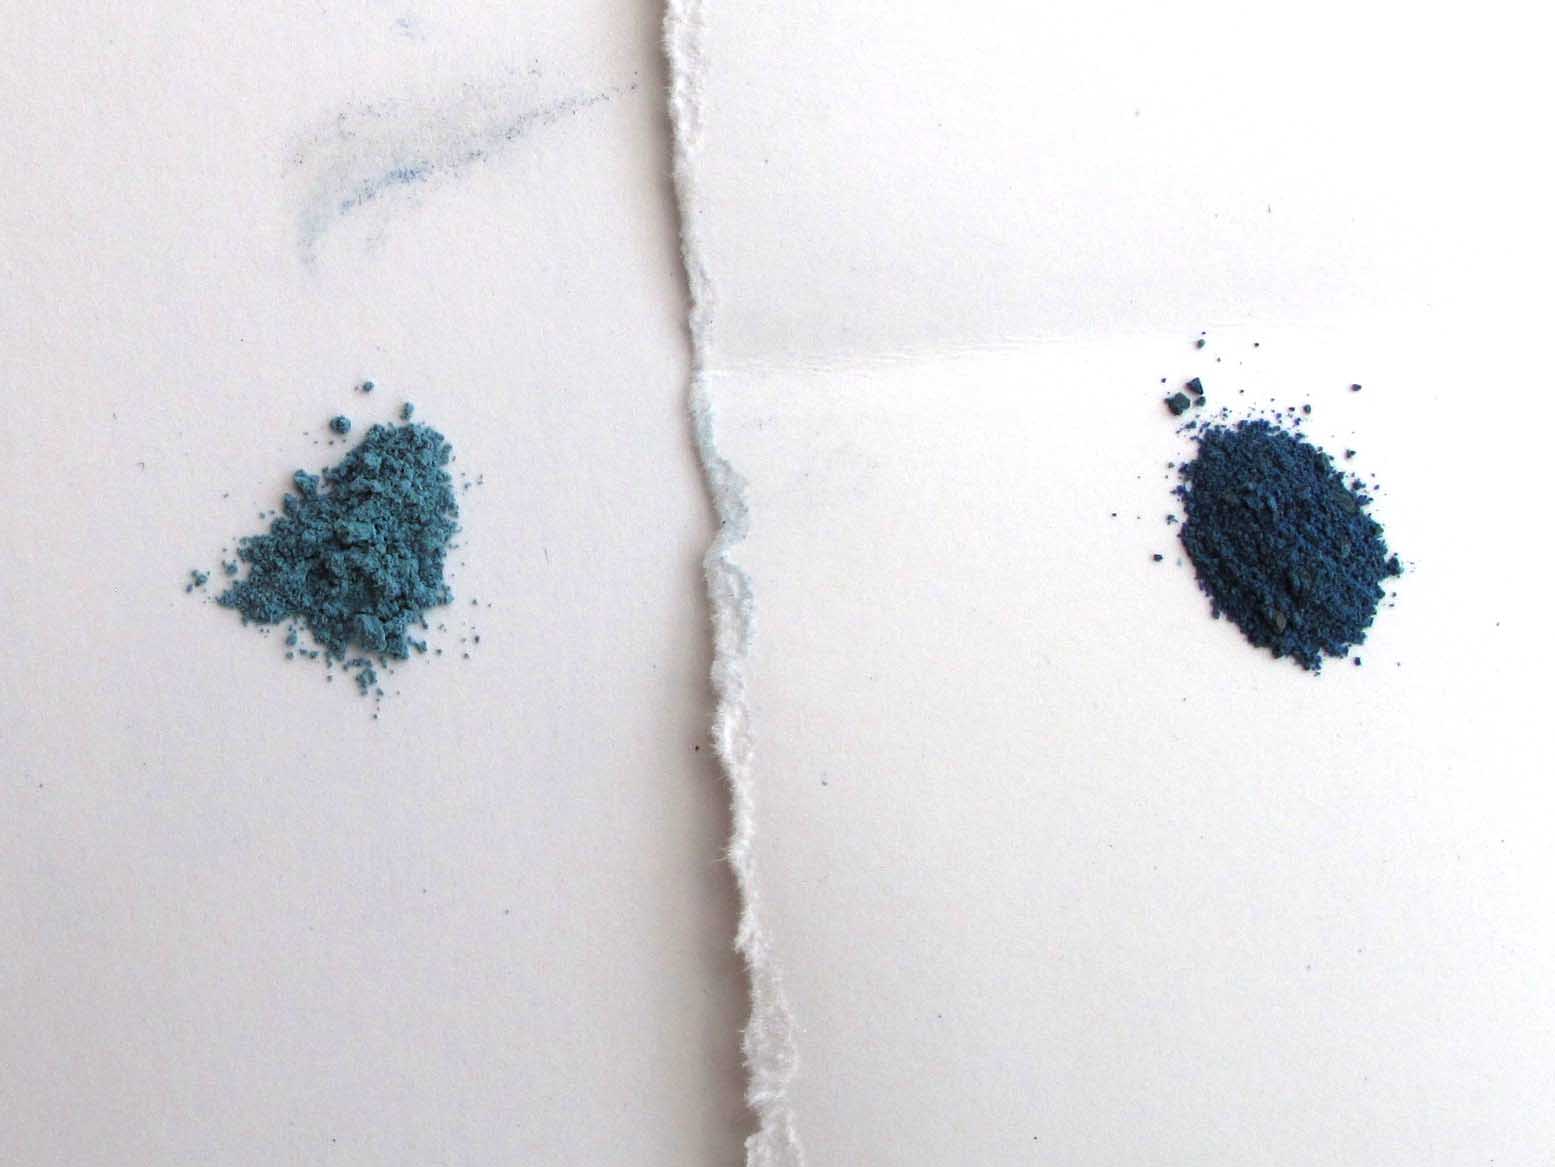
Pigments at last! Samples show mine on the left and the darker pigment of a pre-bought pigment on the right.

This took the best part of a morning but I’ve made enough pigment to easily last me a year or longer. Next post will hopefully show some of this azurite in use on my triptych.

Thanks for reading,

Ronnie

Like Buses

icon membrane technique

Students concentrating on their work. L to R Lee, Joan, Ekatarina, Janina, Martin

Hello again!

Like buses, two posts come along in a row. Whilst Aidan Hart demonstrated the membrane technique for our Mandilions, I made a few video clips so that we can refer back to the method and help it sink in. These are all posted on You Tube in the same folder/channel as the Gilding demos.

https://www.youtube.com/channel/UCuoKiOeoJ–X7JkVpvuCOqQ

Mandilion underpainting

First transfer the monochrome or drawing, then underpaint the mandilion in terre verte and yellow ochre. Protect the gilding before starting.

Modelling painted in terre verte and a touch of yellow ochre, with membrane layer washed over the face. Hair will be done with the proplasmos technique

Aidan’s demonstration icon,  with membrane layer washed over the face. Hair will be done with the proplasmos technique.

Fran and Lee in class

Fran and Lee in class with Susan’s Mandilion taking shape in the foreground.

Aidan applies first layer of highlights using yellow ochre light with a touch of white.

Aidan applies first layer of highlights using yellow ochre light with a touch of white.

Second leayer of highlights

Aidan’s Mandilion: Second layer of highlights

Highlights and hair

Aidan’s Mandilion: Highlights and hair

The method, demonstration and the rest of the stages are all on the You Tube clips. Hope this encourages you to pick up your brush again!

Thanks for reading.

Ronnie

Lofty Discoveries!

Hello Icon Friends,

I am making up for time lost last week when I was out tying ‘Missing’ posters to lamp posts and scouring the internet for our pet cat. Not the little fellow you might have seen eating up my egg mix in November, but our older cat Ollie. Two nights away is unheard of for this home-loving creature. A long story cut short, we now have new friends down the road and if you lose a pet, enlist St Francis and put up posters! Ollie had climbed into their loft space where they were building an extension and got stuck. I am overjoyed to have her home and very thankful to St Francis!

So, back to the paper trial. The Saunders paper is without a doubt a treat to work on but having tried the Fabriano Artistico, I have to say that I found blending the egg tempera just a little bit easier. The paper is almost luminous and seems to make St John more appear more present.

Monochrome study of St John the Evangelist

Monochrome study of St John the Evangelist

Looking back on my posts, I have spared you my earlier image of St John. This will never do! I should be showing you how my work is hopefully progressing.

Why is it we always see things (where we have gone wrong) more clearly when we take a step back?

Why is it we always see things (where we have gone wrong) more clearly when we take a step back?

Let’s see, St John above is my most recent work, on Fabriano Artistico paper.  St John below was painted on rough white water colour paper, about 2 months ago.

Blending the paint is clumsy and the overall appearance is hard. See my post 'Core, Clarity and Confidence'.

Blending the paint is clumsy and the overall appearance is hard. See my post ‘Core, Clarity and Confidence’.

It has taken a few attempts and I am still a long way off, but I think the blending above is getting a bit softer. That said, looking at the uppermost one as I write, his whole head shape is still too round, the shape of his face too wide and flat, the eyes looking too much to the left…oh…I am going to have to have another go!

Homework update from the icon course day five: Day 5 Notes Icon Screens Day 5 26th November 2013 Feet

Before I say cheerio, here are five more quotes from “the mustard seed garden Manual of Painting” to follow from the last blog post:

Originality should not disregard the ‘Li’ (the principle or essence) of things

Learn from the Masters but avoid their faults

Posess delicacy of skill with vigour of execution

The second fault is described as ‘carving’ (‘K’o) referring to the laboured movement of the brush caused by hesitation. Heart and hand are not in accord. In drawing, the brush is awkward.

He who is learning to paint must first learn to still his heart, thus to clarify his understanding and increase his wisdom.

The Spirit Gives Life

Warm greetings Icon Friends,

I have tried some different paper for my monochrome studies and I think it has made all the difference! I would love to know what you think. The study on the left is the second (fourth if you count pastel studies) attempt at painting the Virgin standing at the foot of the cross.

Image

So far, I have been using a rough surface, bright white paper for my monochrome studies and not been doing very well with blending the egg tempera. A fellow icon student suggested I try using a heavy weight (300gsm) hot pressed watercolour paper such as Fabriano Artistico or Saunders Waterford. Both are smooth, creamy coloured and gorgeous to work on, though with a slightly different texture. I have done a monochrome on both these papers to compare them.

I started with the Saunders paper and it was so much smoother to work on than the rough white watercolour paper. The paint flowed and blended without having to saturate the paper with water first although I did apply a light water wash before addressing a large area. I am gradually finding my way around the end of a paint brush – it really is a case of just getting on with it and learning as you go along. Aidan makes it look so easy but it isn’t!

The blending and overall appearance of this monochrome looks a bit better than my earlier attempt a few months ago. I have attached the work in progress photos as a pdf. The folds in the robes still have a long way to go though!Virgin at Foot of the Cross

I have finished writing up my notes and will attach them in stages. Day 4 Proportions of hands Ottoman Romanesque Carolingian examples

Next post will be about the Fabriano paper.

Thanks for reading and I will leave you with:

The seven canons


The Spirit gives life


The brush’s task is to incarnate spirit


Although you abstract, model form

According to the essential laws of nature


Usecolour to manifest the spirit


Organize the elements within the panel

To make an harmonious world


Remember there is an imperfect perfection

And a perfect imperfection


In copying, seek to unearth

The master’s techniques

Core, Clarity and Confidence

Hello icon friends and a very happy New Year to you all!

It seems a long time since I posted my ‘Holy Noses’ but Christmas was particularly joyful this year with much to celebrate and be thankful for. I like to start the New Year with a big early spring clean whilst thinking about what I would like to make room for in the coming year before settling back into painting.

When Aidan reviewed my sketches of the Holy Noses, one thing was quite apparent – my brush strokes lacked confidence. Looking back at them now, they are quite spikey, and they go off in different directions. Not to worry, I heard someone on the radio say “I learned so much from my mistakes in life, I wish I had made more!”

After some reflection, I will keep one word to the forefront this year: ‘CORE’. I hope by building upon my spiritual practice which I believe lies at the core of any external improvement, it may in turn lead to clarity, then eventually to confidence.

So after some time spent going within, I picked up the brushes and began with a monochrome study of the Blessed Virgin. I have photographed the stages of work and this time applied lots of fine layers with much softer edges. I haven’t quite finished her face, but I want to work on the next image and get into more of a flow and then come back to add more shading around the features. Please click on the link below to see the stages of work.

Monochrome washes stages 1-8

I hope to post the summary of Icon Diploma days 4, 5 and 6 in the next few days. Thanks for reading!

Holy Noses!

Hello new icon friends!

Thank you for signing up to the blog – you have no idea how much that has strengthened my resolve to pay attention to my lessons and report back to you, hopefully fairly regularly. I will try not to let the posts get too long winded and aim to title all my documents/notes so you can find things later.

This course is far too exciting for me not to share, so it is great that you want to sit alongside – my invisible friends in Aidan’s classroom! Do let me know if you have any questions that I can ask him on your behalf.

I should have mentioned in my last post that our day begins with a lit candle and a prayer of dedication. I will attach the prayer as a pdf.

Prayer before an icon

Prayer 2

It’s Monday 18th November and I am going to get into the rhythm with some brush strokes. Then, I am going to try the ‘Drawing on the Right Side of the Brain‘ tip and turn St John upside down and begin a study of his nose.

nose study one

One of my fellow students, who paints exquisitely, explained that she builds up in very light layers using the finest of lines and very little paint on the brush. She leaves the pure white of the paper as highlights. Once she has established the form, only then does she begin to apply the darker strokes.

There should always be plenty of scrap paper below your palette to test your brush lines after each dip in the paint.

Second attempt at the nose

Second attempt at the nose

Well, looking at the nose upside down certainly helped. It is an improvement on nose 1 a few days ago. However, I have not caught the true shape of the highlights of where the nose bowl widens.  I have also missed the movement of the nose which very gradually curves from his brow on the saint’s right side. All these things become much more evident when you take a step back and look from a bit of a distance.

I am going to try a pencil study next to try and get a grip of the structure. Some days I just don’t have a full hour to set aside for icon practice so what I will do is more ten minute pencil studies of various parts of the face.

Work out the highlights by tracing over the shapes to identify the key pools of light and dark

Work out the highlights by tracing over the shapes to identify the key pools of light and dark

Pencil study of the nose

Pencil study of the nose

That’s enough of my holy noses, it’s time for morning coffee!

Thanks for reading and thank you God that I can share this with you today. All the best with your own icon practice.

Love Ronnie

BOOK SUGGESTION

Aidan recommended a book for us.  It is an American book and if you haven’t already got it, it is a treat for your Christmas wish list. It is a chunky book, paperback and has lots of good quality colour plates. Here are the links:

http://www.amazon.co.uk/gp/offer-listing/1588391140/ref=sr_1_1_olp?s=books&ie=UTF8&qid=1383298414&sr=1-1&keywords=byzantium+faith+and+power&condition=new

http://www.amazon.com/Byzantium-Metropolitan-Museum-Art-York/dp/1588391140/ref=sr_1_2?ie=UTF8&qid=1384766362&sr=8-2&keywords=Byzantium%3A+Faith+and+Power+%281261-1557%29+%28Paperback%29

Book cover image.

Good Intentions

It’s been over a week of good intentions but I have not settled down properly to brush practice until today. Norman has arrived, three months old and so full of beans that whatever I try to do, he wants to do it better. There’s been little in the way of stillness with our new three pet dynamic at loggerheads. I’ve been asking for help from St Frances, but I think he is enjoying the entertainment too much.

On top of this, my first exhibition at Newcastle-under-Lyme library, for ‘Drawing the Street‘ has been quite a hit. ‘Seeing with the eye of the heart’ applies to our wider surroundings too and it is wonderful that people are starting to look at their town with renewed interest. 

For those who are interested in the icon course content, I am going to see if I can upload a pdf of my notes. If they don’t appear on this blog and you would like a copy, please get in touch with me and I will send a pdf over to you.

28 Oct 13 Day 1 29 Oct 13 Day 2 30th Oct Day 3

I have been practising brush strokes, with one or two which came out ok but more practice required on the exit part of the stroke. We are aiming at being able to complete a hundred or so consistently even calligraphic lines, straight, curved and diminishing, all in one go. 

Brush stroke practice

Brush stroke practice

We have four monochrome studies to complete. This is proving much harder to do than I thought. We all made great progress at Moele Brace, no distractions and fellow students supporting one another, but home life however is another matter. 

Norman

I have made a start on St John, which is taken from that compellingly beautiful and moving icon “the Holy Virgin Kataphigi (Refuge) and St John the Theologian” which came from the Poganovo monastery c1395. I am starting early with my practice on this as I would love to have this as one of my finished pieces.  As you will see from my efforts below, I have a long way to go. That’s ok, I am looking forward to watching things unfold from these early hesitant efforts. 

St John in rough pastel sketch

St John in rough pastel sketch

As a warm up, I did a rough pastel sketch. Looking at it a little later I could see St John’s face was too wide, the tilt of his head up a little too far. A helpful exercise though. Please ignore my messy strokes, I did this quickly to try and get a feel for the proportions. 

I then did a rough sketch in red earth light tempera wash to establish the structure. Again, it’s not quite right, but I will keep at it. I hope that in my next post, there will be a little more progress. I have also got to get better with my brush strokes. 

St John, first wash in very dilute egg tempera

St John, first wash in very dilute egg tempera

Thats all for now. Thanks for reading and all the best with your own icon studies. R

A Stormy Start

Tomorrow, on the feast of St Jude and St Simon, twelve students will gather to begin our three year icon diploma course, run by Aidan Hart in the Trinity Centre at Moele Brace, Shrewsbury. We will be learning about the traditions of icon paintings, the theology, the methods and materials before painting our own icons which will go on display at the PSTA in Autumn 2016.  

Some of the students are travelling quite a distance – from Germany, Dublin and another from Brighton. This is such a privilege to be part of this group and so I would like to share some of my experience through this blog. 

It looks like we will have a choppy start as there is an amber alert for a fierce storm on its way from the Atlantic, nick-named St Jude. I wish my fellow students all a safe journey and look forward to meeting them and trust that the patron saint of lost causes will guide us through the days ahead.