
Archangel Gabriel – A Listening Ear
Every now and again, I’m asked how to get started icon painting. I always recommend painting monochromes on smooth (hot pressed) best quality watercolour paper. I recall the first time I saw some of these red ochre studies by Aidan Hart’s past students and I found them captivating. They were on the wall in a workshop given by Aidan Hart at Walcot Hall over 10 years ago.

For the last few weeks, I’ve been having a bit of a sort out of my studio (and my overspill areas). Over the last few years I’ve gathered quite a gallery of work that’s lying unseen as I have no more wall space!
I made a decision to go through all my work and list it for sale in my Etsy shop as I can’t keep holding on to things – there’s no room to move! Also, letting go of things makes way for the new so let’s make a start with looking back over this large monochrome of Archangel Gabriel.

Before I go any further, I have already written about this monochrome here. It’s really interesting to reflect back on this post from 8 years ago as I’ve become a lot kinder to myself. I can see that things I once thought weren’t good enough actually were a great foundation – they just needed a bit more work and creativity. SO – if you are being hard on yourself – put your work away for a few years then revisit when you have had a few edges knocked off and away you go – again!

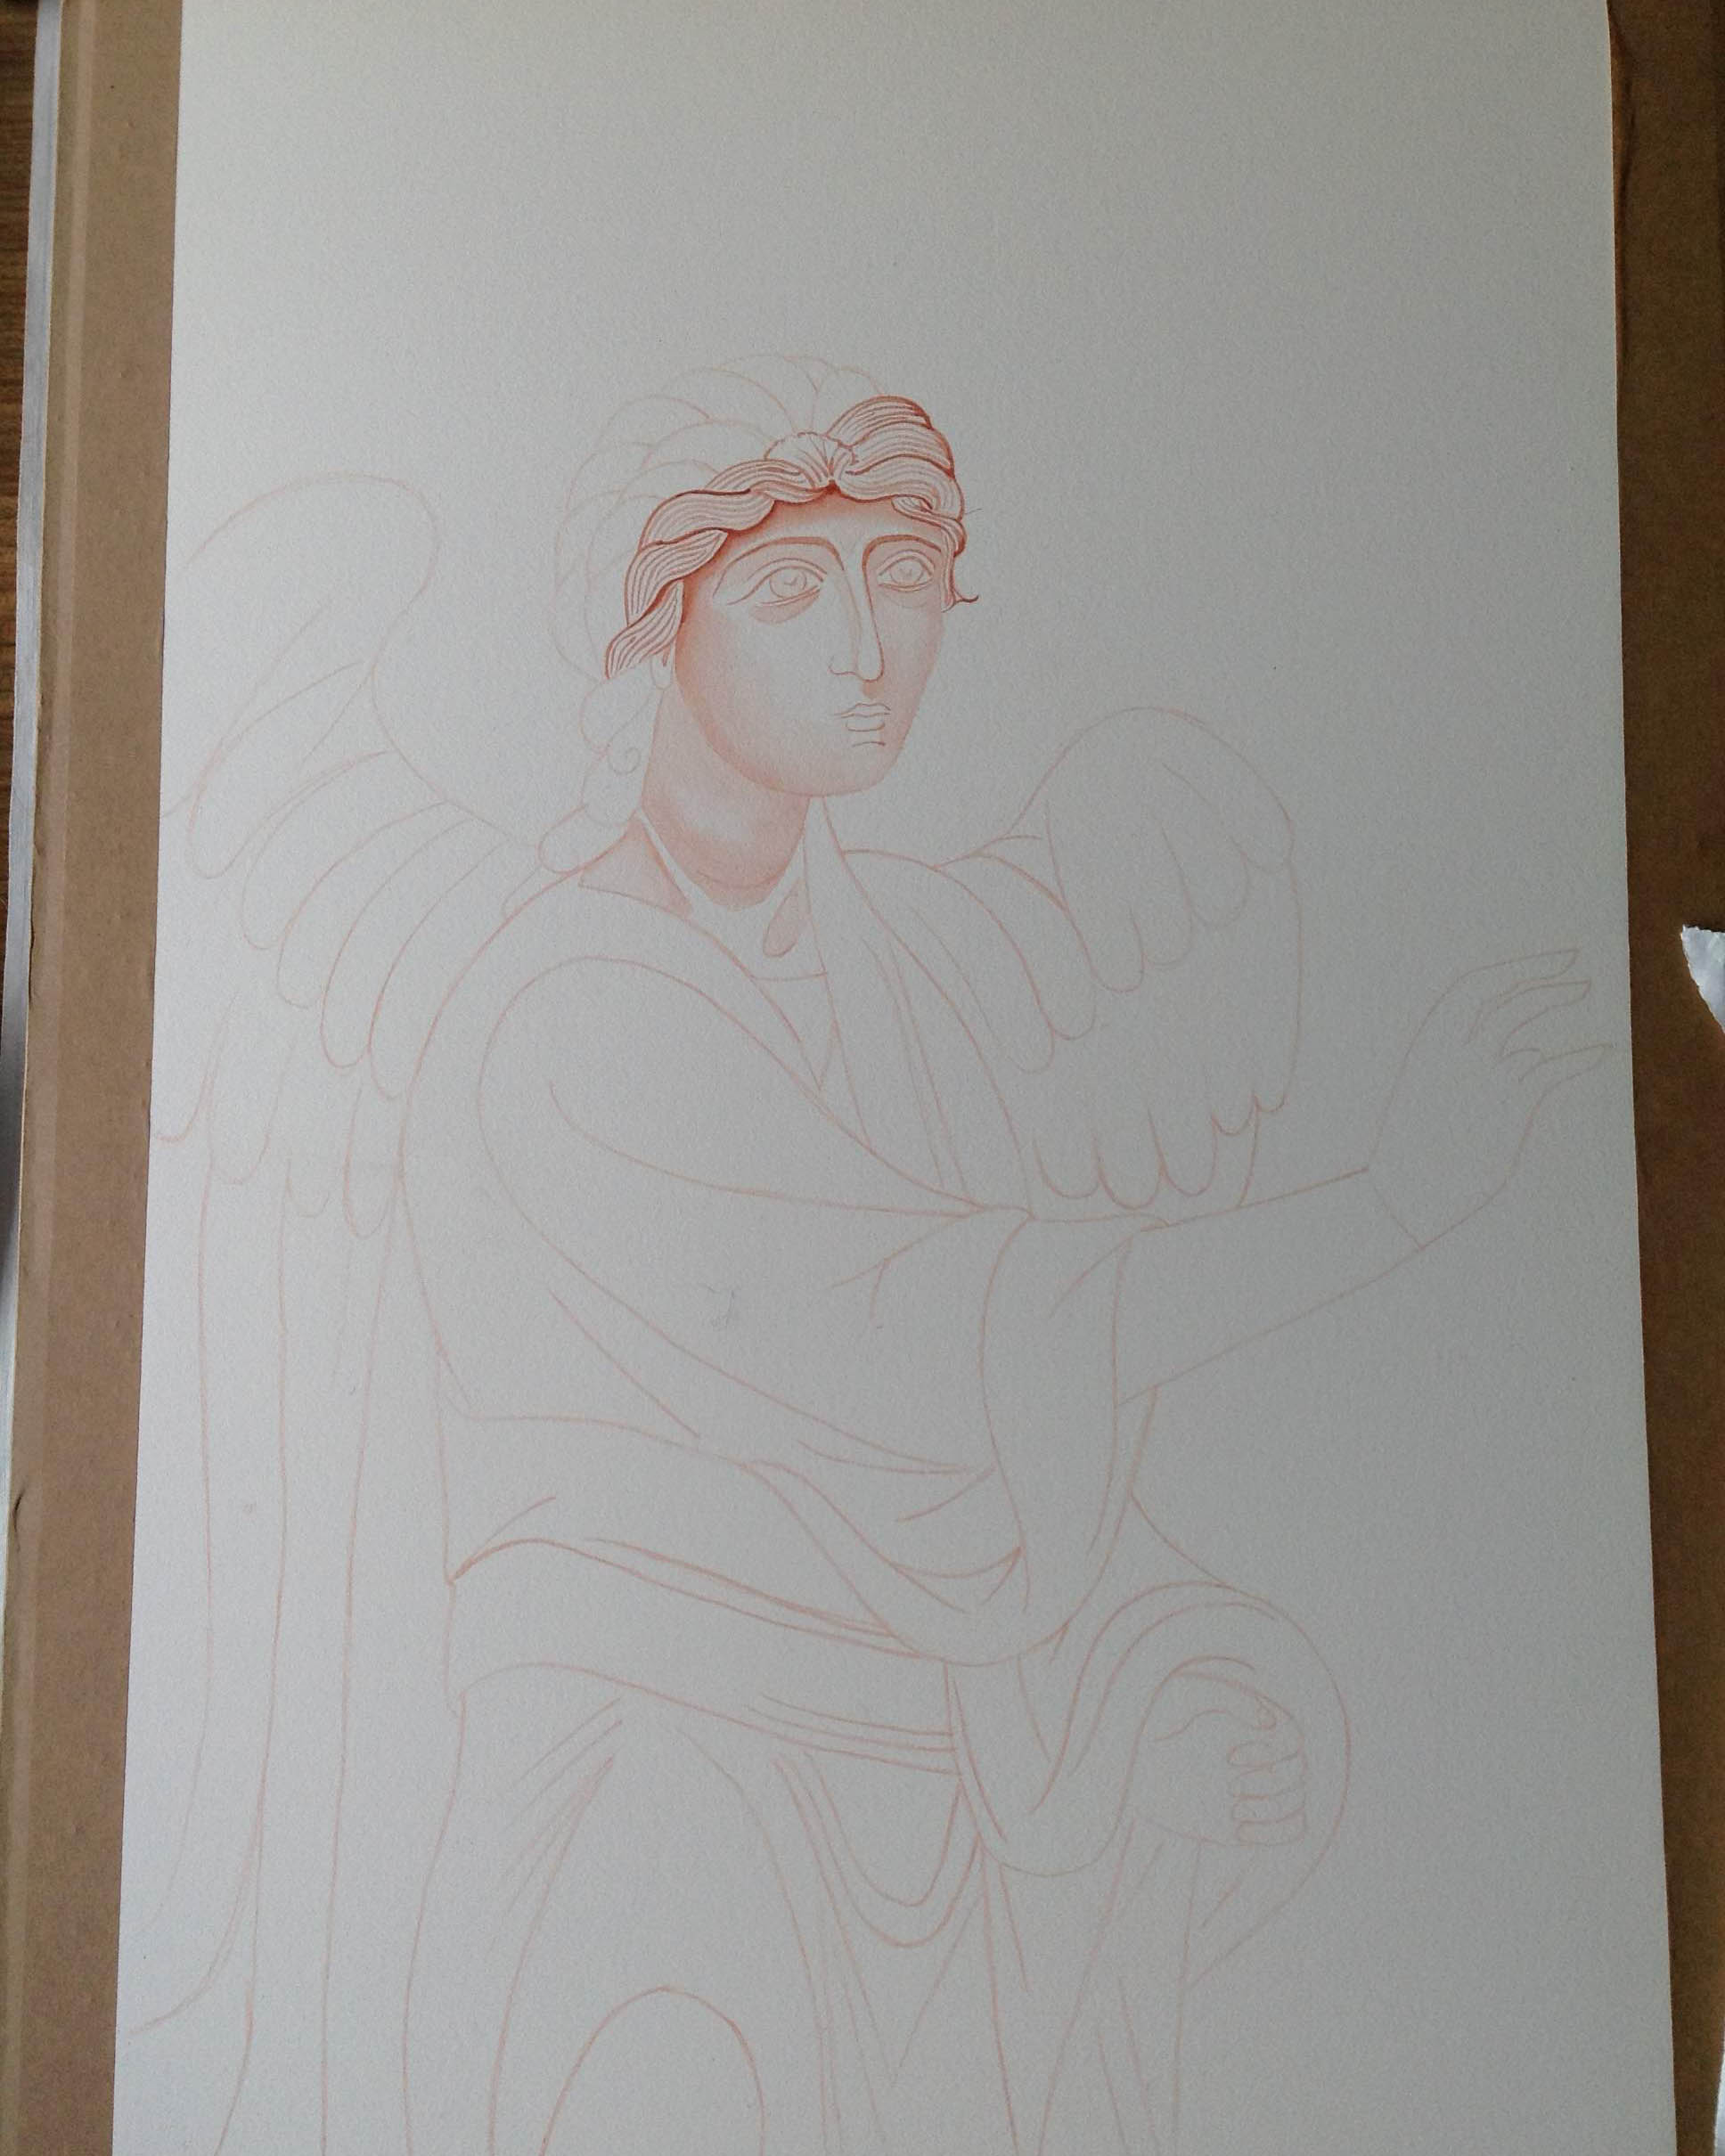
The best way to start as always is with a drawing. Sometime this too can be daunting so be kind to yourself – this is a learning process. You can always make a tracing of the icon you want to paint by outlining the main forms to get familiar with the shapes, shadows, proportions and lines. You could also try laying a grid over the prototype, then draw into your own grid at a larger scale. This can help you can anchor the key features.
With this monochrome – I drew onto a large sheet of cartridge paper (inexpensive paper is fine for this stage), then traced over and rubbed red ochre pigment into the back of the tracing paper. It is them ready to transcribe on to the watercolour paper. You could use pencil but the graphite smudges and I wanted to keep the paper clean.

I use Fabriano Artistico Hot pressed watercolour paper, 300gsm. You can use other brands, but the weight and the hot pressed finish are really well suited to monochromes. I stretched this one but I didn’t really need to. Even though the paper can buckle, it can also be flattened as I discovered later. There are plenty of You Tube videos to help you do this but in short: face the artwork down on a clean dry sheet of paper, place a spray dampened sheet of paper over the back, then place a pile of books on top and leave for a few days. This works a treat.

Once you have the red ochre line in place from the tracing – it’s best to fix it in place using a dilute mix of egg tempera in red ochre or whatever colour you are using – the red/gold/earth ochres all work well. I think the most valuable thing I’ve learnt from painting these is not to rush them – work in the finest layers you can and build up very gradually.

Looking back through my old notes from Aidan’s class, I wrote as follows:
Eyebrows: When painting the eyebrows, the top line is soft and the ends are also soft. Look at an eyebrow, the hair is densest lower down, then feathers upwards (not as I have done here!). When painting the brow, show the graduation of tone. Facial features grow out of the background. Find the high point of the eyebrow in relation to the rest of the curved brow. Pay attention to the descent of the brow.
Lips: Look at the lips in profile, the light falls and hits the lower lip, the upper lip is drawker and in shadow. The lower lip projects and the recess below the lip is alos in shade. Note the gap at the corner of the lips.
This monochrome of Archangel Gabriel has only had a few brief outings since my diploma. Once in a short lived exhibition at the Bar Convent in York and a couple of weeks on the walls of the Tolbooth, Lanark. Lockdowns – say no more!

When I looked at this the other day I realised there was something missing…the hairband and ribbons! This is quite significant as Archangel Gabriel is the patron of communication and this goes two ways – listening and responding. The ribbons either side of the ears are symbolic of listening – important! I had based this icon on the prototype of the Ustyug Annunciation icon. This doesn’t show the ribbons but since I have learnt the symbolism of the ribbons – they are too significant to leave out – so on they go – very late but much needed additions.


Gold leaf is not the best surface to paint over but I laid a dilute layer of egg tempera mix first, let it dry and built up in layers. I used quite a lot of egg mixed with the white pigment and applied it thinly. It goes on with a lot of beading at first but as it dries, each layer helps the next.

The finished size of the overall mounted work is 50 x 70cm and now listed in my Etsy shop. Postage and insurance have shot up, especially overseas. The weight, packaging and protecting the glass of a large frame really bumps up the price so I’ve taken this out of its frame and will post in its mount and backing ready for the new owner to frame.
As always, thanks for reading and for still being here on this meandering path with me 🙂
Ronnie


