Icon Diploma Student

Learning to see with the eye of the heart

Posts from the ‘Drawing icons’ category

Names to Faces

Council of Archangel Michael

When I completed this icon back in 2018, I was unaware of the names of the angels standing behind the three most prominent archangels. However, when looking up old notes and running a few google searches, I’ve since discovered that similar icon examples show that the figures standing directly behind are as follows: to the left are Jegudiel and Selaphiel and on the right hand side, Uriel and Barachiel.

To follow on from the last blog post, I’d like to look at the stages of painting the angel faces. There’s a lot of them! The prototype that I’m referring to is a 19th century Russian icon The faces are captivating.

When painting a new icon, I start by making my own drawing to work from.

The underpainting stage looks quite rough and clunky but it helps to get strong definition at this stage.

Jegudiel (left) and Michael (right)
Jegudiel with darkened shadows under chin, sides of lips and along the hairline
Archangel Gabriel
Archangel Raphael
Several layers of the red and yellow ochre membrane applied
Membranes added to all the faces. The face underpaintings have almost disappeared!

It’s somewhere at the stage when the first few layers of highlights go on that you think the face is nothing as you had intended!

These are small faces to paint so every brush move counts. Taking a black and white photo and printing it out at a larger size helps as then I take a pencil/crayon and work over it by referring back to my drawing and observing where I need to make changes.

Finished face of Archangel Raphael
Finished faces of Archangel Gabriel to the front with Uriel and Barachiel behind
Archangel Michael to the front, Jegudiel and Selaphiel behind

This icon is now spoken for and soon will be making its way to a loving home.

Just a reminder that I’m holding a ten year anniversary sale on all my remaining icons listed here. As soon as someone makes an enquiry, I place it on hold and remove it from the list. I’m happy to give people time to consider.

As always, thanks for reading and happy icon painting.

Ronnie 🙂

Living up a Tree (St David pt 2 of 3)

study on watercolour paper of st david of thessaloniki

St David offering food to a bird

Before I began to paint an icon of St David the Dendrite, I sat down to draw him. There are many lovely icons of St David, but there is one fresco in particular which really appealed to me.  The saint is depicted as an elongated figure with a toe-length beard wearing a light ochre garment set against a green background, amidst a leafy almond tree.

I haven’t been able to find the name of the iconographer to acknowledge him or her and would love to hear from you if you recognise the original fresco image.

pencil sketch of st David

Pencil sketch of Saint David up a tree with print of fresco image alongside

I used this fresco image as a reference to make my own drawing sketched on watercolour paper. Adding colour was the best way of seeing how it would look on the long thin icon board which I had already gessoed using a thick 25mm birch ply.

pencil sketch of st David

Pencil drawing of St David the Dendrite

I referred to my library of icon images to find male saints which helped me to construct the face.


English ochre and black - colour palette

Colour palette – English ochre and black

Here’s the overall study with some more icons of this tree dweller.

st david of thessaloniki icon

Drawing and study on watercolour paper together with reference images

This icon study is now available to buy in my Etsy shop here. I will sign off with an image of my finished study in black and white.

drawing st David
Drawing of St David of Thessaloniki

Last part of this article will be about the finished icon…to be continued soon.

Thanks for reading,

Ronnie


Northern Grace

monochrome study of st hilda of whitby on fabriano paper

St Hilda of Whitby

St Hilda had been left to one side as a drawing on stretched paper (fabriano artistico 300gsm hot pressed) for the past two years.  I chose to paint St Hilda because she is a local saint to me. When I was a youngster, Mum and Dad used to take us to Whitby on family trips and as a teenager, I worked in York Minster, close to where she was baptised, so she has always been there in the background.

The drawing was in preparation for my painted panel icon which I last wrote about here, but had always intended to paint it. Today was the day.

Here’s the drawing in full – I’ve darkened the photo so you can see my construction and correction lines. After erasing lines that might be distracting, I began painting using a blend of pigments which I know are really warm and earthy.

2 Hilda first washes of colour

Building up the tones

There are some pigment combinations which are lovely to work with – one of which is French Ochre Sahara and French Ochre Havanna. Pigments look quite soft on water colour paper.

3 Pigments ochre sahara

Mixing pigments

Mixing up pigments is best done separately (unlike how I’ve shown!) then add small quantities of the stronger colour to the weaker colour. A very strong pigment, such as English Red Ochre, would overwhelm any other pigment and has to be used sparingly when mixing.

When all the painting was done, I gilded the halo.

St Hilda work in prog Cruwys

Gilding paper is a breeze compared with water or oil gilding an icon boards!  I used Roberson’s acrylic gold size which works well with transfer gold . The size is painted on in two layers, thinned down with a few drops of water. The first layer seals the paper. (Tip: If you rub some washing up liquid into the brush before you use the size, it’s easier to wash out after and protects the brush).  I add a touch of red ochre to show where I’ve painted and to give some background to the gold.

5 applying gold size to halo

Applying gold size to the halo

It’s been good to reflect on the life of this strong northern saint, patron of learning and culture especially in these post-Brexit days. St Hilda lived through dangerous and difficult times – her father was murdered when she was a child. Baptised in 627AD, close to the place where York Minster now stands, she grew up as a noble woman but later became the founding abbess of a monastery in Whitby. More pertinently, as a Celtic Christian, she chose to graciously accept a vote at the Synod of Whitby which didn’t go the way she had wished. Quoting from this last link:

     ‘In Northumbria, along with the politics of the time, there were two strains of Catholic Christianity, and they could not be reconciled: Celtic and Roman. Celtic Christianity, which emanated from Ireland, was less structured than the Roman variety. The Celts were independent, wandering from place to place all over Europe, where they would establish centers of learning and teach. Celtic Christianity relied on monasteries and abbeys where the abbot was supreme rather than the cathedral and bishop system the Romans followed. The Romans viewed the Celtic brand of Christianity as “rural.”’

6 st Hilda monochrome gilded Cruwys.jpg

Completed study on paper

If you would like to read a little more about St Hilda, there is a good write-up about her life by the Order of the Holy Paraclete here.

We still live in troubled times and it helps to connect with the saints. Hilda was considered so wise that kings and princes sought her advice. The Venerable Bede describes her:

“All who knew her called her mother because of her outstanding devotion and grace”.

Thanks for reading,

Ronnie

Drawing Heavenly Bodies: Virgin and Child Enthroned with attendant Archangels Raphael and Michael

pencil drawing of icon of virgin and child enthroned

Cartoon of the Virgin and Child Enthroned

Hello icon friends,

The summer before I embarked on the icon diploma course, I asked Aidan if there were any practical steps I could take to help my ability as a student icon painter. His answer was immediate: ‘Learn to draw!’ So I signed up to a really good local drawing class with David Brammeld and a year later Drawing the Street was born, not long before I was accepted on the Diploma course.

Drawing is becoming a way of life for me and I am always exploring ways to develop. There are many online classes and one which I have found refreshing and energetic is Sketchbook Skook

In the meantime, there is so much to learn with icon painting that I thought that I could share my cartoons of the figures for the triptych I’m working on, which might help you get started with your own icon studies.

You should be able to save these drawn images to your computers and print them off on A4.

The four images of the Angels of Chora are all borrowed from Aidan’s library. I hope to be able to credit the photographer in an update to this post.

Meanwhile, happy drawing!

Ronnie

pencil drawing of angel of Chora

Archangel Michael after one of the Angels of Chora

pencil drawing of Archangel Raphael

Archangel Raphael line drawing after one of the angels of Chora

Now for the full size images:

Virgin and Child Enthroned line drawing low res

angel of chora pencil drawing

Full length drawing of Archangel Michael taken from an angel of Chora

pencil drawing of Archangel Raphael

Archangel raphael full length line drawing

Image of Angel of Chora

Angel of Chora image courtesy of Aidan Hart’s image library

image of Angel of Chora

Angel of Chora images all courtesy of Aidan Hart’s image library.

Angel of chora

Angel of Chora images all courtesy of Aidan Hart’s image library.

angle of Chora black and white

Angel of Chora – images all courtesy of Aidan Hart’s image library.

Angels of Chora

Archangel in Monochrome

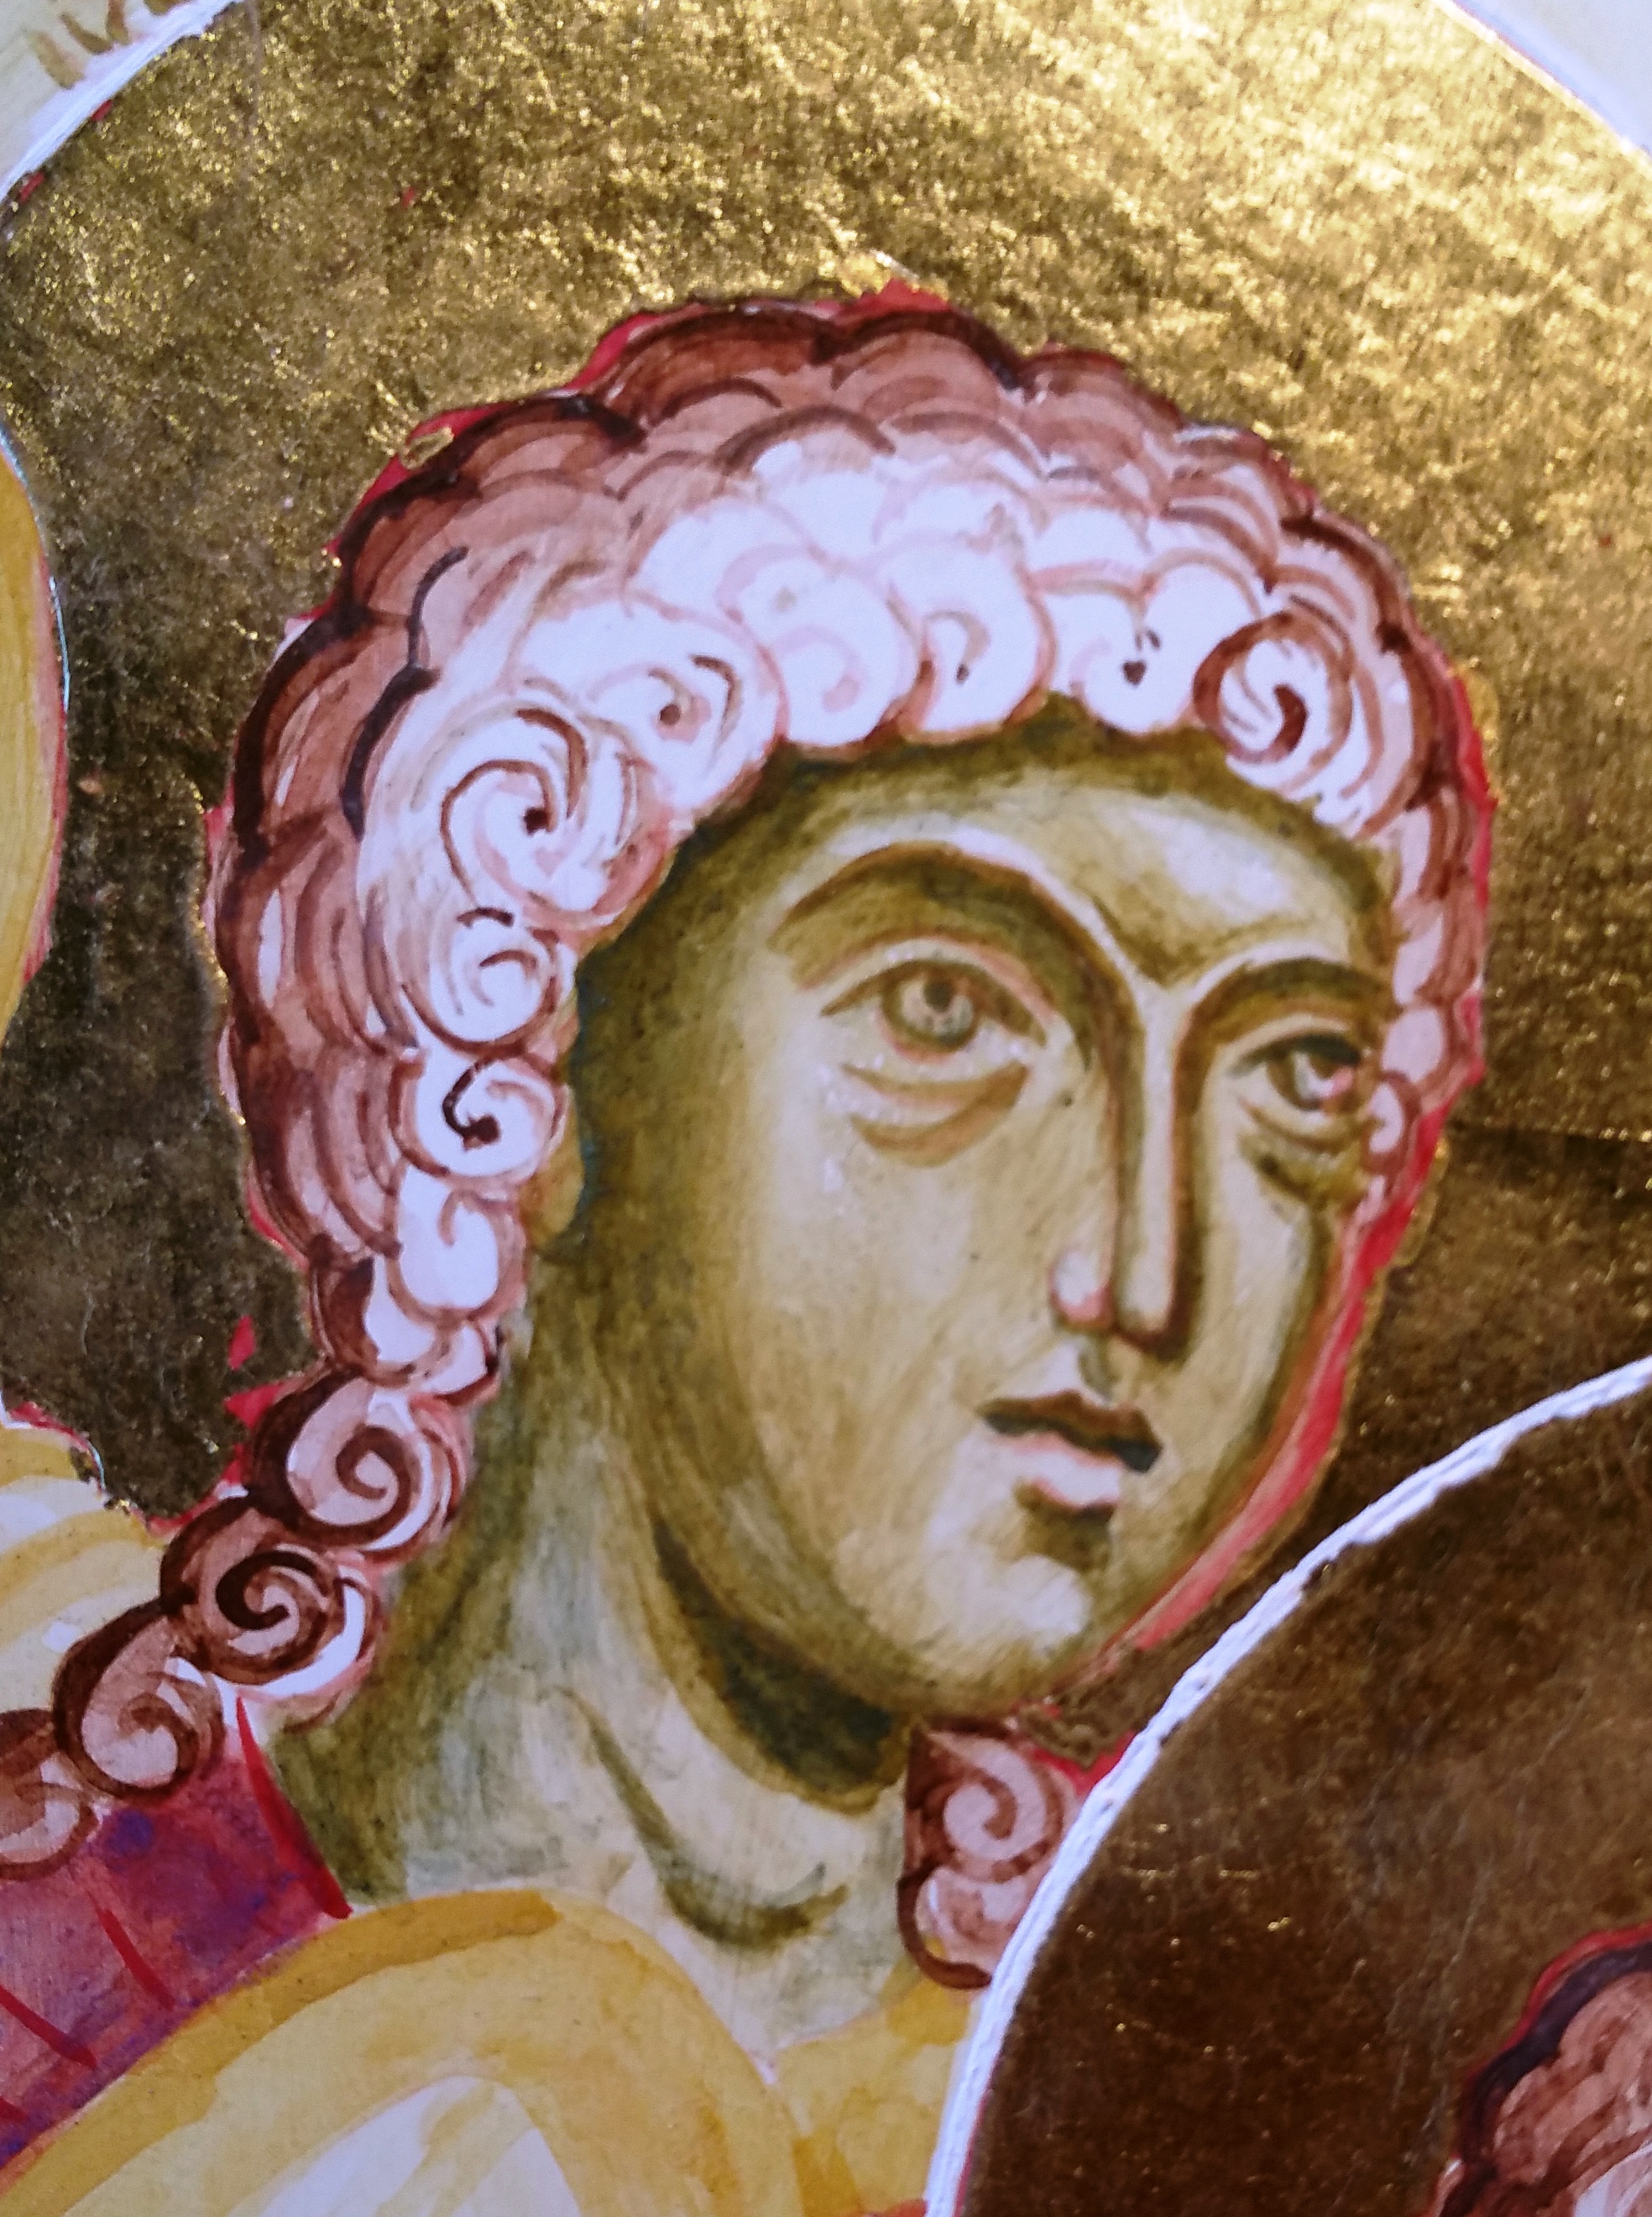
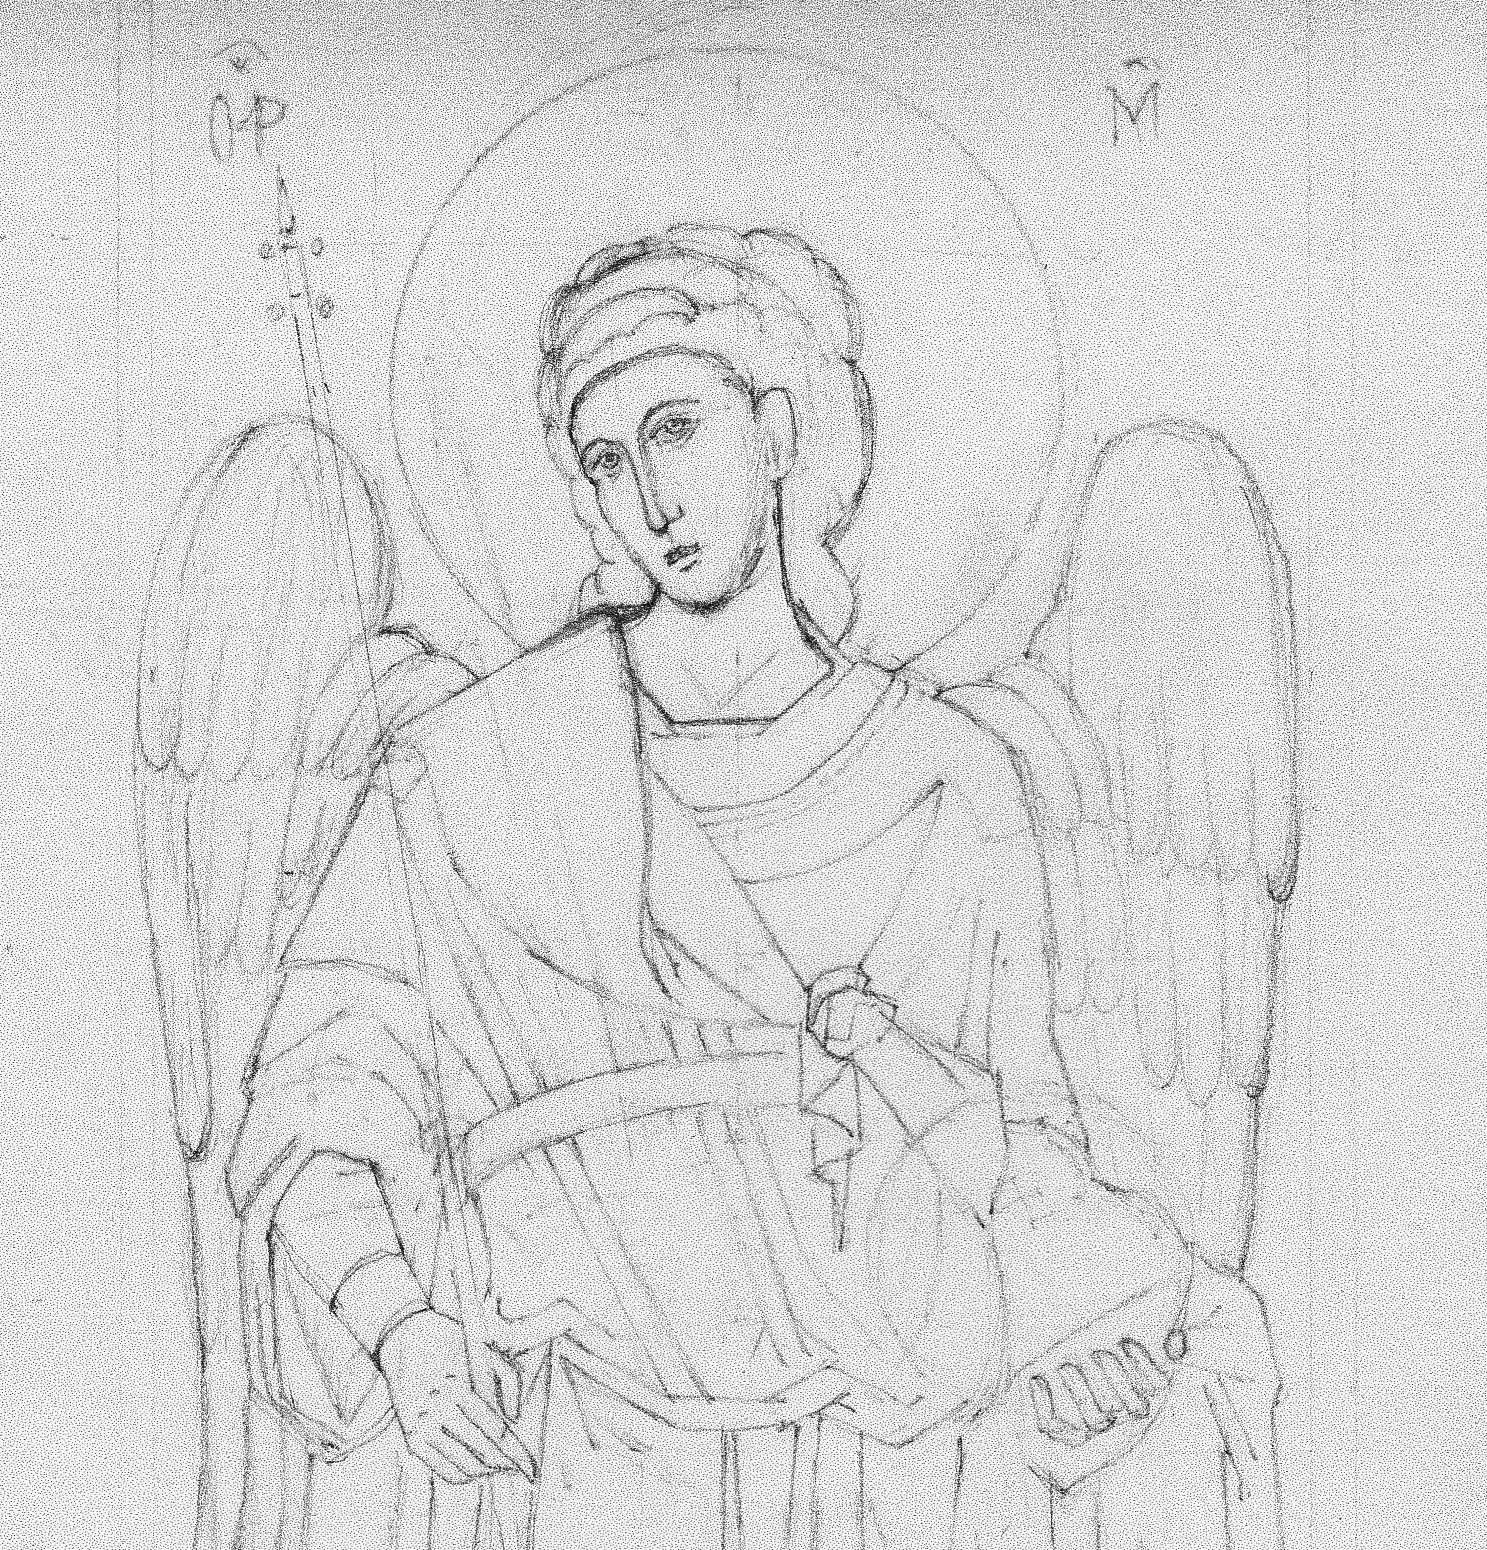
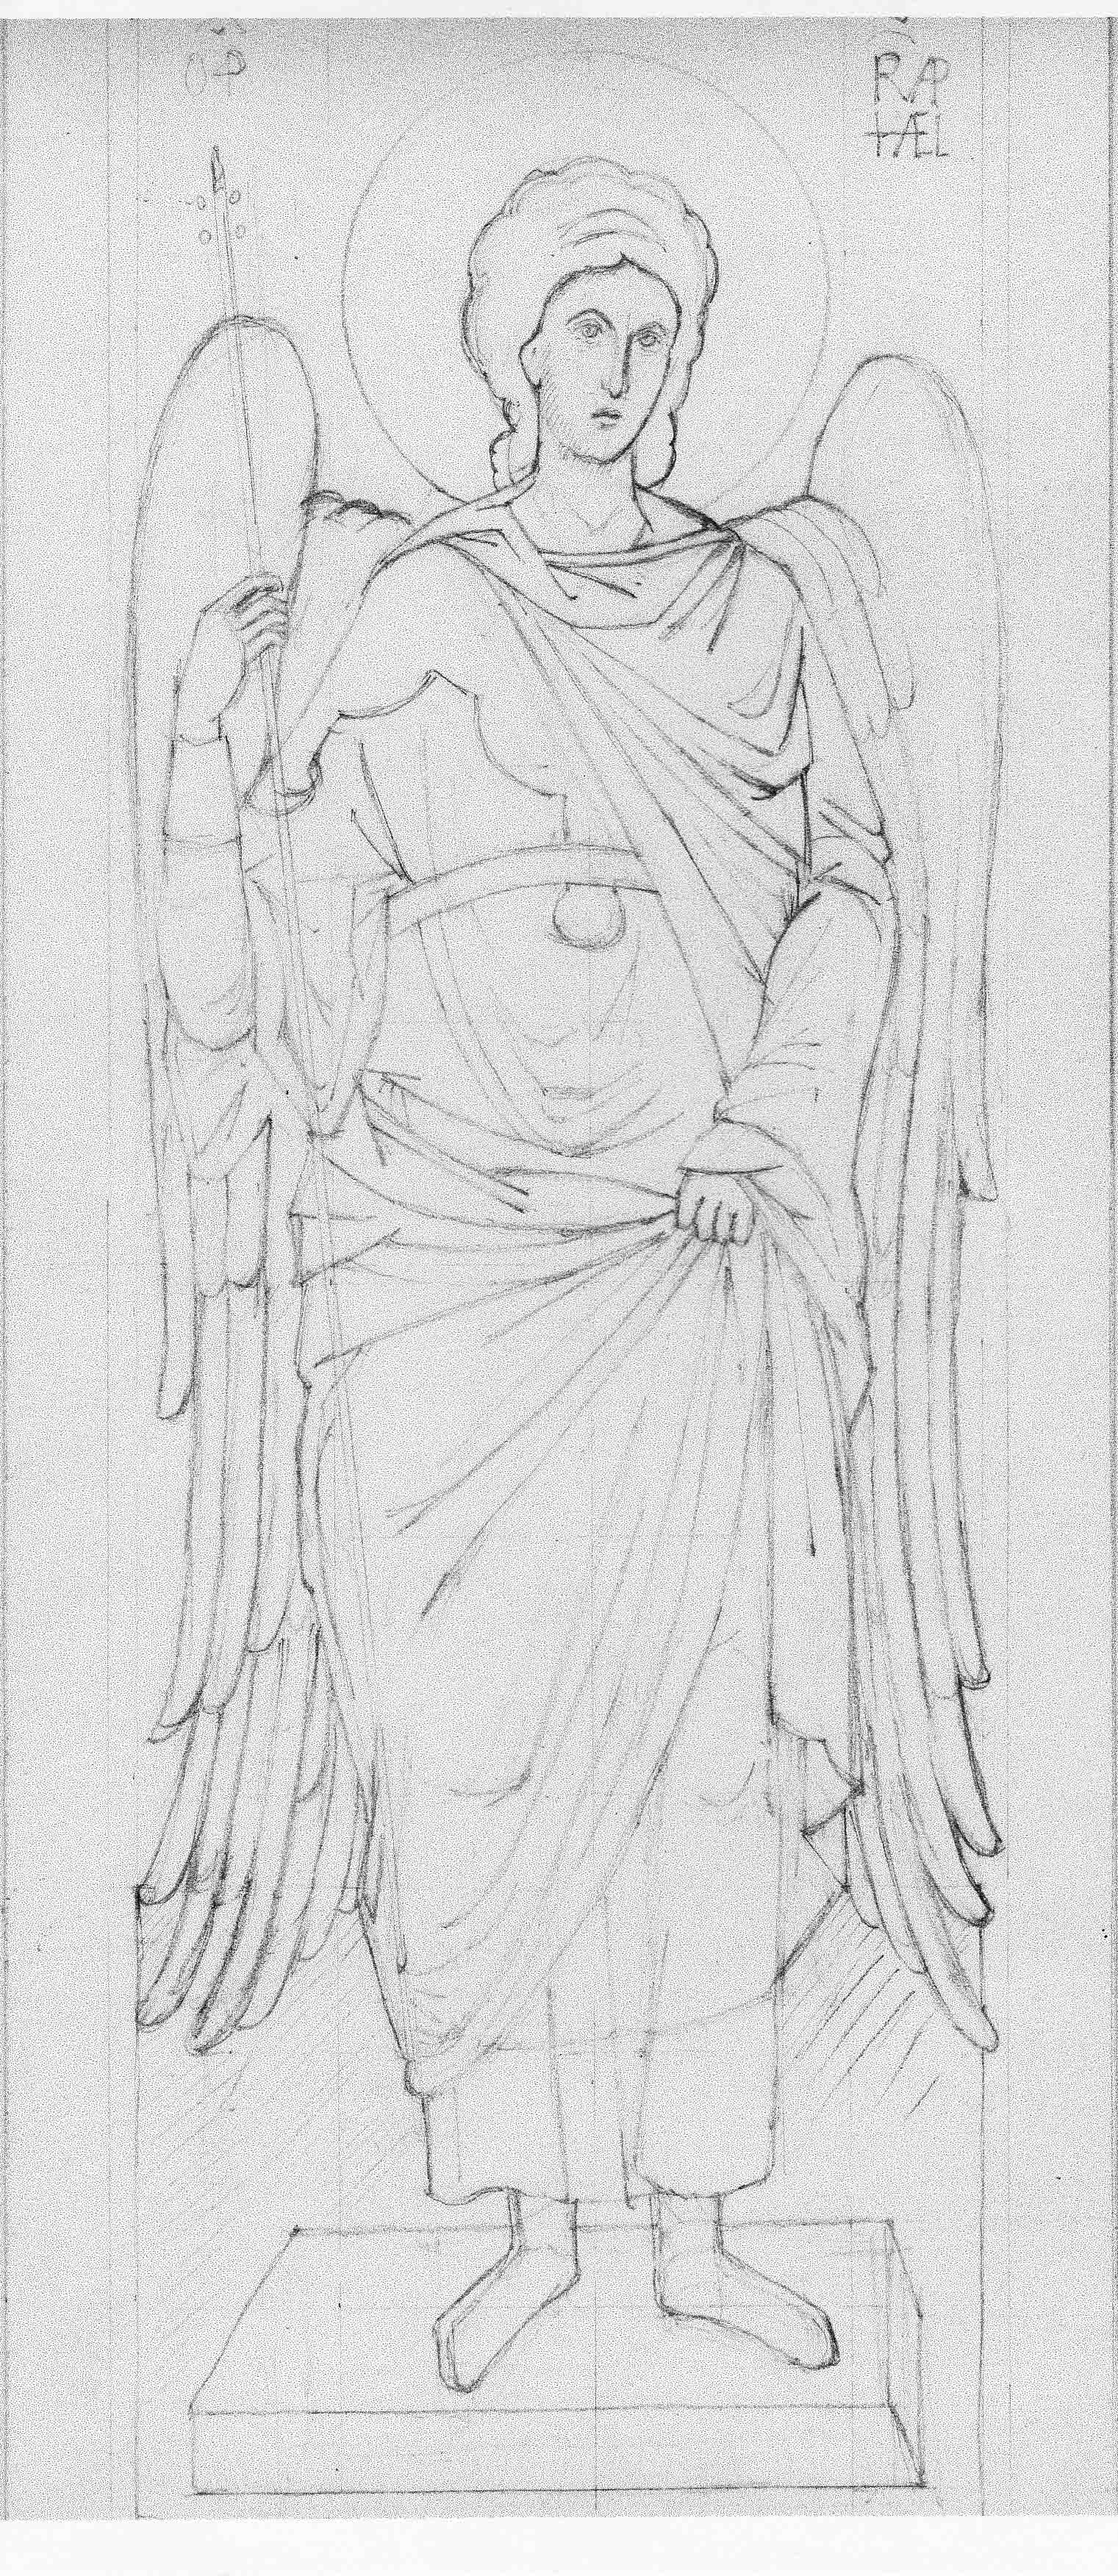
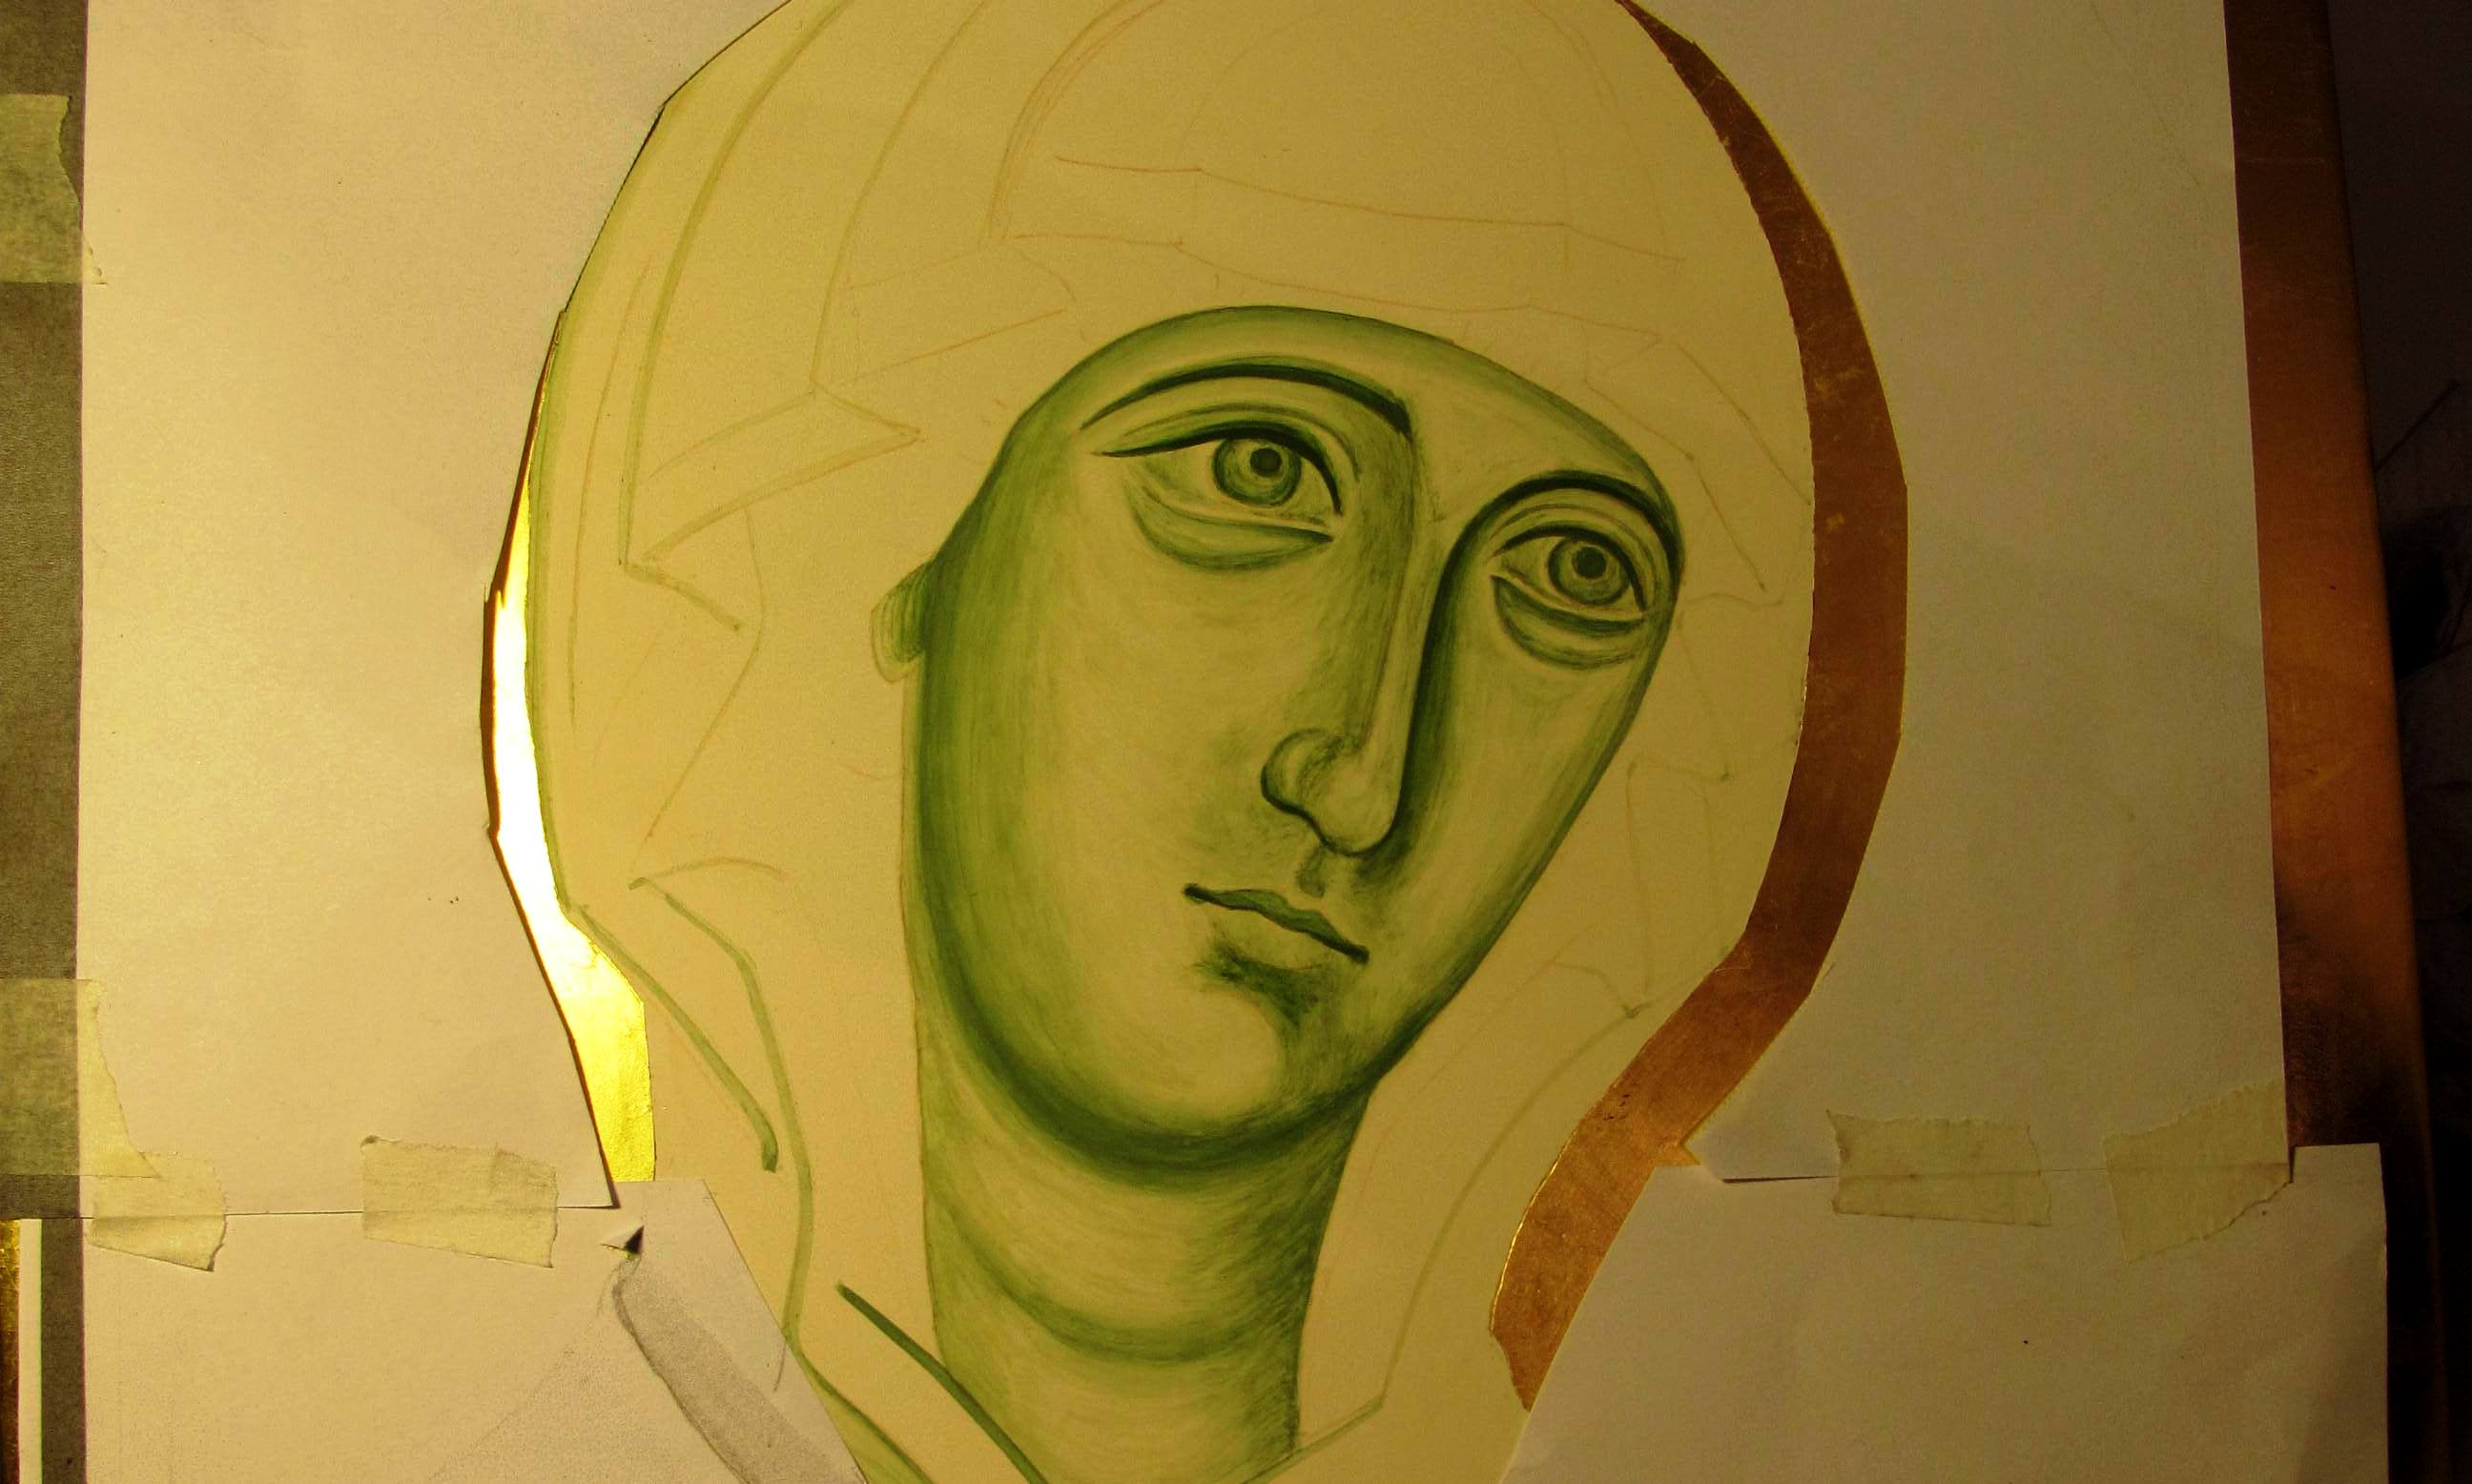
Face of Archangel Raphael in a monochrome study

Warmest greetings icon friends!

Our summer visitors have all gone home, my dissertation for the icon diploma has been handed in (more on that in another post) and our icon classes resumed last week with Aidan Hart in time to celebrate the feast of St Michael and All Angels.

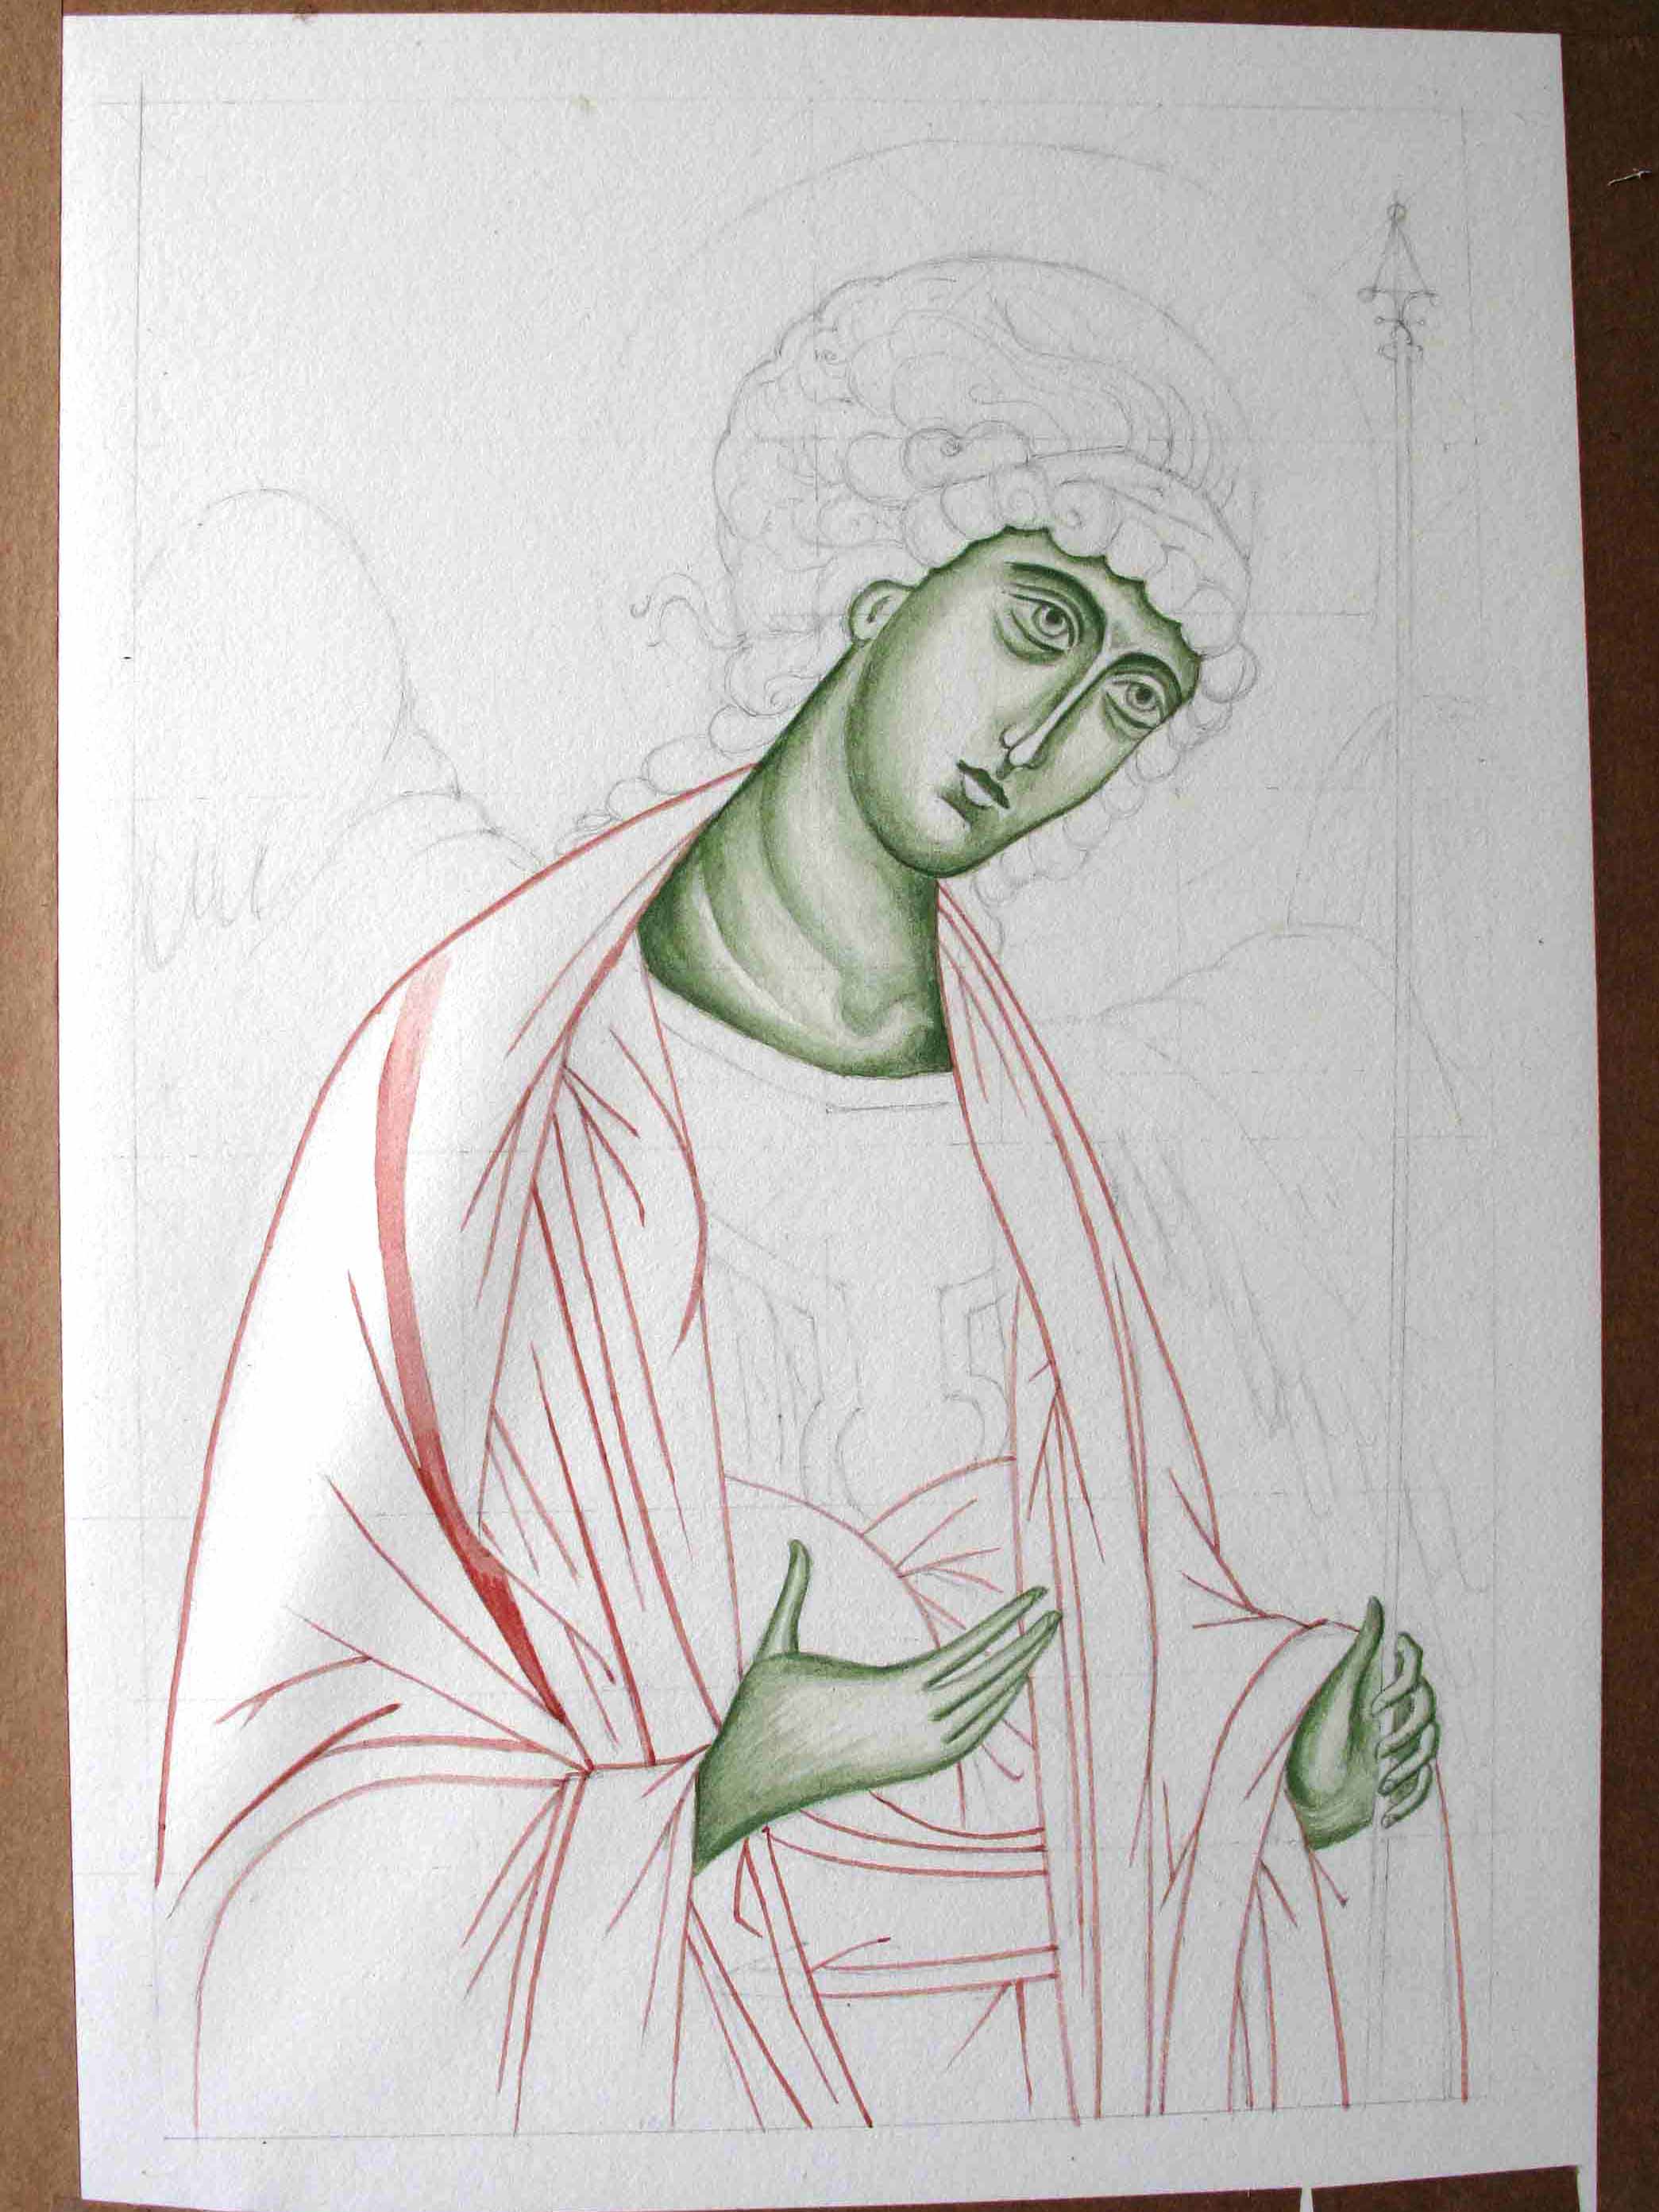
Having spent a couple of months away from the paintbrush, I felt I would benefit from painting a monochrome. Besides, I had already stretched some 300gsm watercolour paper (Fabriano Artistico hot pressed), and had the images already prepared in outline.

painting the lines of st Michael in monochrome

First lines applied on Archangel Michael in English Red Light pigment

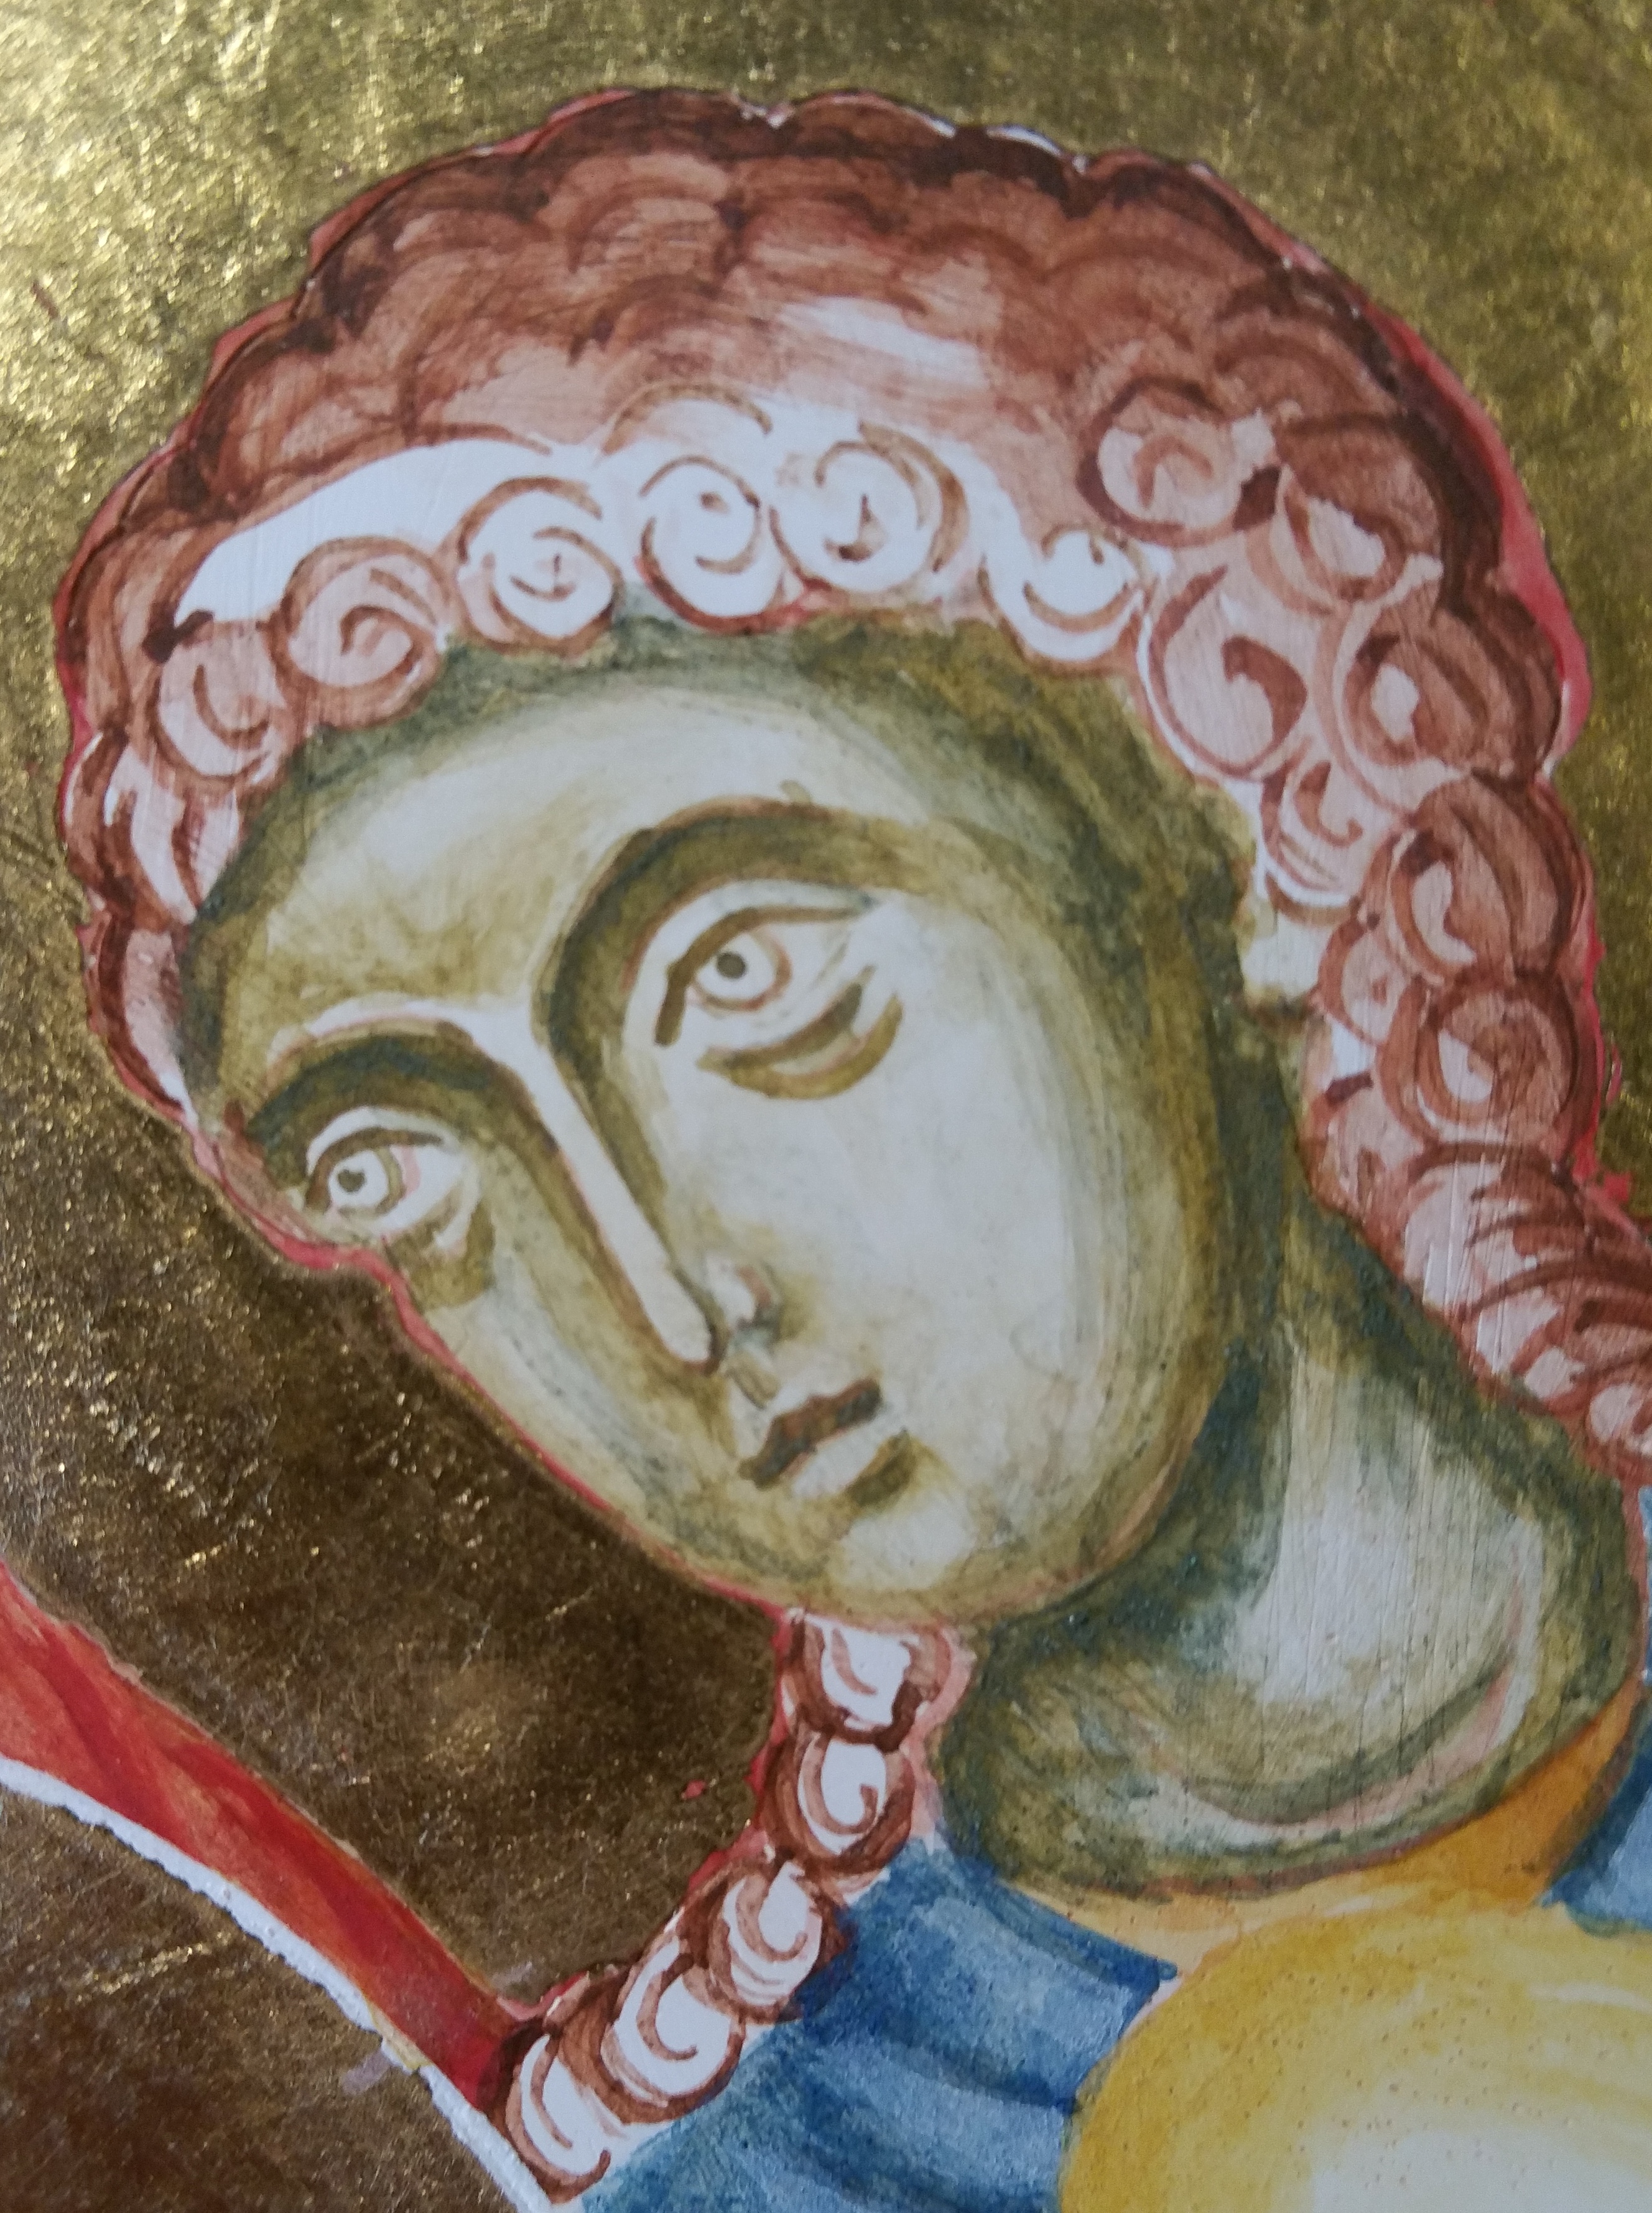
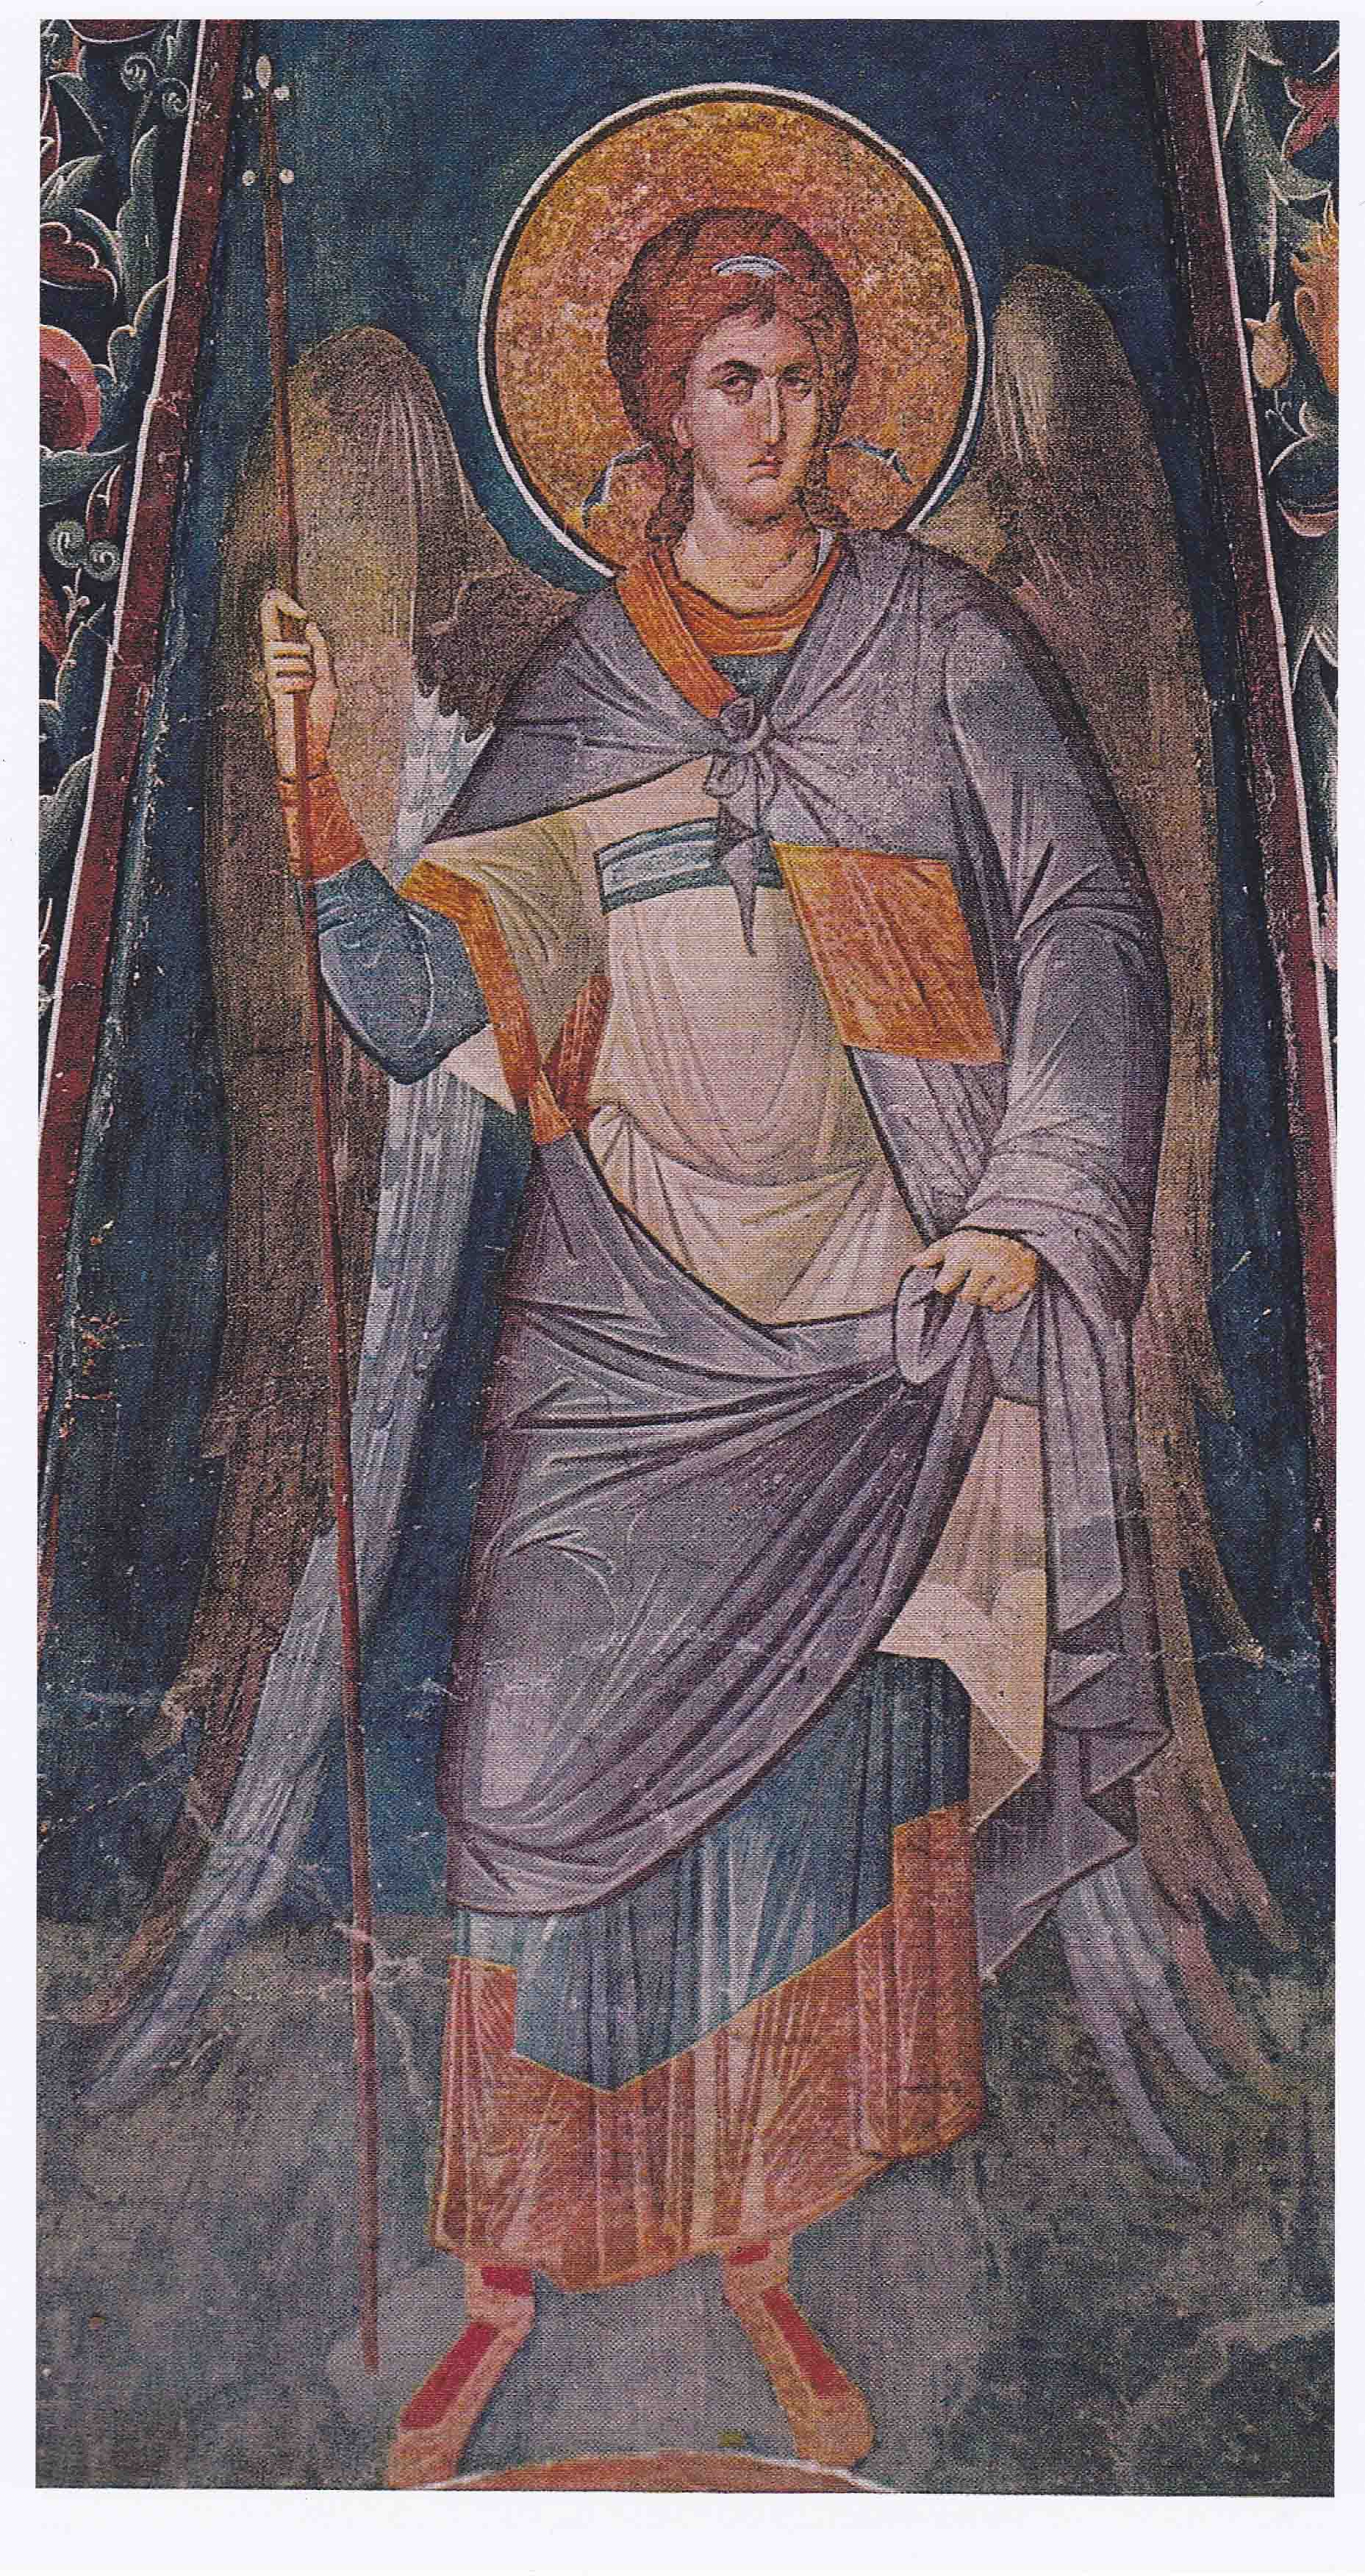
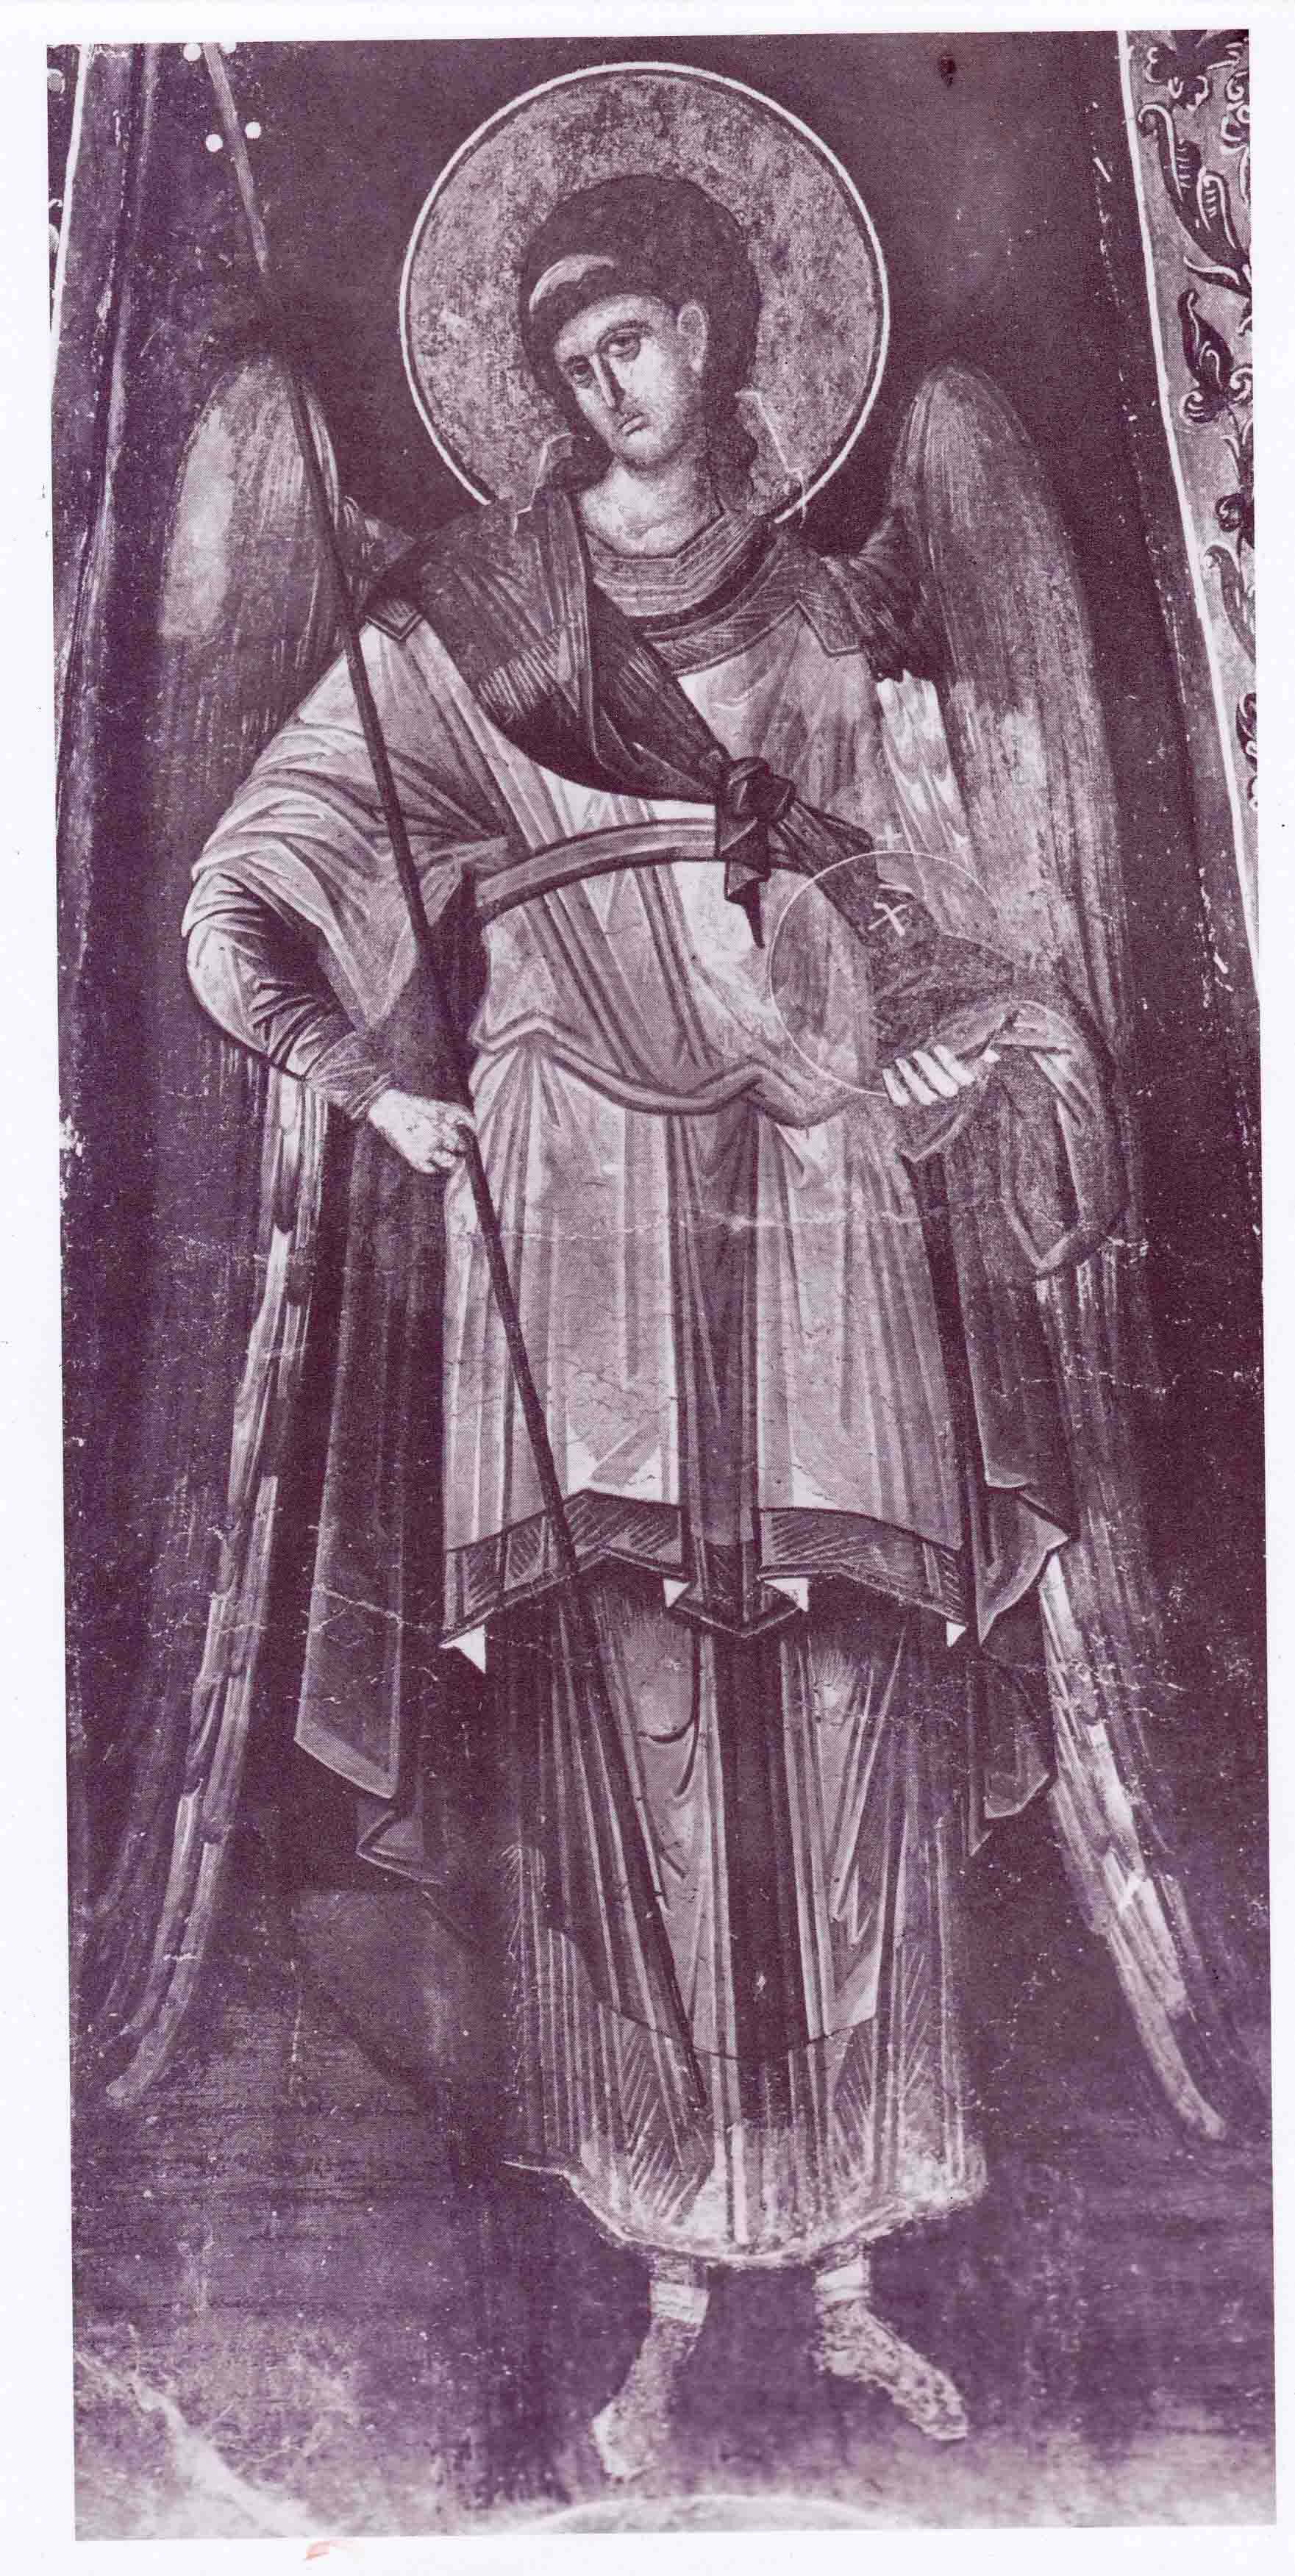
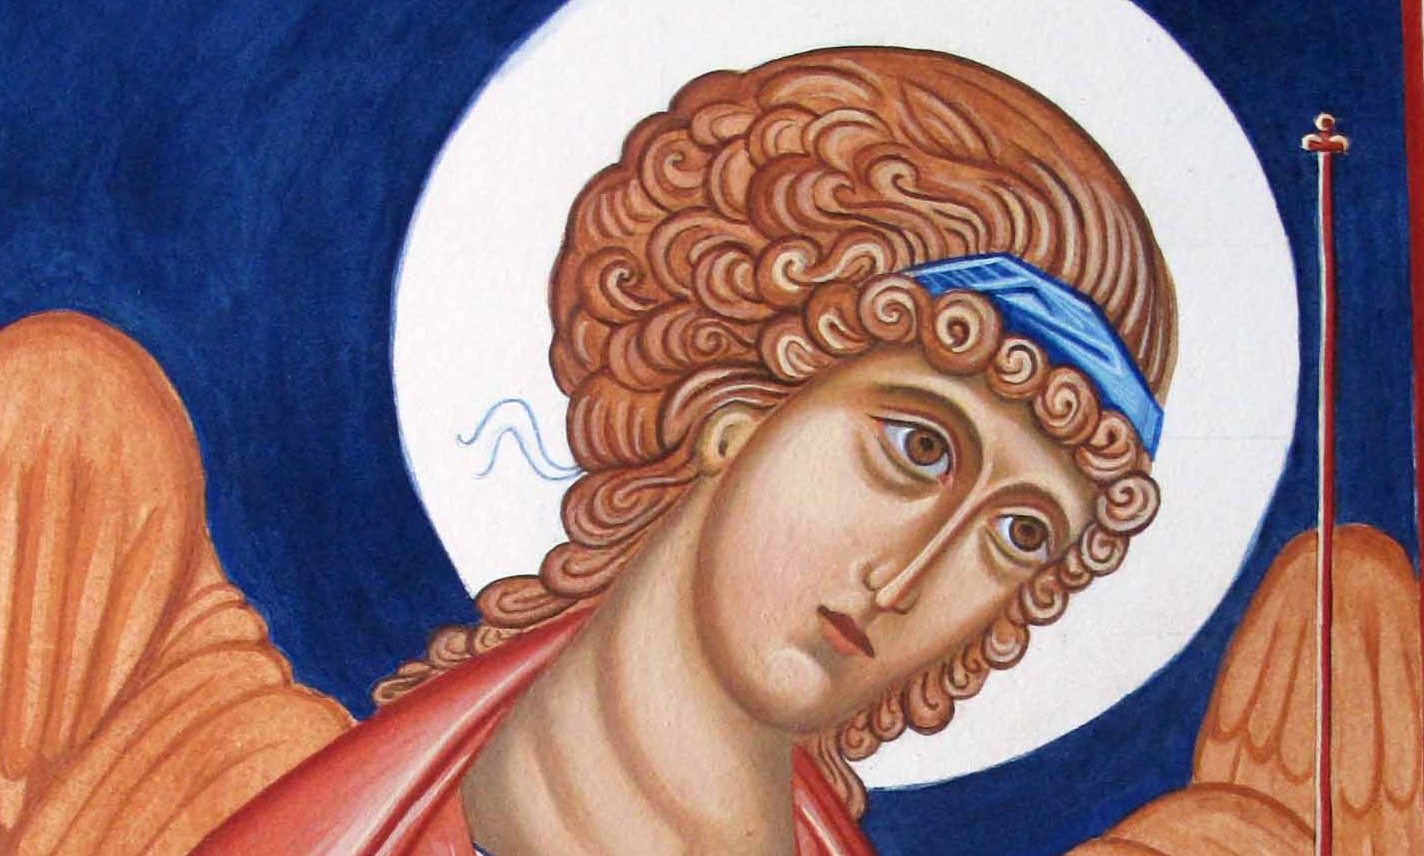
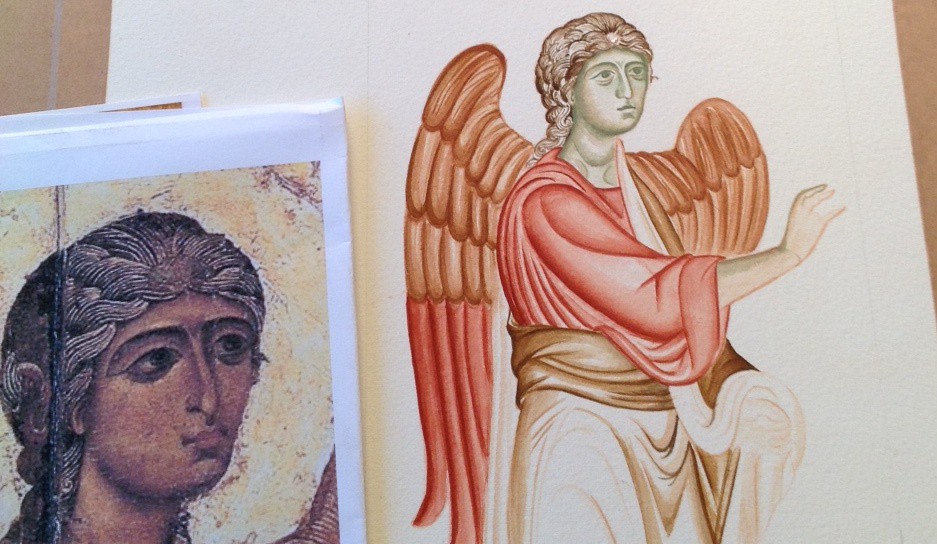
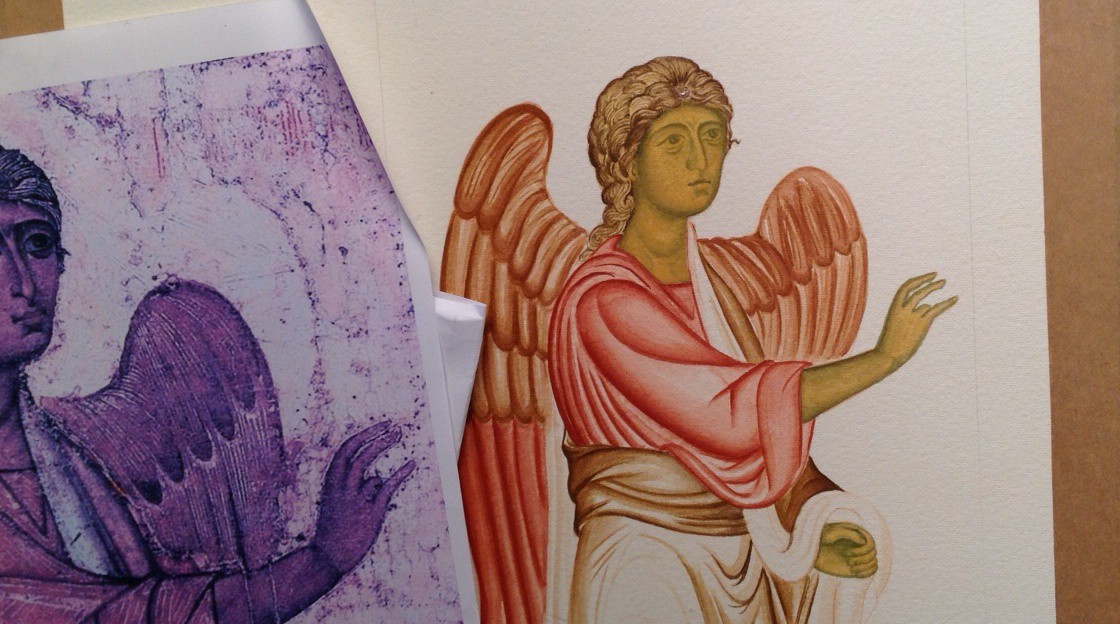
These are the same images of the Angels of Chora which I am using in my triptych (see previous post).  I haven’t painted the faces on any of the figures in the triptych yet, so these monochromes have been helpful in getting me back in the painting groove.

Modelling icon garments

Building up the layers of pigment to model the garments.

archangels Raphael and Michael

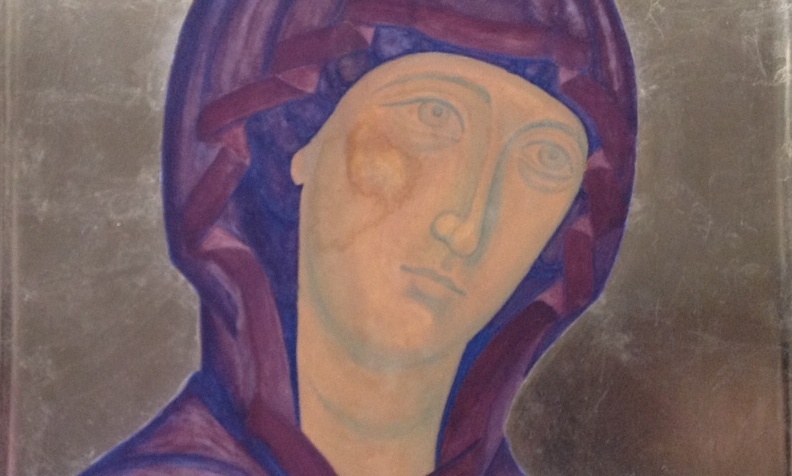
Background added of pure azurite pigment

I really enjoy painting monochromes. It’s relaxing not having to think about colour and to simply concentrate on the form, looking at the areas of light and shade. I also wanted these studies to stand on their own, so I gilded the haloes and garment highlights.

If ever you feel daunted by the prospect of painting an icon, this is a really good place to start.

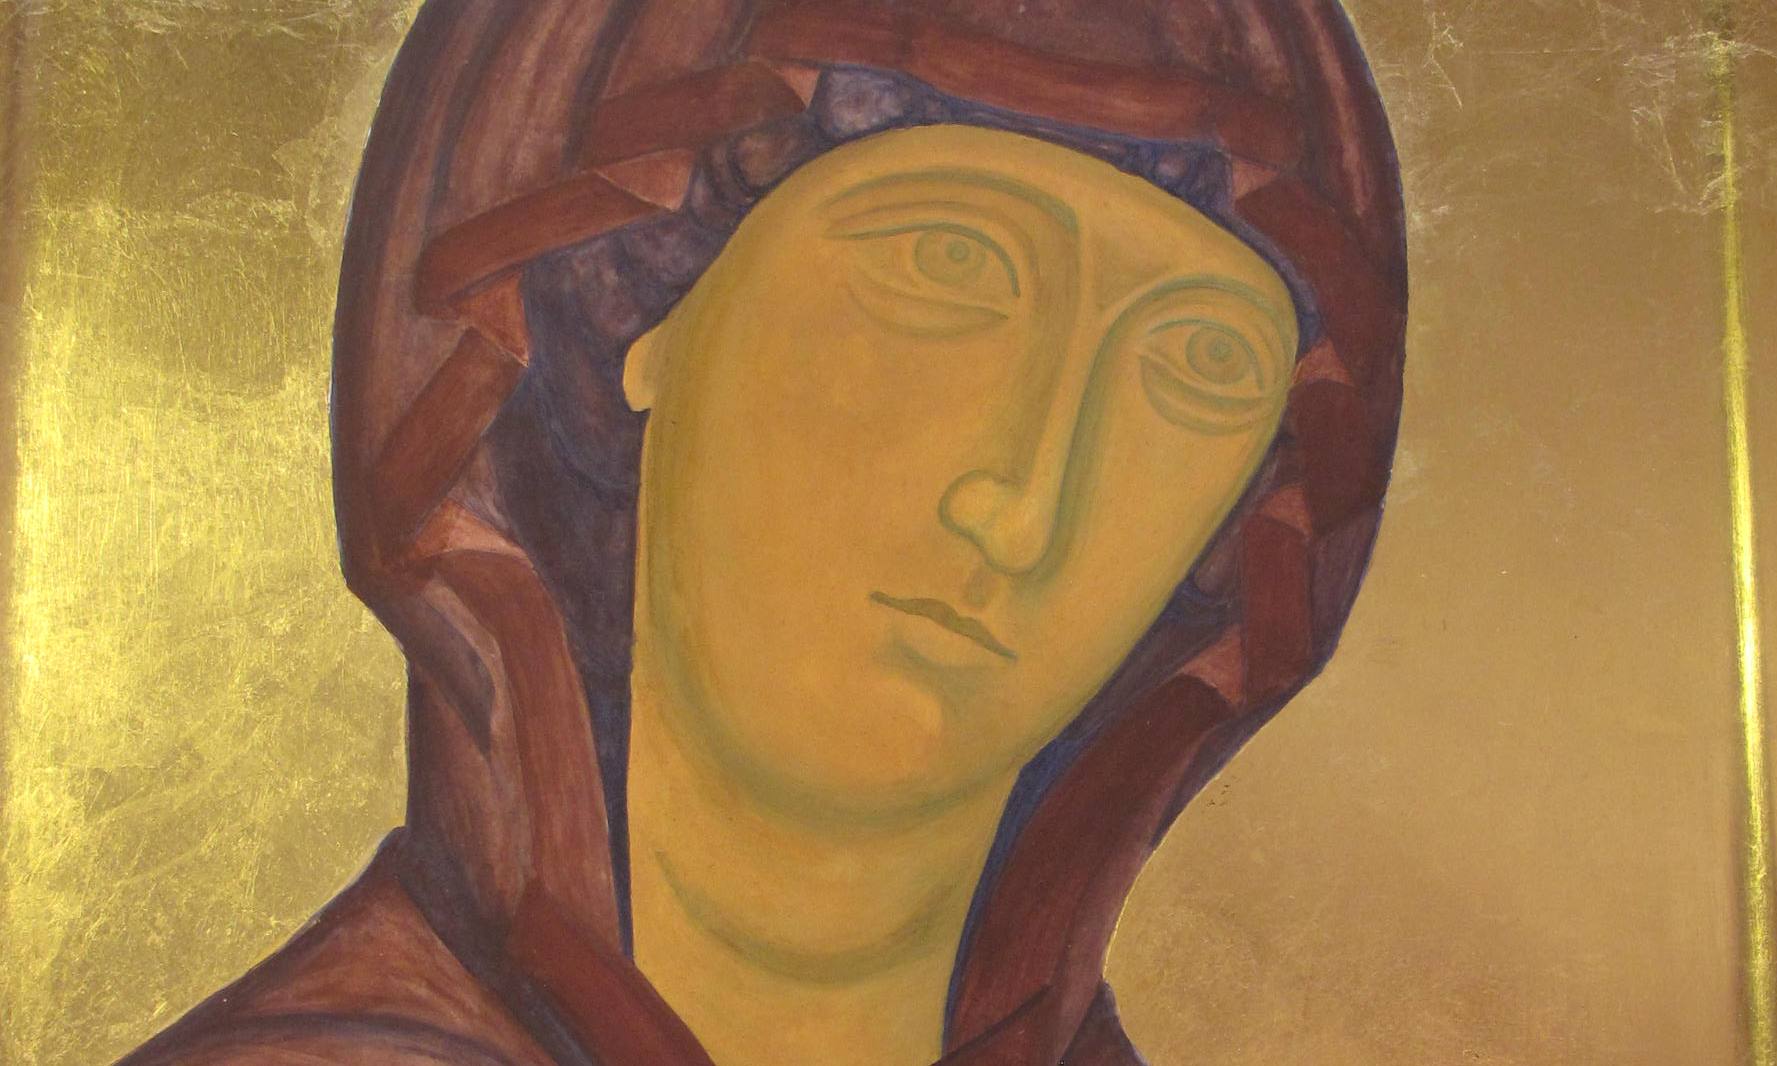
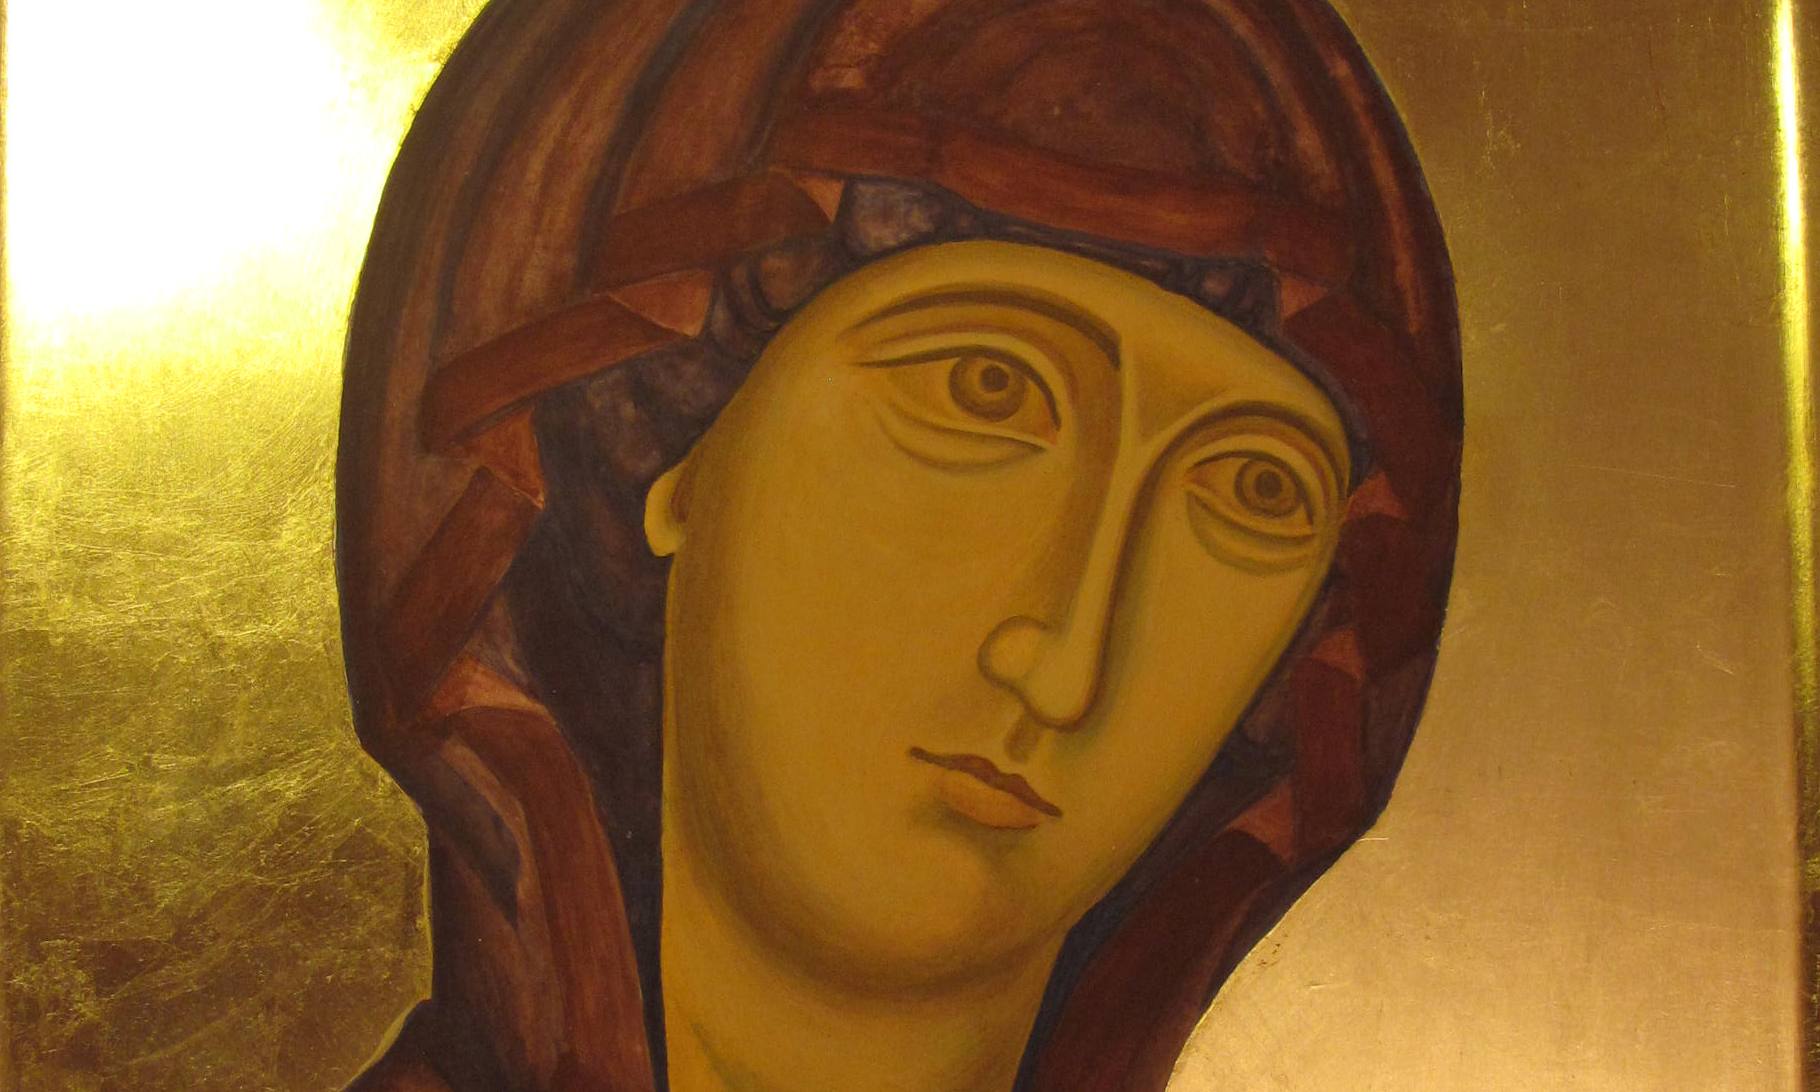
I love the deep blue-greys of the Chora angel backgrounds. They give a wonderful feeling of a heavenly sky. It is quite a challenge to match colours, for one thing, even if you know that the colour used was azurite, this can vary according to the quality of the stone and where it was mined. For these studies, I applied over a dozen washes of azurite – the pigment which I ground from a small rock bought from Burslem Lapidary shop, then a few washes of Indigo from Cornelissens.

I used acrylic gold size, applied in two layers, then after ten minutes or so, I applied some transfer gold leaf (from Wrights of Lymm) once it had gone tacky. If you add a pinch of red pigment to the size, it helps to give some depth to the background as well as show you where you’ve painted.

gold transfer leaf

Adding gold leaf to Archangel Michael’s halo

After applying the gold leaf to the halo, I then used a compass with a dip pen attachment to draw a circle to frame it. This is fiddly and I haven’t mastered it at all yet and ended up with a line thicker than I intended.

thick line around halo

Halo line a bit too thick.

I had used a sheet of cardboard over the image to protect the face/paper from getting a compass puncture mark right in the middle of Raphael’s brow. The thickness of the card had a knock-on effect of dislocating my circle by a few millimetres – I will try a sheet of acetate cut to size next time.

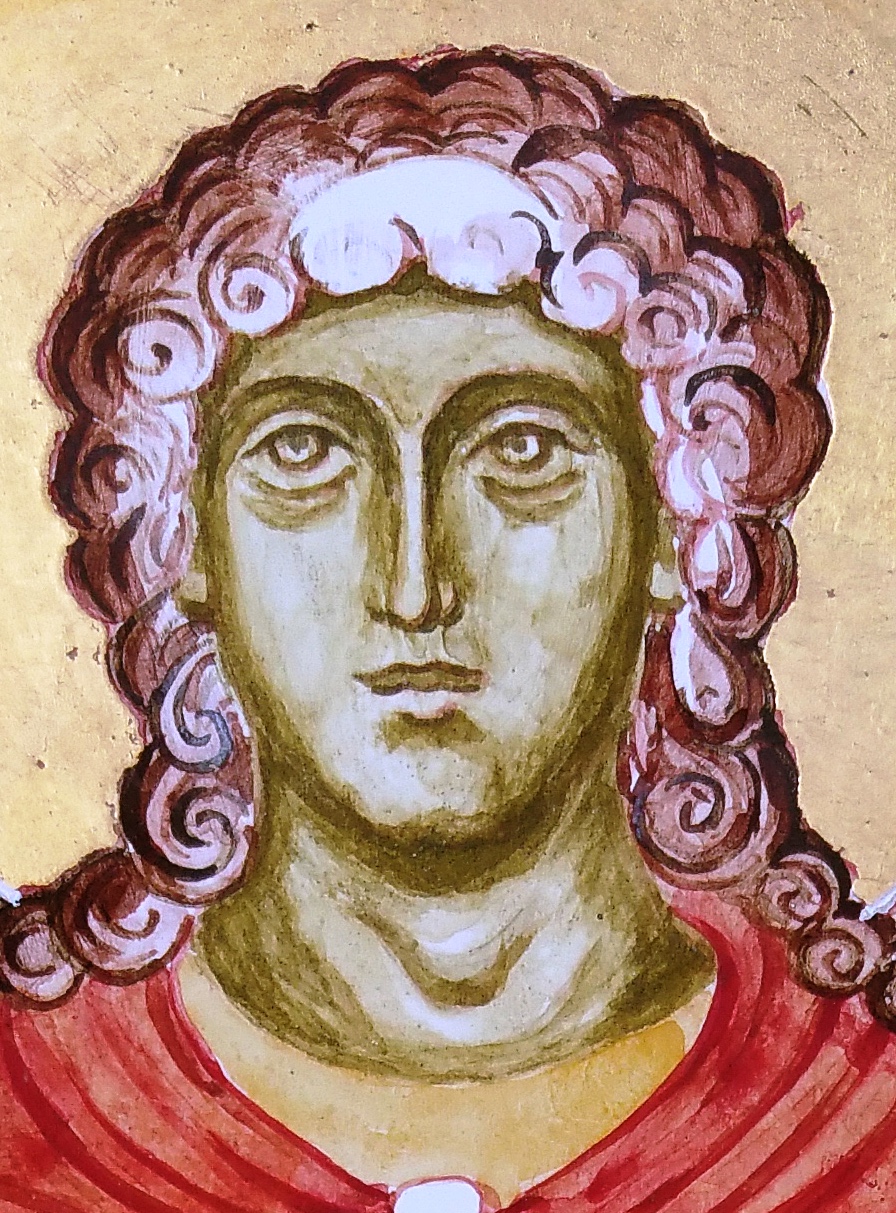
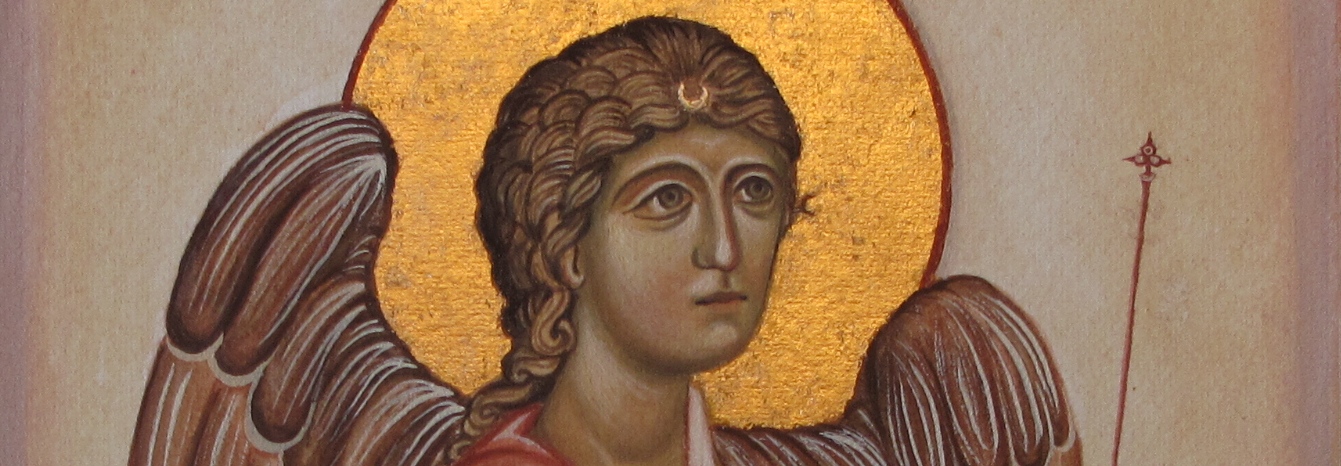
Here are the finished studies. They are not the best photographs but hopefully give you an idea of the end result.

monochrome archangel Michael

Complete study of  Archangel Michael

Archangel raphael

Complete study of Archangel Raphael in monochrome

That’s all for now.

Many thanks for reading. Ronnie

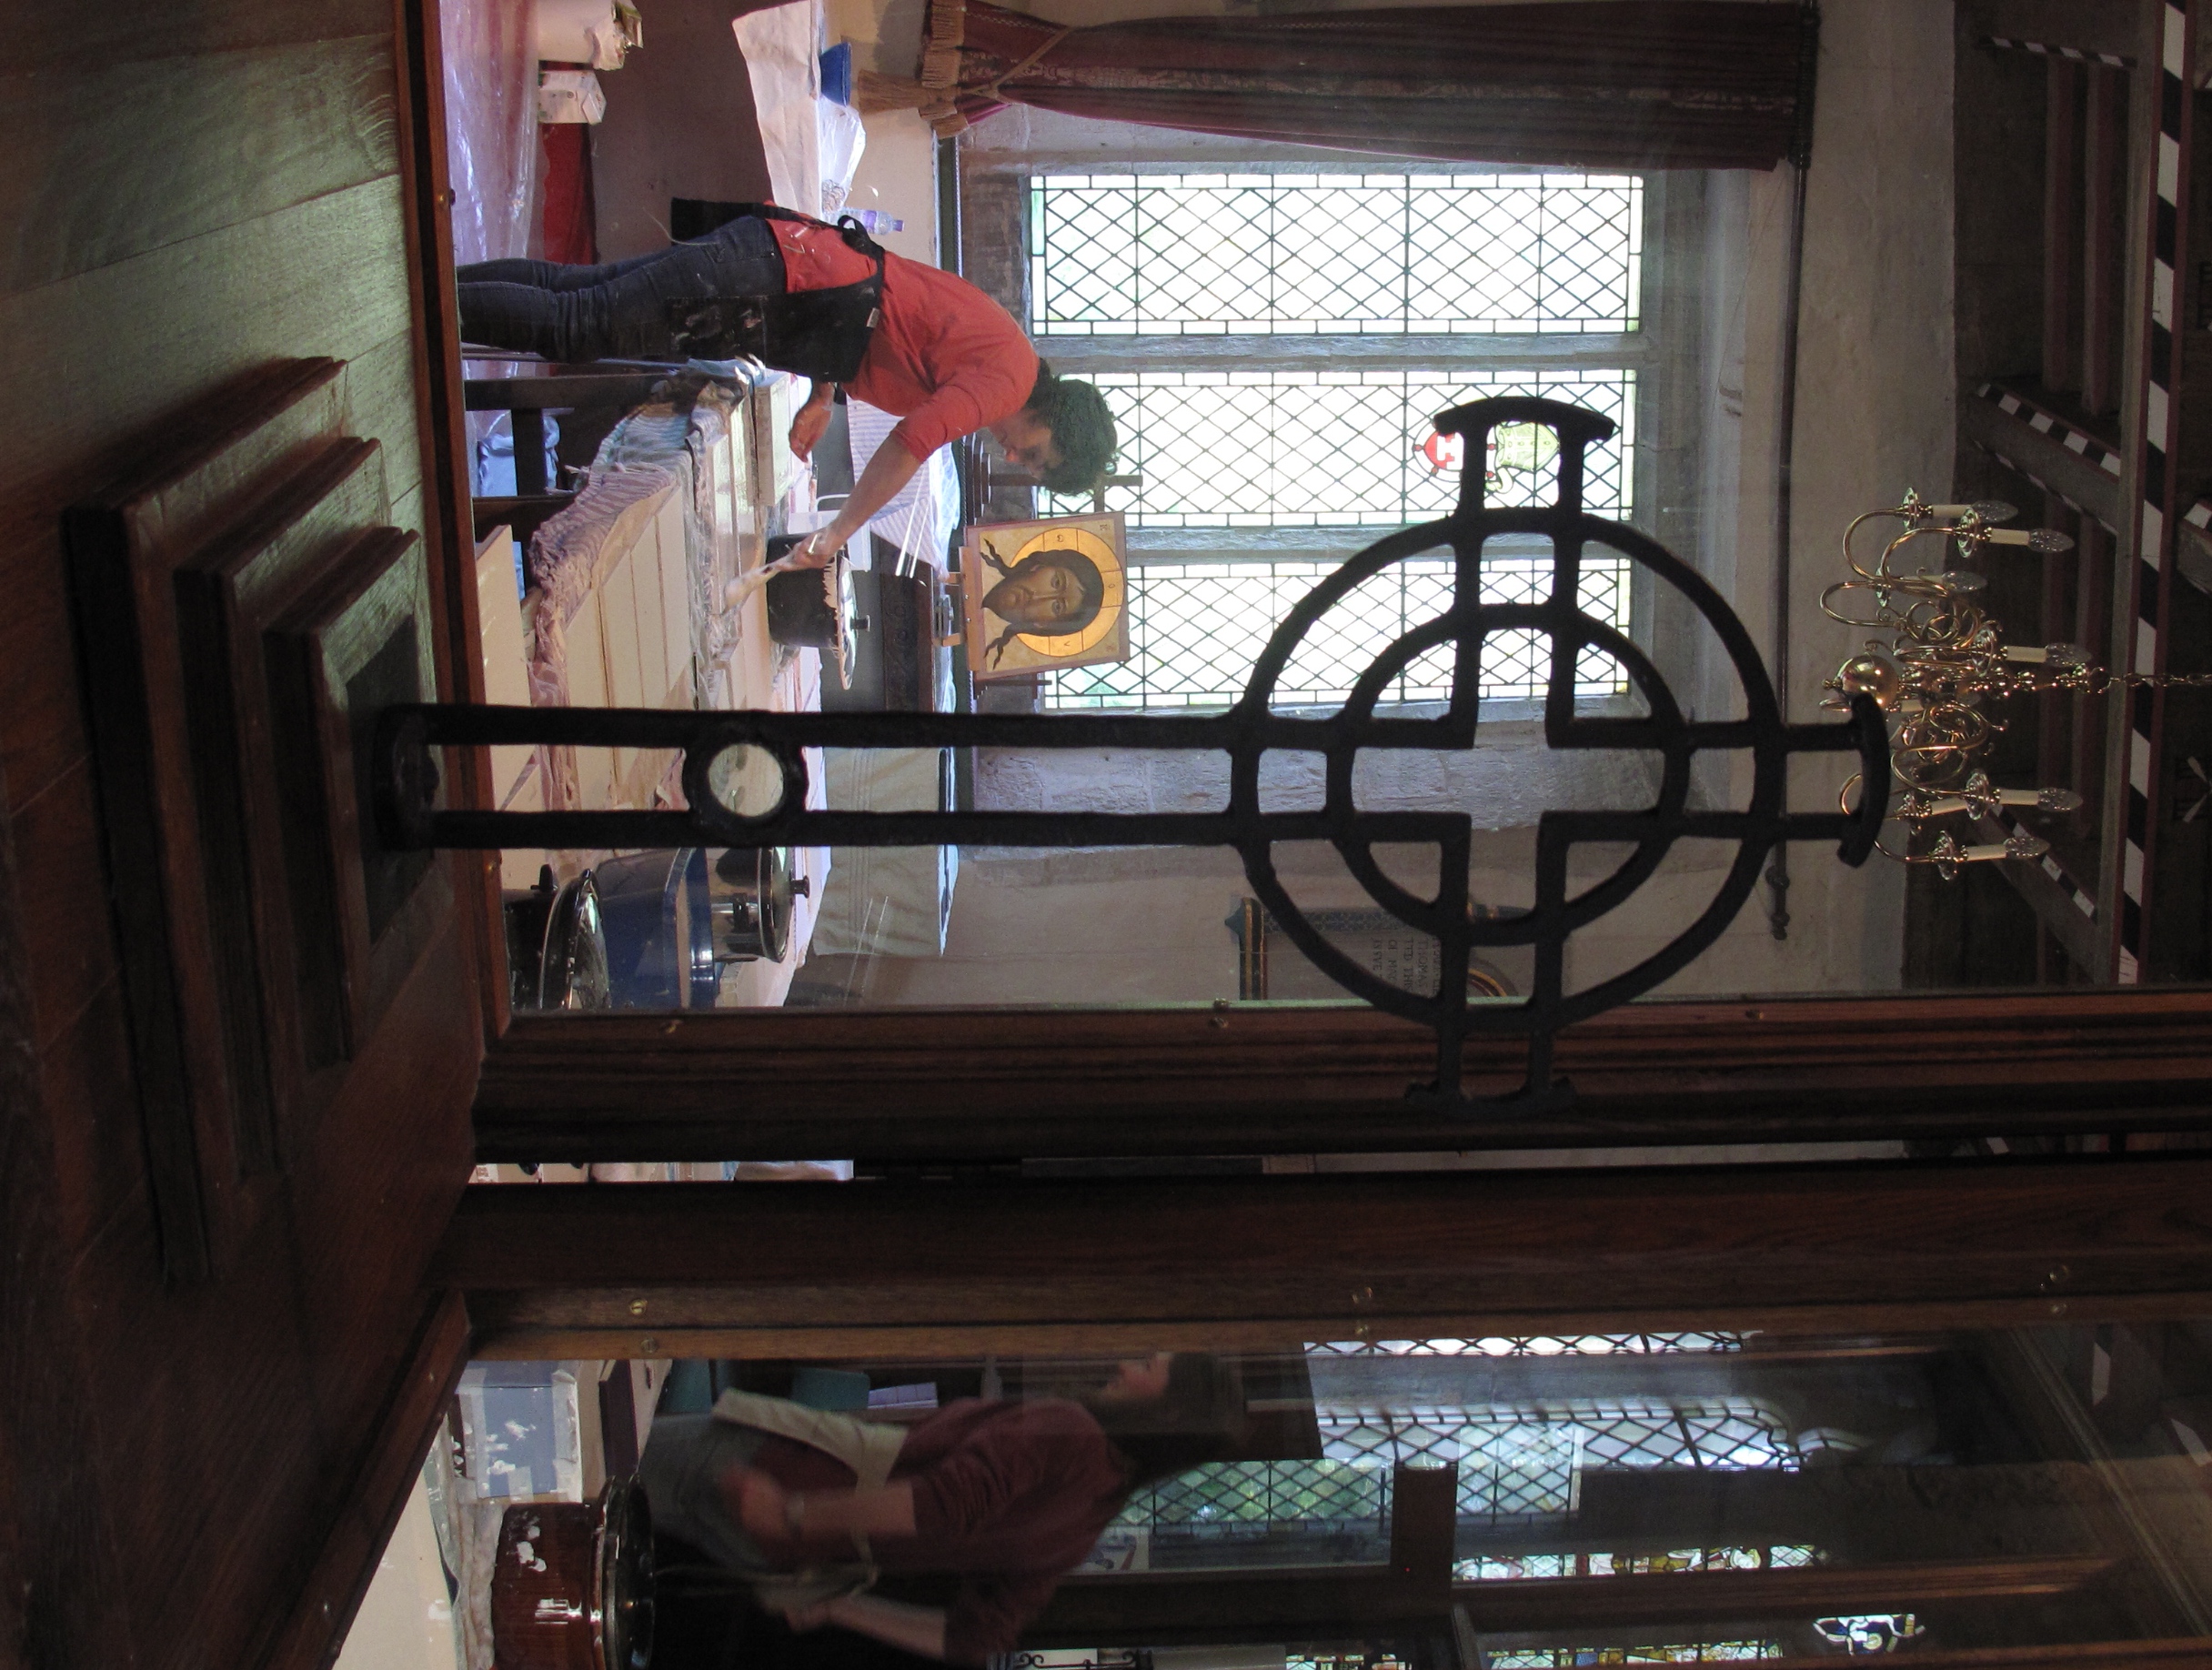
PS Aidan has recently been filmed whilst painting an icon and has been included as part of Simon Schama’s Face of Britain series.

PPS Prints and cards of Archangels Michael and Raphael are now available from Smith York Printers.

Archangel Gabriel – egg tempera on watercolour paper

angel gabriel

Archangel Gabriel on water colour paper

Hello icon friends, While I was recovering from the fractures, I was keen to get my arm painting or drawing again in some way. Since I was pretty limited in my mobility, I decided to make use of some pre-stretched water colour paper which was mounted on a board light enough to handle. I really liked the monochrome studies which we painted in egg tempera on paper and thought I would tackle some different garments as a way of practice before returning to make amends to the hashed up garments of St Francis.

egg tempera on paper

Drawing on to stretched water colour paper

This proved to be a delightful exercise and although it doesn’t have the translucency of painting on to a gessoed board, the results are surprisingly soft and gentle. It is also a great way of practicing if you don’t have an icon board to hand.

Underpainting garments, hair and face

Underpainting garments, hair and face

The paper is 300gsm Fabriano cold pressed water colour paper, which accepts the pigment really easily once it has been stretched. I dampened the paper again where I was painting large areas which helped to blend the pigments.

adding pigment to hair and wings


Underpainting the wings and adding membrane to hair

For the garments, I chose English Red Deep with a little Raw Umber and for the wings, I chose French Ochre Havanna with a dash of English Red Deep. The blue in the garments and hair band is Ultramarine Blue light with a dash of Raw Umber and the background is the same blue but with a little Ivory black added.

4a  angel

Adding membrane to the face and to garments

5a angelapply facial highlights

applying garment highlights

applying garment highlights

Highlights added to garments and face

Highlights added to garments and face

Applying gold leaf to the halo and wings

Applying gold leaf to the halo and wings

The original framed icon is available to buy in my Etsy shop here.

Sanding for St Hilda of Whitby

Icon board

Highlight surface scratches on a gessoed icon board by rubbing in red ochre pigment

St Hilda of Whitby

St Hilda (c614-680) showing adjustments I need to make to head and shoulders

My homework for the next diploma session, is an icon of St Hilda, referring to an image painted by Aidan Hart. The icon can be seen further below and also on his website Aidan Hart Icons. During my childhood, Whitby was a favourite seaside destination from our home in York. The sight of the ruined abbey looming over the cliffs was a vivid landmark against what was often a cloudswept sky. This dramatic photograph courtesy of Mark Davis Photography shows how the abbey forms such a striking silhouette against the east coast sky.

Whitby abbey

Photo of Whitby Abbey by  Mark Davis Photography  http://www.mark-davis-photography.com/yorkshire/whitby-and-the-east-coast/

To think that St Hilda founded an an abbey and community in this wild landscape is remarkable and gives an insight into the strength of her character.

Icon by Aidan Hart of St Hilda of Whitby

St Hilda of Whitby by Aidan Hart

For this icon, I am using a flat plywood board.  I will oil gild the halo so the sanding only needs to be taken as far as 600 grit sandpaper. If you over-sand the gesso, the paint won’t stick.  I’m using an icon board which I gessoed last summer which I also sanded up to 120 grit paper. With hindsisght, I should have sanded it right up to 600 grit, as it is much easier to work outside in the warm than indoors in a UK January! Sanding gessoed boards is a dusty process so be prepared. Put a few sheets of newspaper over your worksurface and have your vacuum cleaner and a dust mask to hand. You will also need a medium sized dry paintbrush to brush the gesso dust out of the sandpaper, a cork sanding block and all the different grades of sandpaper to hand. Looking back on Dylan Hartley‘s notes which he gave us at our gessoing session last year (click here for a pdf copy SANDING ICON BOARDS by Dylan Hartley), Dylan reminds us that you should choose a place to sand where there is raking light ideally with one main light source. This helps to show up anomalies and scratches. The first sanding is done with 80 grit paper, then work up through 120, 180, 220, 320, 400 and 600 grades. It is important to use these in sequence and ensure that any grooves left by the gesso brushing are smoothed away.

Sandpaper

Splitting sandpaper sheets and filing them by grade

In the UK, sandpaper is sold in sheets about A4 size. I hadn’t realised until Aidan showed us, that if you fold and tear the paper in half lengthwise, then tear these strips into three, you can get six pieces ready to wrap around your block. Given that you go through sandpaper very quickly, it is worth spending time folding, tearing and filing the different sized papers into envelopes which does helps the flow of work.

brusgh off clogged sandpaper

Keep brushing off clogged sandpaper

It is really important to brush the sandpaper often – as soon as you have sanded the board a few times, lift the block and brush. You can also vacuum up the clogged paper to save dust clouds forming. The whole process is a bit of a faff as my glasses steam up when I wear a dust mask and they get covered with dust! Rubbing in a pinch of red ochre with cotton wool is a really effective way of seeing where the scratches are hiding. Even with good raking light, it is easy to miss a scratch until you start painting – and they are difficult to disguise later.

red ochre pigment on gesso

Identifying scratches in gesso by using red ochre pigment

Looking closely at the photo above, you can also see the horizontal marks made from clogged up sandpaper.

finished icon board

Icon board finished to 600 grit paper ready for painting and oil gilding

That’s the board now ready for me to trace on the drawing. More on that next time. Thanks for reading!   Ronnie

PS To see a demonstration by Dylan Hartley gessoing icon boards – there is a clip on You Tube here

An Archangel for Christmas

Archangel Gabriel on Watercolour Paper.

egg tempera painting

Archangel Gabriel on watercolour paper

Christmas greetings icon friends!

A few lines to say thank you for your companionship during my first year of icon painting. It has been lovely to have your quiet support and interest encouraging me to keep on posting and writing up notes etc!

There are a few more video clips of Aidan Hart’s in-class demonstrations over on You Tube and I have written up some supporting notes to go with them. These are not direct transcripts, simply notes to help as you try out the various stages of painting.

https://www.youtube.com/watch?v=N3a6puiMDuQ Aidan Hart demonstrates underpainting for the Membrane Technique Click here for Notes

https://www.youtube.com/watch?v=XaSi-WVHGaY Aidan Hart demonstrates applying flesh membrane to icon bust Click here for Notes

https://www.youtube.com/watch?v=Hr4R8BzMpPc Shadows and highlights on garments using membrane technique Click here for Notes

https://www.youtube.com/watch?v=CiFkJrsDS1s Aidan Hart demonstrating halos

https://www.youtube.com/watch?v=mFG-XxPqiSI Aidan Hart demonstrates painting Mandilion hair

https://www.youtube.com/watch?v=QbwE0QY1aOw Aidan Hart demonstrates painting garments Click here for Notes

I have enjoyed the monochrome icon studies on watercolour paper and thought I would have another go at the Archangel Gabriel based on the Annunciation of Ustyug. I stretched some Fabriano Artistico paper and painted using the membrane technique. The colours are much softer on paper – lines are not quite as crisp unless you go over them several times. However, it is a great way of practicing if you haven’t got a board prepared.

1 Angel gabriel study

Underpainting: the face is in Terre Verte and a touch of Yellow Ochre Maimeri, garments and wings in a mix of English red ochre, French ochre Sahara and Avana.

Yellow ochre Maimeri eith titanium white and red ochre light

Membrane applied to flesh parts.

Building up the hair and facial highlights.

4 Angel Gabriel study

Highlights added to wings and sleeves

Preparing to gild

Preparing to gild using Roberson’s gilders size – applied over the halo which has undercoat in red ochre.

Gilding the halo

Gilding the halo. Applying final facial highlights

9 Complete Angel Gabriel study

Finished angel with halo, staff and lettering.

It is a better attempt than my last one but there is a long way to go before I become fluent and produce anything nearly as elegant as the original. All the same, it comes with my very best wishes for a happy, peaceful and blessed Christmas wherever you are in the world. Thanks for reading.

Happy Christmas, Ronnie

PS…Some years later and I did revisit some of the finer details on Archangel Gabriel’s face – around the upper lip. I am now happy with this and it is listed here in my Etsy shop

Concealing a Blemish

Underpainting the icon of the Virgin

Building up the underpainting in terre verte and a dash of Maimeri yellow ochre

This post is going to consist mostly of photos to show how I dug a hole in the membrane making a terrible mess of our home project (mine is the Blessed Virgin) and then how I managed to repair the damage.

membrane layer number one

Adding the first membrane layer of maimeri yellow ochre and a tiny dash of titanium white.

Having stressed the phrase ‘do not fiddle’ in my last set of notes, I then went on to fiddle by trying to repair a hole and this is what happened:

stain damage

Stain appears on the cheek

A tiny bare patch had appeared on the upper cheek which I tried to mend very carefully by dropping some paint in from the tip of my brush. It made a big stain. If this happens to you – I suggest that you put the icon away for a day so the paint goes bone dry and you return to it refreshed.  I didn’t and ended up spreading the stain.

stain on icon face

Stain increases on the membrane and breaks through the underpainting

I tried to add more membranes but this seemed to increase the damage. At this point, I took a break. I decided to call it a day, wrap up and leave it overnight for the egg tempera paint to thoroughly dry out, in the hope that with fresh heart in the morning, I could somehow repair the damage.

Repeat the membrane process

Repeat the membrane process

Next day, the paint seemed to stay in place when I applied another membrane so I painted 4 or 5 more layers over the left hand side of the face from chin to brow and between nose and jaw, working with thin layers applied fairly quickly but allowing each layer to dry for at least 15 minutes. I was glad that I had painted quite a strong underpainting as I could still see the image clearly below.

add membranes to icon

Keep applying membranes, at least four or five layers, then begin to add Avana Ochre to the shadows

As soon as the stain was reasonably well covered, I stopped and began to add the shadows in Avana Ochre.

Avana

Add Avana to deepen shadows

8 Strengthen shadows

I then began to add the first of the face highlights, in Maimeri Yellow Ochre with a tiny dash of Titanium White. I haven’t finished yet, but at least the stain has been taken up in the fresh layers of paint. It was a useful lesson to me as I really thought I would have to remove the whole underpainting.

9 Begin to Add highlight layers

Developing the facial highlights

I’m uploading more videos to You Tube from the last class which should be ready in a few days but for now, thanks for reading!

Ronnie

A Day at St Luke’s Icon Centre

St Lukes Icon Centre

Marcella, Susan, Jane and Chris at work applying layers of gesso

Hello icon friends!

Part of our homework over the summer has been to gesso our own boards from scratch to reinforce what we learnt at Dylan Hartley’s workshop a few months ago. By the way – Dylan sends his love to the group and wished us well for the day!

One of my fellow icon students, Susan Mobberley, runs a weekly icon painting session where members of the St Luke’s Icon Centre meet weekly to paint and pray in the sacred context of St Laurence Church, Rowington, Warwickshire.

St Laurence Church Rowington

13th century tower of St Laurence Church, Rowington, Warwickshire

Lee and I were delighted to be able to join the group on the recent ‘gesso day’. It was a treat to  experience the wonderful hospitality and companionship that is flourishing in this small but dedicated gathering.

Pray before an icon

Gathering to offer a prayer before work begins

Gessoing boards is messy and long-winded! It requires a lot of floor and fabric protection, at least 7 hours of even tempers and even temperatures, so once the dust sheets are down, the setting within the church is ideal. No phones or distractions, just concentrated effort.

measuring gesso

Marcella and Susan measuring out quatities of whiting

St lukes icon centre

Susan and Lee adding final layers of gesso

St Lukes icon centre

Susan and Lee still at work

dried icon boards

Results: Icon boards dried overnight with not a crack nor bubble in sight!

Dylan – if you are reading this – our thanks for your clear instructions and for drumming it in that for the best results, stick to the rules!

St Luke’s Icon team – a big thank you for making your guests so welcome.

Last but by no means least, it was the feast of St Lawrence of Rome yesterday, 10th August. There is an interesting blog written by the British Library on illuminated manuscripts and yesterday it featured St Lawrence as a tribute on his feast day.

Thanks for reading.

Ronnie