Icon Diploma Student

Learning to see with the eye of the heart

Posts from the ‘Archangel Raphael’ category

At the Heart – A Child

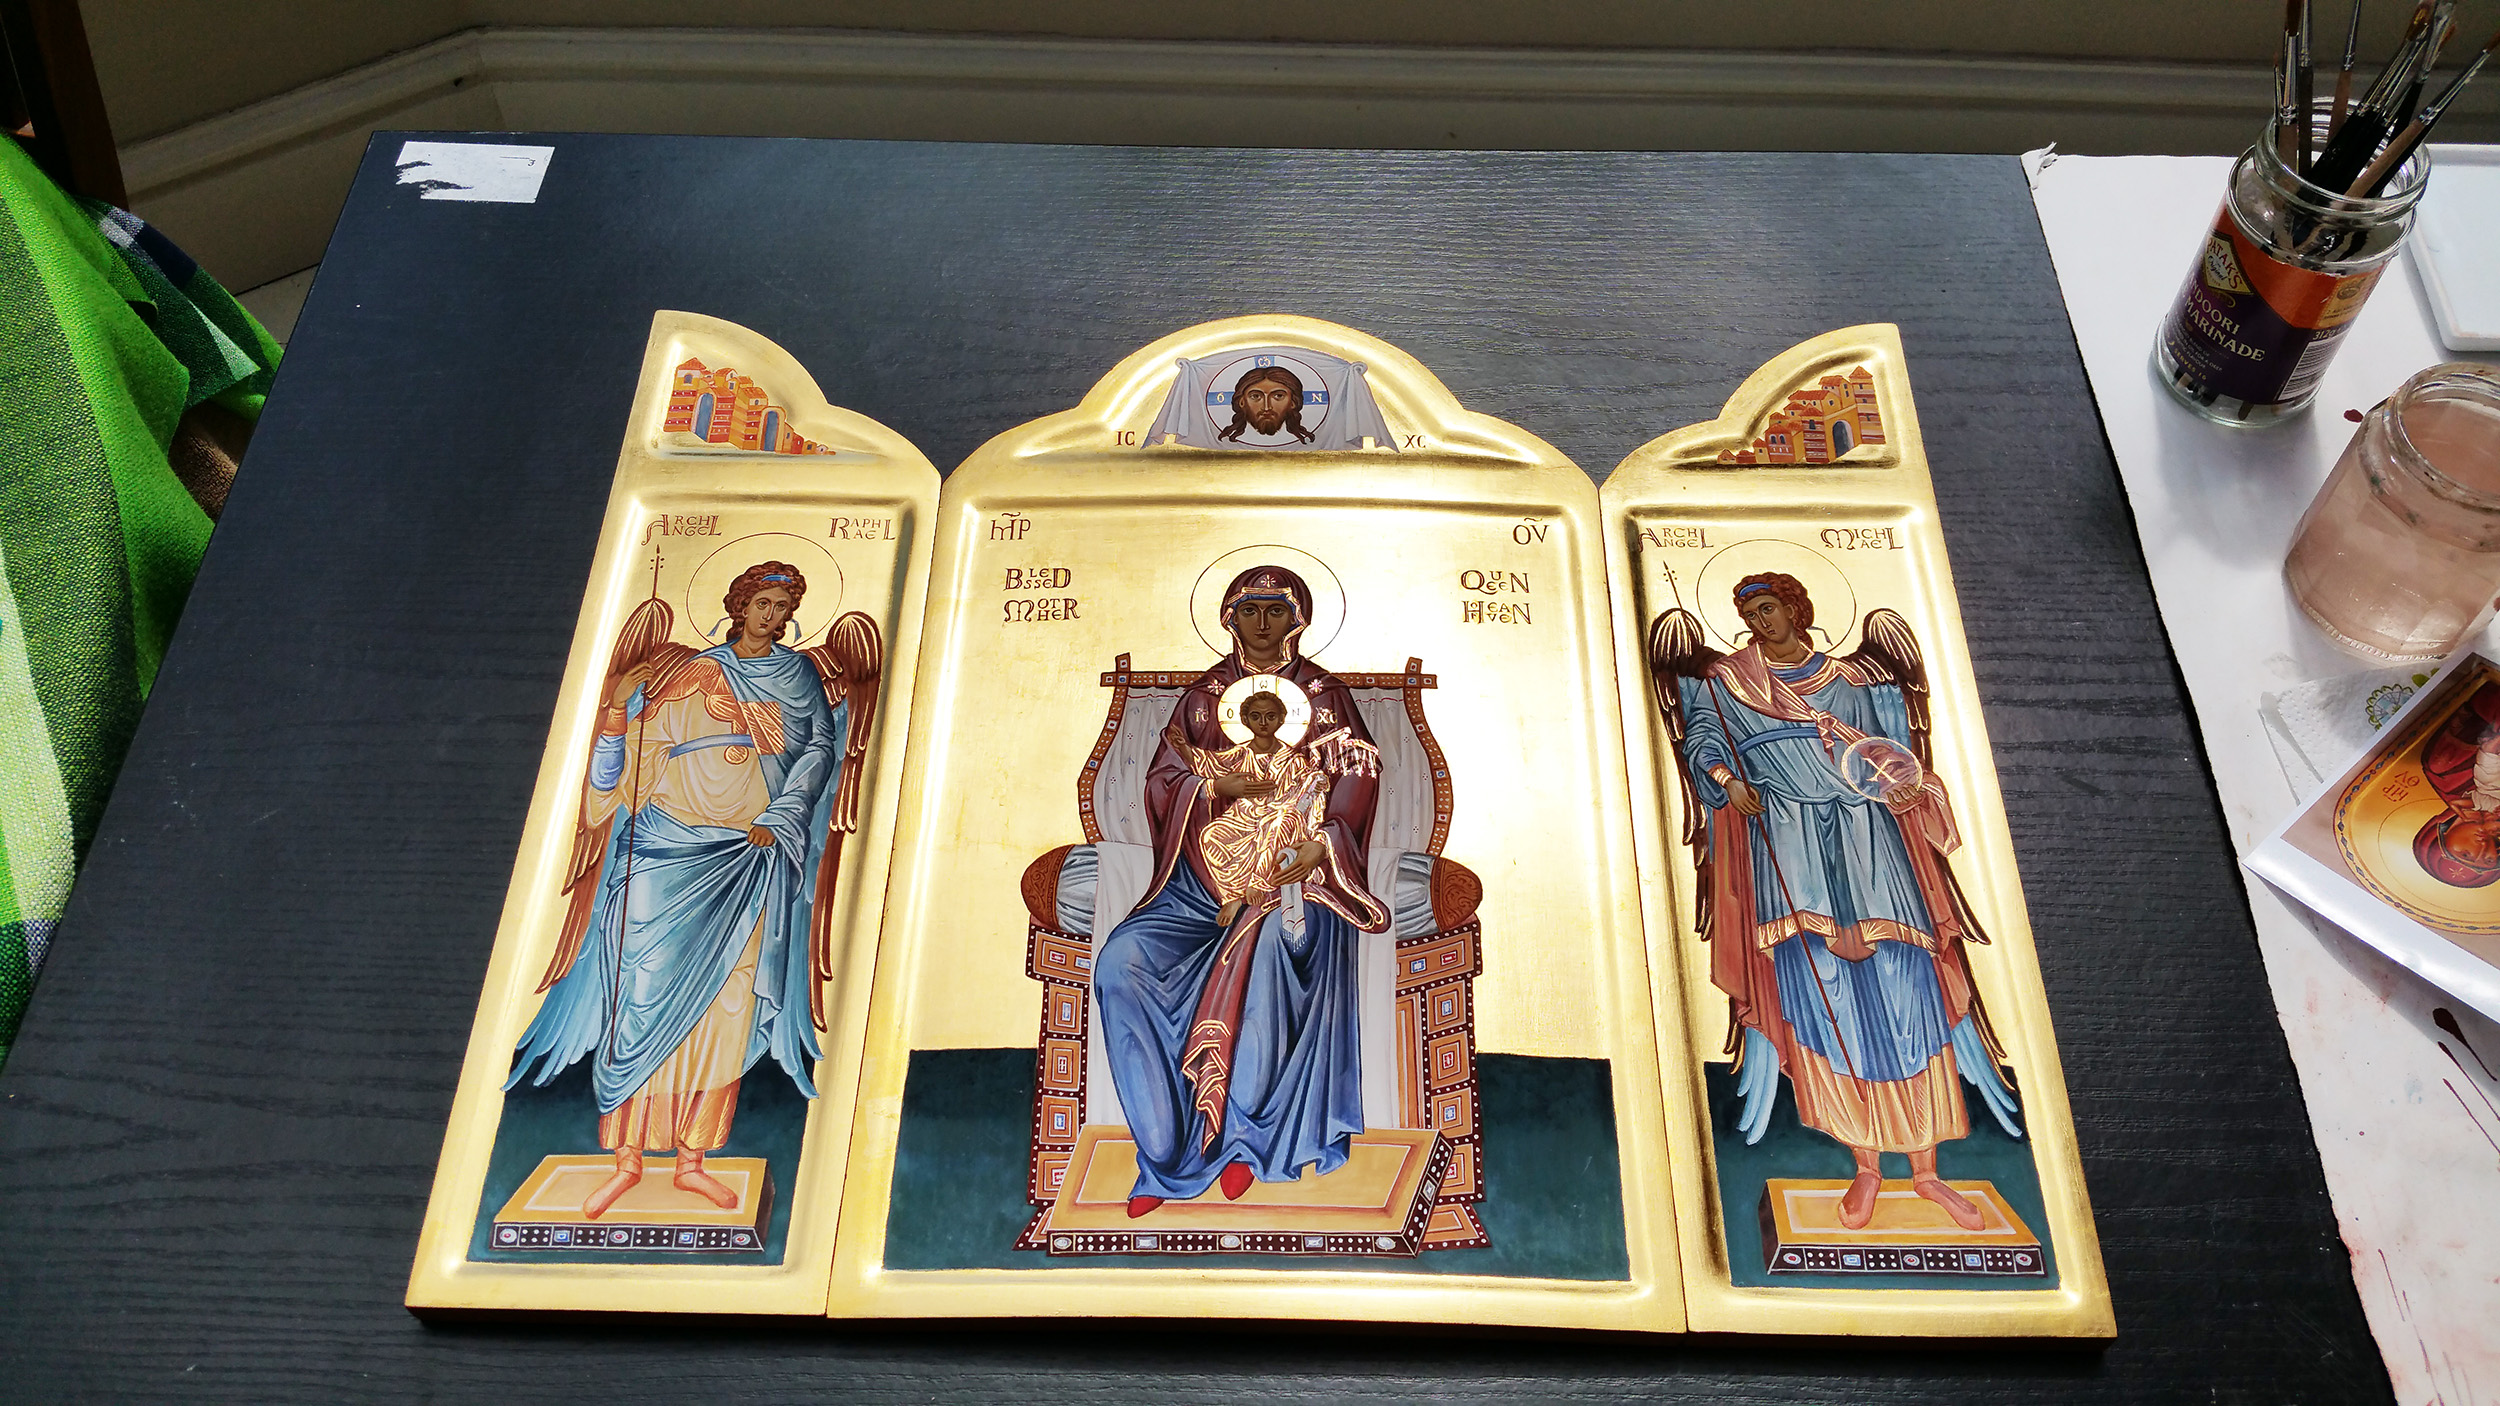
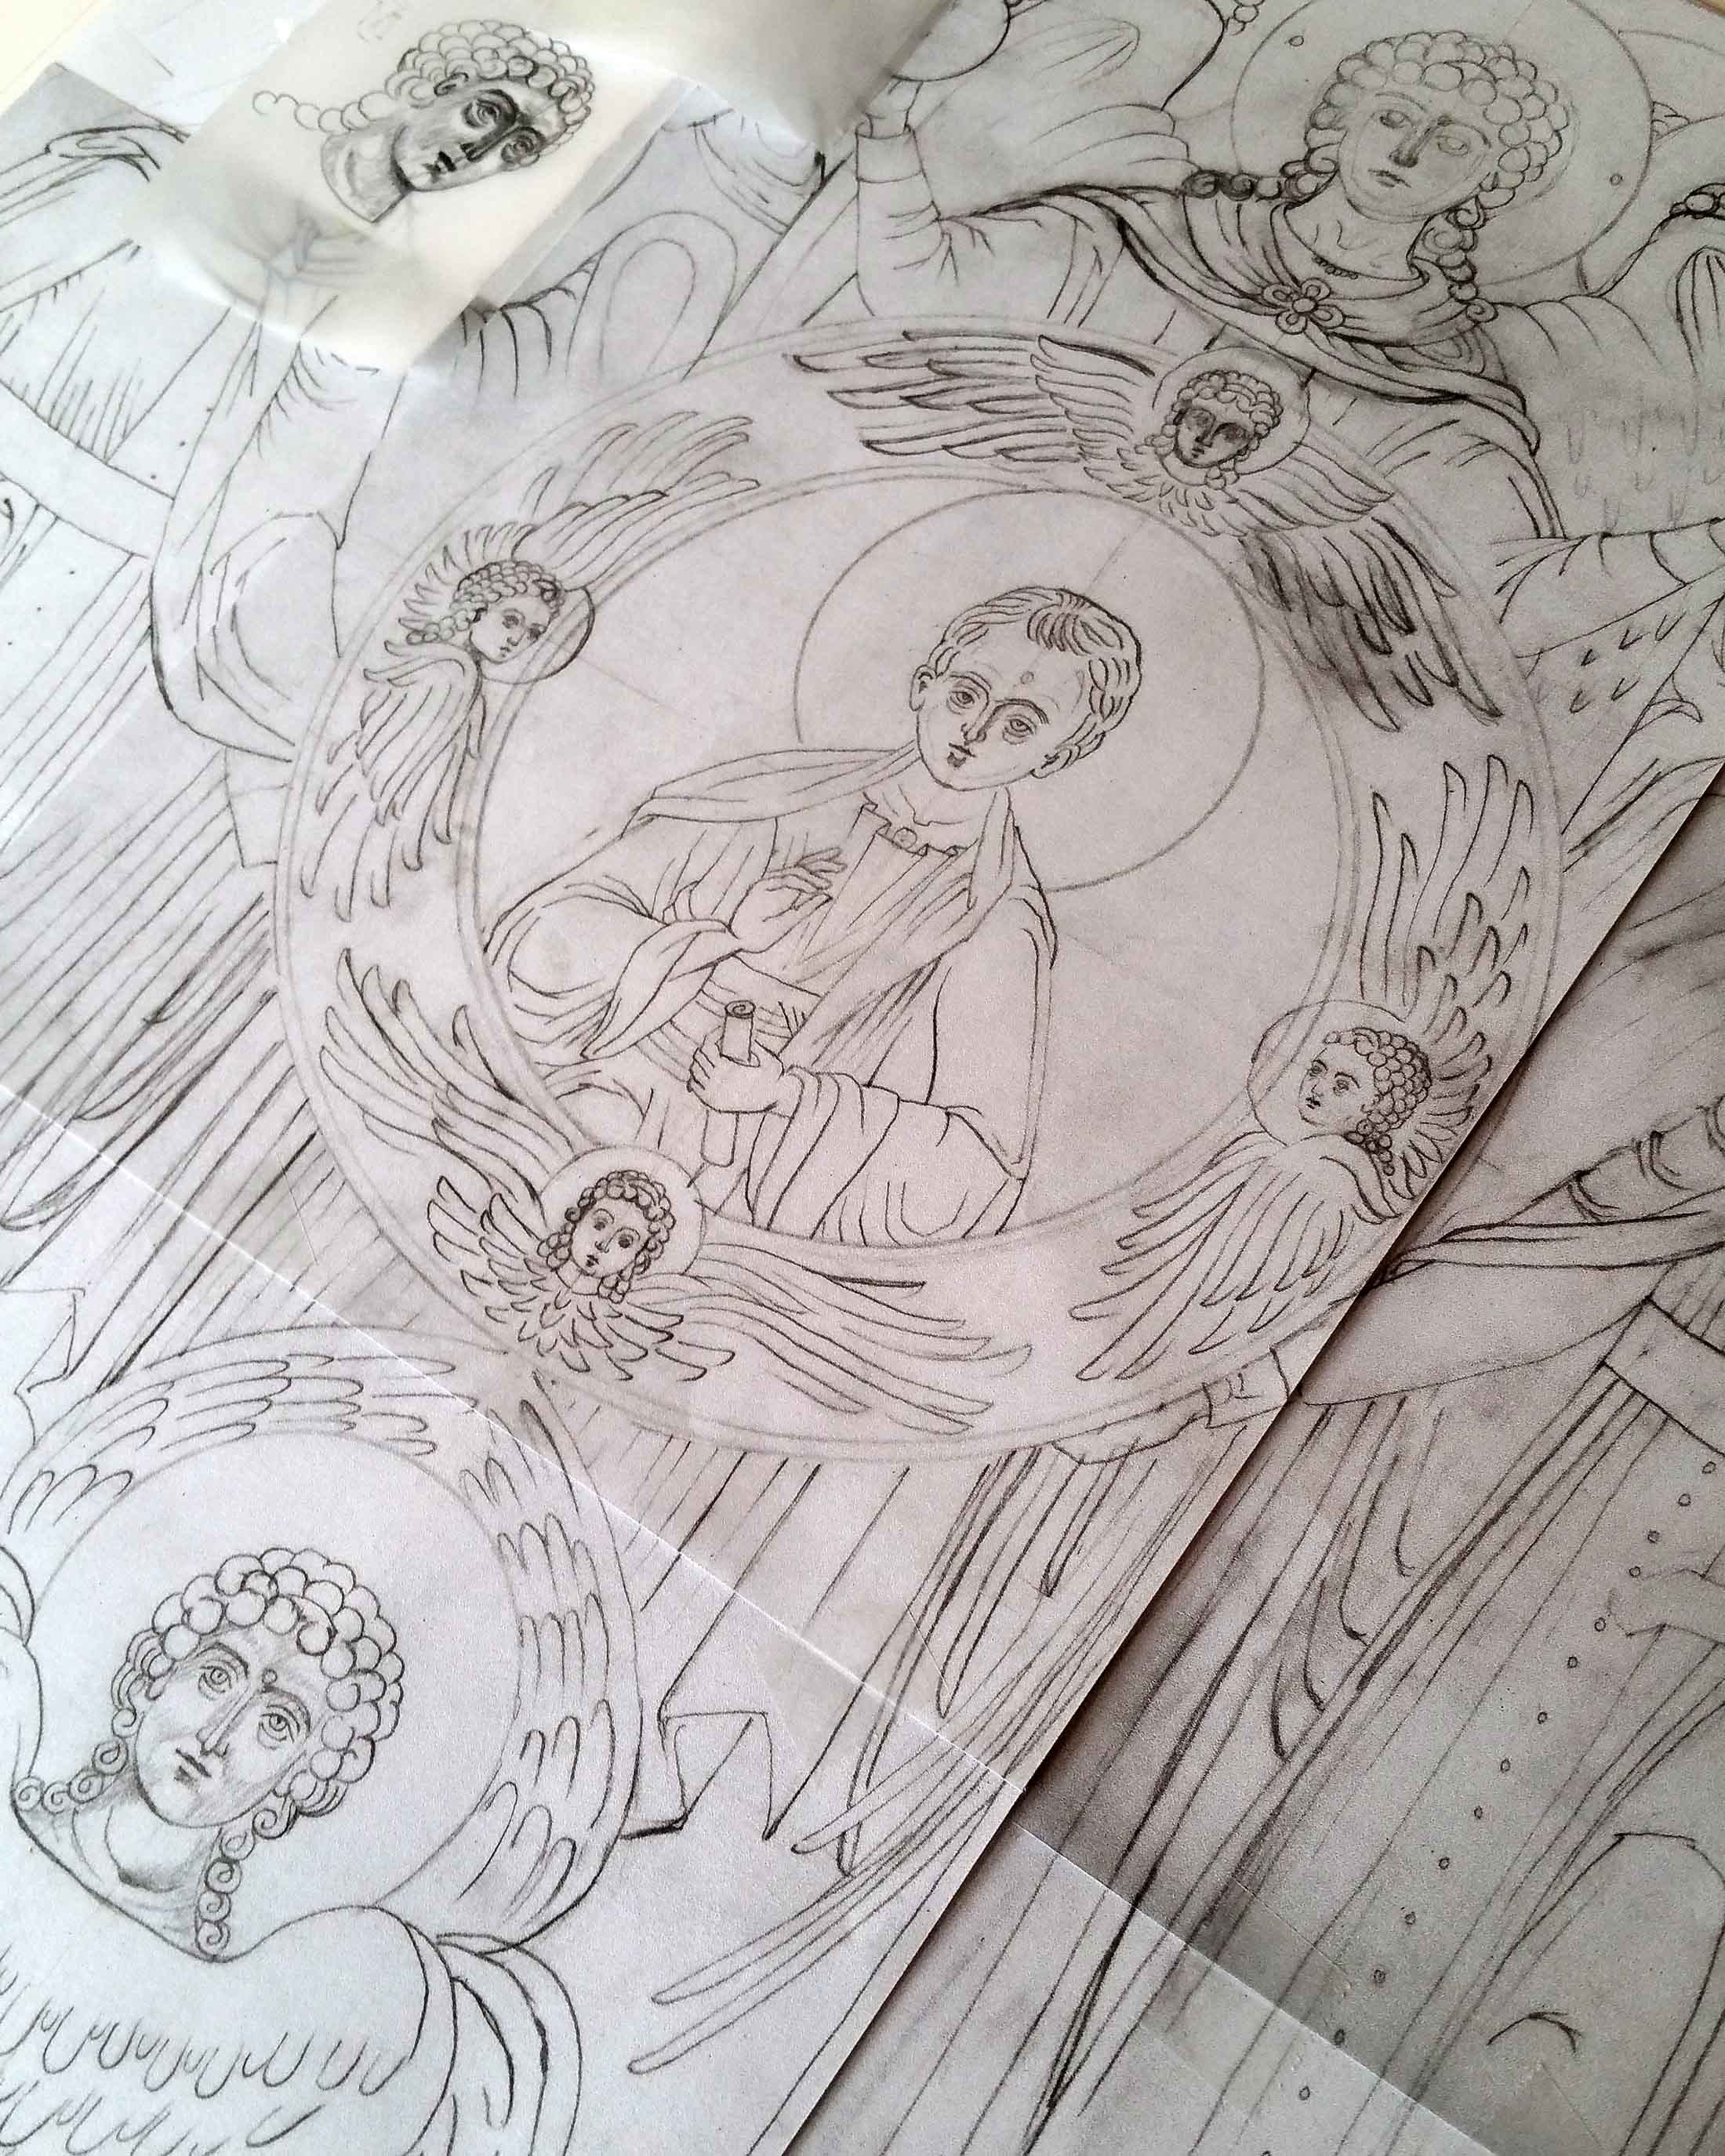
When painting a large icon, it helps to try and progress things evenly across the panel. I’d like to show you how I approached this in this post but also want to focus on the steps taken as I painted the Christ Child at the heart of this icon. I also have some exciting news… more about that at the end of this post.

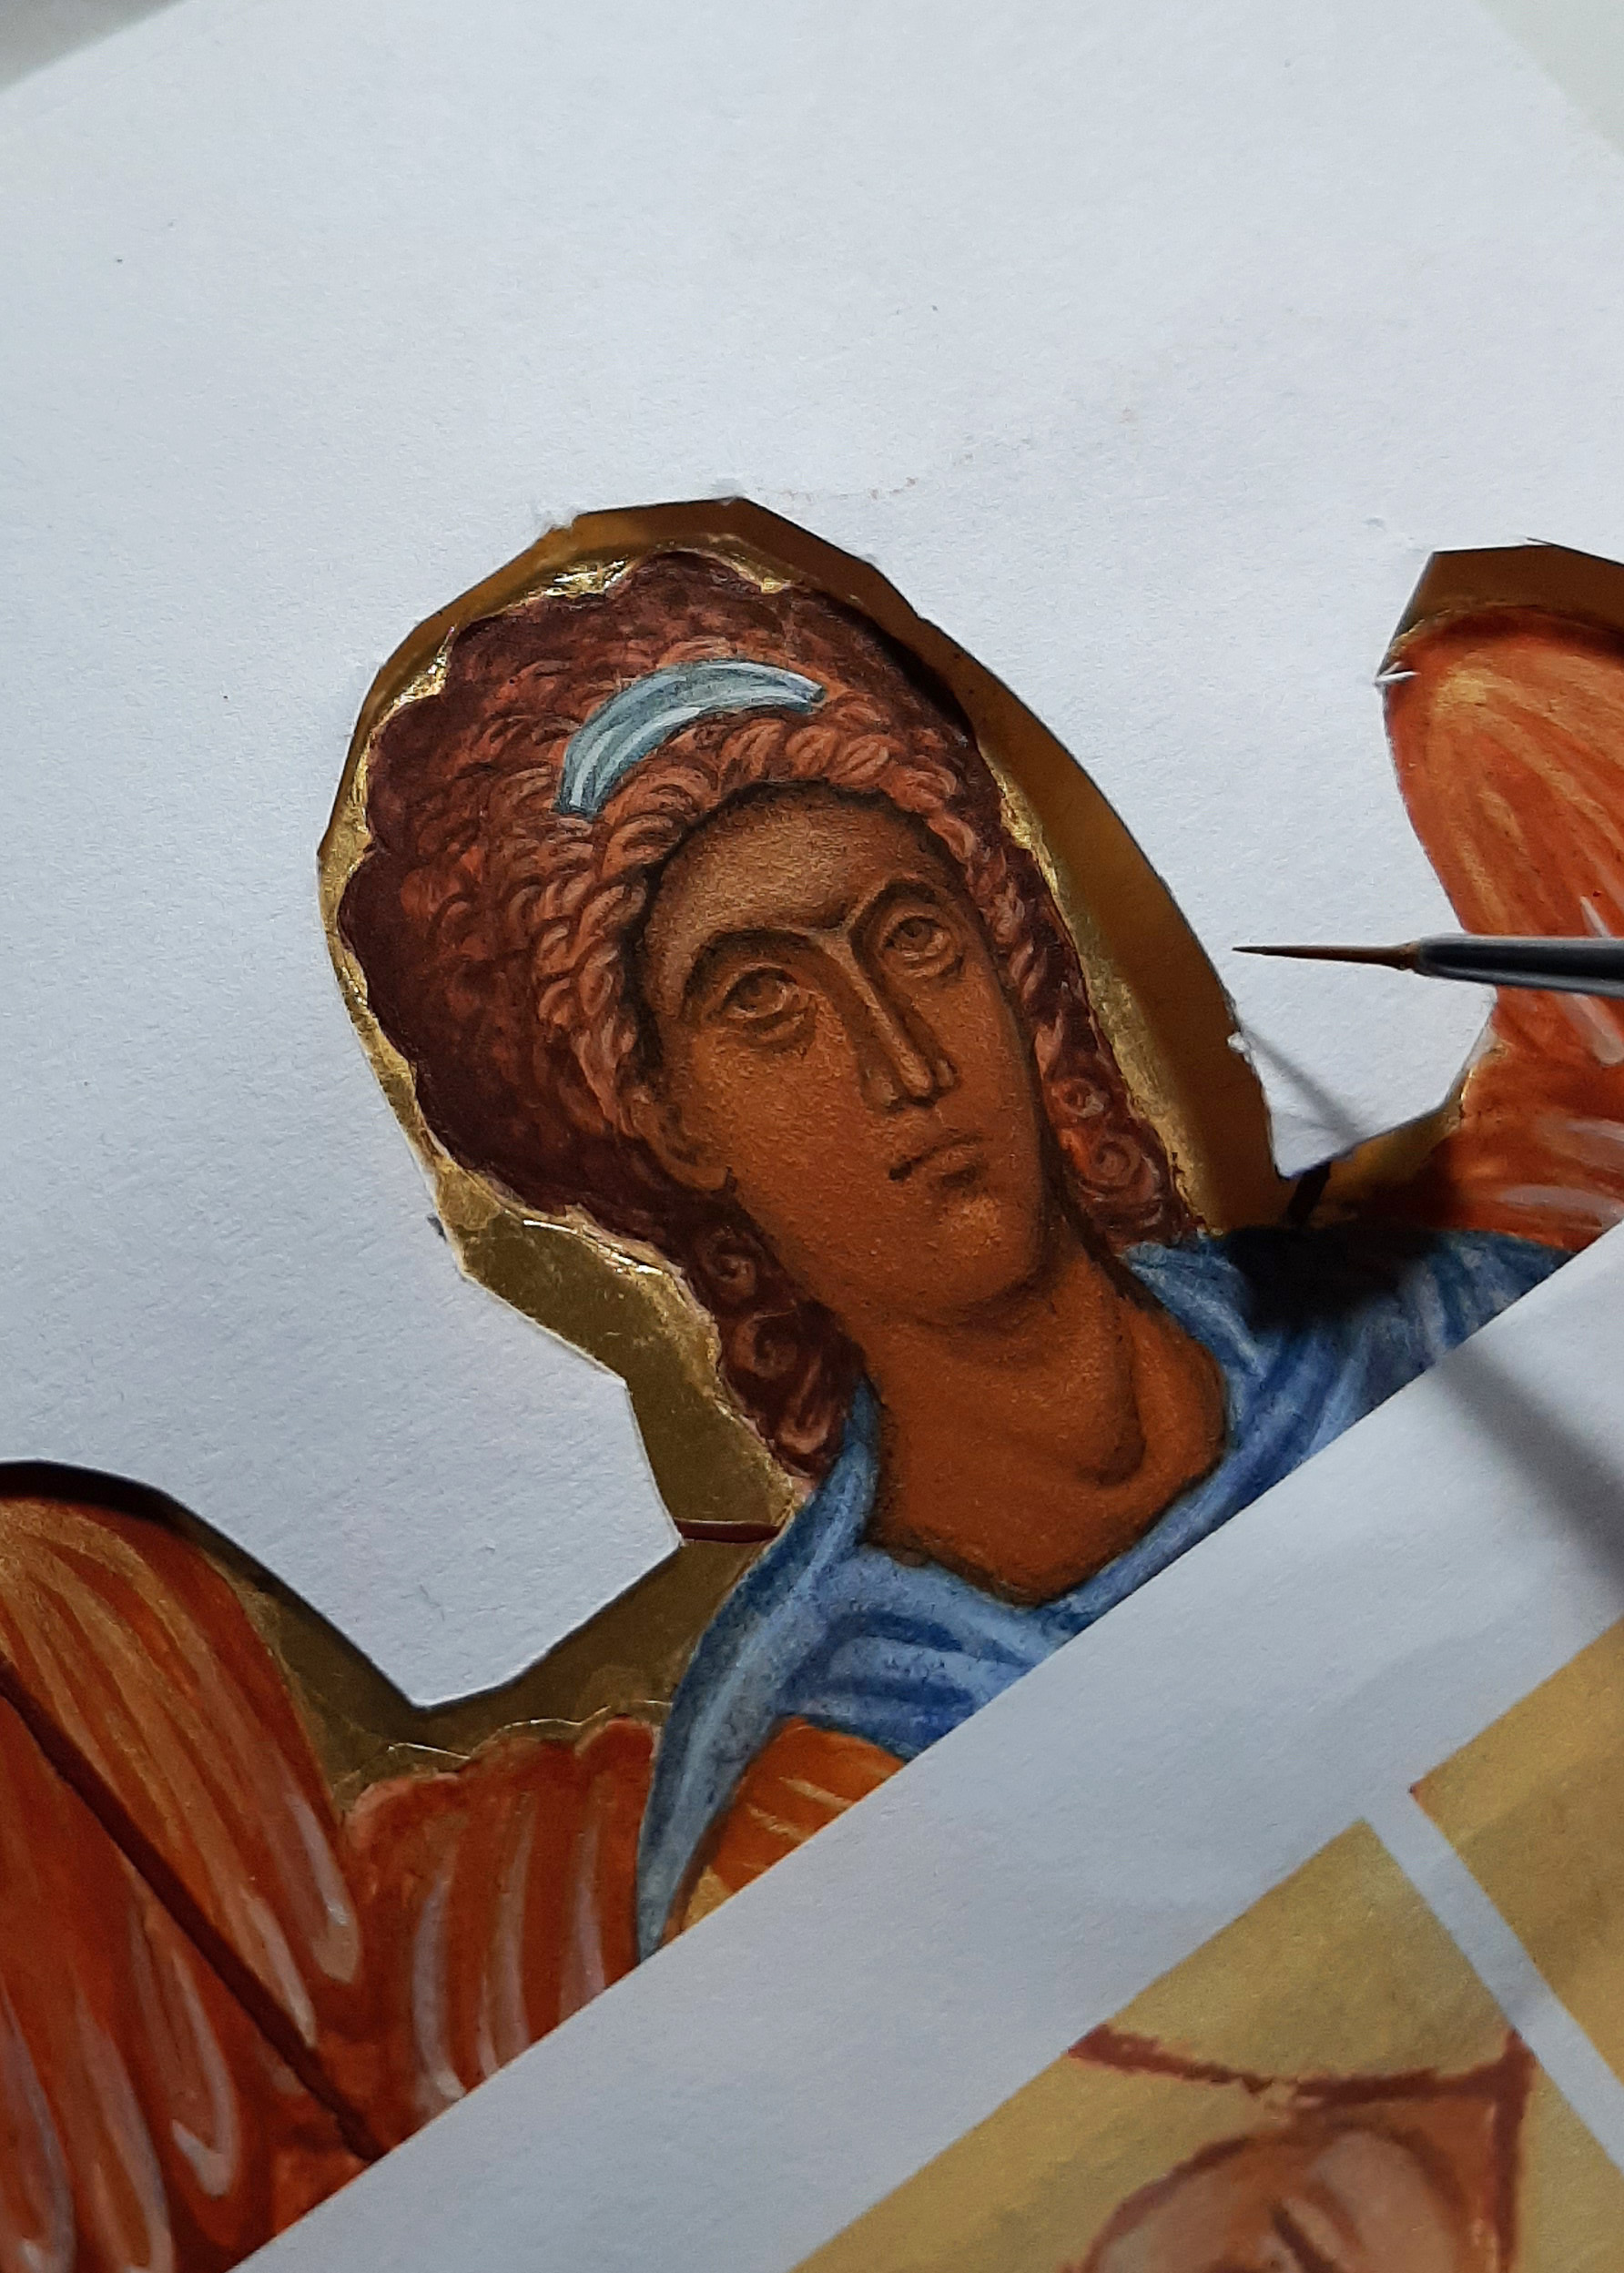
An icon with so many figures and halos can be quite tricky to paint so it’s worth pausing to think about the sequence of work. Top of the list is to remove the protective pads as soon as I can; they can leave a sticky residue if left on too long.

Small pieces of card taped to the gesso as protection pads.

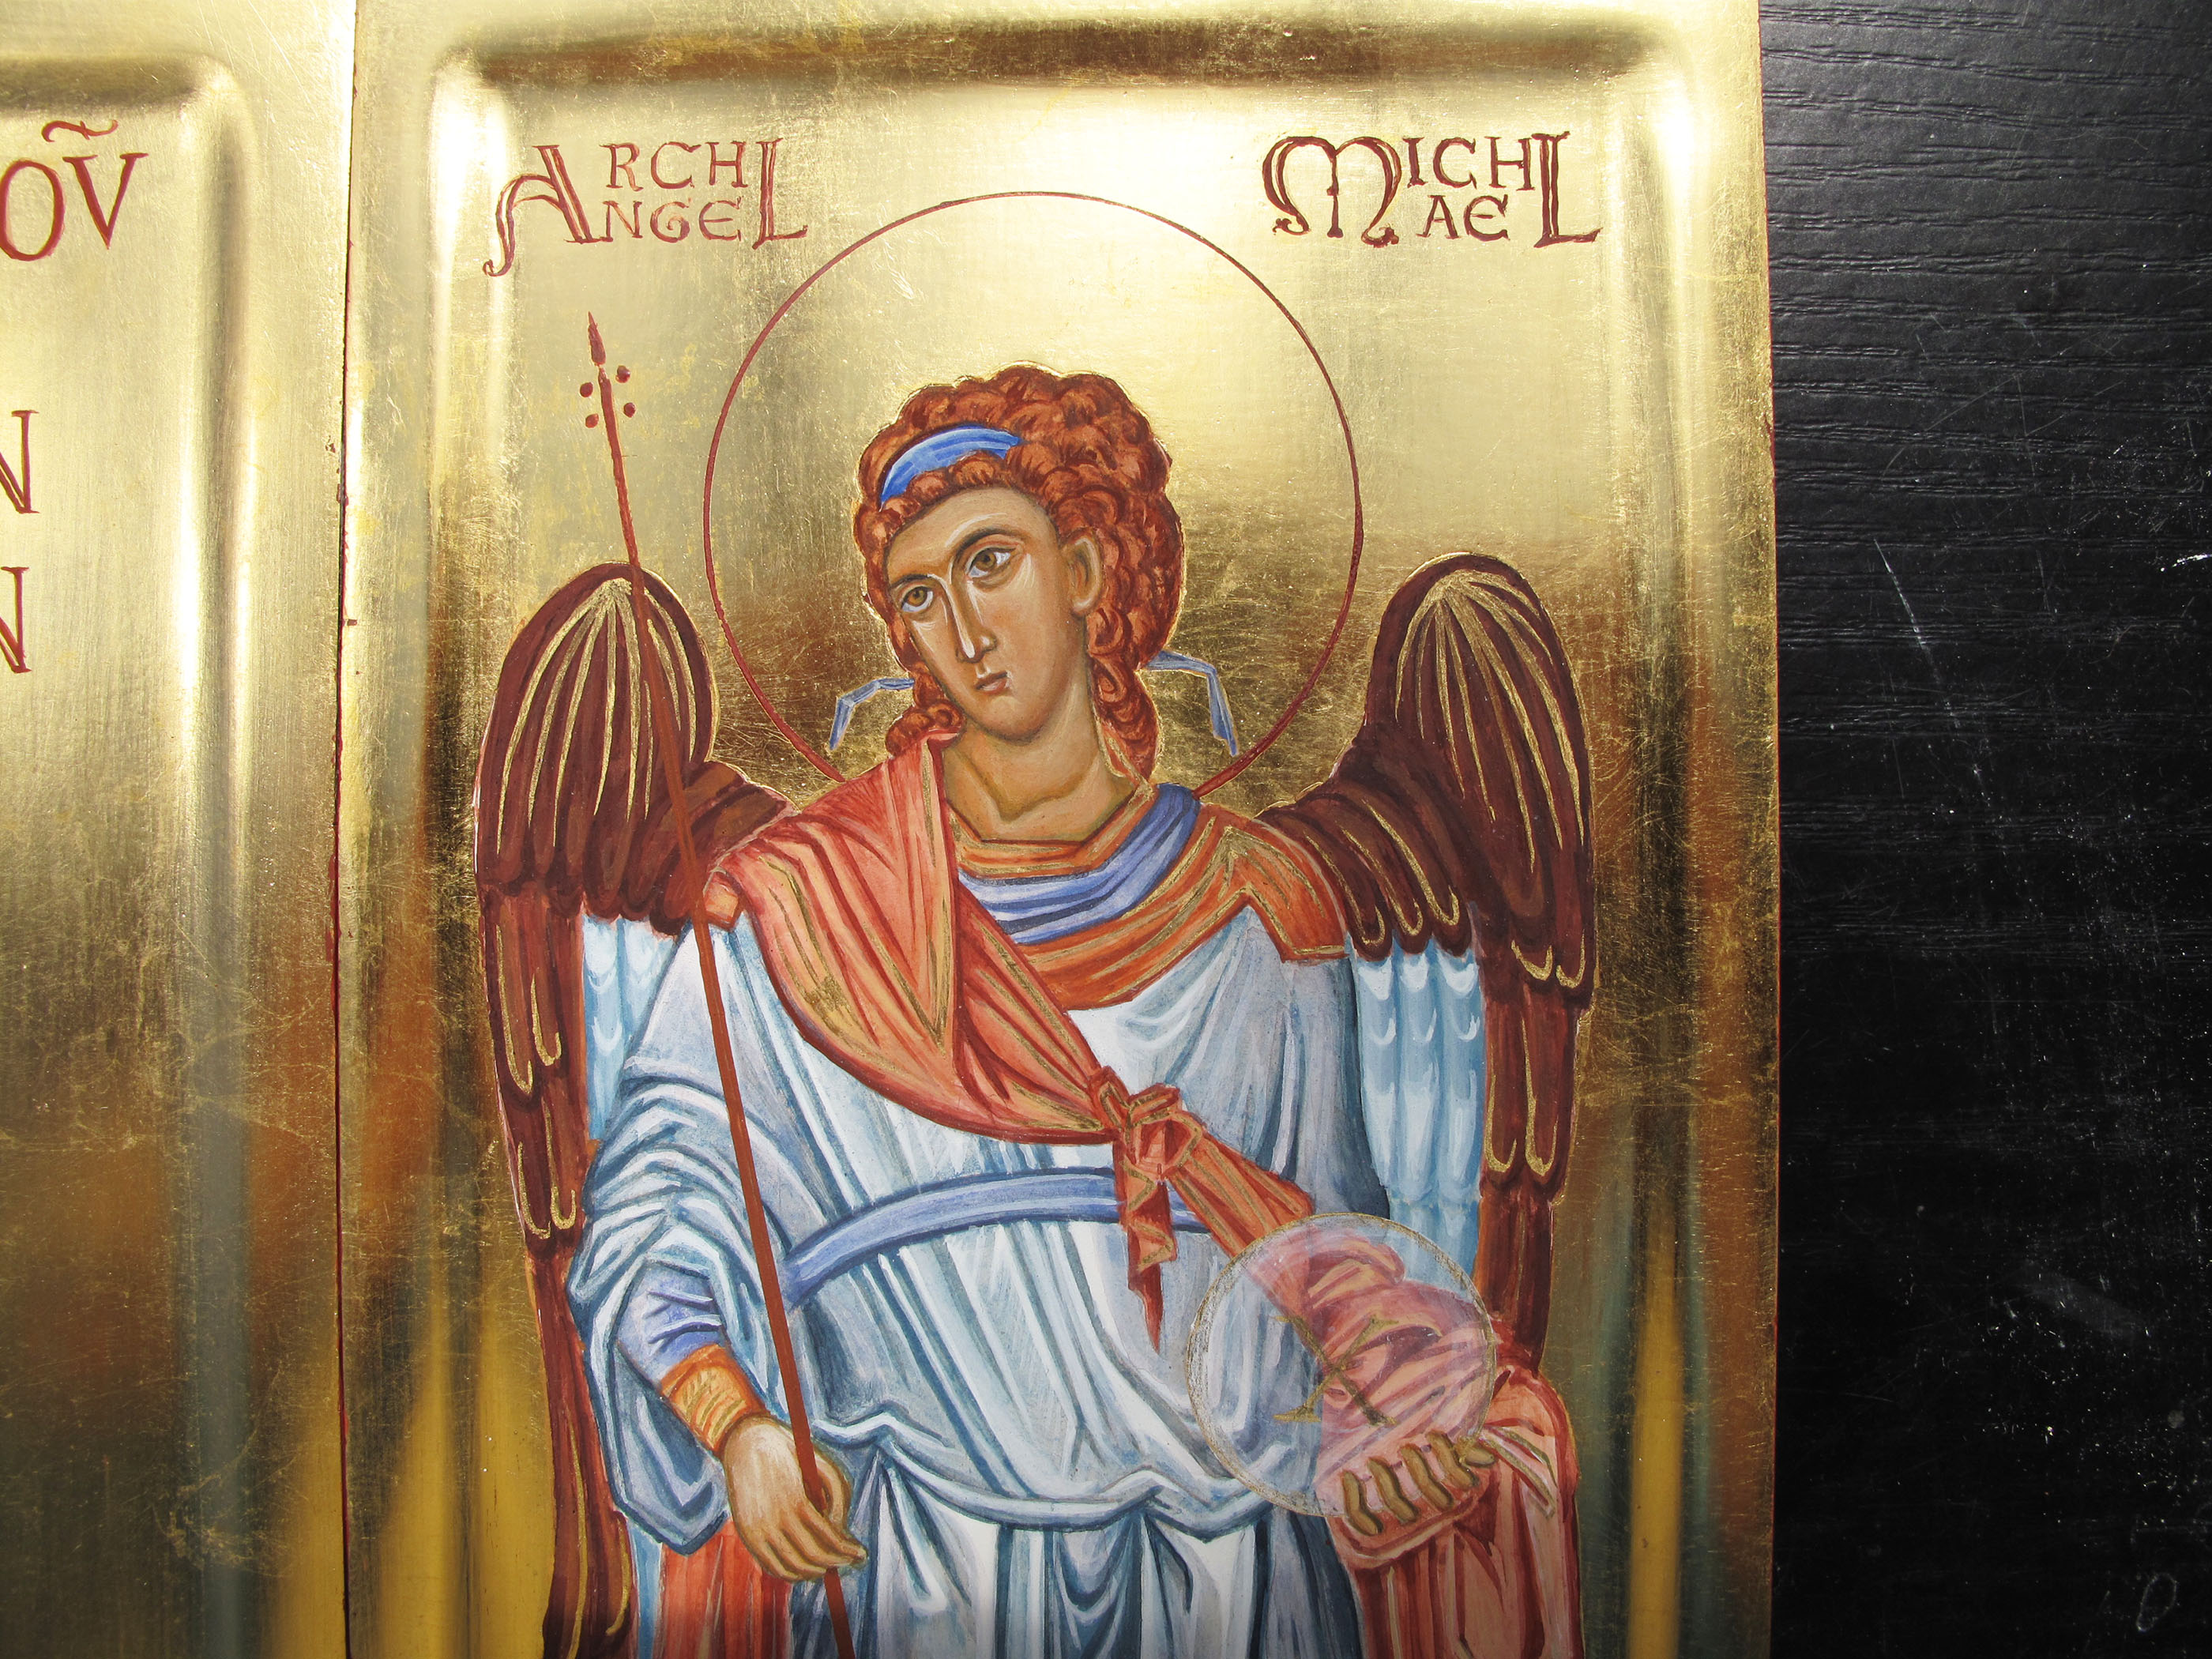
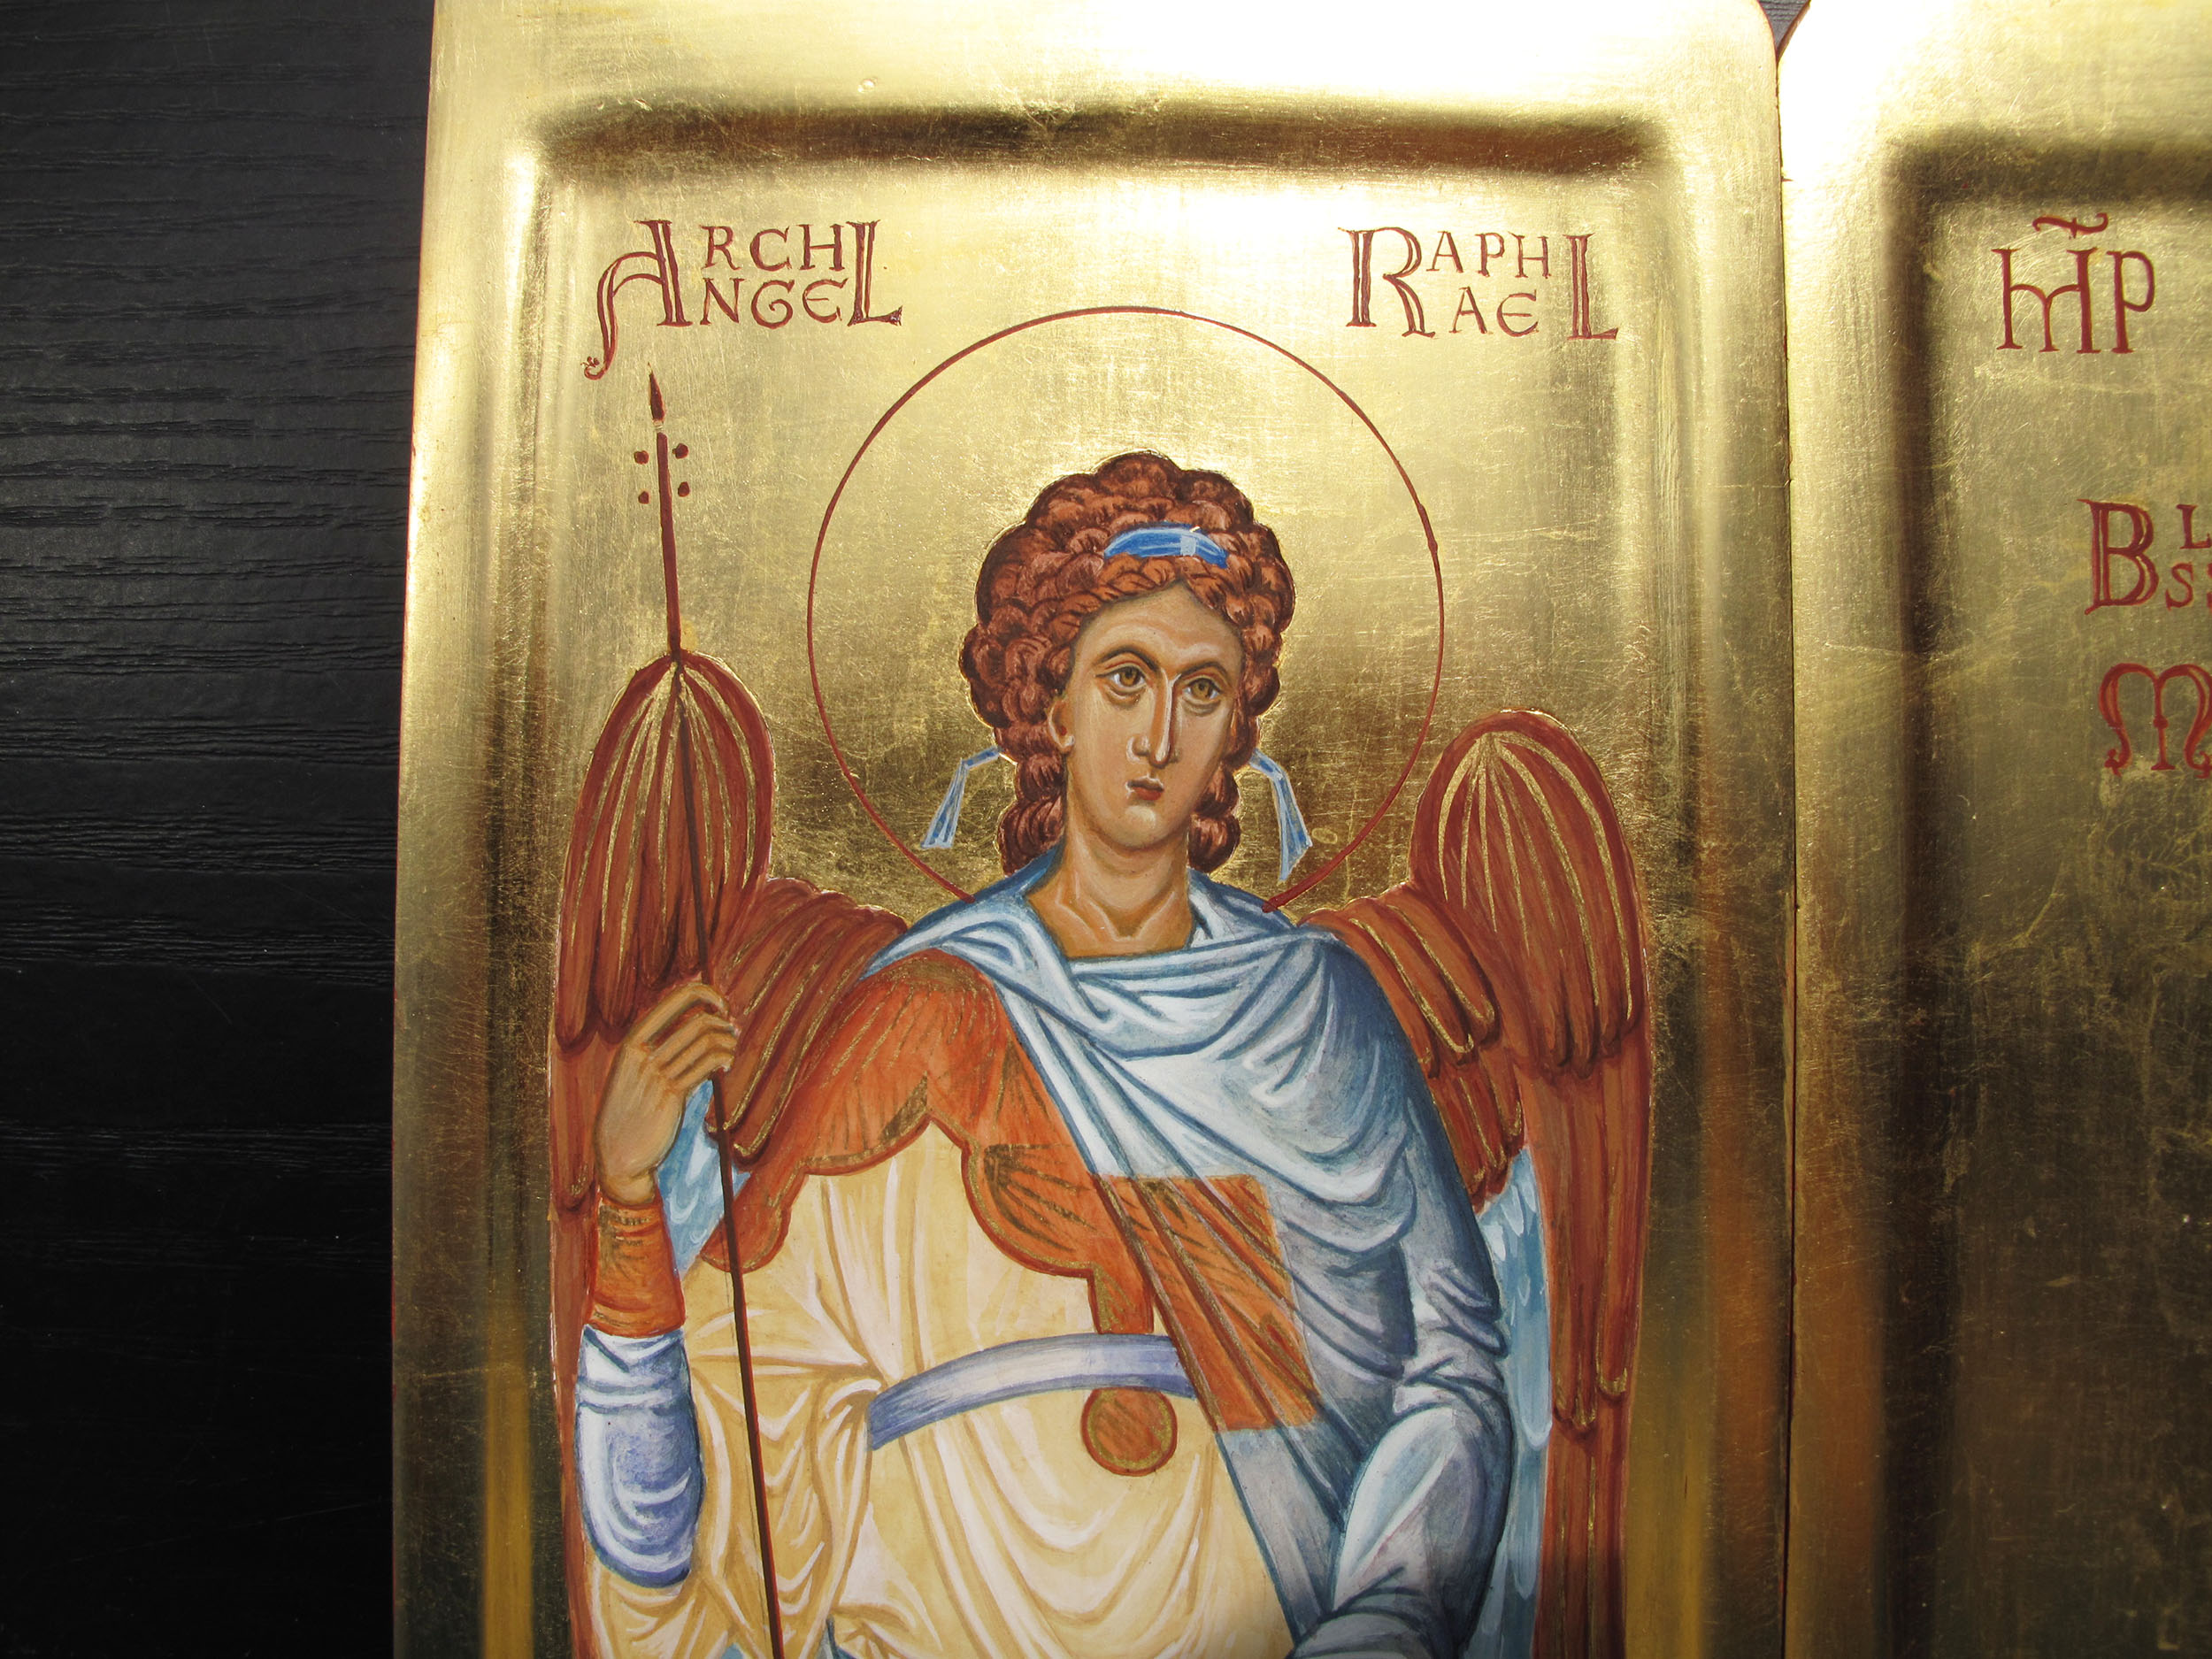
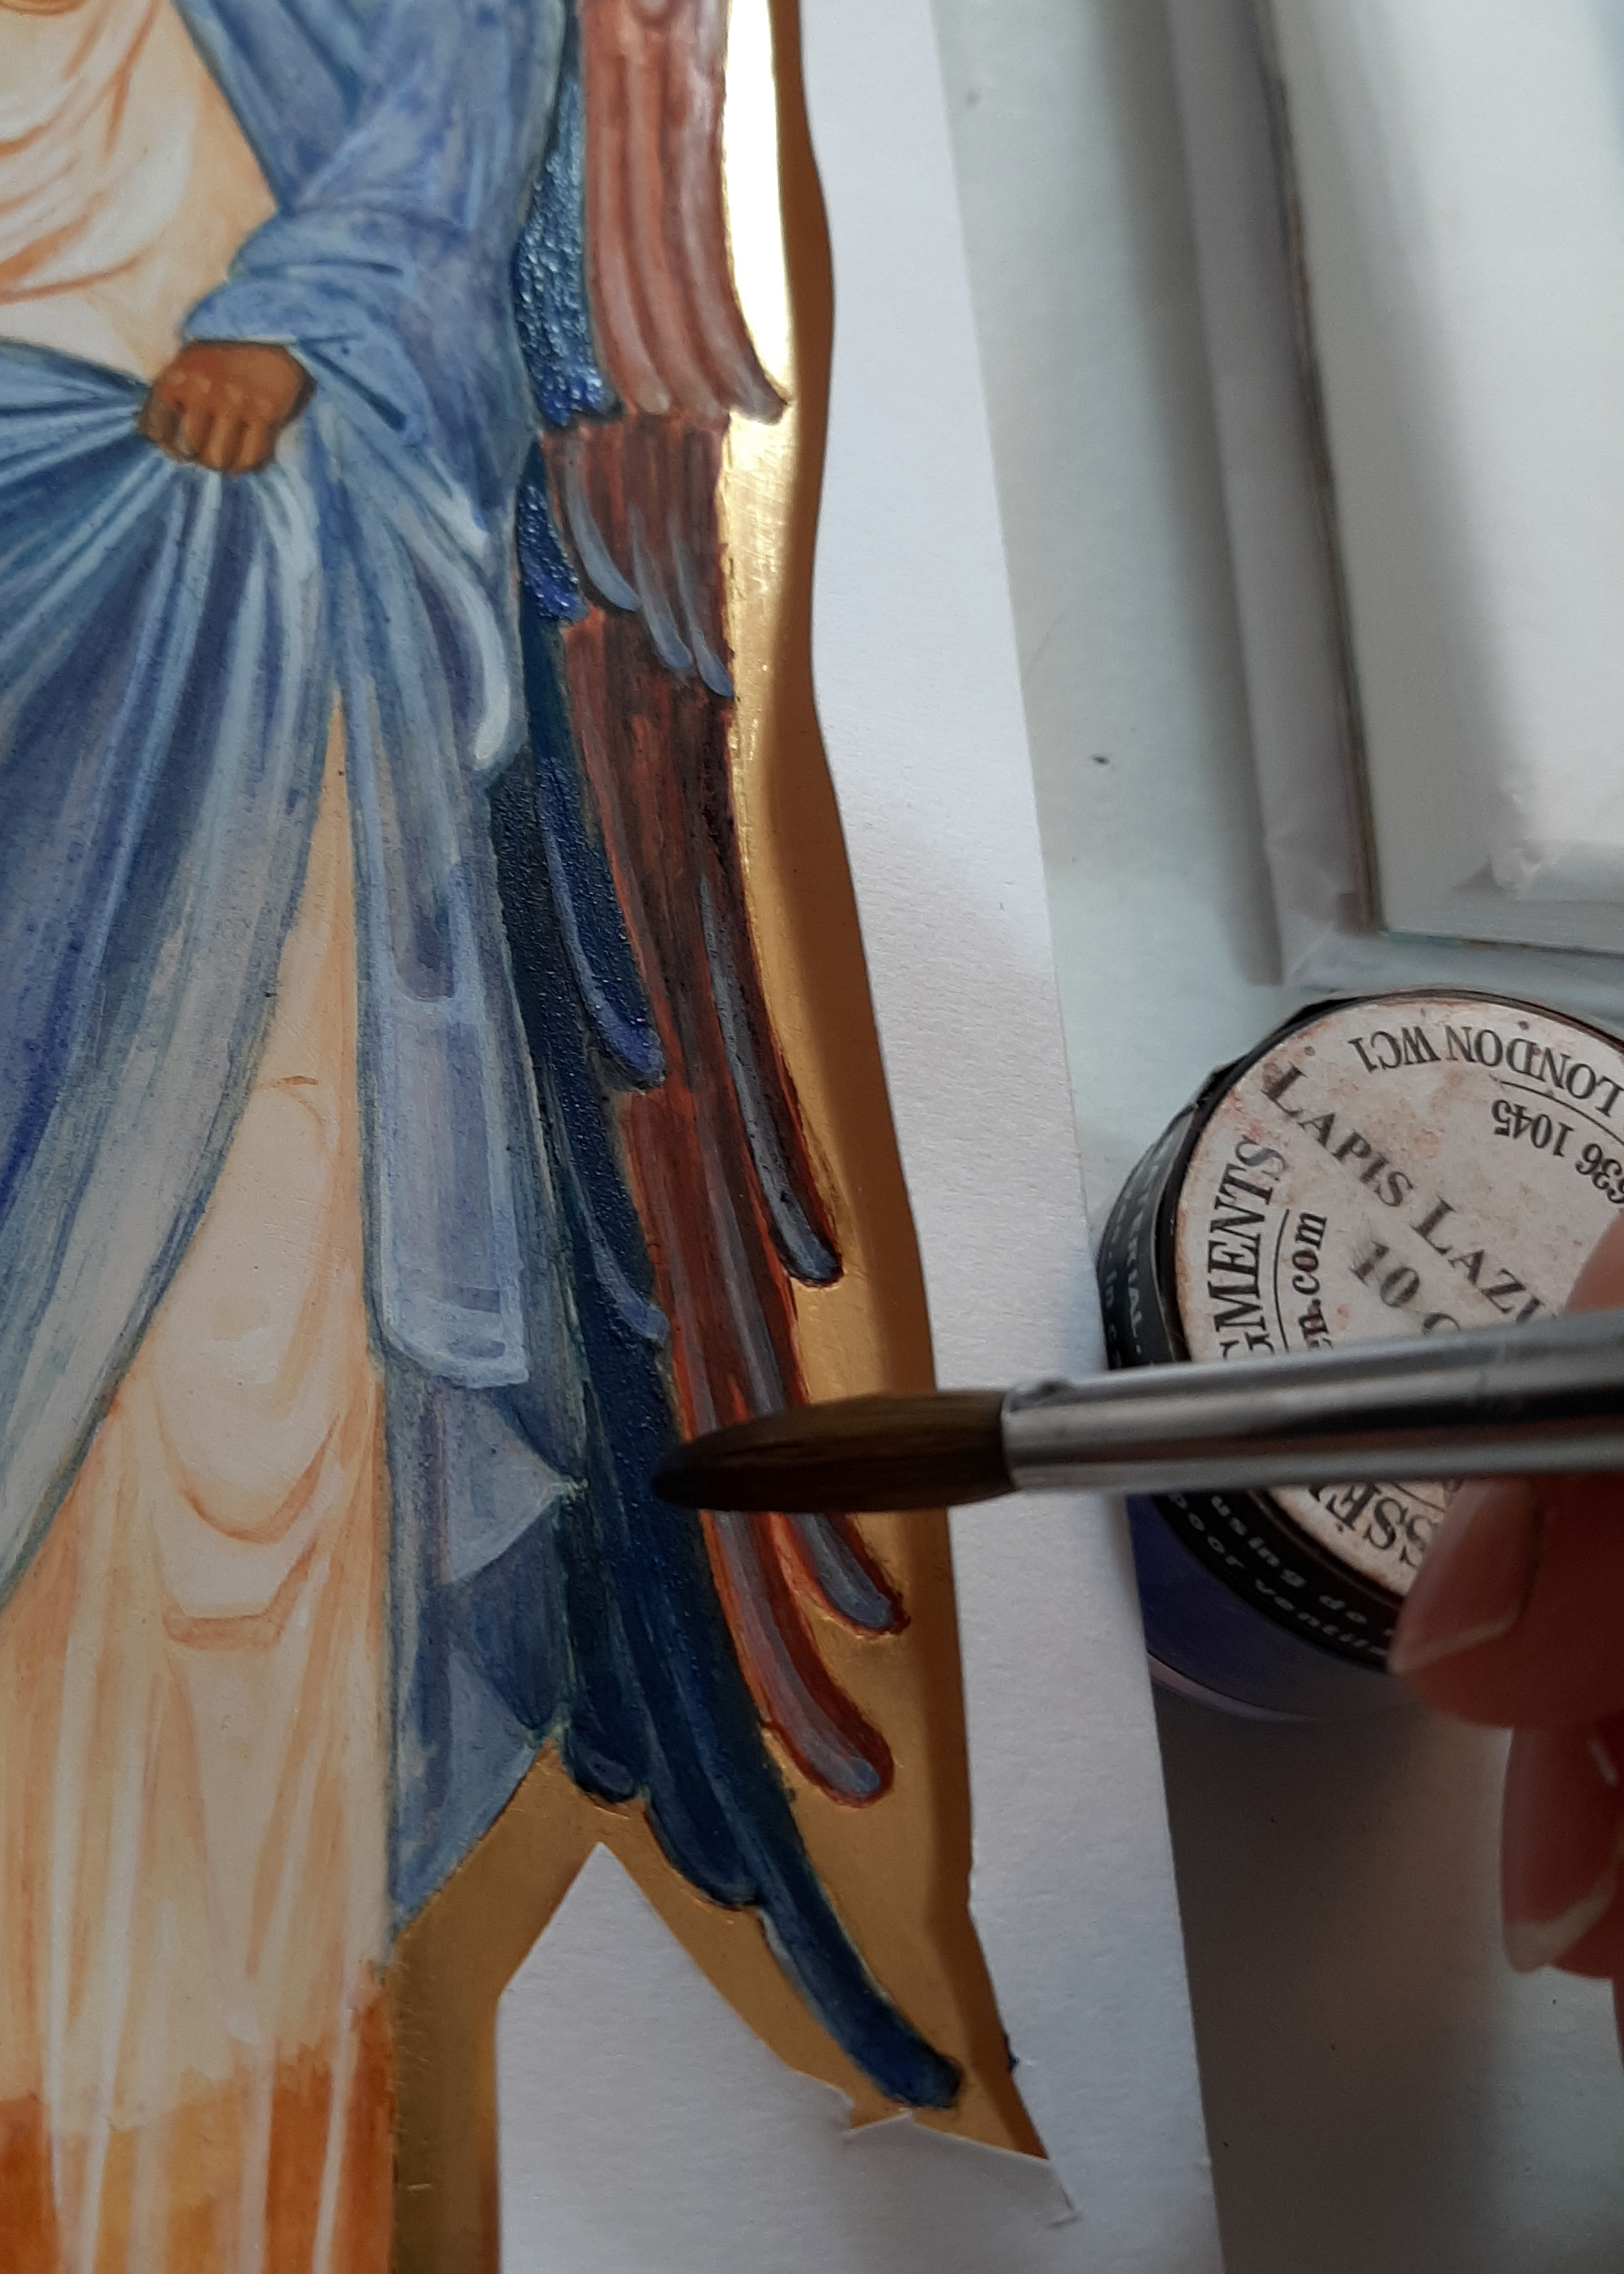
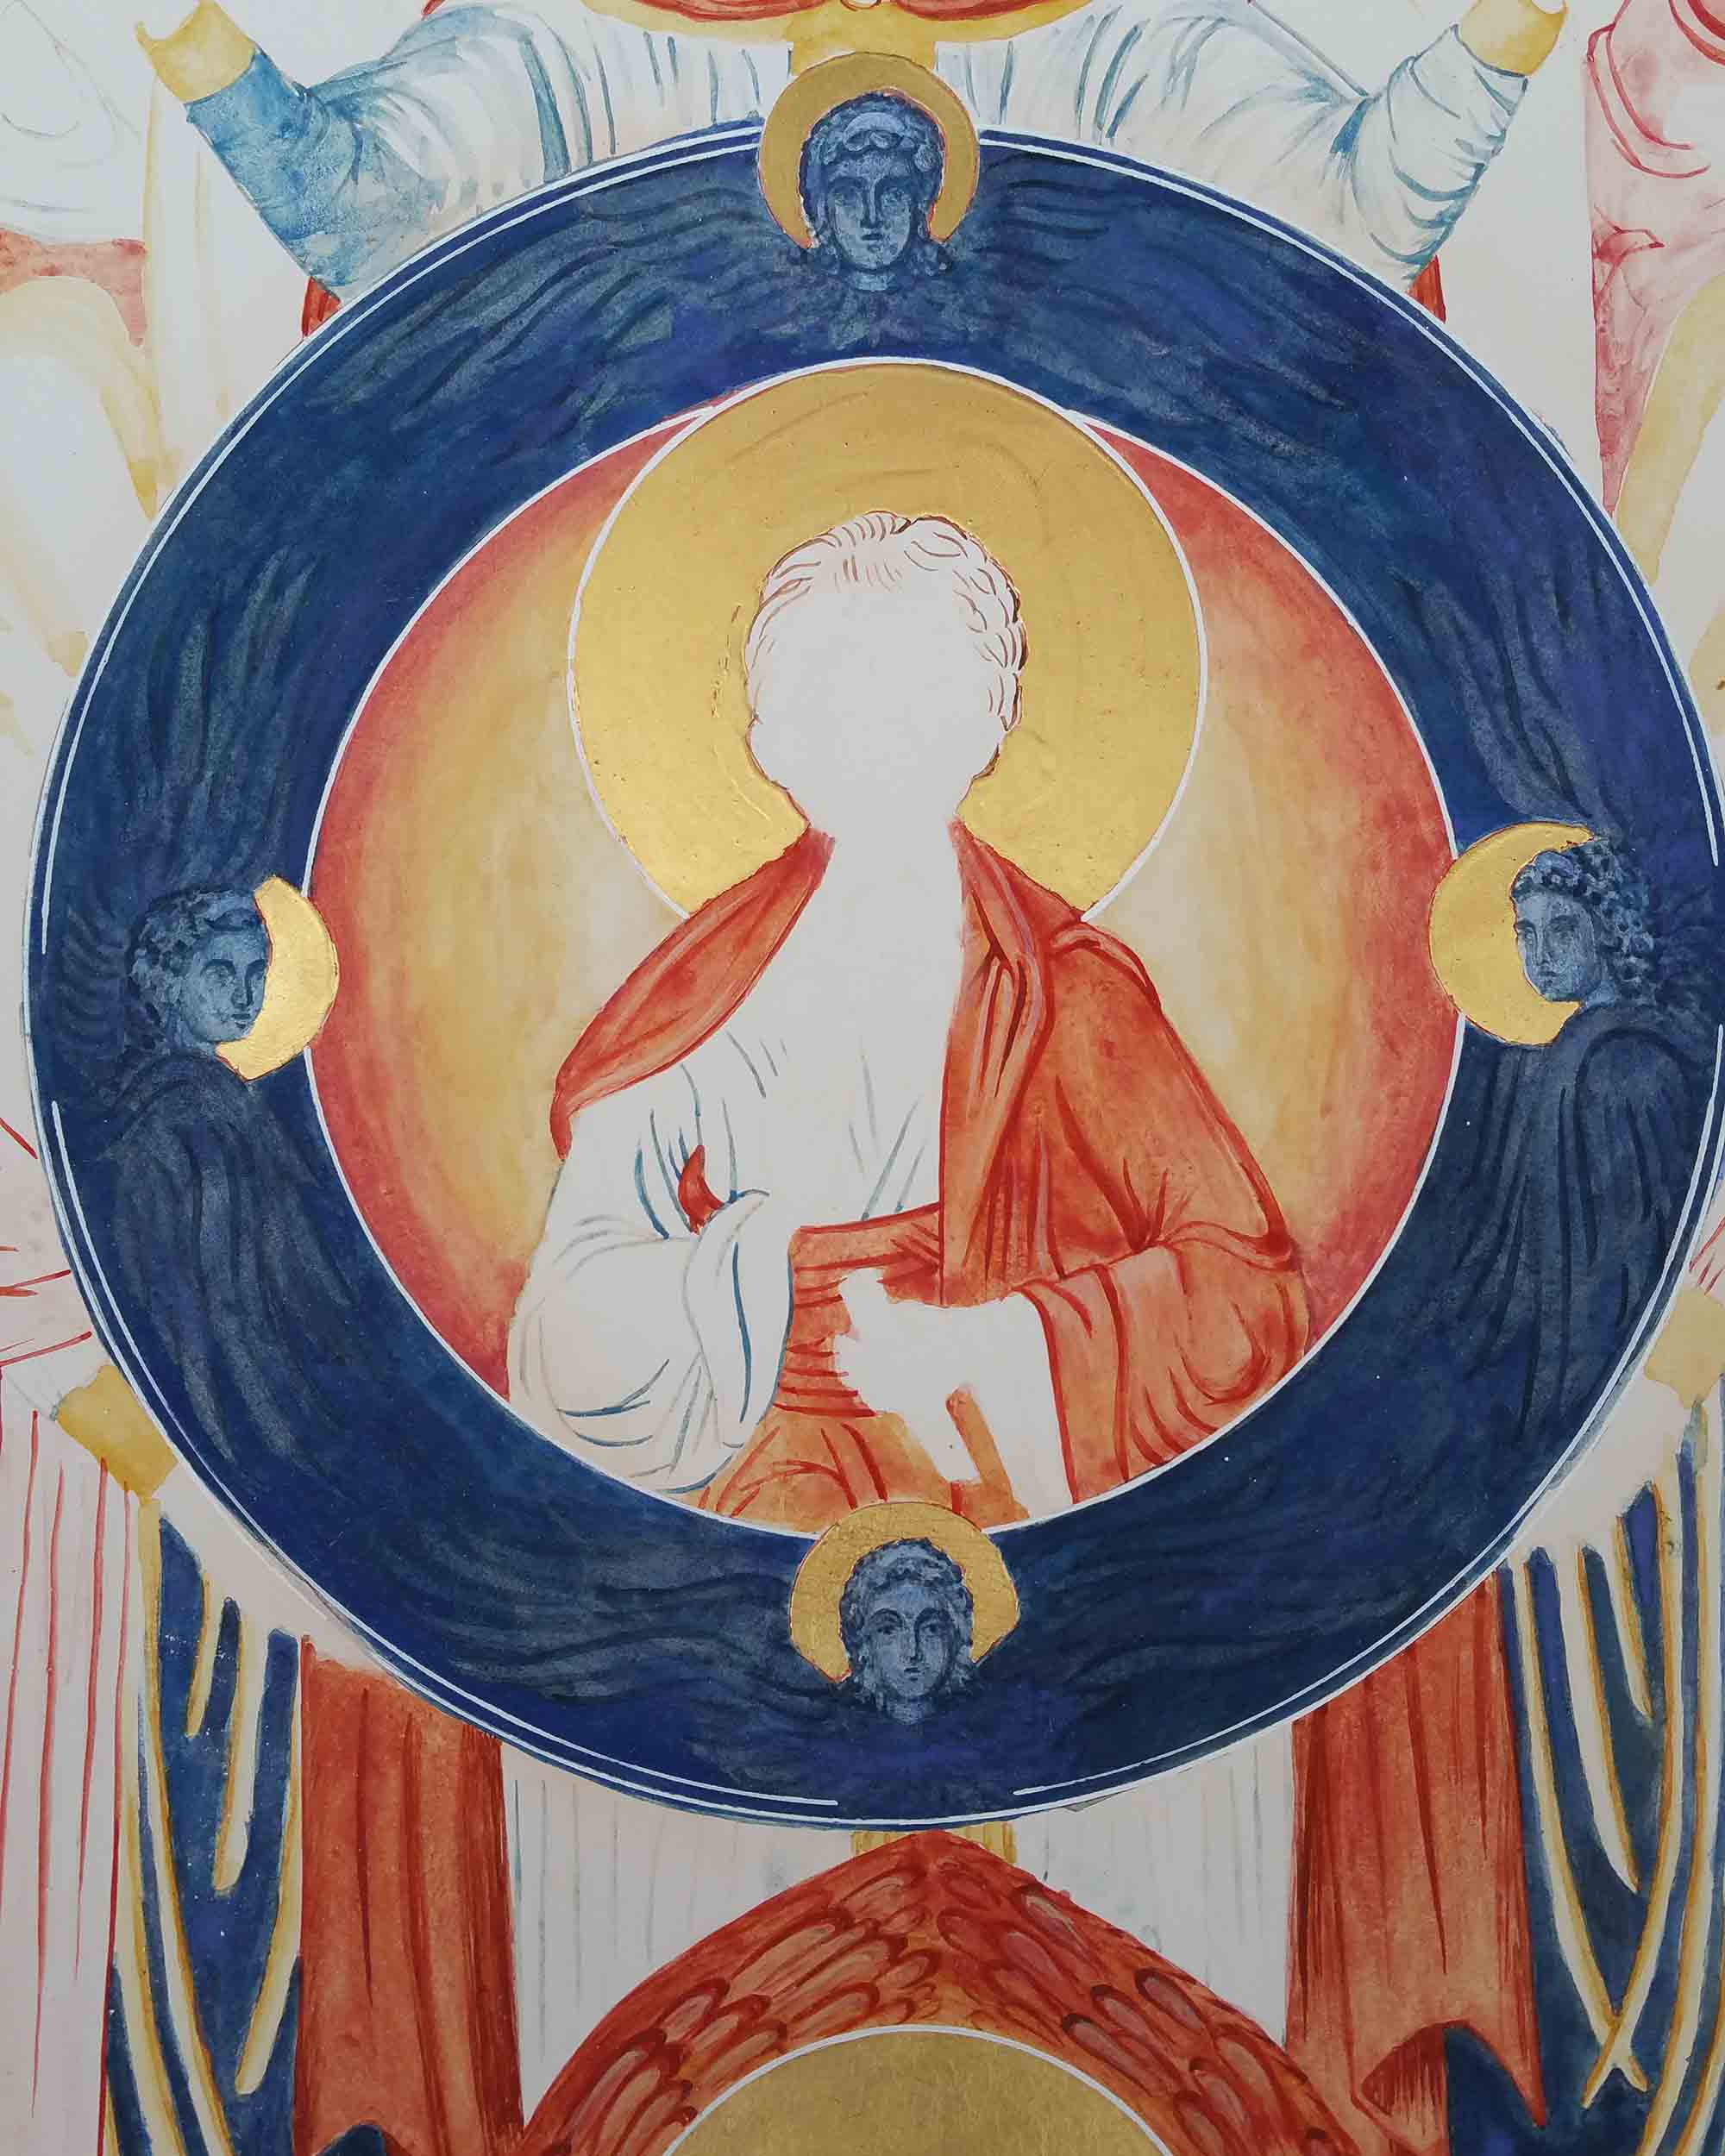
Before I scribe defining lines around the halos, a certain amount of painting needs to be done around them first. The halo lines are adjacent to the hair of neighbouring angels and central the blue ring also touches the halos of the Seraphim. These need to be painted and allowed time to thoroughly dry out. I’ve found that when scribing lines on paint that hasn’t dried or ‘tempered’ for a day or so tends to spread.

Small triangles of hair meet edges of halos – better painted before the halo lines are scribed

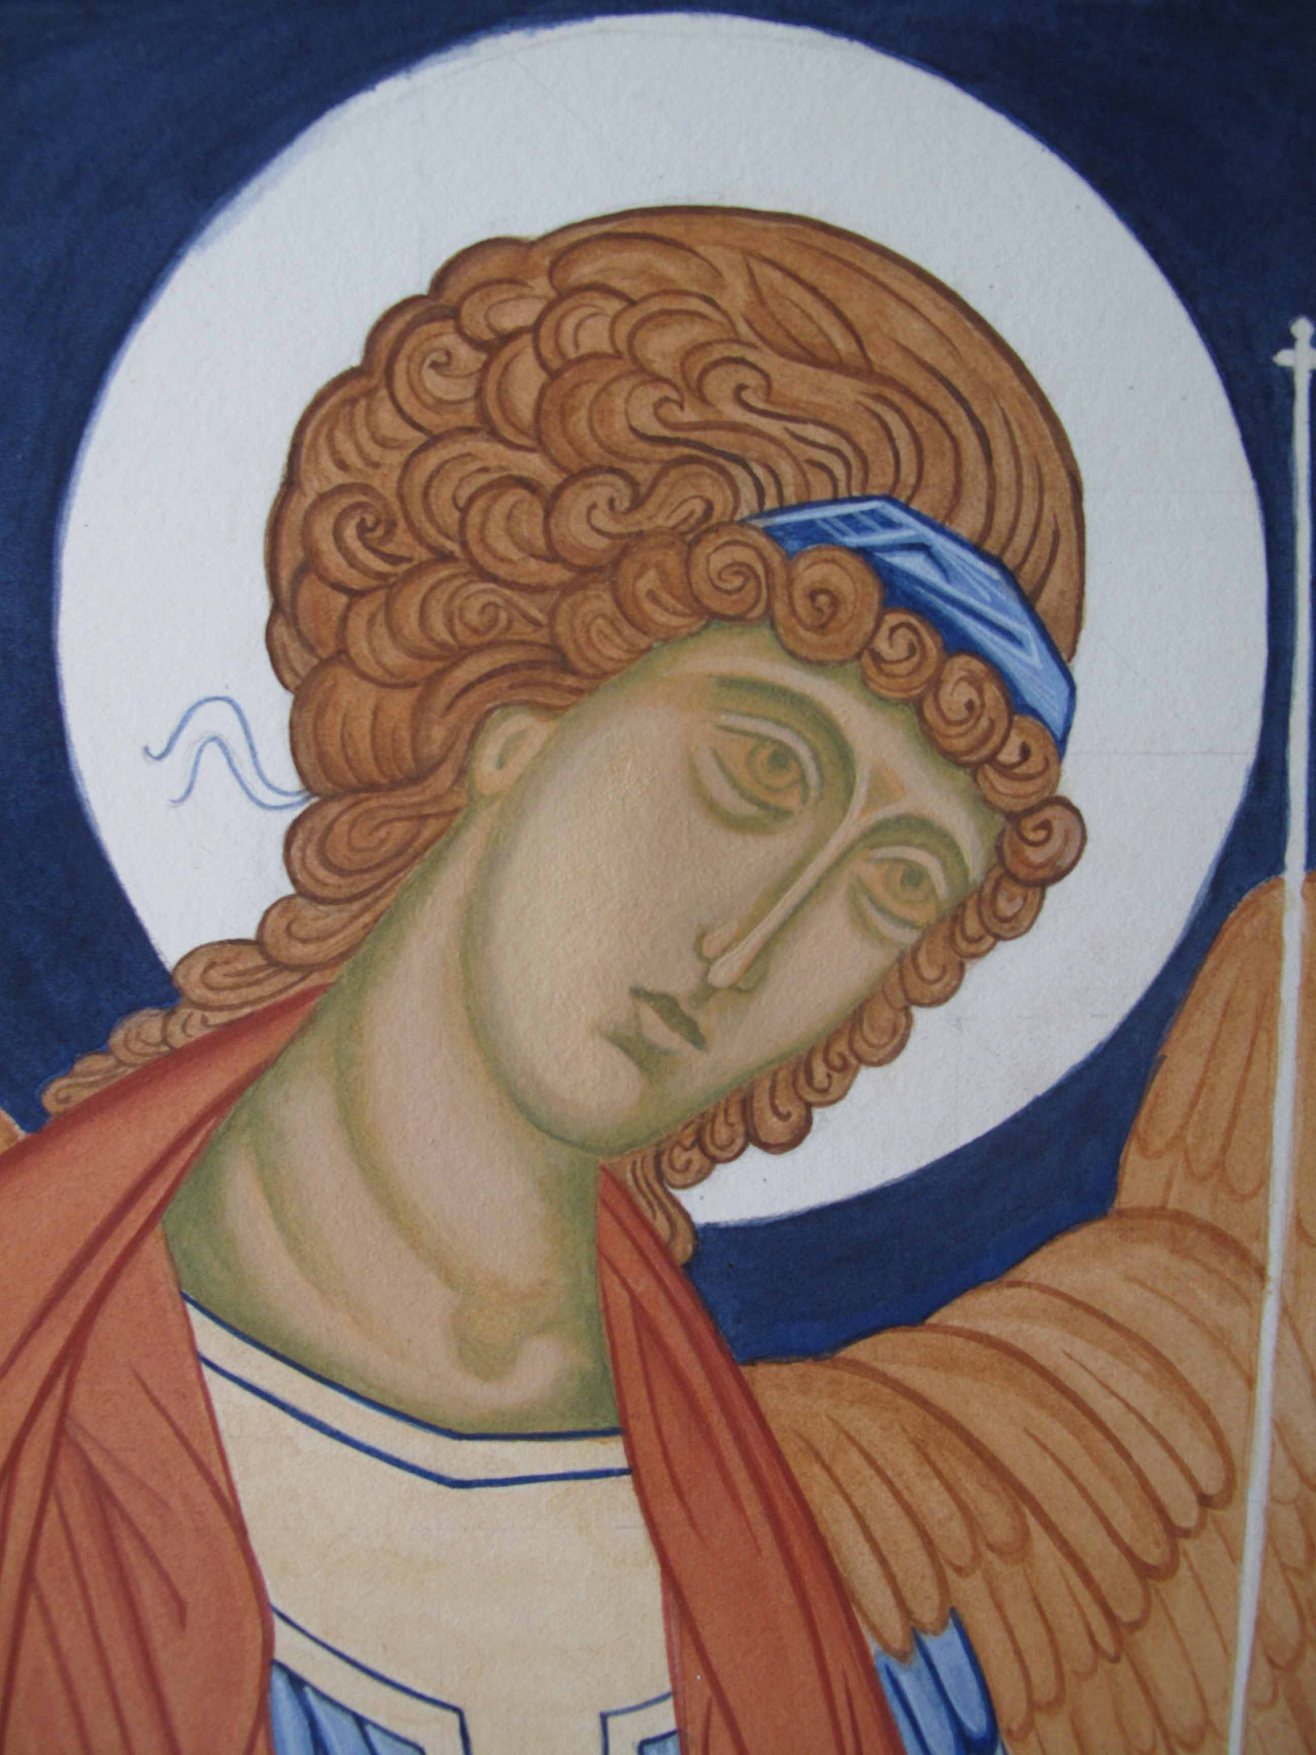
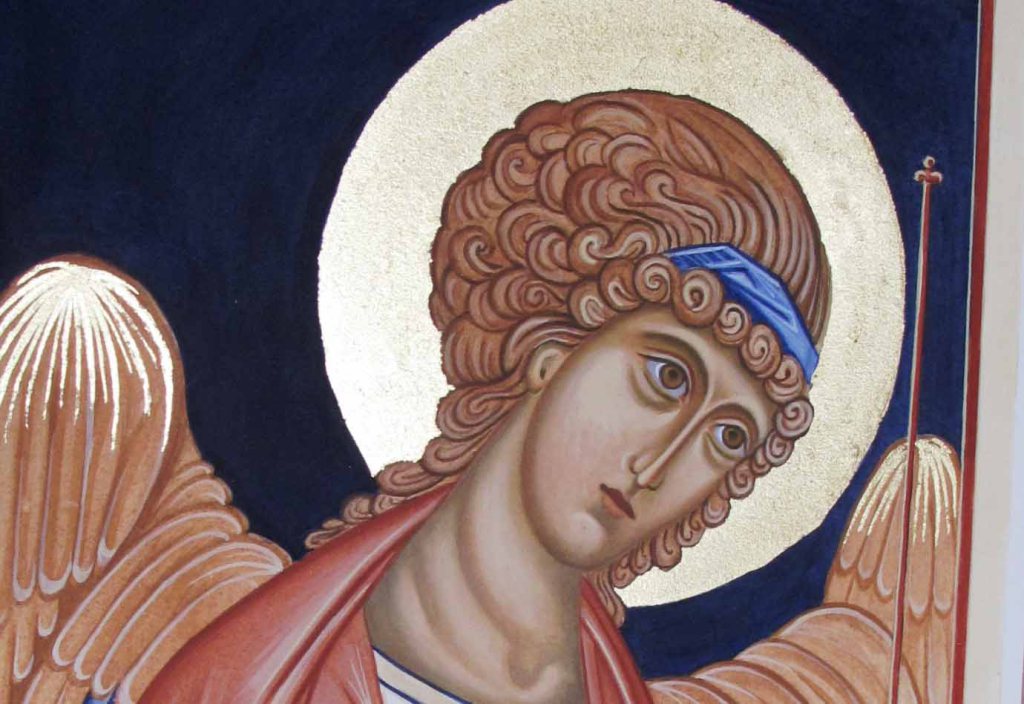
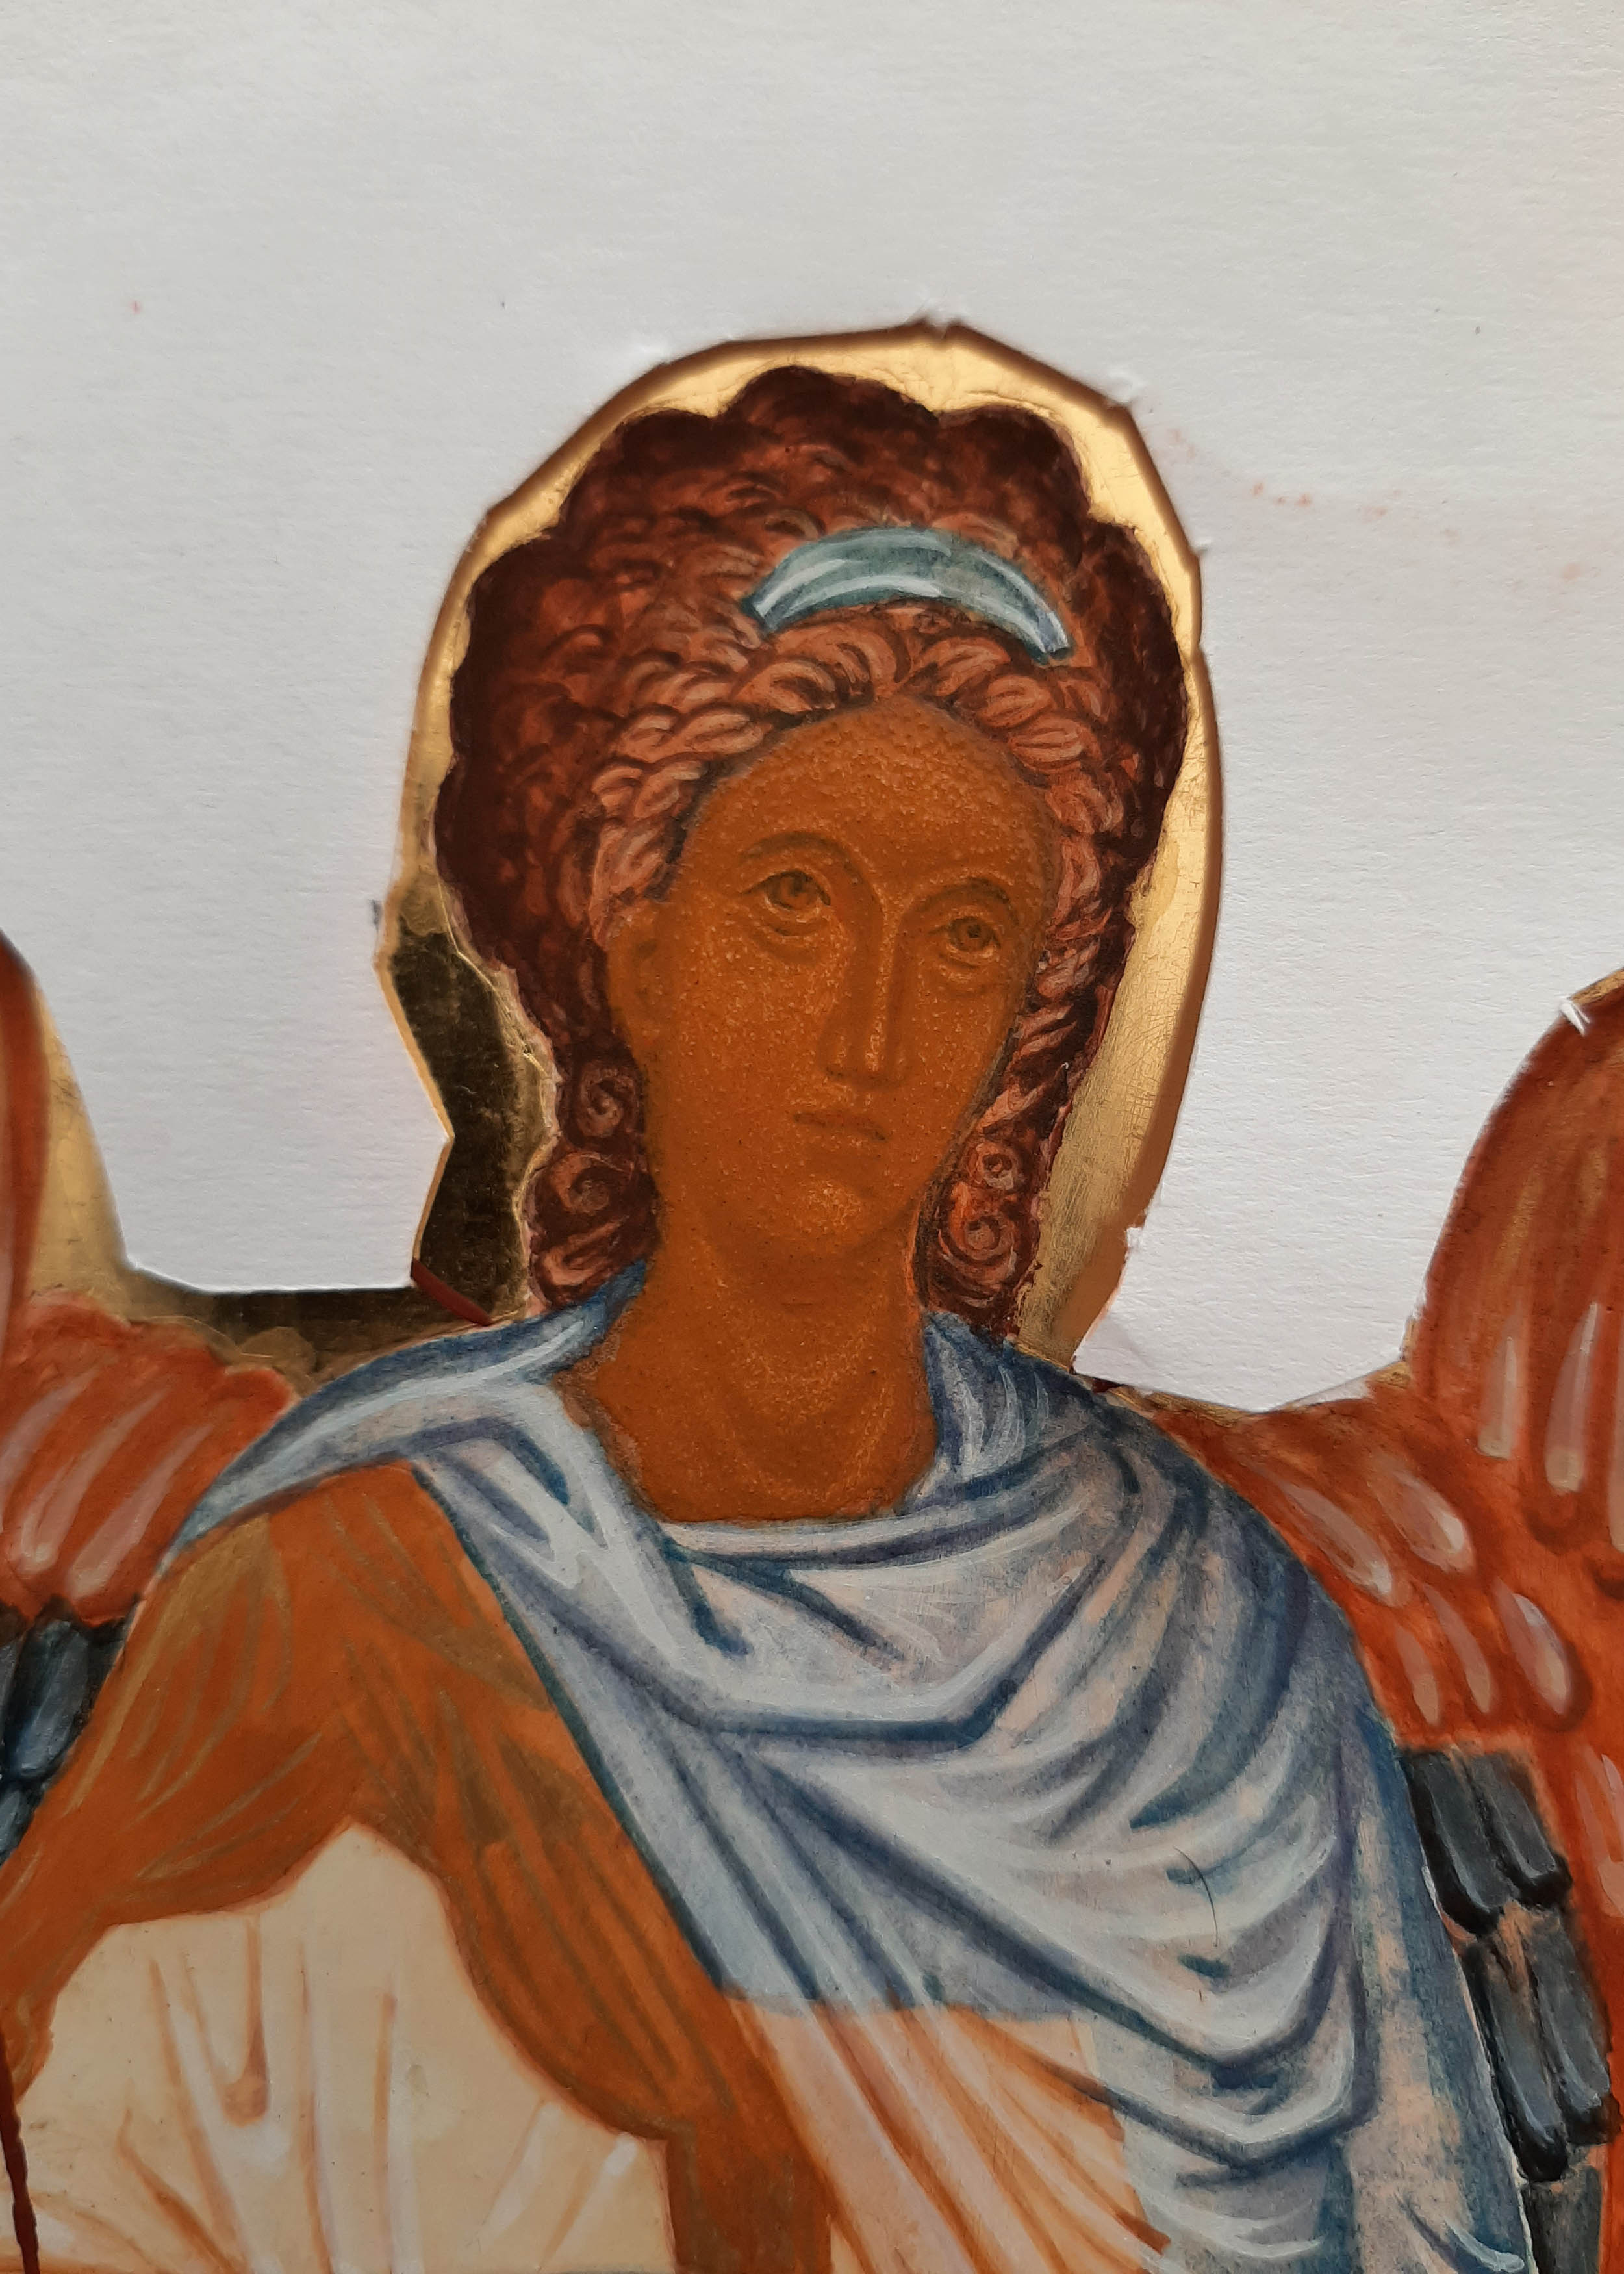
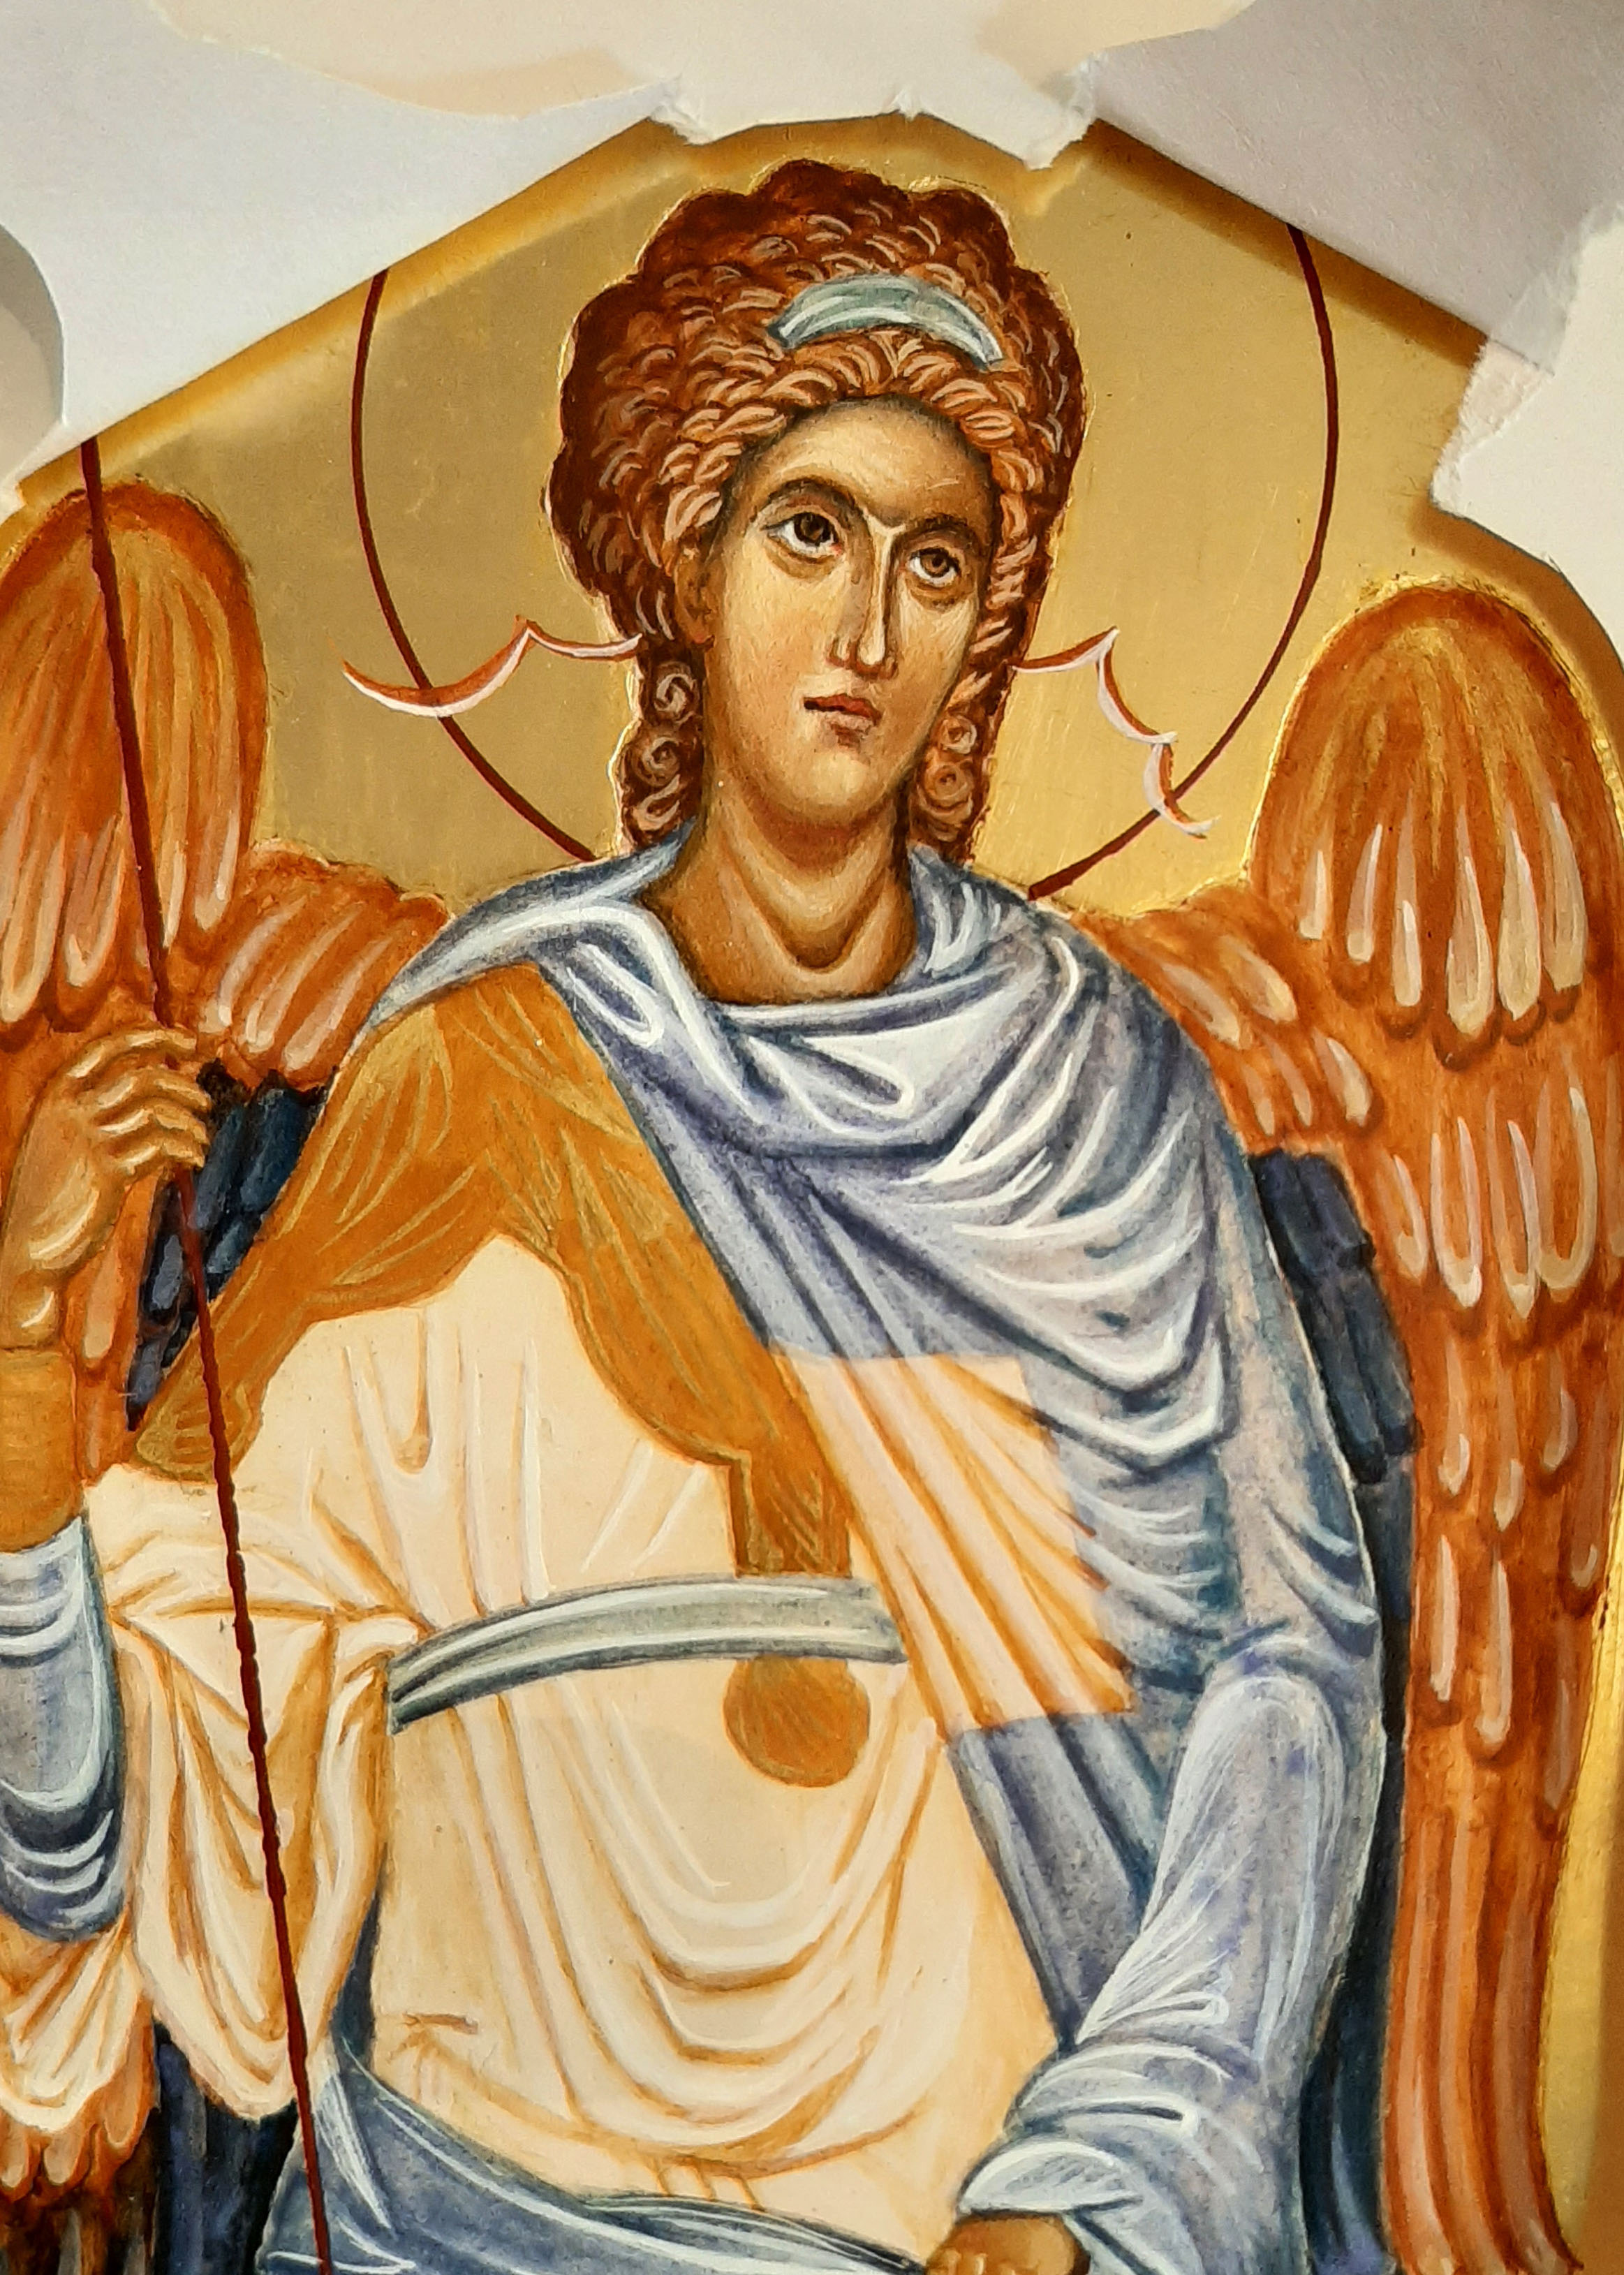
At the centre of this icon is the young Christ with one hand raised in blessing and the other holding a scroll. The young boy is wearing a rich vermillion cloak and sash, radiating a gold (yellow ochre maimeri) light contained in an outer circle of seraphim. I decided not to paint all the garments surrounding the ring as I thought I would be able to work fairly neatly up to these edges.

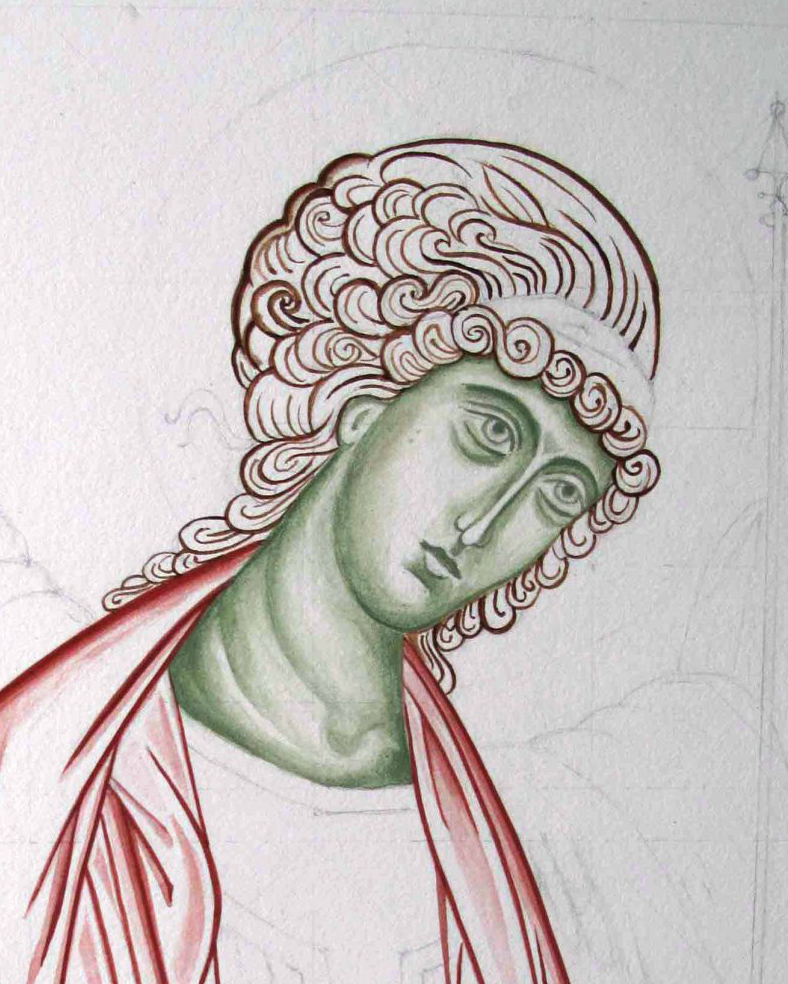
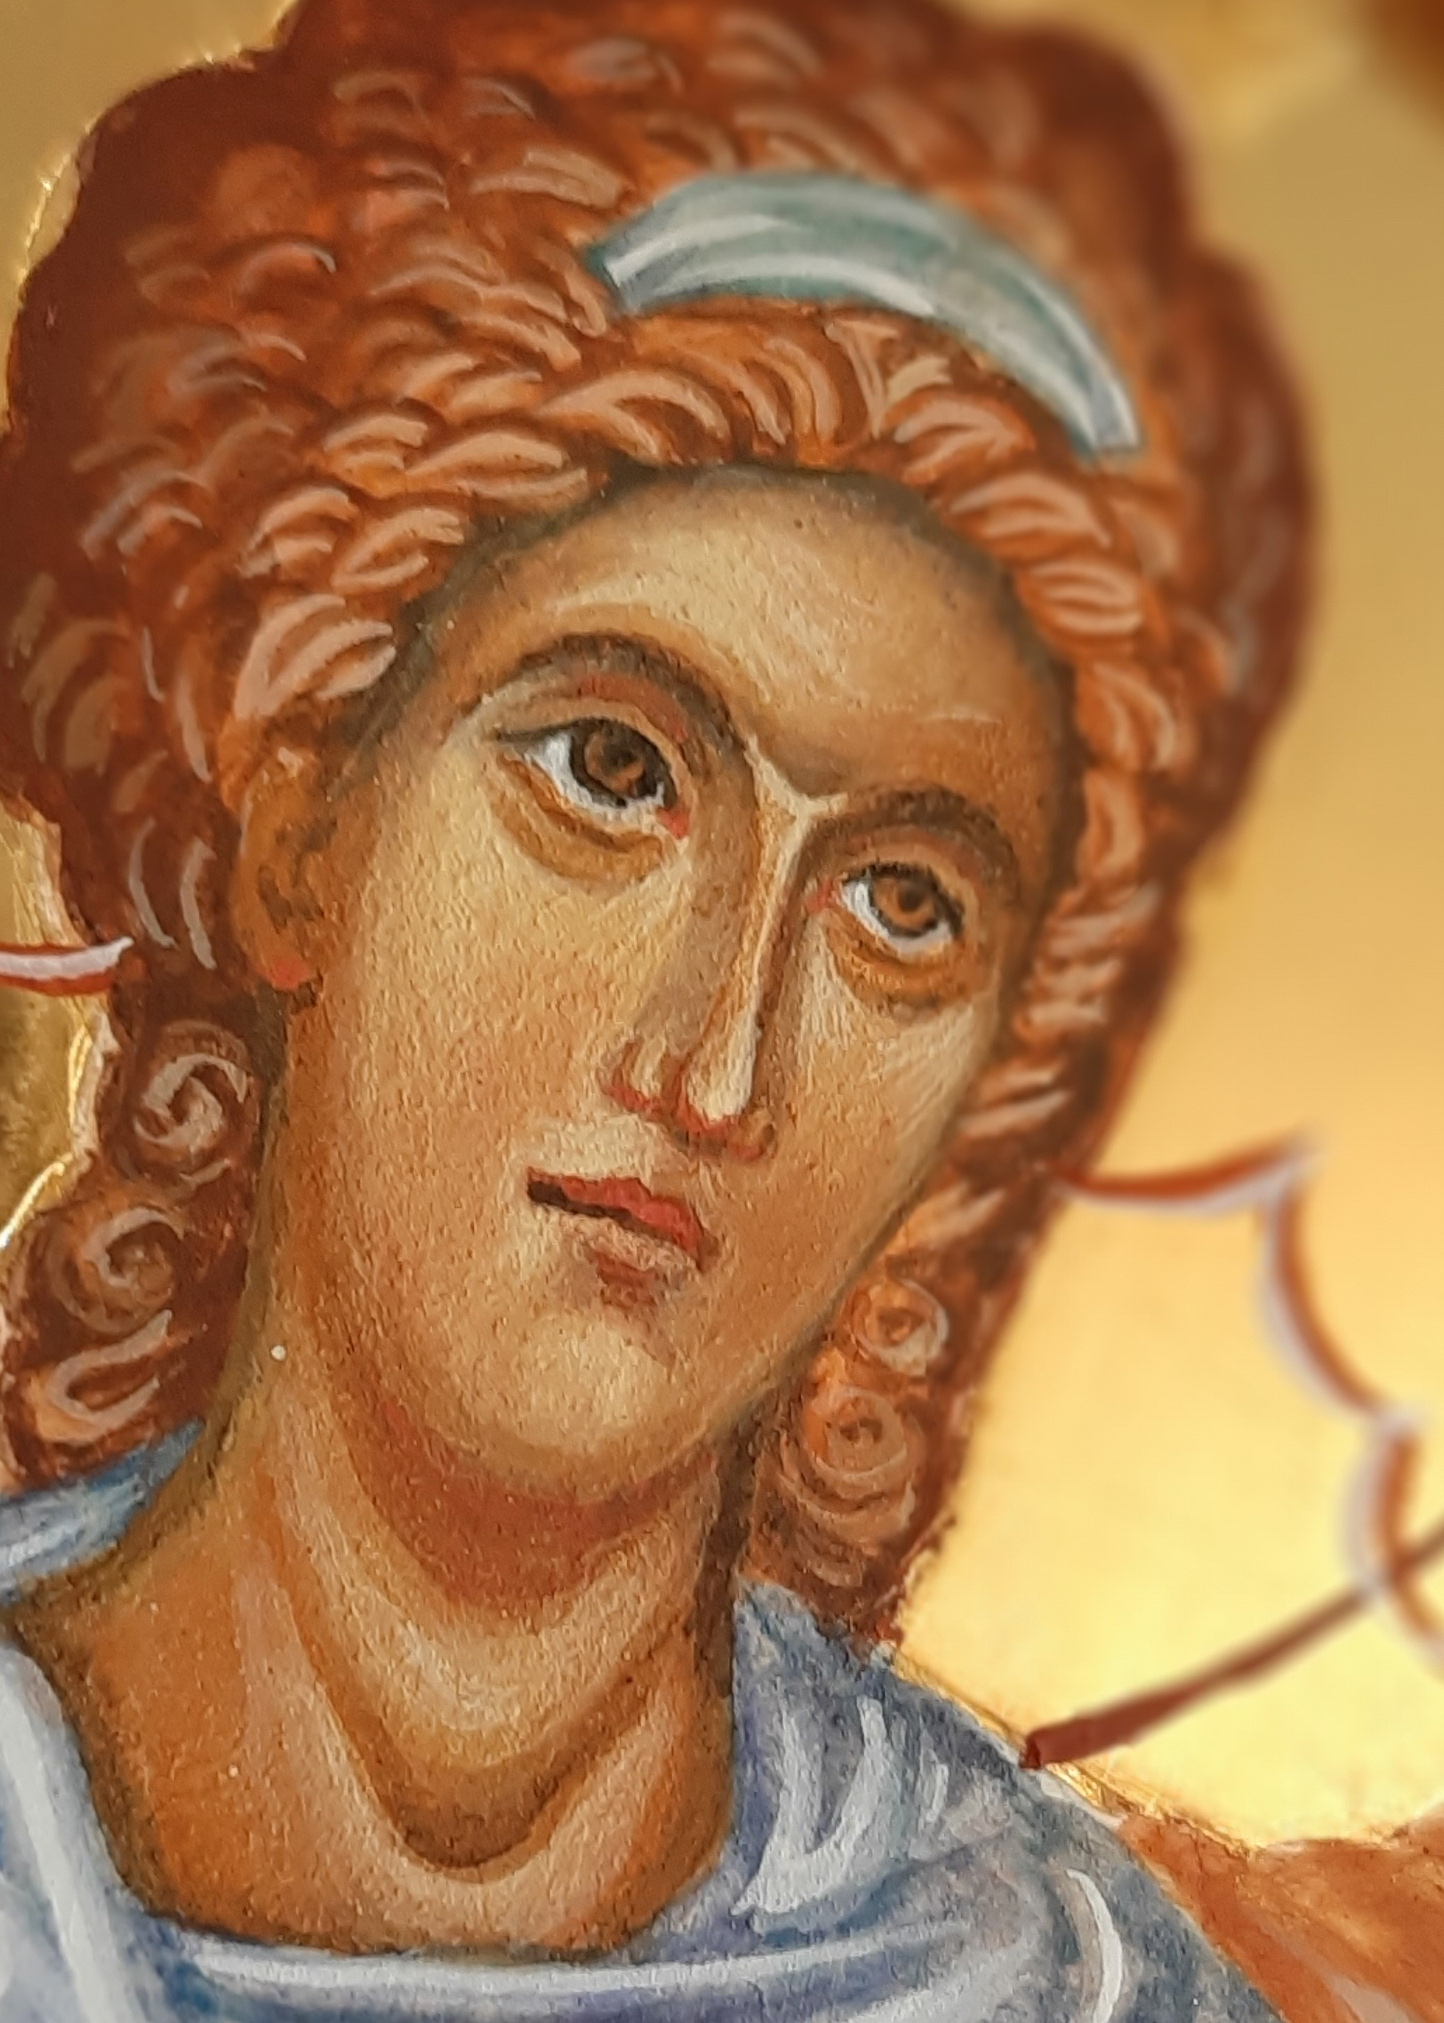
I referred back to my initial drawing to trace and transcribe the face.

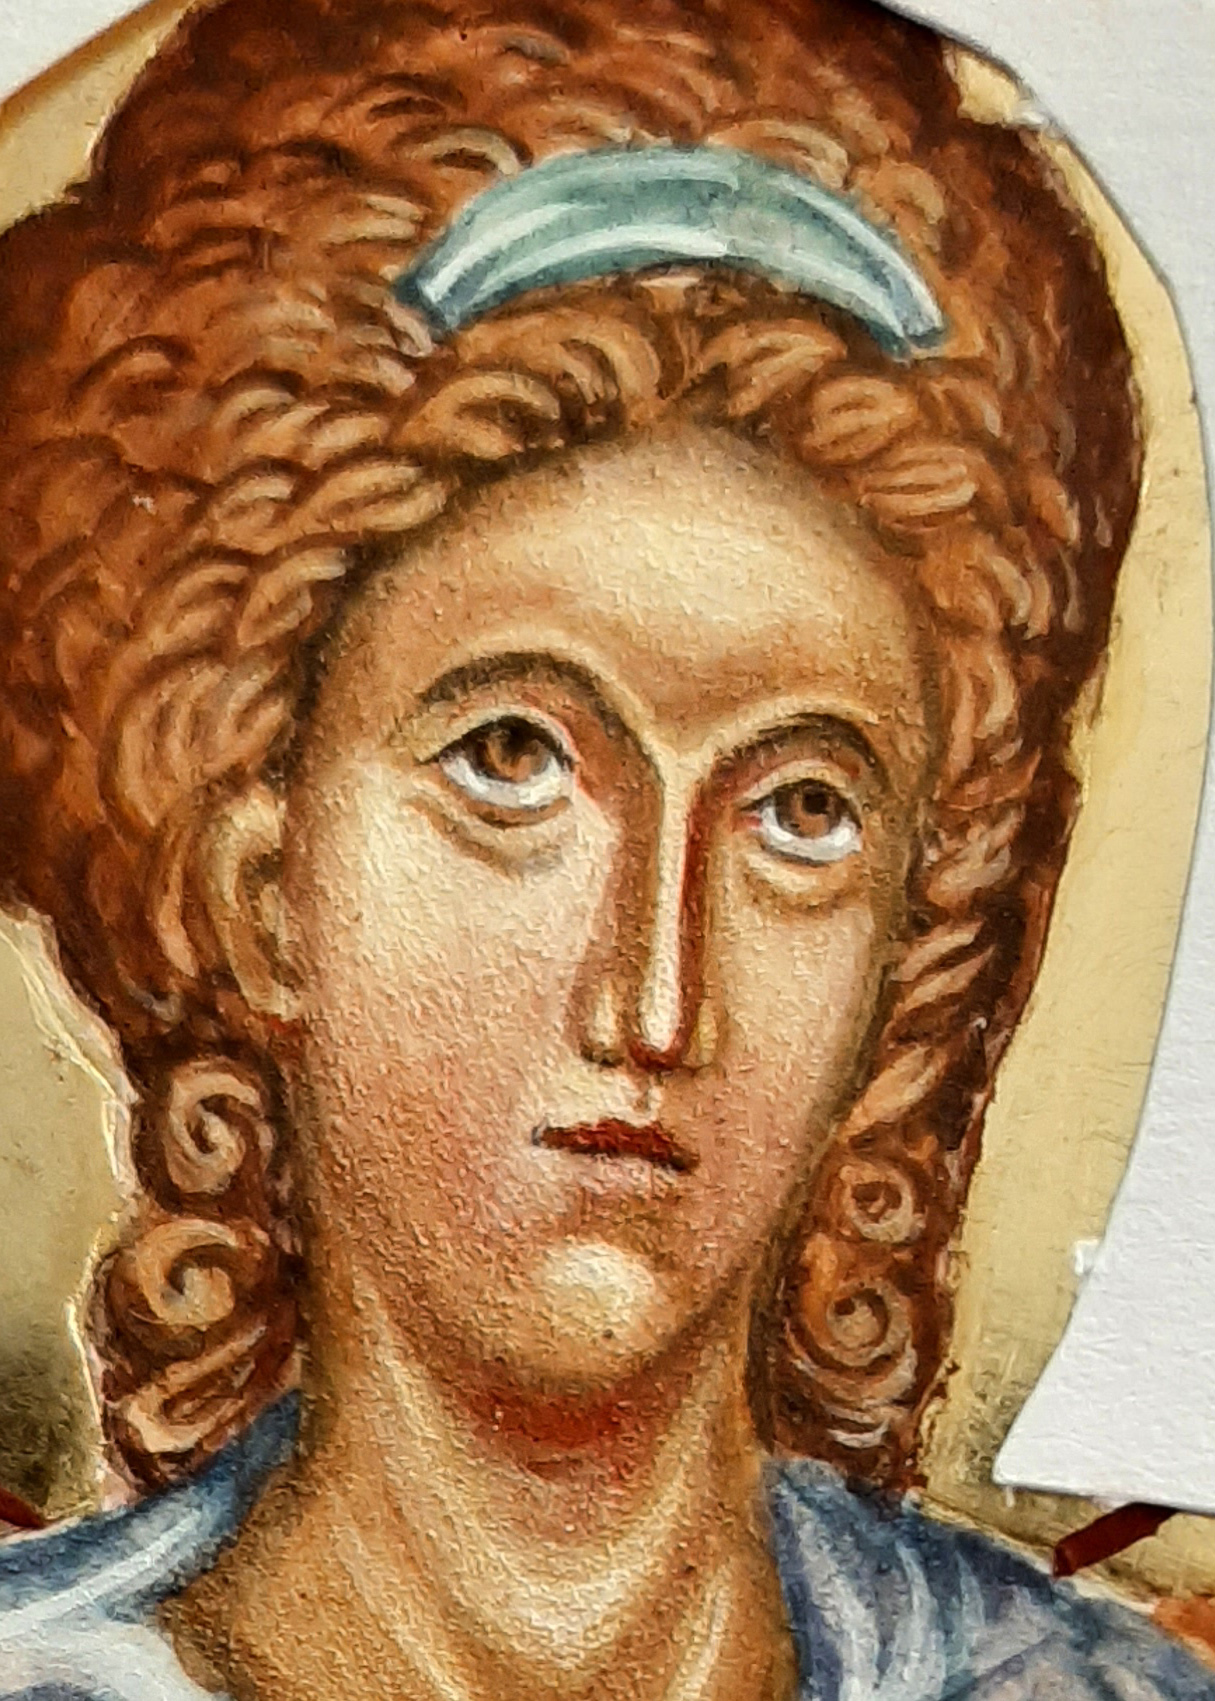
I have learnt to be very careful with strong lines when underpainting a face – they can be hard to integrate later. Better to have just a few key lines in the right places as reference points to move from then shade in thin layers, building up depth gradually around the cheeks, below chin and brow, to the side of nose and under the hairline.

Below you can see I’m building up all the faces at the same time, gradually deeping the shading. I’ve used yellow ochre maimeri and a tiny dash of ivory black to give a greenish yellow underpainting. You can also use Terre Verte for underpainting faces but this pigment can be quite sticky for painting small fine facial details.

It’s worth going quite dark with the shading – it will all get held together by the membrane layers. Don’t forget to add a few glazes of your egg mix – diluted with a few drops of water and let it dry before you add the membrane. These are tiny details but they help bring it all together. The egg seals the gesso below to provide an even surface for the next layers.

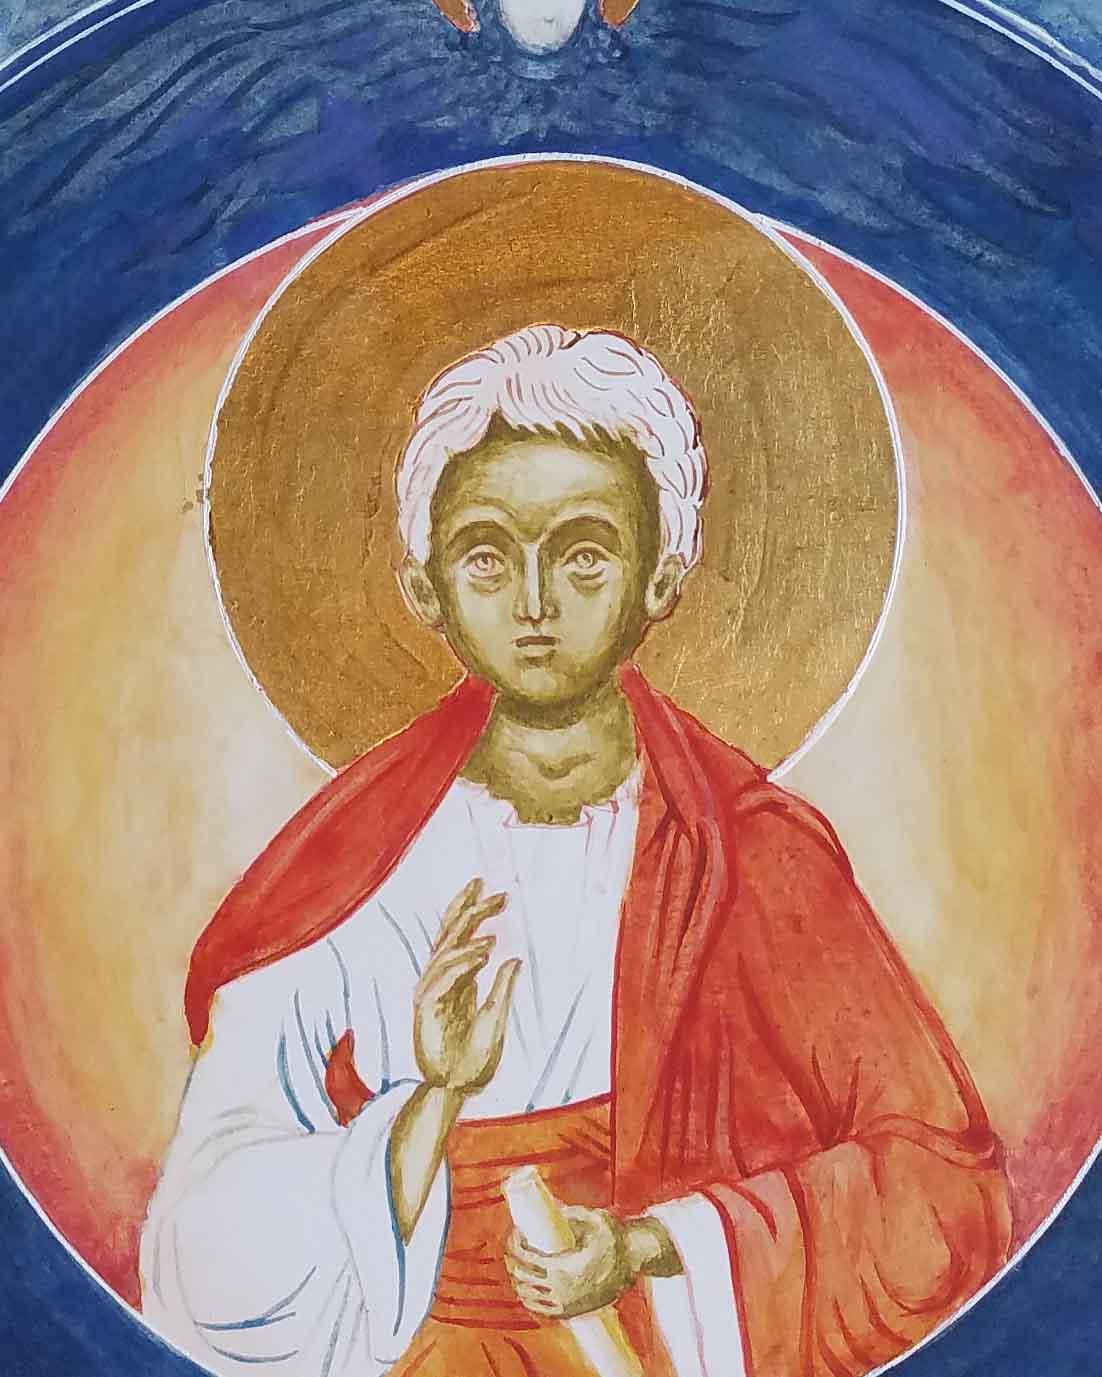
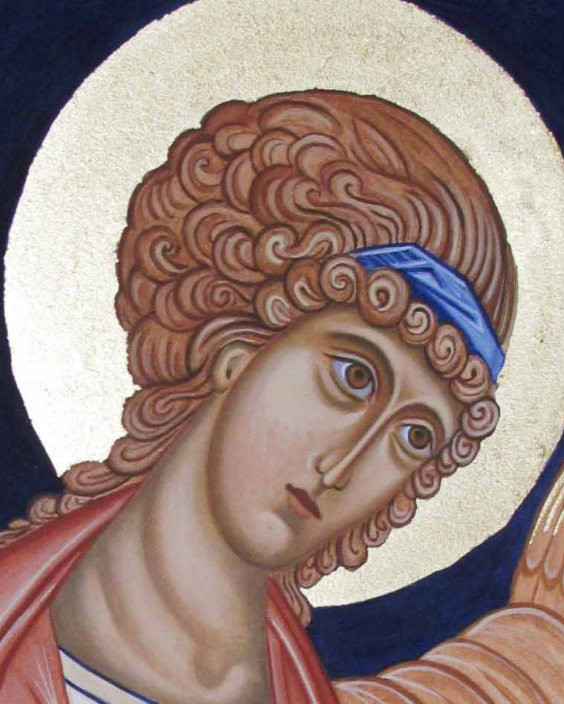
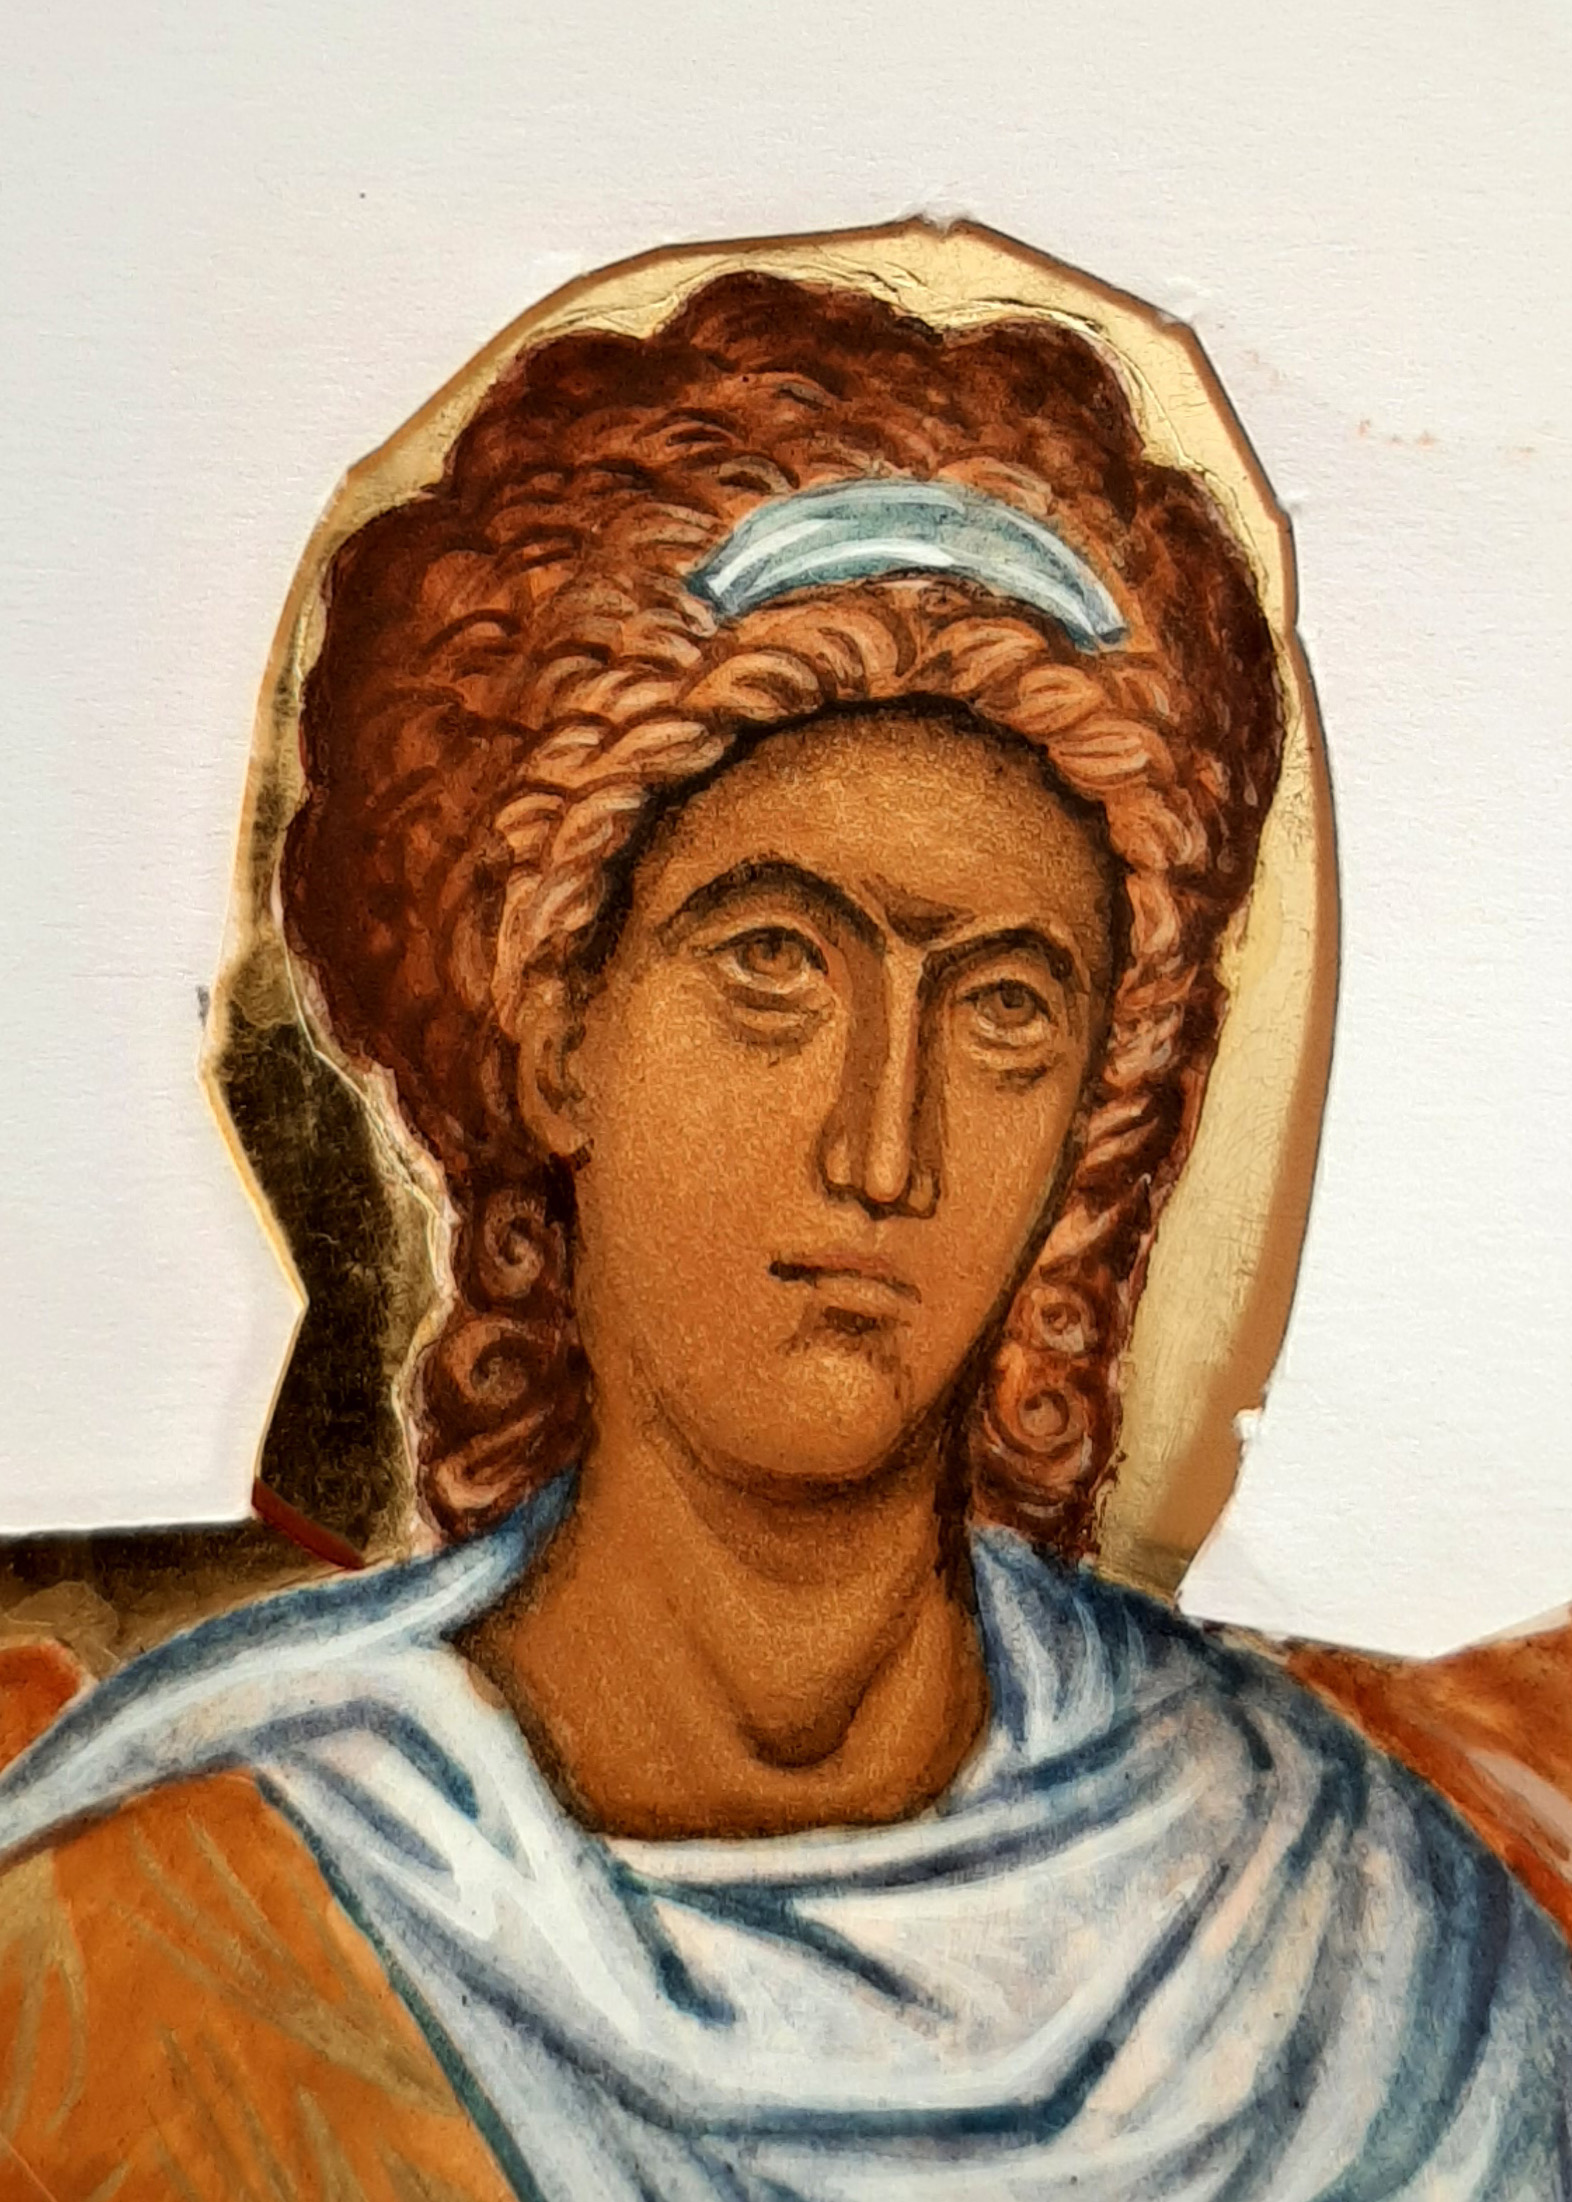
I’ve used English Red Ochre light and Yello Maimeri for the membrane layers. Add just enough membranes to make out the features. At this stage I leave things for at least a week and work on other areas. This is only something I’ve learnt. The more this layer is left to temper, the easier it is for you to correct mistakes without making a hole back to the gesso. You can read about that one here!

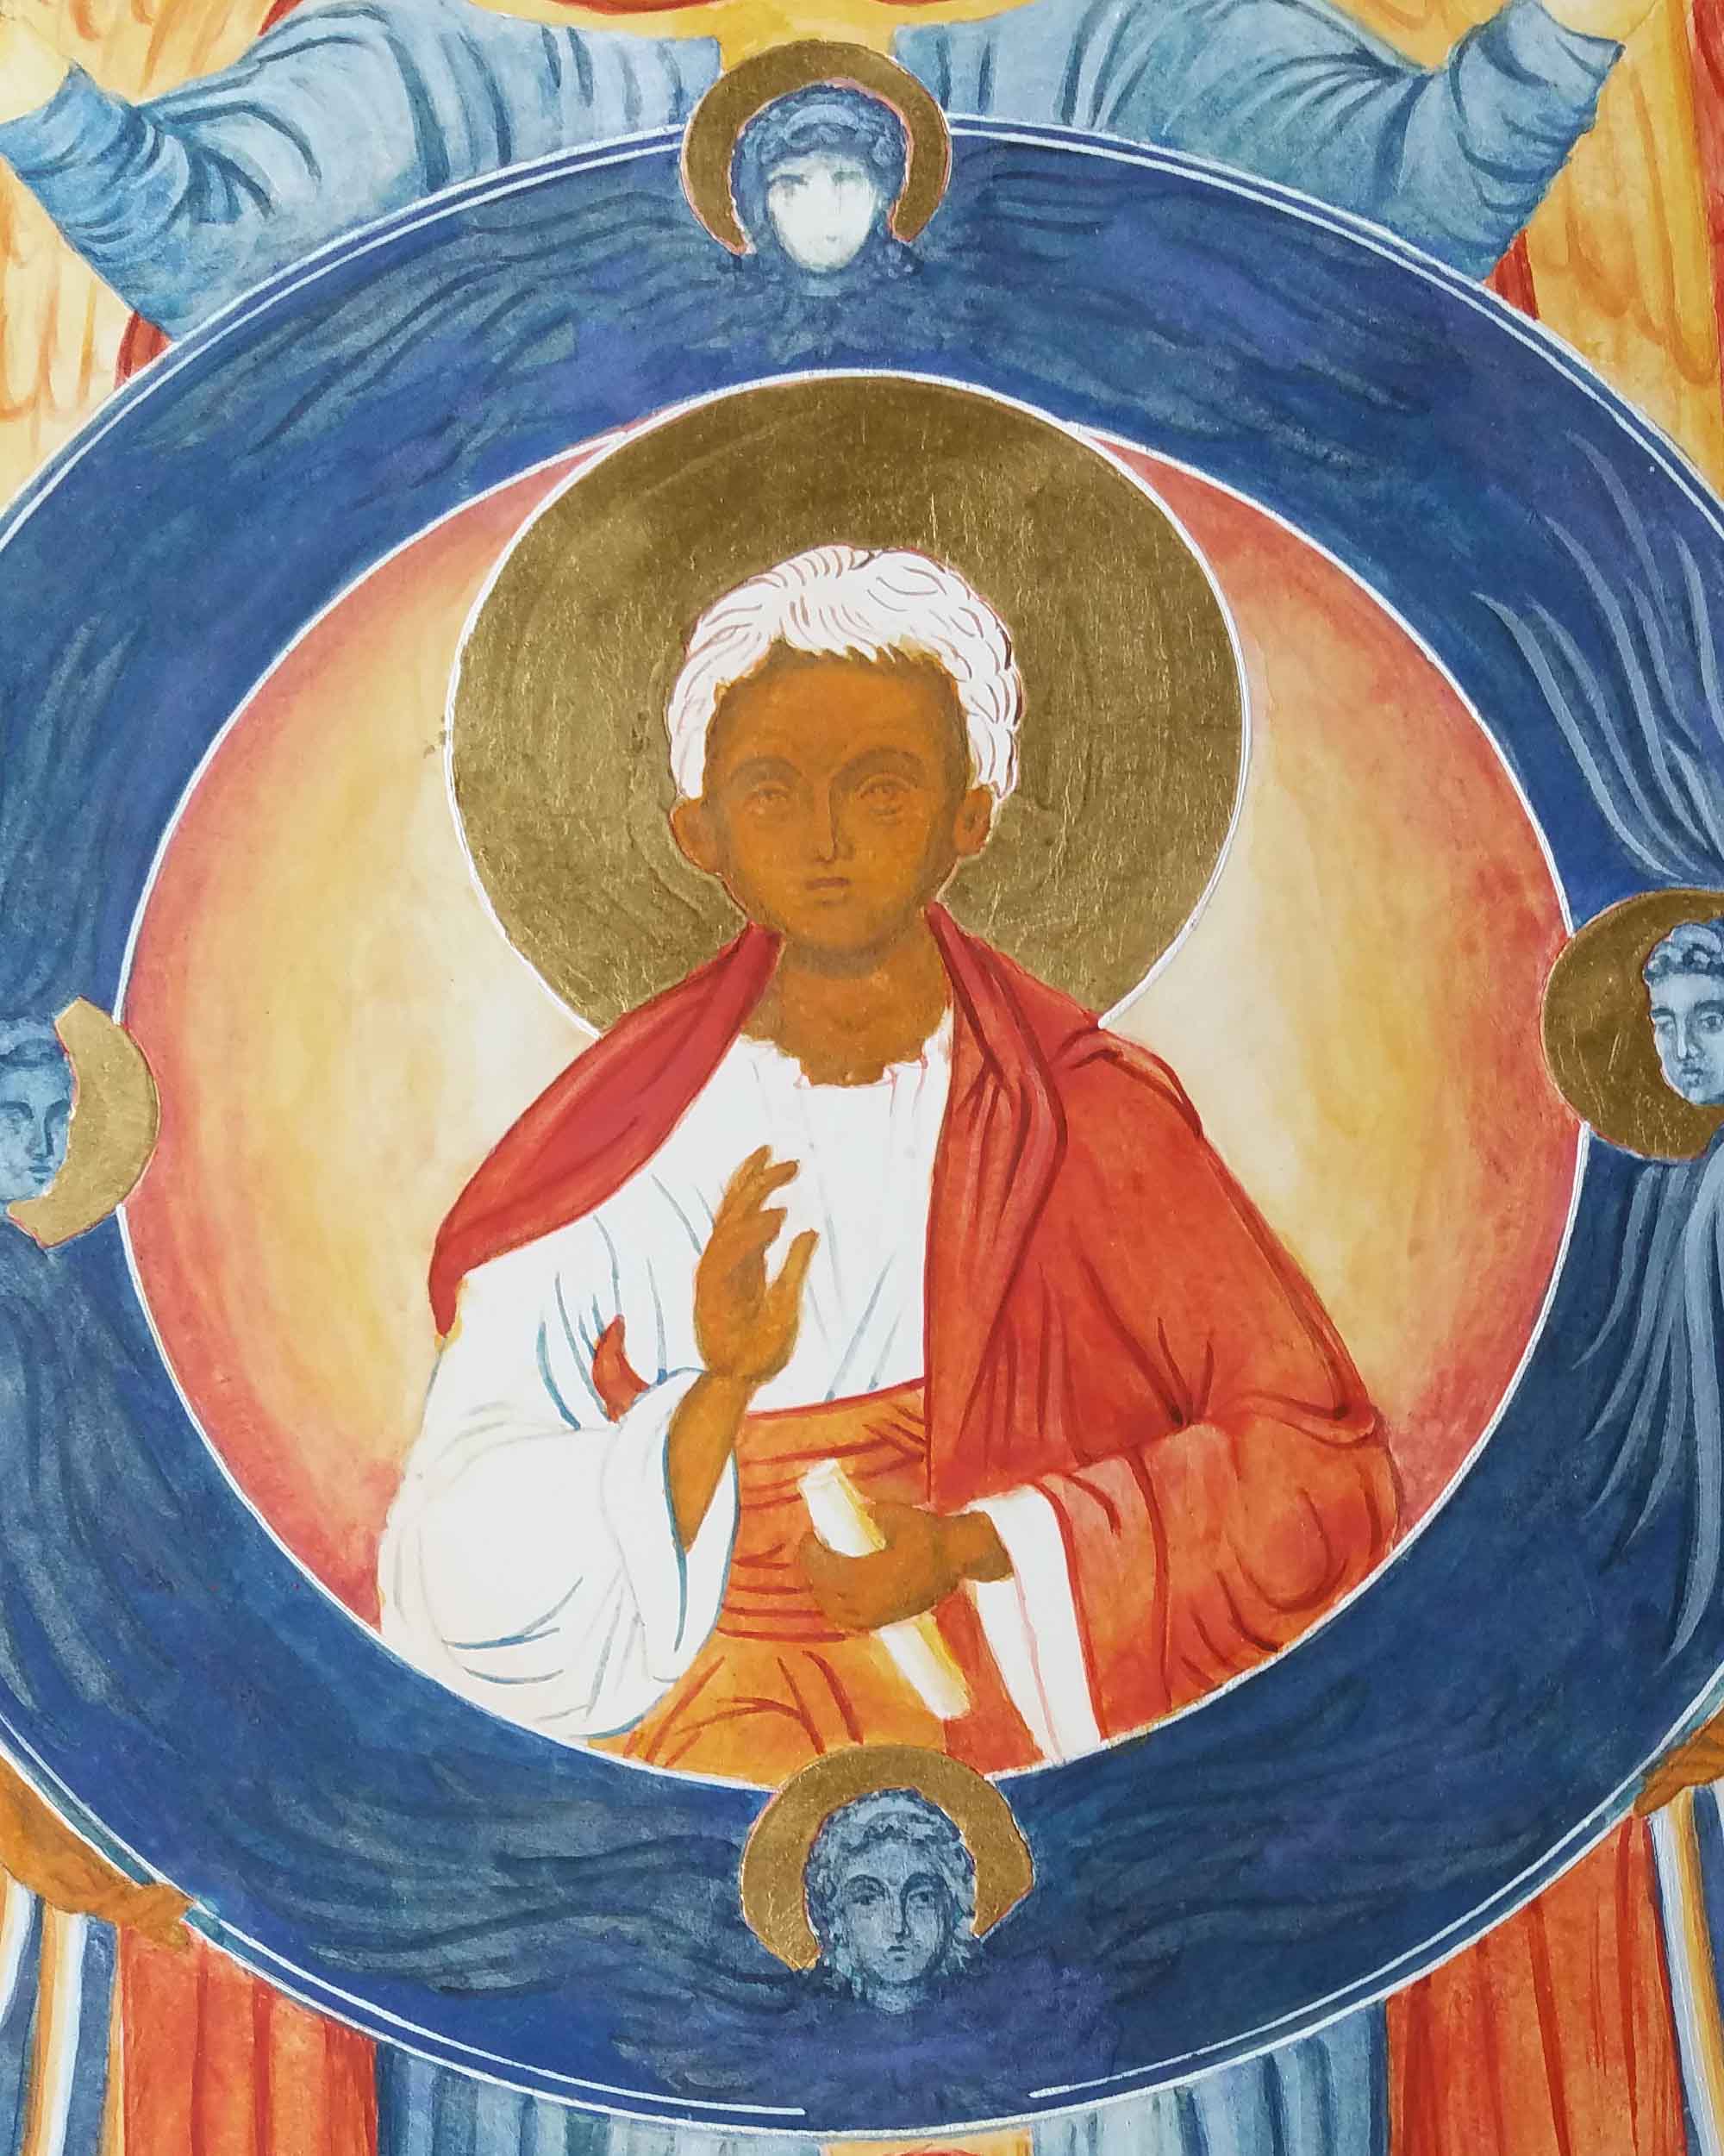
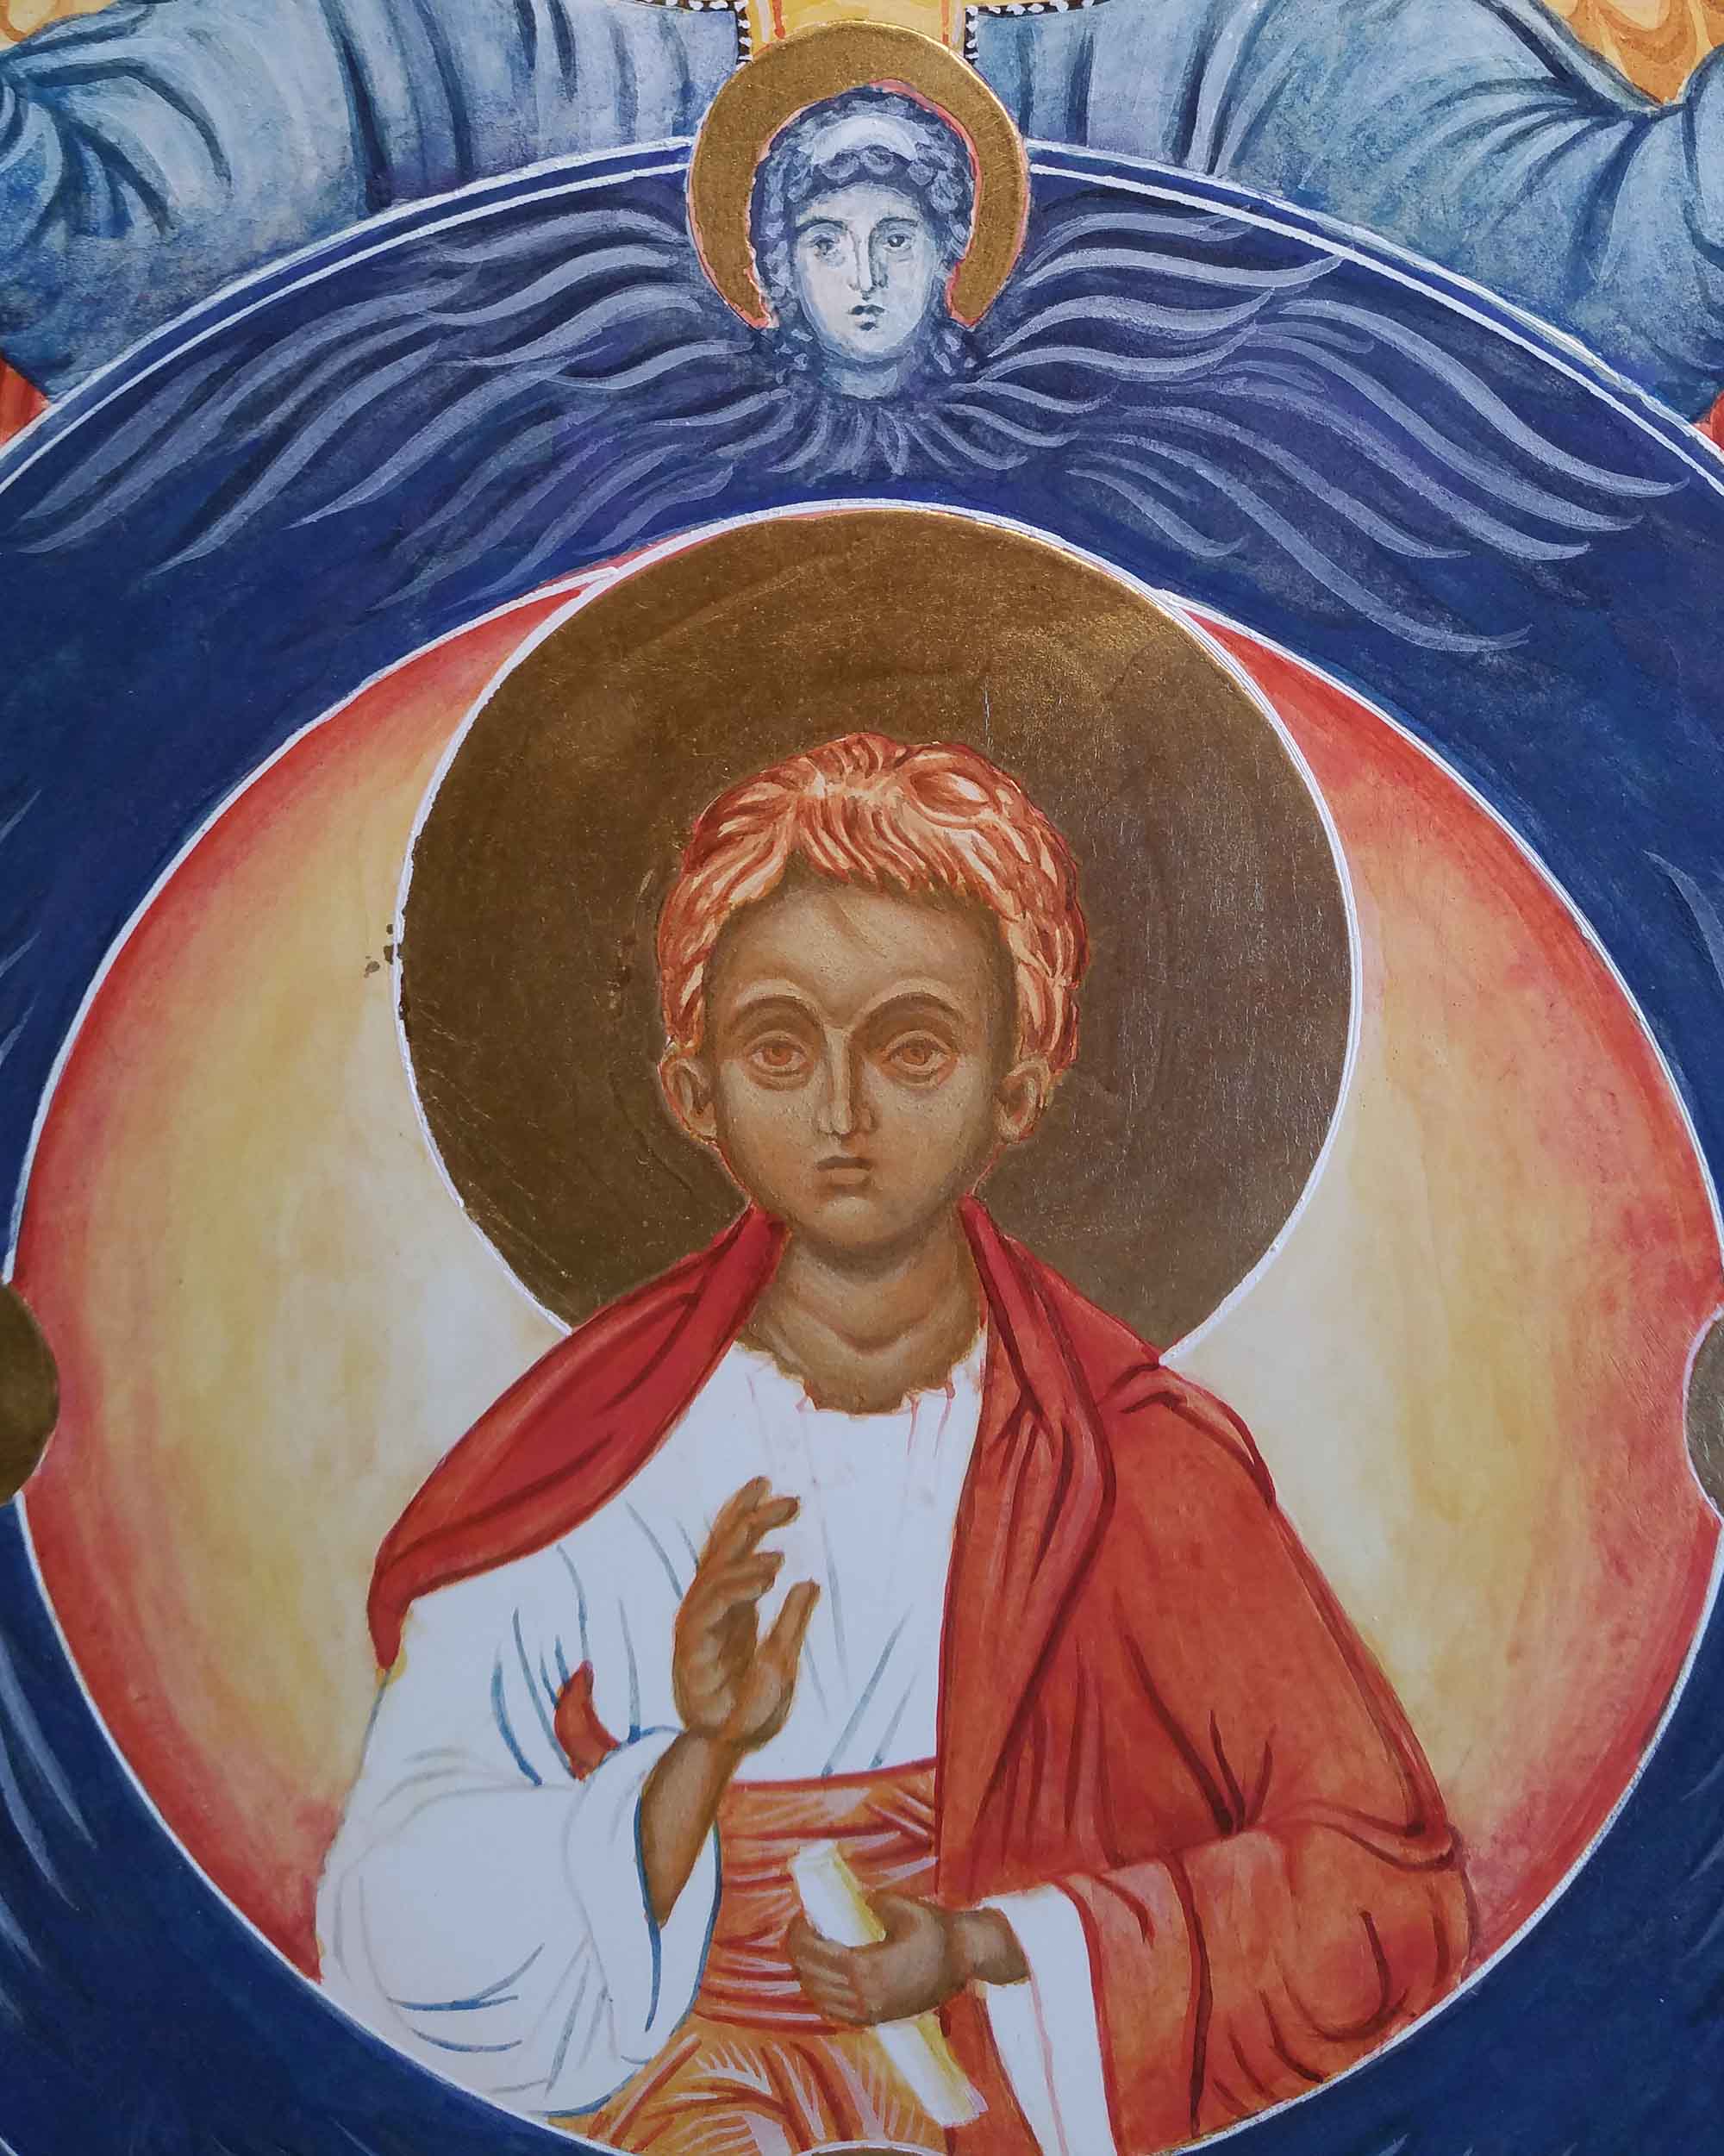
Darkening shadows and defining the features with ochre avana.

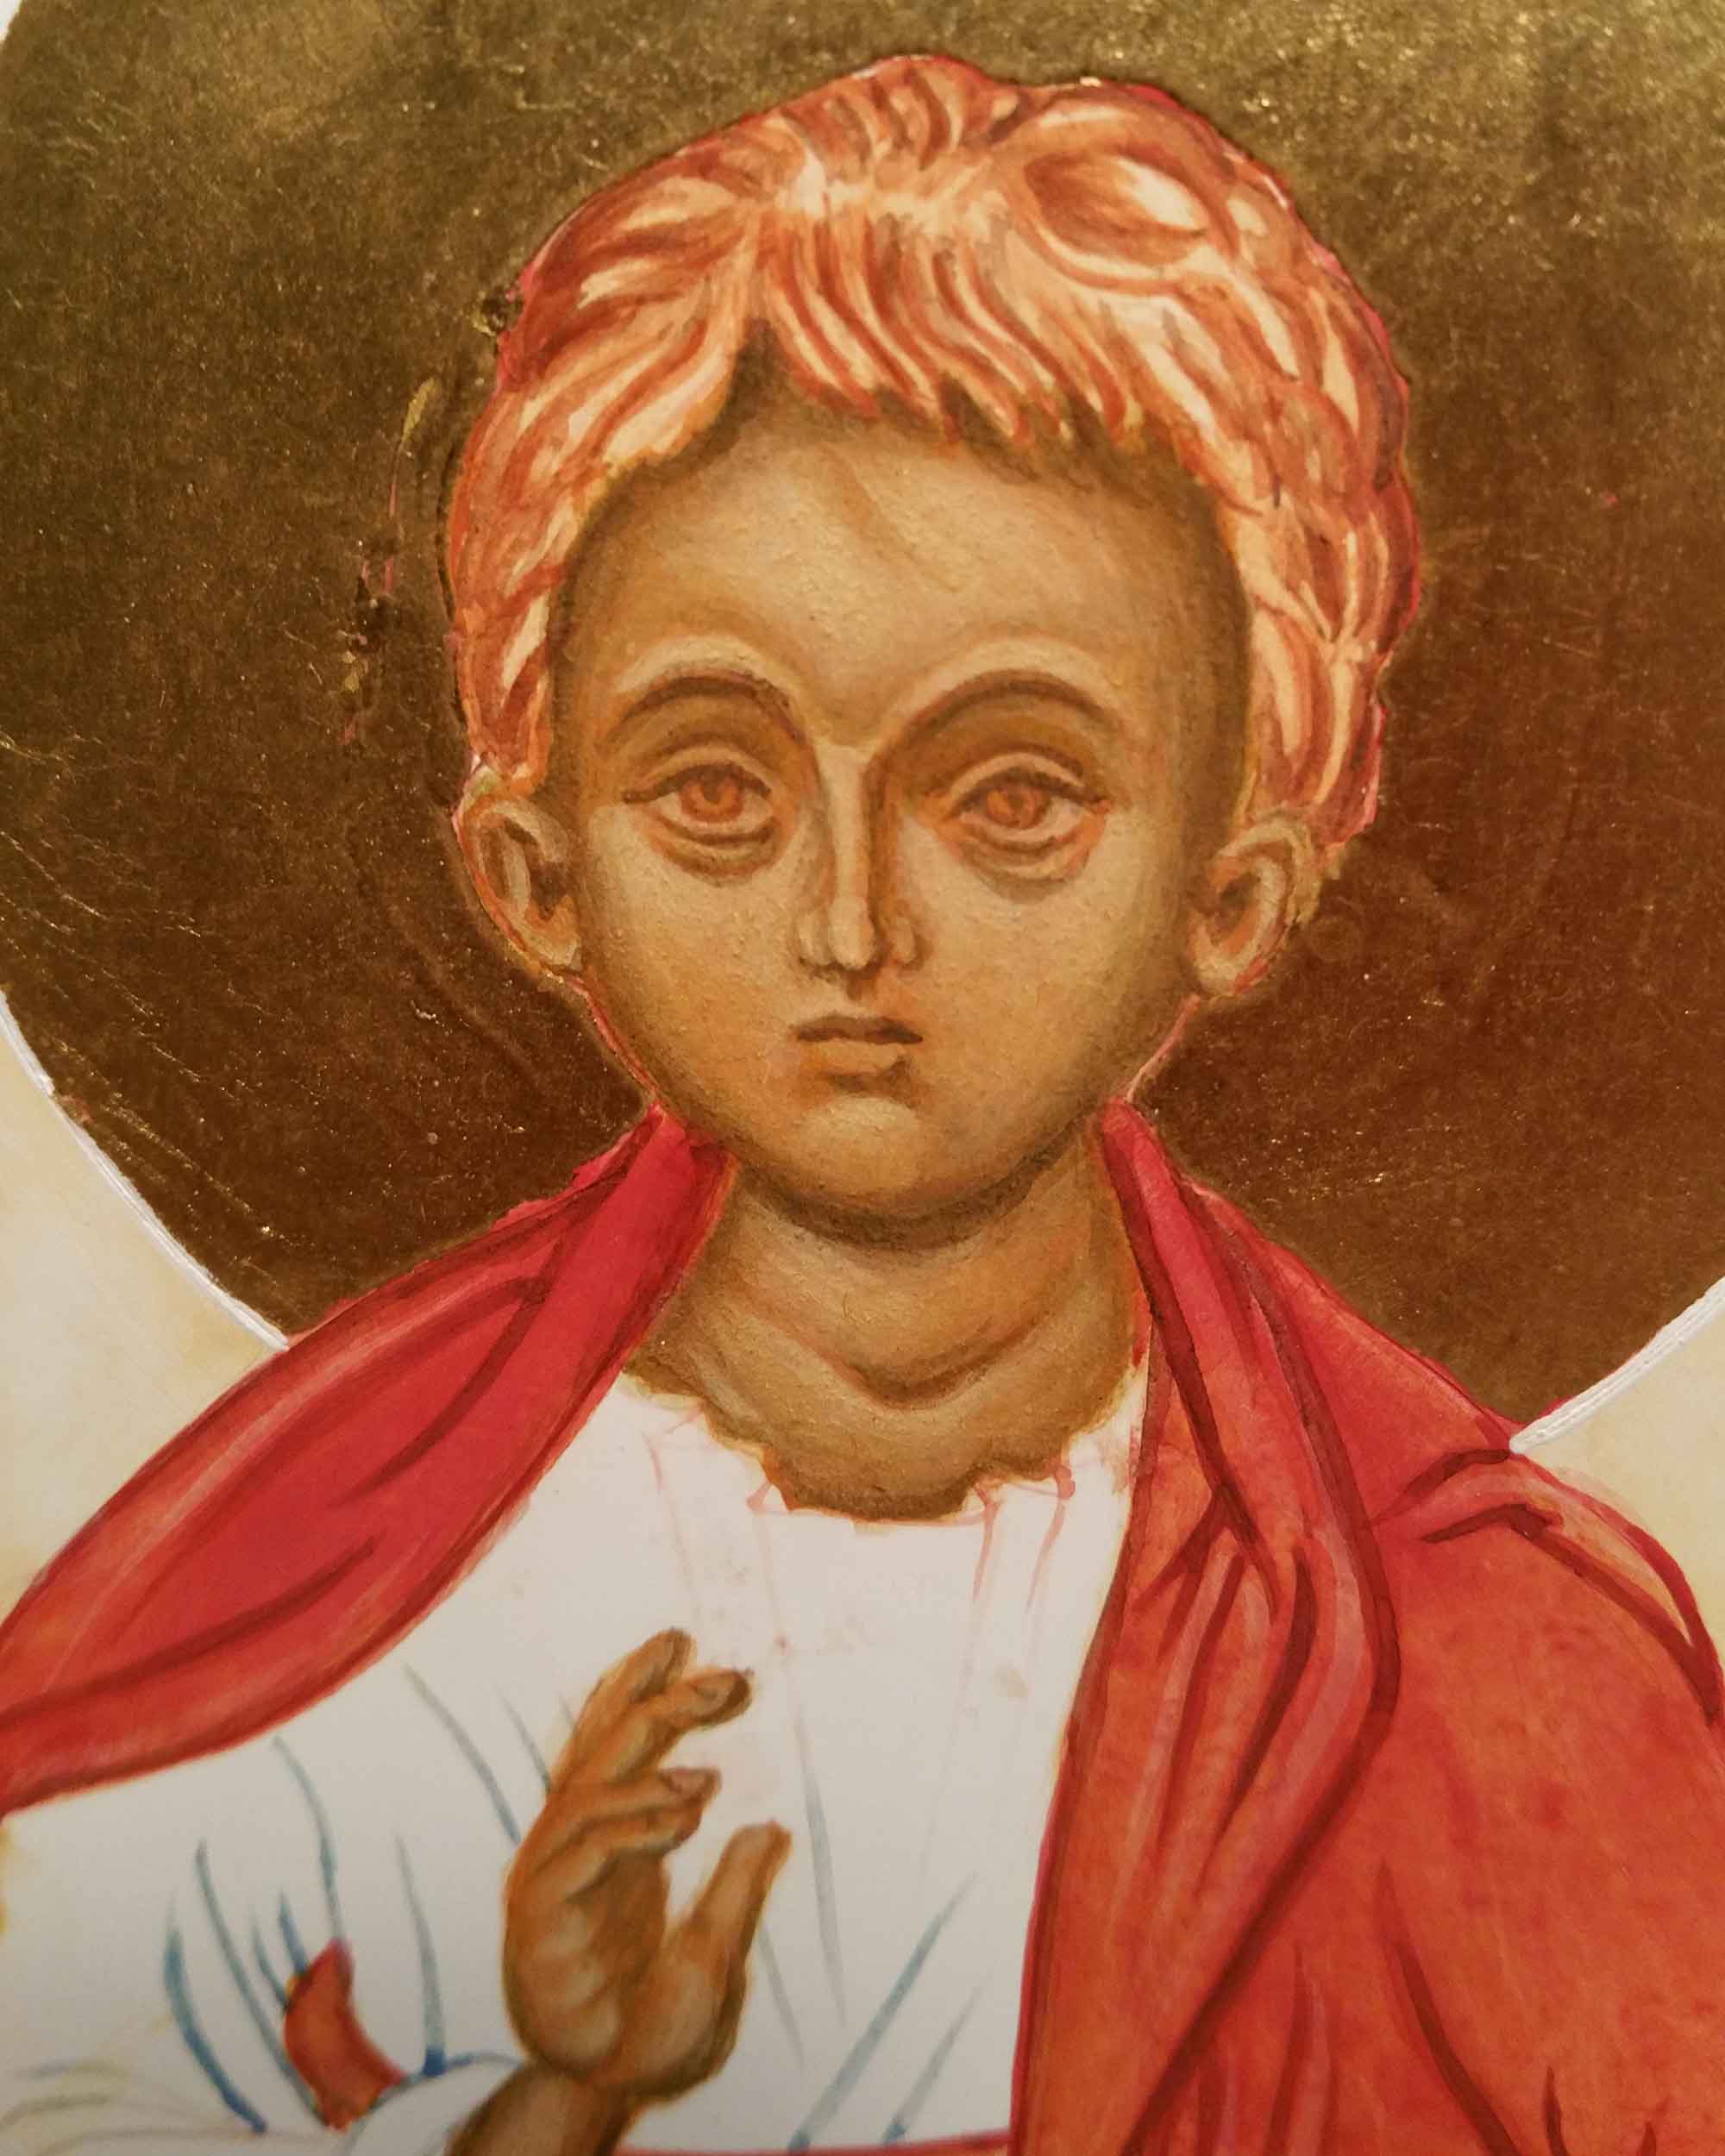
Building up highlights with very thin layers of yellow maimeri mixed with titanium white.

All these stages are comprehensively covered in Aidan Hart’s book ‘Techniques of Icon and Wall Painting’

If at any time the highlights look too stark, add a few thin layers of French Ochre Havanna to even things out.

Finally, add whites of eyes, black pupils and eyelids, the lettering, ribbons, shell gold and fine jewel details on the garments.

Now for that exciting news… This year I’m celebrating ten years of icon painting and sharing my work here on this blog. As a big thank you for your company and comments over the years I am offering ALL my icons (including this one) in stock listed here at half price for the month of February. This offer will not be found on any social media page as it is excusive to all my readers, past icon buyers, friends and family. Postage will be added at cost and the icons will be sold on a first come first served basis – please get in touch if you would like one.

As always, thank you for reading and happy icon painting!

Ronnie 🙂

Michaelmas

As September gives way into darker evenings and mornings, it pulls back many memories of the ancestral hearth for our family. It’s a time of remembering our loved ones and lighting a candle. It is the time to honour the Archangels on the feast of Michaelmas.

This was a triptych which I painted for my sister – she had seen a small version years ago and loved the way the doors opened up for the big reveal and had wondered if I could ever paint one for her one day. I’m so glad I did!

The images for these two Archangels which stand either side of the Blessed Mother and the Christ Child are based on the frescoes of Chora in Istanbul, seen high up in the dome.

I’ve written about this triptych previously in this blog but for this evening, I wanted to include a sequence of work-in-progress photos of an icon which I painted on watercolour paper of Archangel Gabriel.

If you haven’t got a gessoed board ready prepared, some heavy 300-400gsm+ smooth hot pressed watercolour paper is a really beautiful surface to work on. If you can find cotton content paper then it will be archival and long lasting in the right conditions.

You will see from this photo that I’ve used a pencil grid to help draw the image – don’t hesitate to use all the help you can get as you go along. Turning the master image upside down to refer to also helps you to tune into the areas of light and shade, angles/directions, hard and soft edges and so on.

I have under-painted the face in the pigment Terre Verte. You could also use Yellow Maimeri and ivory black to get a different green.

I have used a mix of English Red Deep and French Ochre Havanna for the hair, wings and robes.

This is a thin wash of Yellow Ochre Maimeri and a touch of Red Ochre light for the membrane over the skin. The red ochres are really strong pigments so you will only need a diluted drop of it for warmth.

Adding the facial highlights in thin layers of Yellow ochre Maimeri and titanium white
Building up very thin layers to model the face
Adding shell gold to the wings

You can see this icon completed and framed together with a few other icons here on my Etsy shop page.

Final details of the red line around the halo and ribbons to denote listening

And finally to close this post on the Triptych – here it is complete in the UK and ready to fly to Australia – with my Aussie sis joining in a wee family gathering!

Triptych in UK – sister in Aus!
Sisters!

In the meantime, trusting you all into the care of our celestial helpers.

As always, thanks for reading,

Ronnie

Face up to the detail

This icon is of Archangel Raphael, one of a pair of standing angels which are based on the frescos of Chora in Istanbul, painted high up in the dome. As I mentioned in my last post, I was not too pleased with the expression.

To make a start adjusting the features, I covered the face with four or five glazes of French Ochre Havanna. This helps to return to the point where you make the first glazes over the underpainting.

Then, taking Ochre Avana and a very small amount of raw umber, deepen the hair, brow and jaw line.

I also decided to deepen the colour of the wings with a few more glazes of lapis lazuli to send them back so to speak.

In the photos below, I have added more layers of light glazes for the facial highlights. Somewhere along the line, the gaze of the angel moved to a different direction. The tiniest detail makes all the difference.

To summarise – the hair is deepened with red ochre and a touch of black. The right eye brow has been lowered and softened. The brow has been adjusted to remove the central highlight and instead bring the highlight towards the viewer. The highlights below the eyes adjusted. The nose is still a work in progress but the shape fits better with the face. The mouth has a warmth and the chin is less pointed.

I’m so glad I worked on these faces! It’s easy to leave things as they are when you have already put so much time into the icon but egg tempera is a wonderfully versatile medium and revives easily. Painting over faces with glazes is a straightforward way to make the adjustments that you know are needed. Another thing that helps is to take a photo of the face, turn it to black and white and print it off. That way, you can see clearly what isn’t working and what needs to be done.

Here’s the finished icon complete with the ribbons which symbolise Divine Listening.

The finished icon can be seen here .

As ever, thanks for reading!

Ronnie 🙂