Icon Diploma Student

Learning to see with the eye of the heart

Posts tagged ‘Gold Leaf’

‘I Saw Him!’

mary Magdalene tells the disciples Christ has risen

Mary Magdalene is first with the good news ‘I have seen the Lord!’

Good morning and Happy Easter!

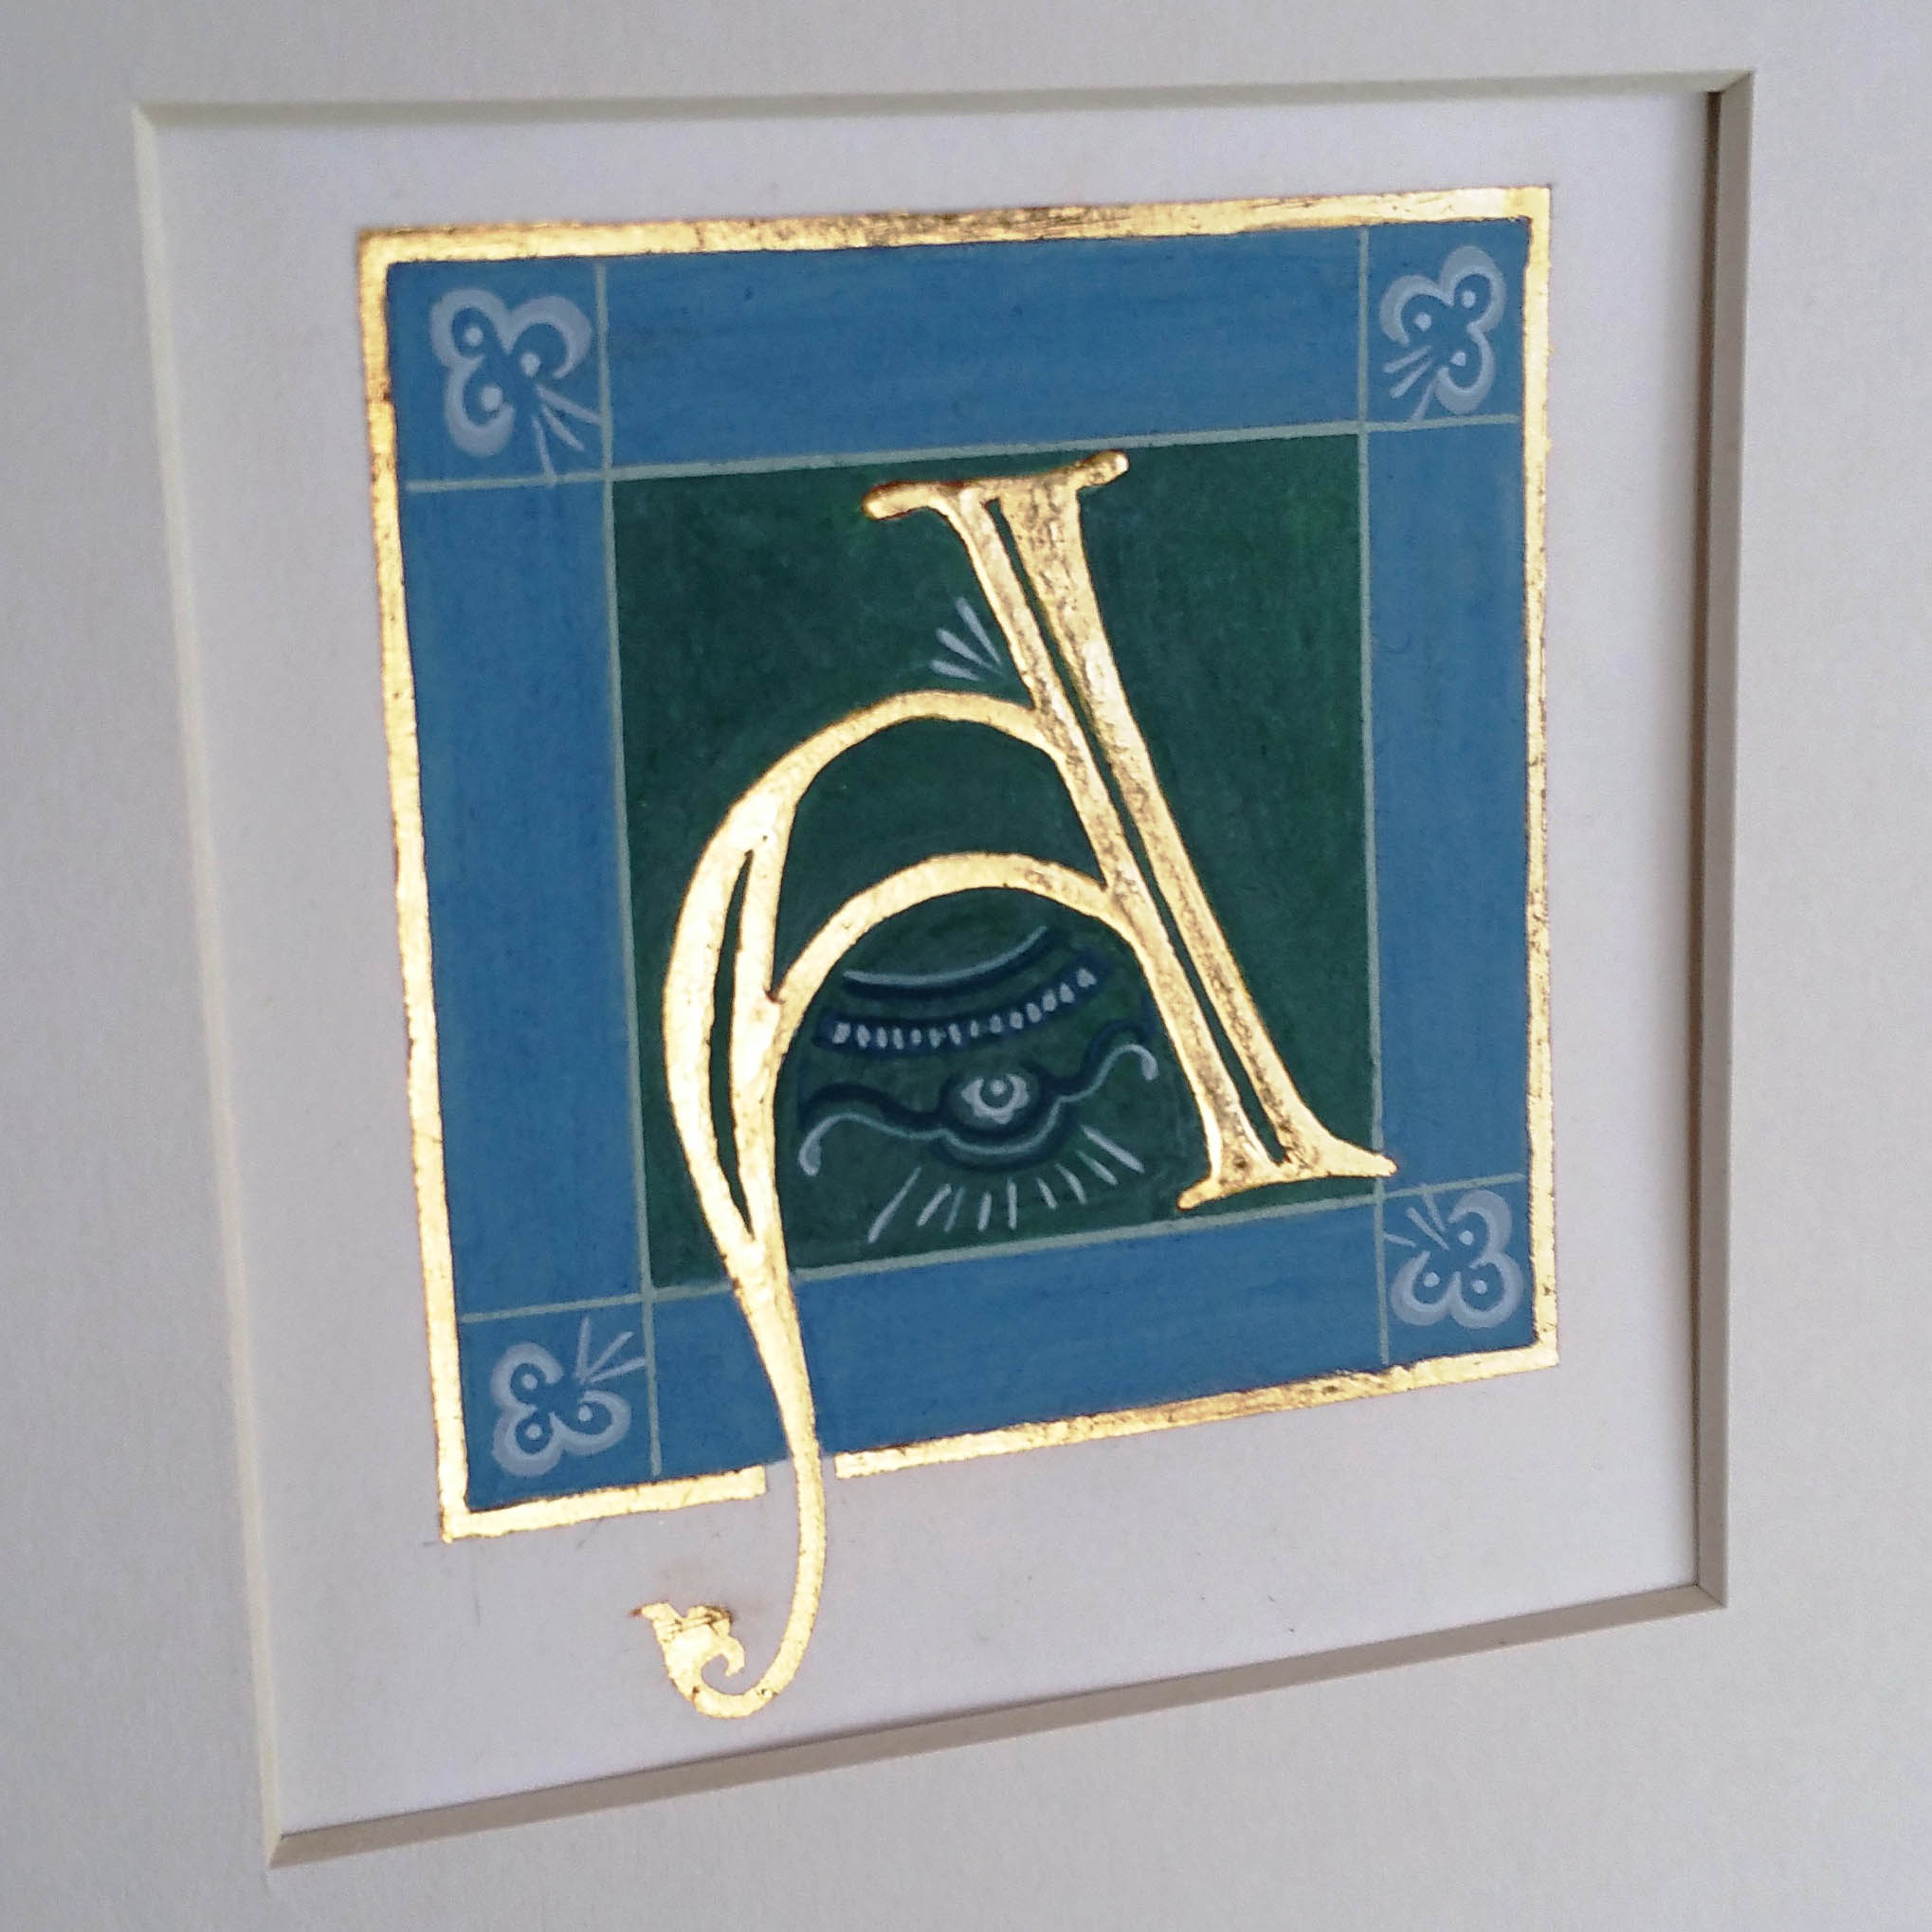
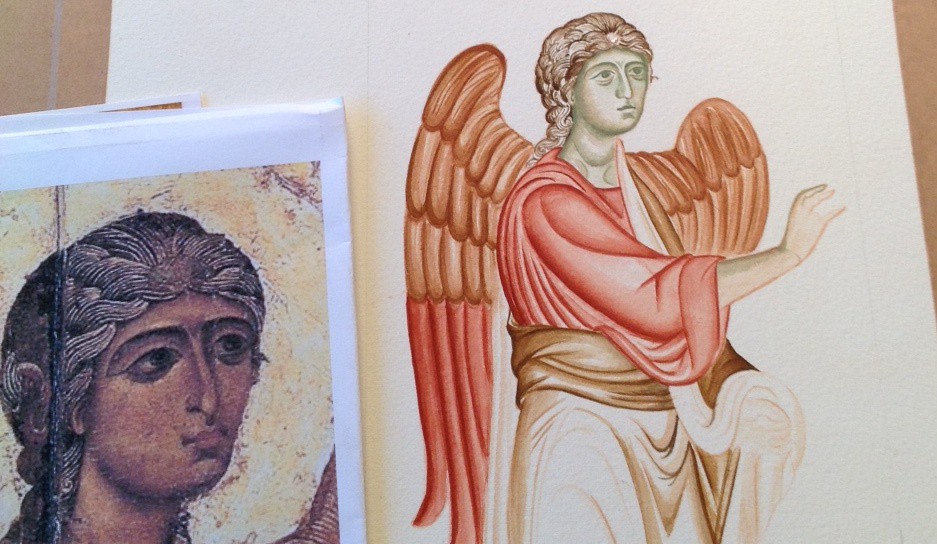
Romanesque manuscripts are a rich resource for iconographers. I have often wondered how a manuscript image would work painted on to a gessoed board instead of vellum. I had a small maple board (approx 6″x 8″) already prepared so I set aside the homework on my nativity icon to work on this small experimental piece during Lent.

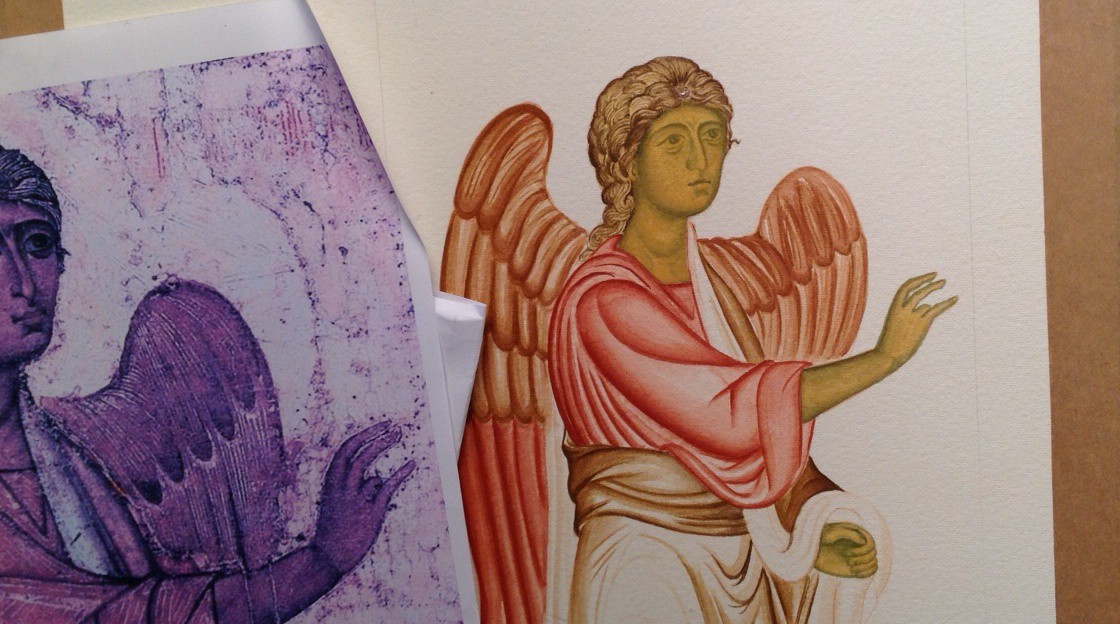
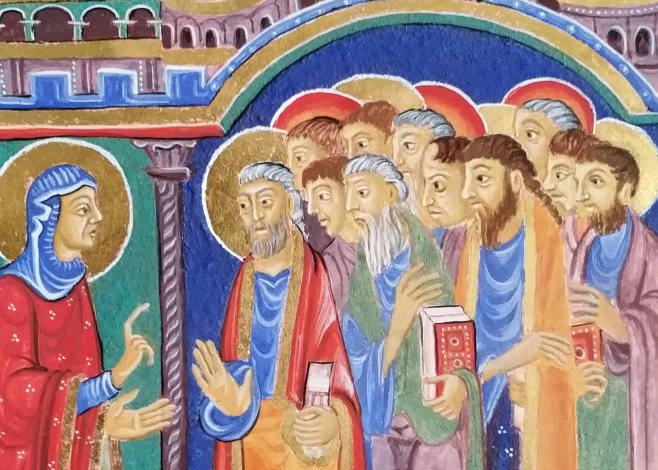
I chose this image of Mary Magdalene announcing her news to the discples. It’s from the St Alban’s Psalter, one of several known to have been created at or for St Albans Abbey in the 12th century. I love their expressions and the long thin draperies contrasted with oversized hands and feet.

Icon board first stage of work for St Albans Psalter

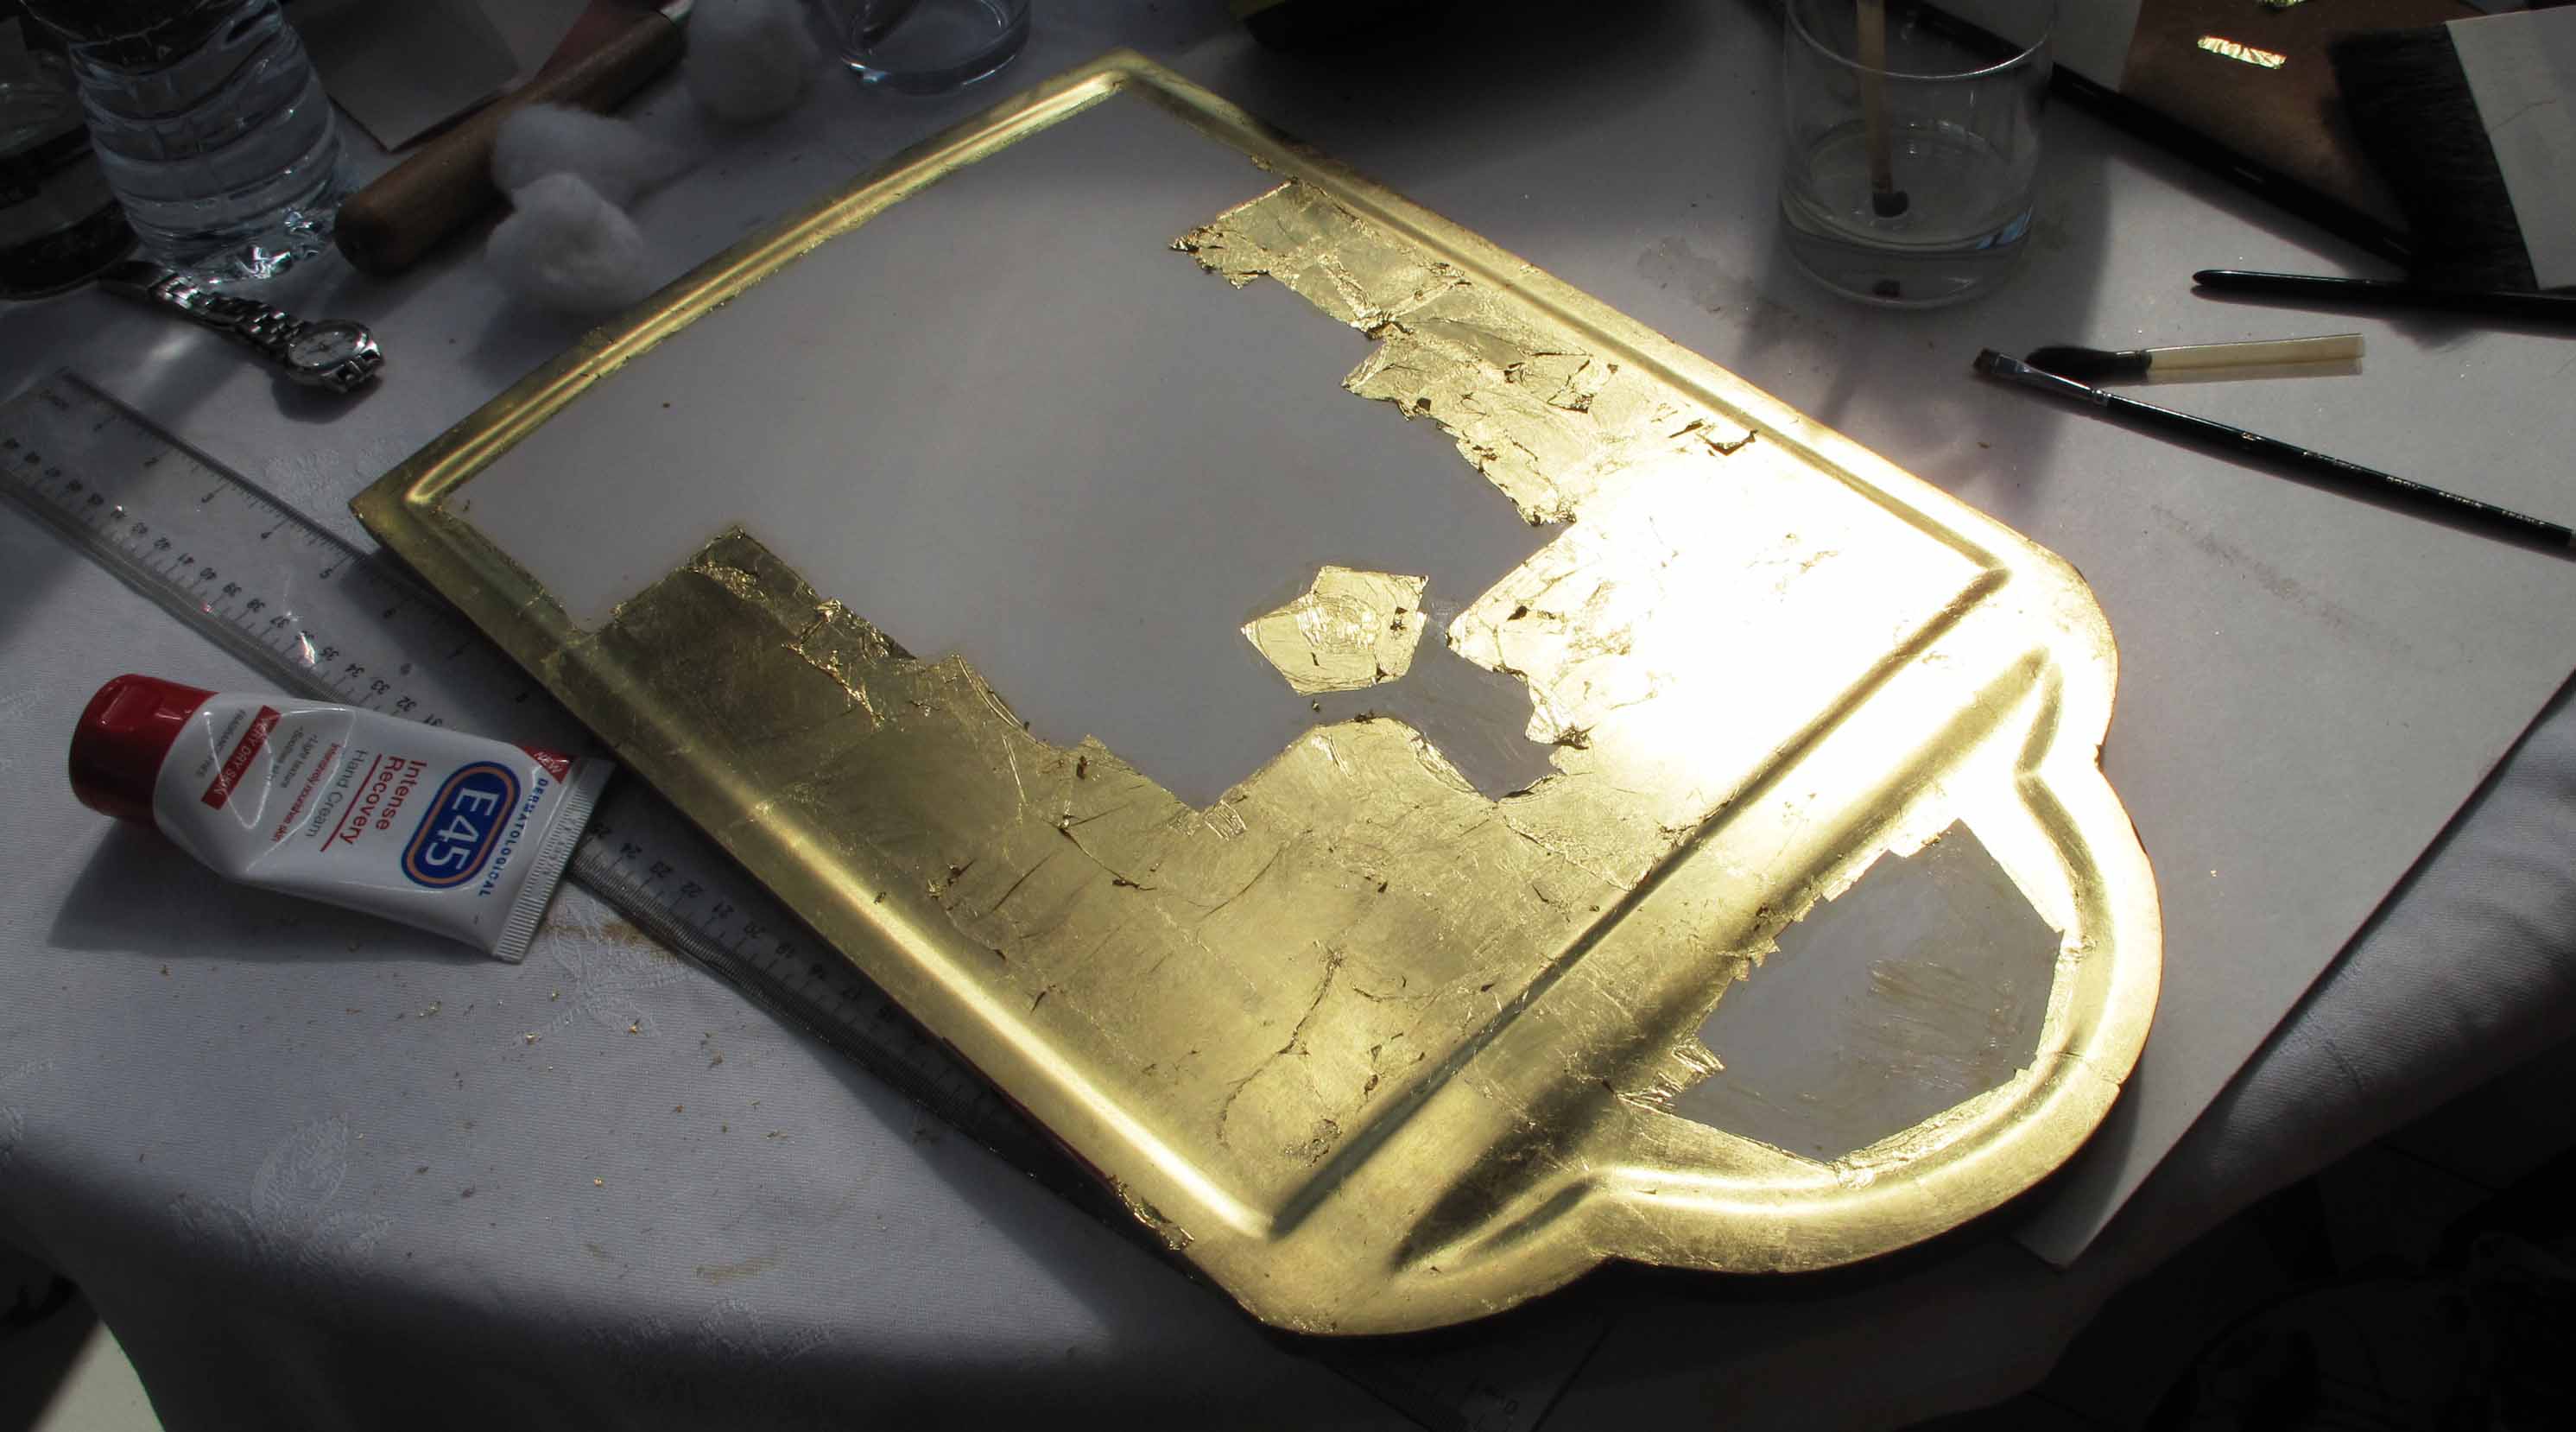
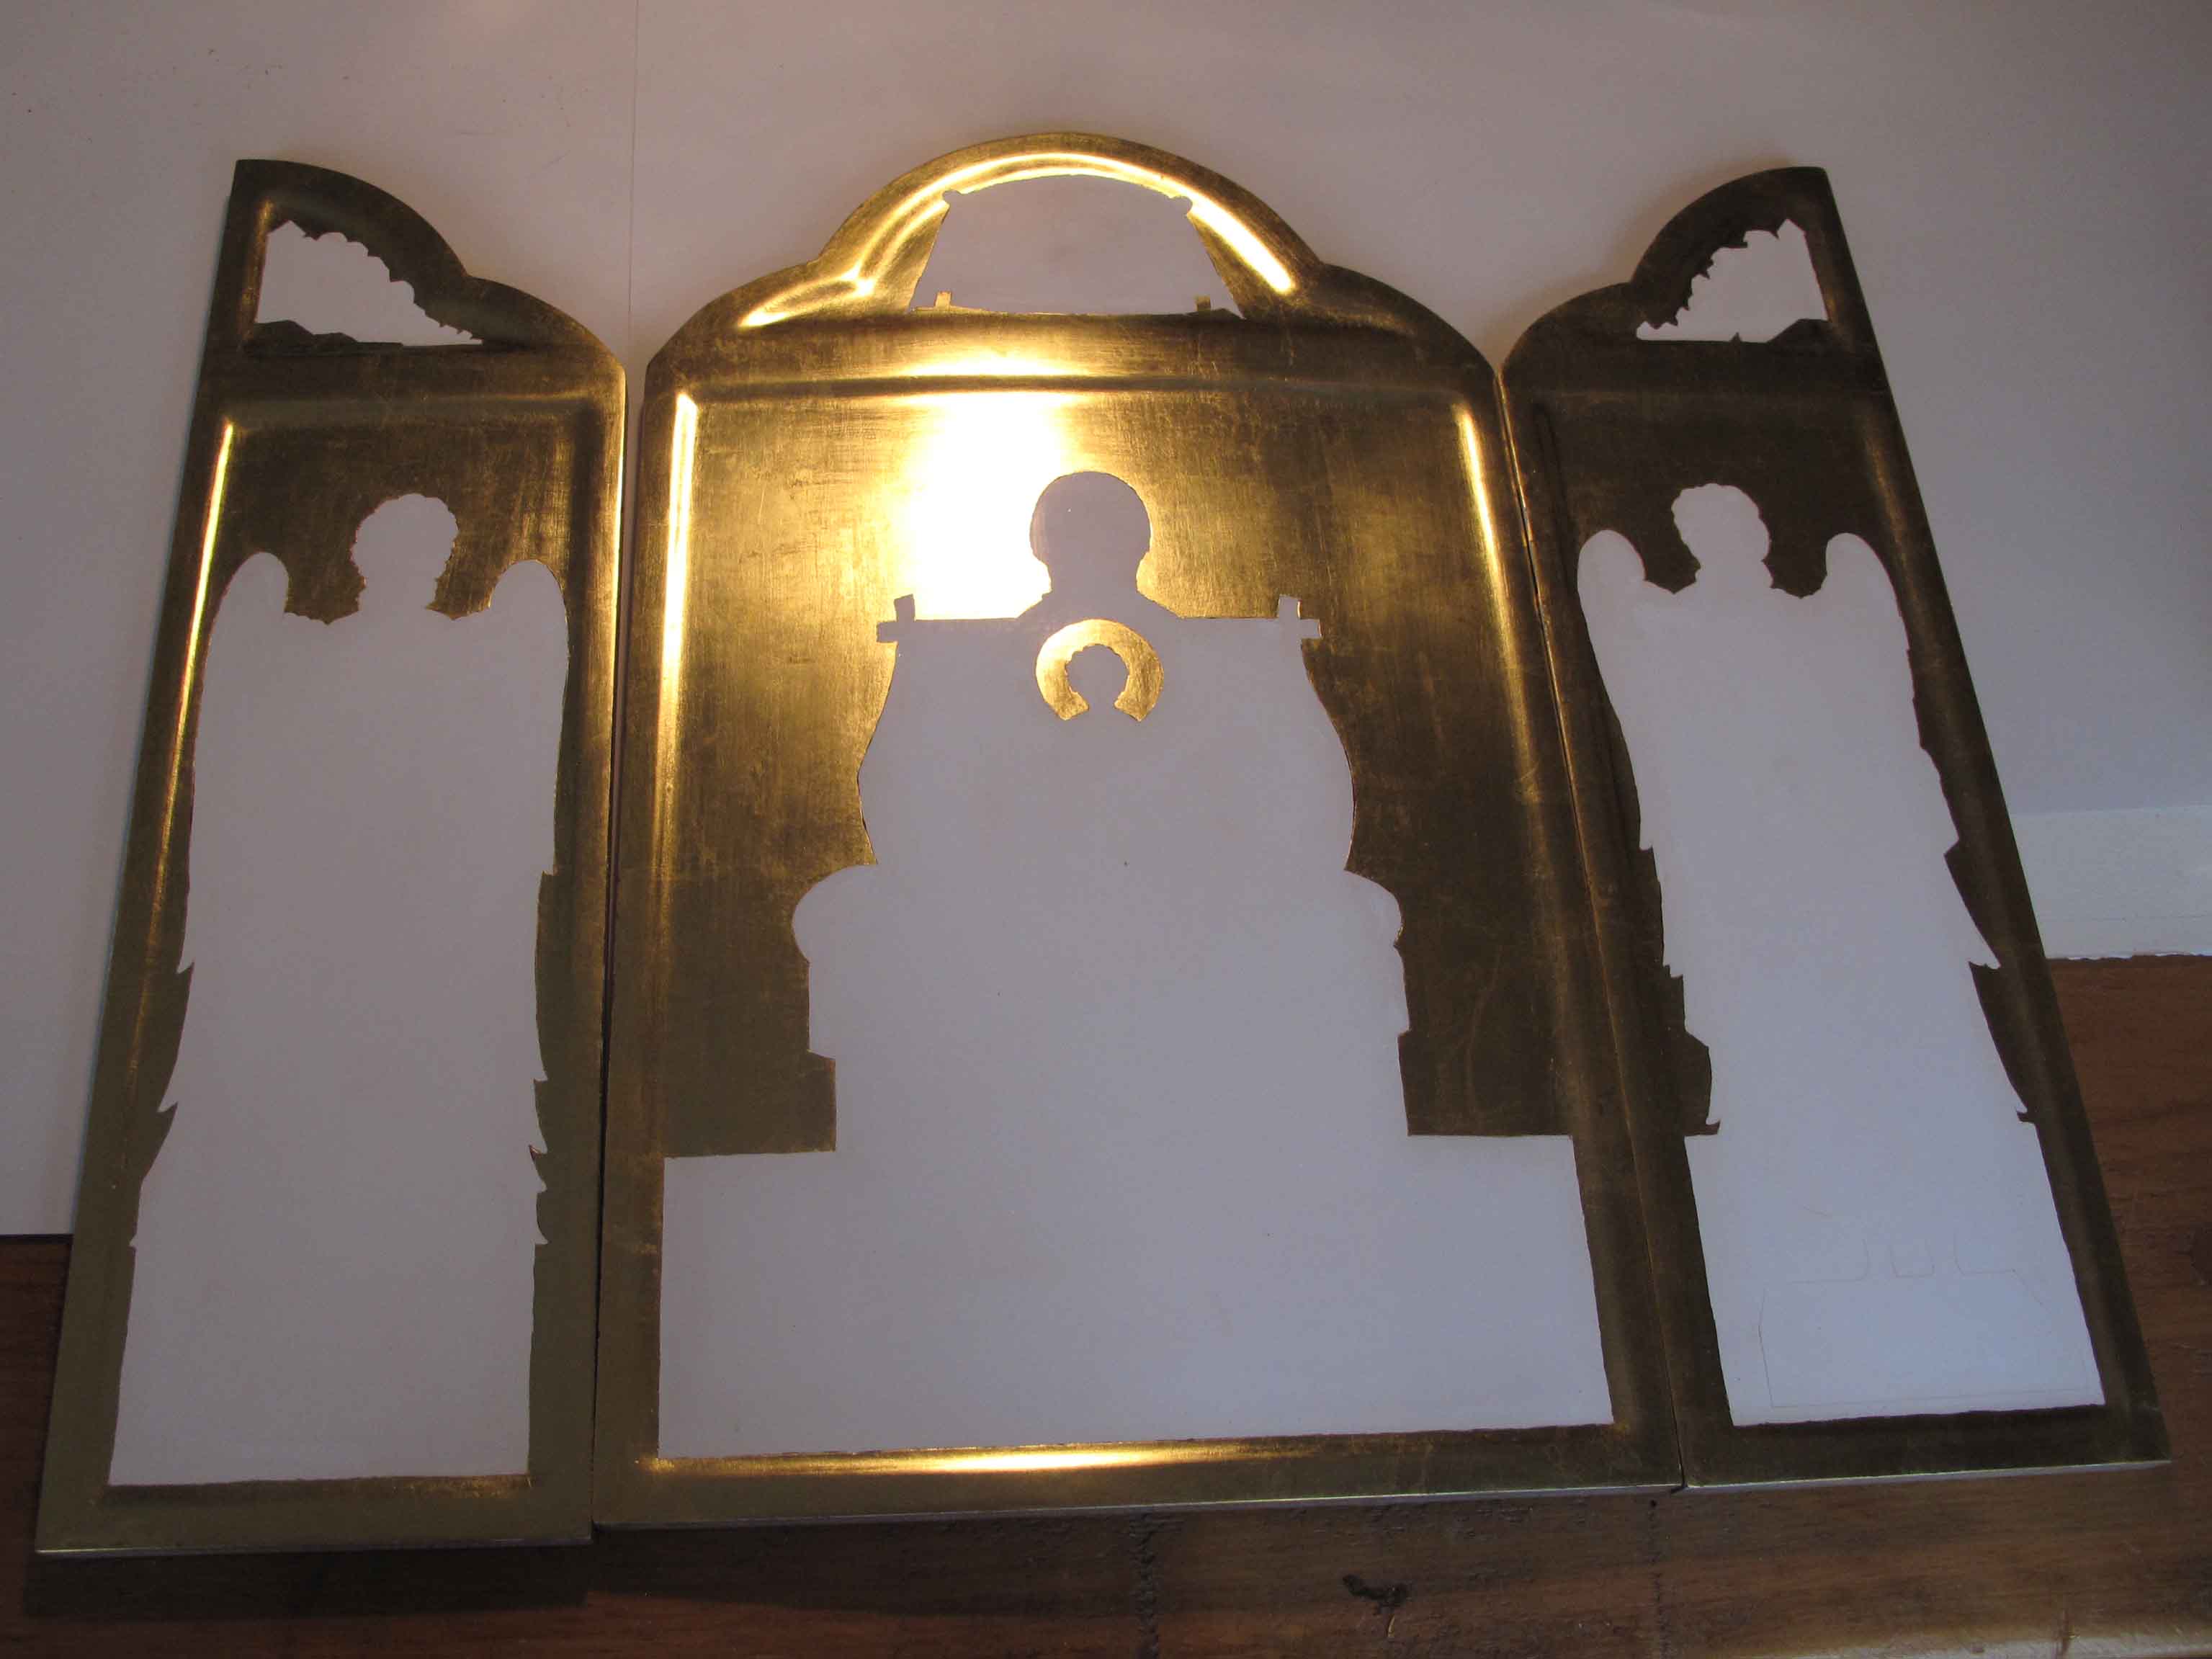
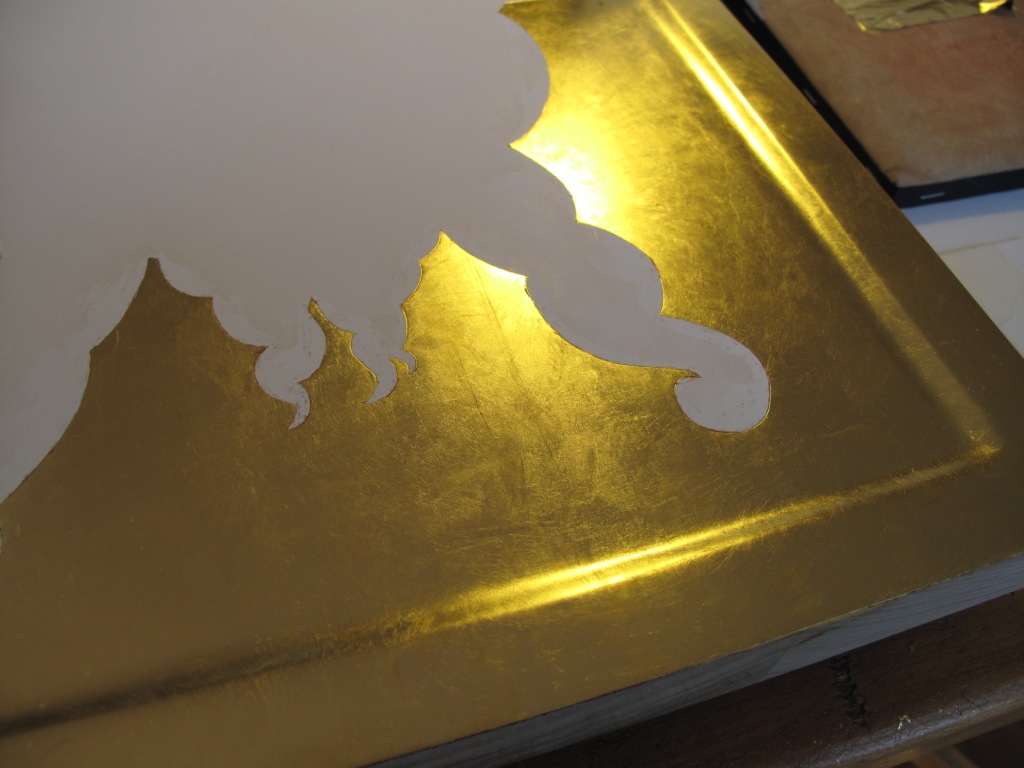
Outline of figures added and oil gilding applied.

I transferred the outlines from my line drawing in red ochre then applied several layers of acrylic gold size (with some red ochre added to provide a contrast against the gesso) to adhere the transfer gold.

I then applied the base colours, including the richly coloured Caput Mortum for the background.

Ground terre verte azurite on icon board

Building up the layers of garment colours

7 a Magdalene and disciples st Albans

Gritty pigment

Some of my pigments are quite gritty. I like this varied texture on backgrounds but it’s hopeless to work with on tiny faces and details so I ground them up with a slab and muller and a spoon of water until they were very smooth.

The blue I used was a gift from my son who has recently been to Japan. While he was there he went to the new shop ‘Pigment‘ especially to buy me some! Here’s a sample of Azurite which I ground up and by levigating the mix I ground out three beautiful blues.

grinding up pigment from Tokyo PIGMENT

Kyojyo Gosu 6 Azurite from ‘Pigment’ in Tokyo

As the terre verte was too gritty to underpaint the small features on the faces, I used black and yellow to make green instead.

Underpainting faces

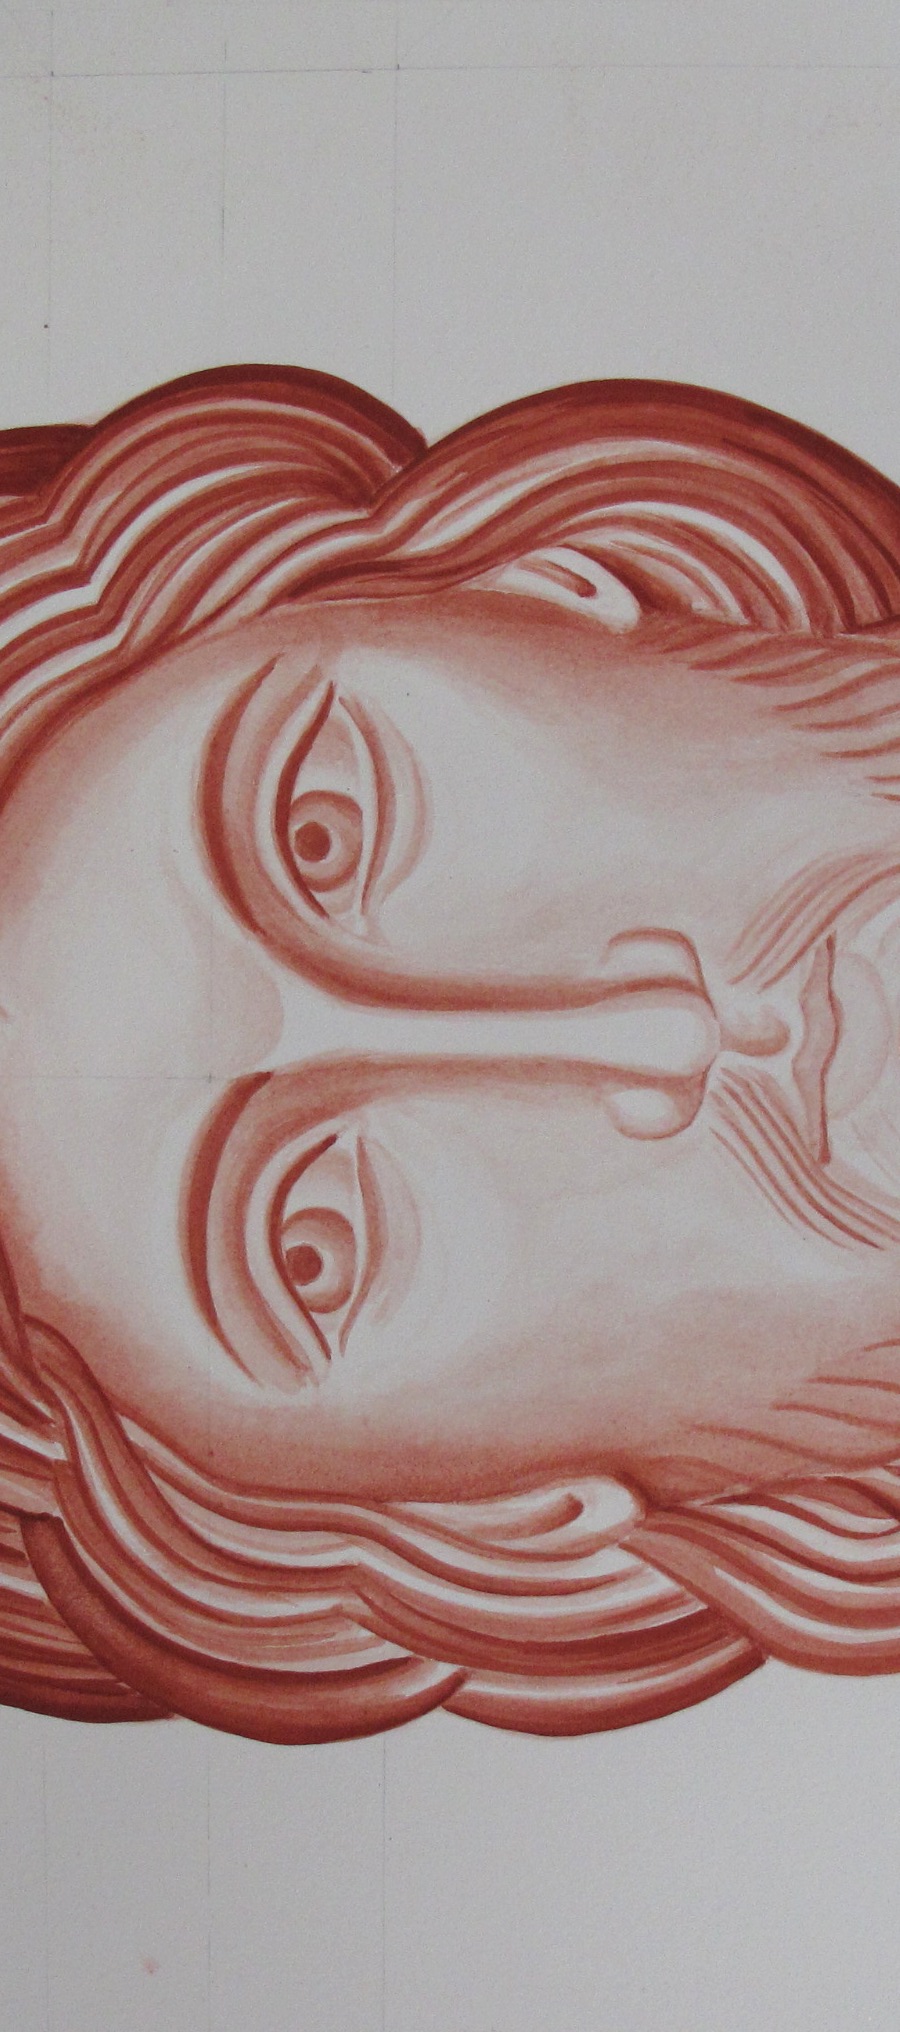
Underpainting faces using Maimeri yellow and a touch of ivory black

applying membrane to face painting

Adding the membrane to faces using maimeri yellow and white, a dash of red added later

6 face highlights

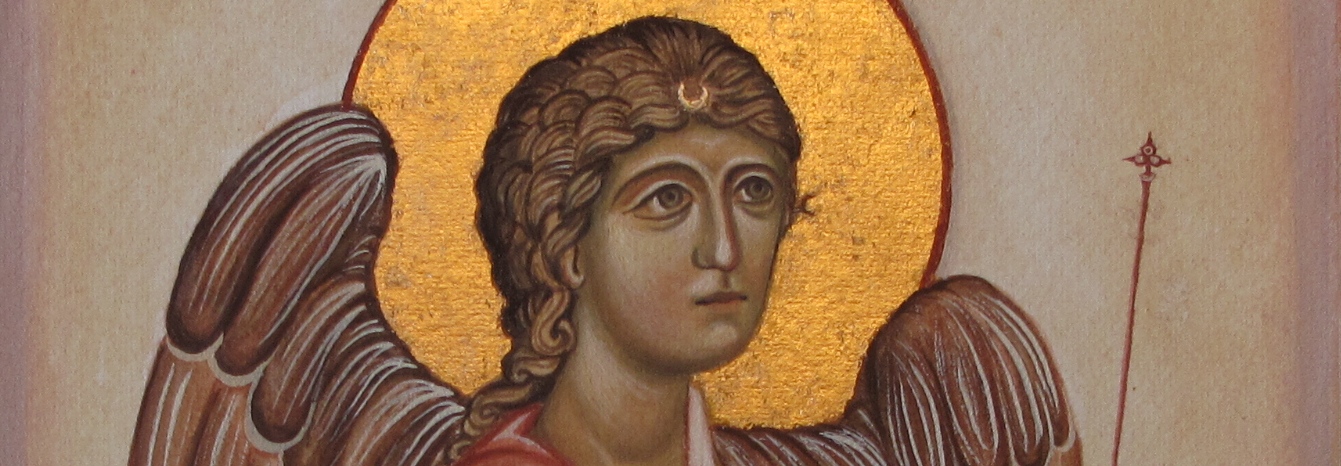
Building up highlights on the faces and adding the hair

The faces still seemed too pale so I added a few washes of French Ochre Havanna (also called Warm Ochre). Looking at the faces and hair this close up I can see there is still some work needed.

7 final faces

Deepening the shadows, adding vermillion to the eyes and white highlights

I added several layers of malachite over the terre verte to give this rich green.

8 St ALbans Psalter Magdalene announces news

The almost finished article.

To see the original manuscript, please visit the St Albans’s Psalter here and this icon is now available to buy from my Etsy shop here.

Wishing you all a blessed and happy Easter and as Mary Magdalene first said: ‘He is Risen!’

Thanks for reading

Ronnie

P.S. Prints and cards are now available of this icon from Smith York Printer


Hallowed be thy Name

Lettering on handmade book

Hand made book covers for the dissertation showing four different manuscript lettering styles.

Hello icon friends,

Part of  the icon course includes submitting a dissertation. This sounded quite daunting but Aidan has been great at keeping this in perspective explaining that it is really just an essay on a subject which we are passionate about – something we can share with the rest of the students. I will be sharing my subject in stages here and will start off with an overview of my subject.

I was encouraged early on in the course when Aidan spoke about illuminated manuscripts as a rich resource for western iconongraphers. I have loved calligraphy and illuminated manuscripts since I was at school and so my dissertation subject was waiting in the wings: ‘A comparative study of four illuminated manuscripts as a resource for lettering on contemporary western icons’.

Hand painted illuminated letters

Finished letter samples and bound lettering books

The best part for me about this subject was when, on the very first day of the course, Aidan explained how it is the name on an icon that makes it an icon:

We venerate the icon that bears the name”.

It struck me how important it was to apply the same care to naming the icon as given to painting the image itself. When we are named in Baptism, the sacrament leaves an indelible spiritual mark of belonging to Christ on the soul and thus our chosen name becomes an intrinsic part of who we are. Solomon declared that:

“A good name is rather to be chosen than great riches” (Prov. 22:1).

The significance of naming is a wonderfully rich subject but my dissertation is a practical one based on writing out alphabets interpreted from the lettering of four manuscripts, which I will briefly touch on here. I will go through each manuscript study in stages in subsequent posts.

The first manuscript I chose was a European example of an early 8th century uncial hand, taken from an unidentified manuscript from Mont St Michel which I named ‘Avranches‘ for the purpose of my study:

Avranches manuscript

Example of lettering from the Avranches manuscript

Avranches lettering

Samples of gilded lettering in the ‘Avranches’ style and the hand bound book of lettering.

Gilded letter G from Avranches

Gilded example of letter G from the ‘Avranches’ manuscript.

The second is the Anglo-Saxon Benedictional of St Aethelwold, written in Winchester 963-984, by the scribe Godeman.

gilded lettering

Examples of gilded letters and hand bound book of Aethelwold lettering

Aethelwold benedictional

Gilding the letter X from the Aethelwold Benedictional.

Gilded letter sample on heavyweight, hot-pressed watercolour paper, using gesso made from the recipe when I attended Patricia Lovett’s Gilding and Illumination skills course. Vellum makes the ideal surface for gilded letters but these are lettering studies rather than finished pieces.

Gilded letter X

Gilded letter X from the Aethelwold Benedicitonal

Gilded letters D and S

Letters D and S in the Aethelwold style

The third and fourth manuscripts were written about the same time but one written in Bury St Edmonds the other in the Holy Land – the latter providing context for my study.

lettering of the Bury Bible

Bury Lettering on the hand bound book of letters

The Bury Bible is an example of High Romanesque style, written c.1130-1135 AD, and is a spectacular work of art by the hand of Master Hugo, considered one of the earliest professionally documented artists in England.

letter A gilded in 23 ct gold leaf

Gilded letter A from the Bury Bible

letter N Bury Bible

Illuminated Letter N based on the Bury Bible manuscript

The Melisende Psalter was my fourth and final study.

melisend Psalter pic of dissertation work

Gilded letters and hand bound book of lettering based on the Melisende Psalter

It is written in the style known as ‘protogothic’ by a group of six artists and a scribe, thought to be of French or Italian origin, in the scriptorium of the Monastery of the Holy Sepulchre, Jerusalem, between 1134 and 1143 not long before the second crusade.

Illuminated letter A

Letter A from the Melisende Psalter, painted with Azurite and Terre Verte.

gilded letter B

Here’s B taken from the Melisende Psalter – painted in egg tempera with lapiz lazuli and terre verte.

My choice was also influenced by the availability of clear letter examples within the manuscripts. I was looking for enough images of each letter to study and compose an alphabet in the spirit of the original. That’s more than enough for now. Hope it has sparked a little interest in the subject!

letter C

Last example from the Melisende Psalter – letter C

Before I sign off,  I would like to say a big thank you to those who take the trouble to get in touch. I really appreciate hearing from you:-)

Thanks for reading.

Ronnie

Gilding the Triptych

gilding a triptcyh

Gilding a triptych

I’d like to share a few thoughts following my attempts to water gild the triptych. It’s Spring here in UK and I love the lighter days and milder weather. I opted to work in the conservatory for the even light and to be immersed in the burst of new green in the garden.  I often have cold hands so the warmth in here is wonderful for loosening up my fingers ready for gilding. It’s better to gild in cool, damp weather but I thought I might just get away with it being mild – nope, I didnt! So here is my first tip: if gilding a large area in warmer weather, do it in two or three stages as the bole dries out so quickly. You need time to burnish the gold whilst the bole is still relatively soft soon after double gilding. With hindsight, I should have gilded and burnished all the raised areas as one complete area first, then gilded and burnished all the flat areas afterwards.

raised border gilding

Gilding the Kivotos

Masking out the gesso was helpful as carefully scraping the gold off the gesso after gilding can take an hour or so. For the fiddly areas, I used a sharp scalpel to score along the edges in the same way as I did with the bole (See previous post). The other thing which helped was thirteen layers of bole. These were just enough to cover the tiny air holes in the gesso and the patches of scrim which had shown through. If you are about to gild, then I can recommend Aidan Hart’s class demonstration video clip here on You Tube.

gilding a door to the icon triptych

Double gilding over the first layer of loose gold on one of the doors

Masking fluid saves time scraping gold from gesso

Masking fluid saves time scraping gold from gesso

gilding kit

Some ingredients for gilding – cat drinking the water for brush-cleaning is optional!

A phone (switched off) makes a handy 10mm/half inch prop to lift the icon board so the water flows away from previously gilded areas. Hand cream is useful to rub on the back of your hand before brushing the squirrel tip across – this helps the gold leaf stick to the tip. Vodka is added to the gilding mix together with Buxton water (PH neutral). I used gold leaf, 23 and 3/4 carat loose, extra thick from Wrights of Lymm, Cheshire. The small jar contains size prepared from rabbit skin glue granules. Other gilding kit consists of a squirrel mop ( the large brush to the top right), a gilder’s cushion and gilder’s knife to cut the gold leaf. Having a cat in the midst is not ideal as hairs blow into the mix. However, at the moment our cat is still out-of-sorts having recently lost her companion and won’t settle unless she has company nearby. If you are about to water gild an icon – here is our class crib sheet of Gilders’ Tips which may help.

Gilding complete

Gilding complete

This actually looks a lot better than it does in real life but I am glad the gilding is done. Some parts are smooth, some pretty rough in spite of a solid week’s work. Here’s a close-up on the burnishing marks as a result of letting it dry out too much:

Burnishing marks

Burnishing marks

Once again, thanks for reading and all the best with your own endeavours. Ronnie

An Archangel for Christmas

Archangel Gabriel on Watercolour Paper.

egg tempera painting

Archangel Gabriel on watercolour paper

Christmas greetings icon friends!

A few lines to say thank you for your companionship during my first year of icon painting. It has been lovely to have your quiet support and interest encouraging me to keep on posting and writing up notes etc!

There are a few more video clips of Aidan Hart’s in-class demonstrations over on You Tube and I have written up some supporting notes to go with them. These are not direct transcripts, simply notes to help as you try out the various stages of painting.

https://www.youtube.com/watch?v=N3a6puiMDuQ Aidan Hart demonstrates underpainting for the Membrane Technique Click here for Notes

https://www.youtube.com/watch?v=XaSi-WVHGaY Aidan Hart demonstrates applying flesh membrane to icon bust Click here for Notes

https://www.youtube.com/watch?v=Hr4R8BzMpPc Shadows and highlights on garments using membrane technique Click here for Notes

https://www.youtube.com/watch?v=CiFkJrsDS1s Aidan Hart demonstrating halos

https://www.youtube.com/watch?v=mFG-XxPqiSI Aidan Hart demonstrates painting Mandilion hair

https://www.youtube.com/watch?v=QbwE0QY1aOw Aidan Hart demonstrates painting garments Click here for Notes

I have enjoyed the monochrome icon studies on watercolour paper and thought I would have another go at the Archangel Gabriel based on the Annunciation of Ustyug. I stretched some Fabriano Artistico paper and painted using the membrane technique. The colours are much softer on paper – lines are not quite as crisp unless you go over them several times. However, it is a great way of practicing if you haven’t got a board prepared.

1 Angel gabriel study

Underpainting: the face is in Terre Verte and a touch of Yellow Ochre Maimeri, garments and wings in a mix of English red ochre, French ochre Sahara and Avana.

Yellow ochre Maimeri eith titanium white and red ochre light

Membrane applied to flesh parts.

Building up the hair and facial highlights.

4 Angel Gabriel study

Highlights added to wings and sleeves

Preparing to gild

Preparing to gild using Roberson’s gilders size – applied over the halo which has undercoat in red ochre.

Gilding the halo

Gilding the halo. Applying final facial highlights

9 Complete Angel Gabriel study

Finished angel with halo, staff and lettering.

It is a better attempt than my last one but there is a long way to go before I become fluent and produce anything nearly as elegant as the original. All the same, it comes with my very best wishes for a happy, peaceful and blessed Christmas wherever you are in the world. Thanks for reading.

Happy Christmas, Ronnie

PS…Some years later and I did revisit some of the finer details on Archangel Gabriel’s face – around the upper lip. I am now happy with this and it is listed here in my Etsy shop

Gilders’ Tips

scratched gilding

Thumbs down for the gilding. Mixing water and oil gilding too difficult to troubleshoot!

Hello Icon Friends, I have been quiet on the blog, sparing you the details of my gilding efforts until I had something useful to share.  I deliberately chose to work on bigger boards as I thought it would quickly show up all the places where I could go adrift. It did just that. Lesson one. Start with a small board, or even better, start with a practice board as Lee Harvey suggests. Water gilding is a difficult skill to master! Some of the students have made notes on their tips which you can read about here: Gilders Tips. Anyway, I wasn’t too pleased with the water gilding that I did in class for my mandilion so I sanded the lot off and applied 18 fresh layers of bole and started again – I think my bole consistency was a bit too thin. Once it had dried, I sanded and polished the bole and was really encouraged when I managed to get a deep shine. Good so far!

Bole layers

Fresh layers of bole applied to support water gilding – allow it to dry at least 24hrs before sanding and polishing.

However, the water gilding process got the better of me and even after quadruple gilding, four books of gold and five days solid of faulting and polishing, the results are still average! The final appearance looks much the same as one layer of oil gilding and only slightly better than what I had sanded off in the first place.

water gilding icon

Water gilding the mandilion

Third attempt at the monochrome of Christ for the Mandilion

Third attempt at the monochrome of Christ for the Mandilion

I also painted my third attempt at the monochromes of Christ (for the Mandilion) and the Virgin, which I was reasonably happy with, so all set to begin the transfer on to the gessoed icon boards next session. My next post will include links to another set of You Tube clips of Aidan Hart demonstrating the different stages of the membrane technique. My final note is to say a couple of farewells. We all wish our fellow student, Susan O all the very best. We will miss you on the course Susan and hope that you keep in touch. A fond farewell to my beloved pet Norman. He was a larger than life character who once trampled over my keyboard typing in the letters Vatopedi as he went and inadvertently googling images of a Greek Orthodox Monastery. He recently got sick with secondary poisoning and much as I tried to keep him indoors (shown here) this weekend he got killed on the road.

Norman the cat

Norman 1.8.13 to 27.9.14 – pictured after he sniffed up a leaf of gold which of course ended up down the hatch!

We are only ever their custodians and I am grateful for the delight he brought in his short life with us. Thanks for reading.

Gilding Demonstrations with Aidan Hart

icon diploma students

Sanding our icon boards

In this session, Aidan explained and demonstrated the two different techniques for gilding icons: water and oil gilding.

Two of our fellow students were absent due to close family bereavements so this time round I have filmed the demonstrations as gilding is quite tricky and this way, we can all refer back to the demonstrations later.

The following clips capture parts of the different stages of both gilding processes. The videos are pretty basic but if we watch them a few times and then read Aidan’s instructions in his book, they may help us on our way to mastering these techniques!

Homework notes etc will be on the next post.

I hope that the top link below leads to the overall play list, and the others to the individual clips.

http://www.youtube.com/playlist?list=PLFzuzMtzpZZhjM1ldgGDlyFm9rF7221rW

1 Aidan Hart applying shellac for oil gilding:  http://youtu.be/7DrT1bbu0Lk

2 Aidan Hart applying bole for water gilding 1: http://youtu.be/J-dj_XkzKi0

3 Aidan Hart applying bole for water gilding 2: http://youtu.be/y4F7h21qVBI

4 Aidan Hart applying bole for water gilding part 3: http://youtu.be/H7068I-OvI4

5 Sand sand sanding the boards!: http://youtu.be/BcaoYeJTH0Q

6  Aidan Hart applying gold leaf for water gilding  https://www.youtube.com/watch?v=0etKCemxQYg

7 Aidan Hart burnishing gold (water gilding) http://youtu.be/9KBi92P3euM

8 Aidan Hart faulting water gilding  http://youtu.be/s6CoUJoLKYs

9 Laying size for oil gilding  http://youtu.be/gSaqvVm-xJQ

10  Removing gold from gesso  http://youtu.be/7R-c4UMFMUA

11 Oil gilding flat board  http://youtu.be/JVdI7PXZ14A

12 oil gilding kivotos  http://youtu.be/NSxTfUPISJM

13 Grinding Azurite pigment http://youtu.be/y-FHvAxwg9w