Icon Diploma Student

Learning to see with the eye of the heart

Posts tagged ‘Aidan Hart’

Advent one: What shall we offer?

It’s Advent as I write and timely to reflect on some of the foundation work for the Festal Nativity Icon which I worked on in the third and final year of the diploma course (2013-16) with Aidan Hart. I know that this is a silly-busy time of year for many of us but you don’t have to read it now – it’s here for later!

Detail from icon study on paper acknowledging the prototpye by Gabriel Toma Chituc

Before I get started, I also want to say that the British Association of Iconographers have an online exhibition ‘Icons Emerging from Lockdown 2021’ sharing the work of over 46 icon painters. The work is worth leaving this page right away and having a look!

Back to the Nativity icon – In this post, I want to look at the starting point of the icon – looking at the choices and decisions behind the composition.

We were invited to work on a festal icon of our choice and to design a new composition which emphasised a particular aspect of the feast. I chose the Nativity – with the theme of praise and thanksgiving so beautifully expressed here in the Festal Menaion – Nativity Vespers:

Lettering in mapping pen and gold gouache on paper

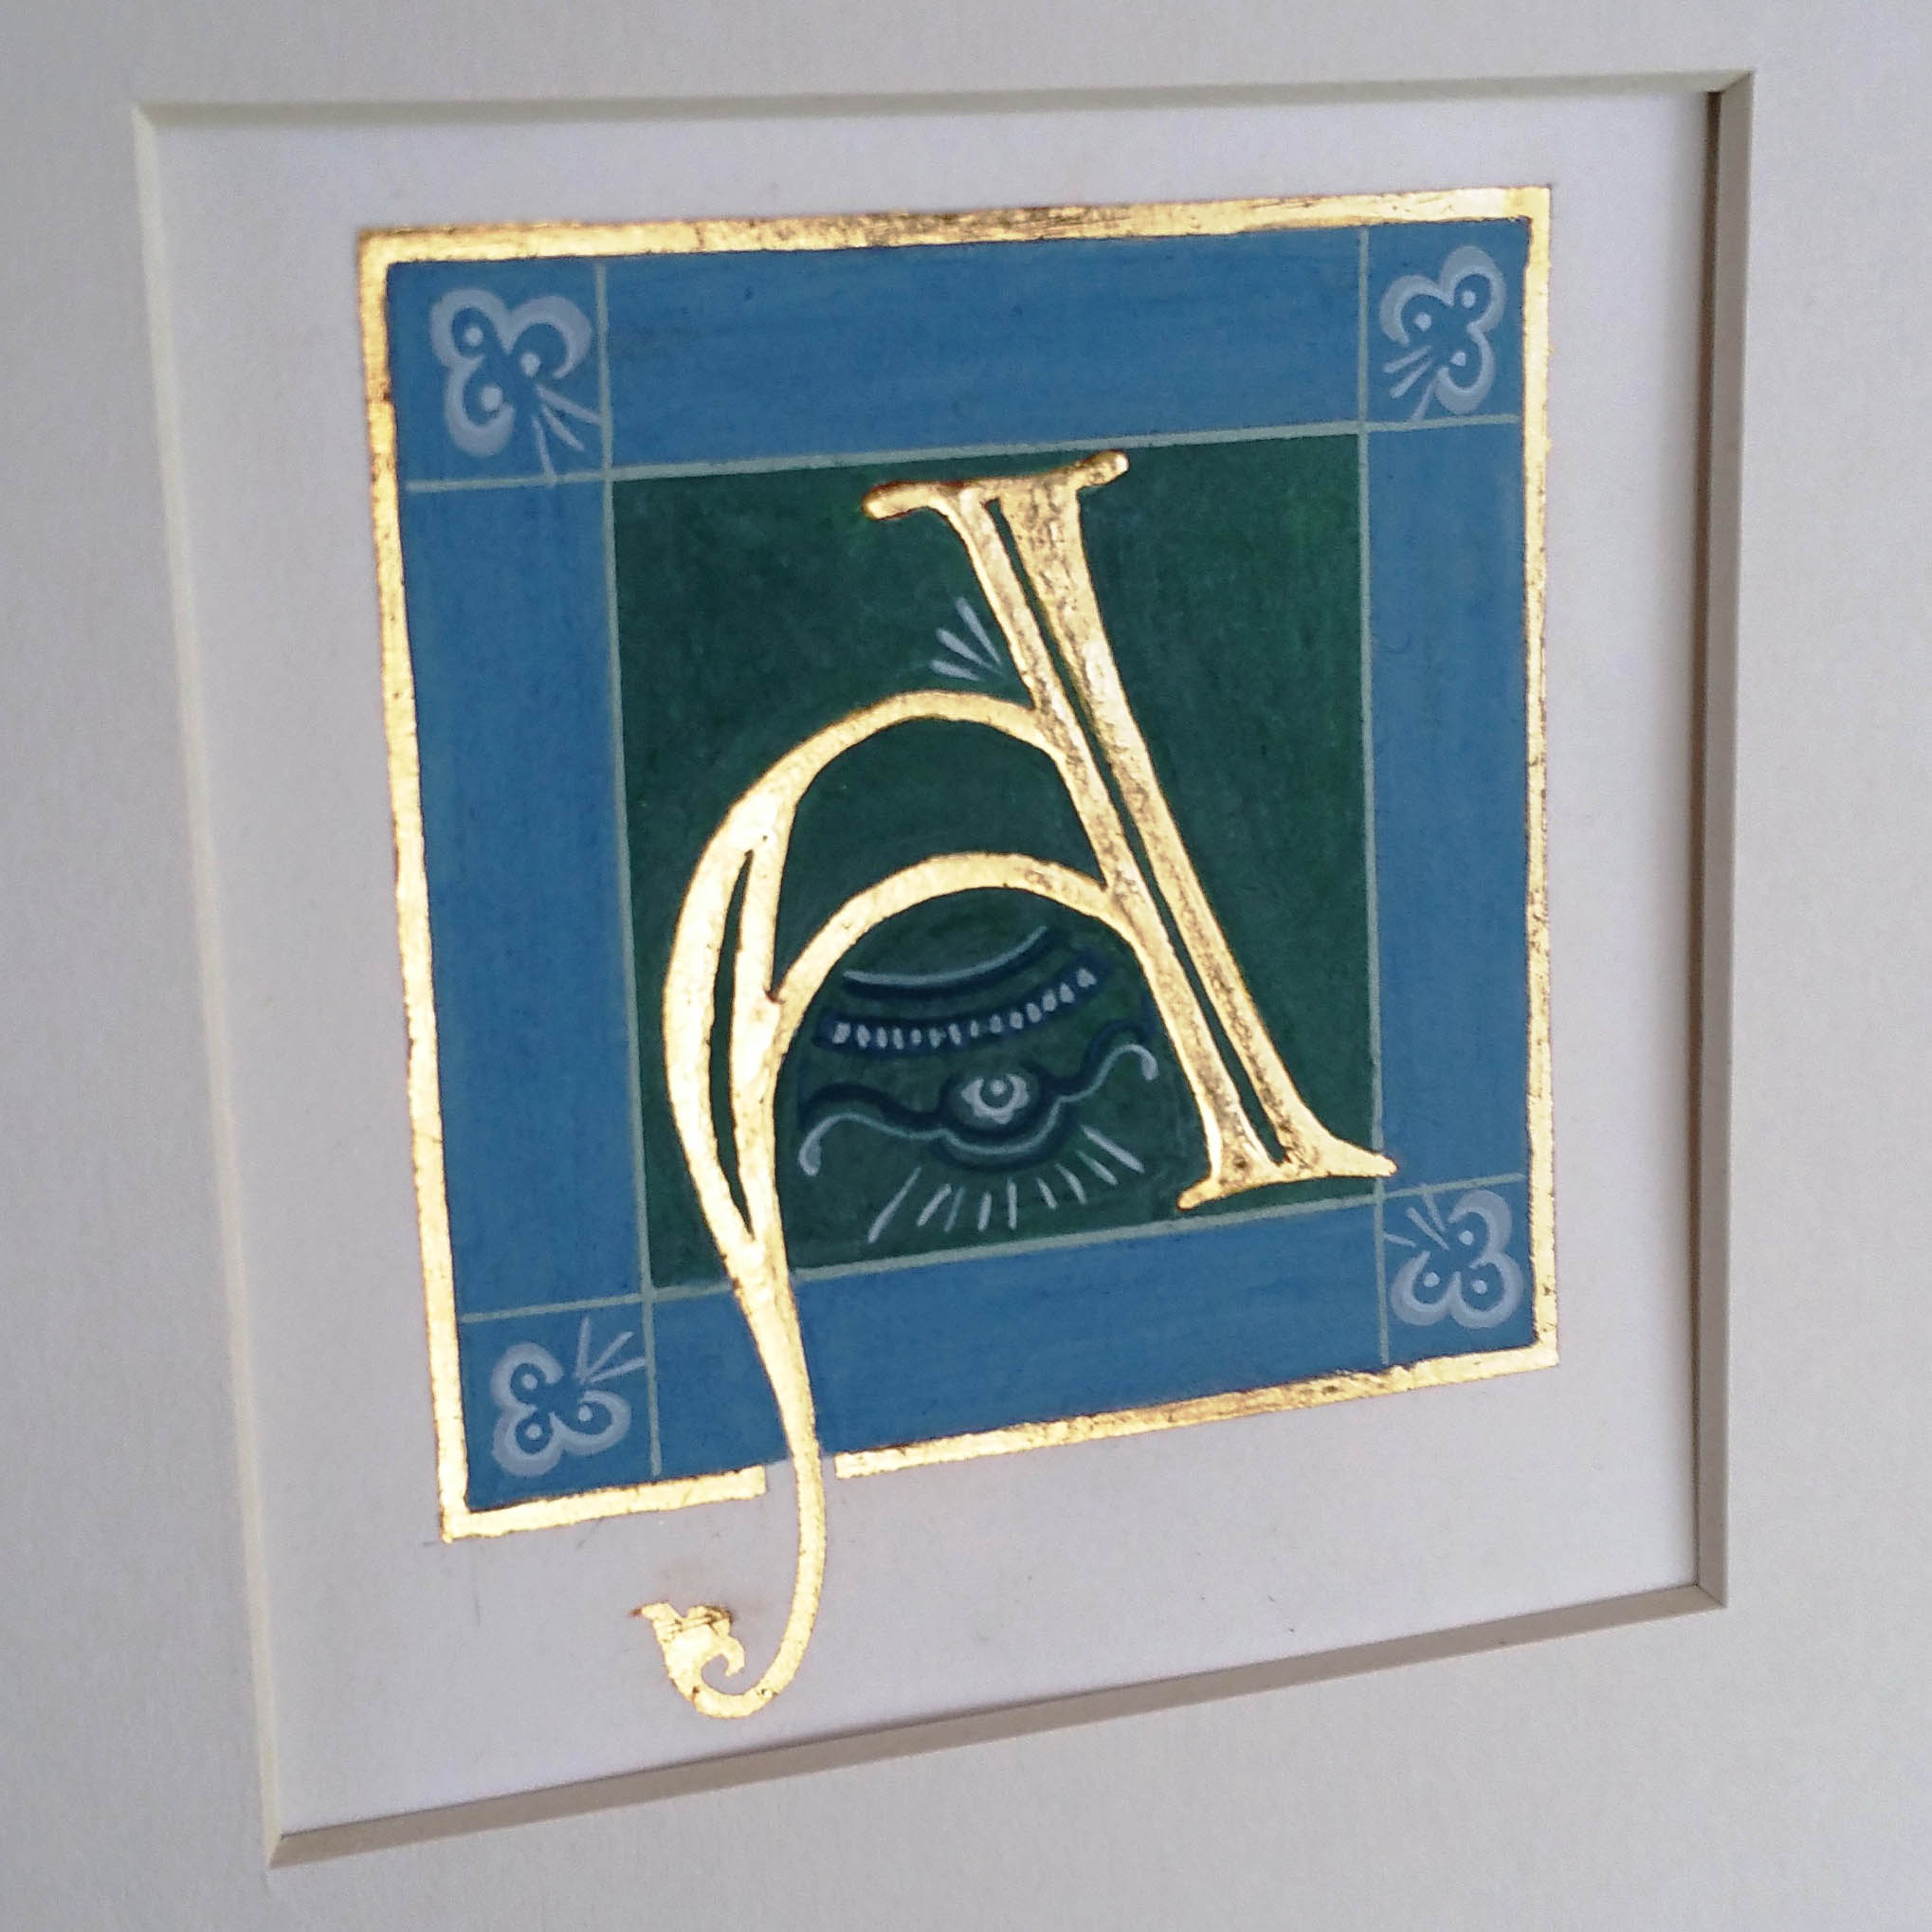
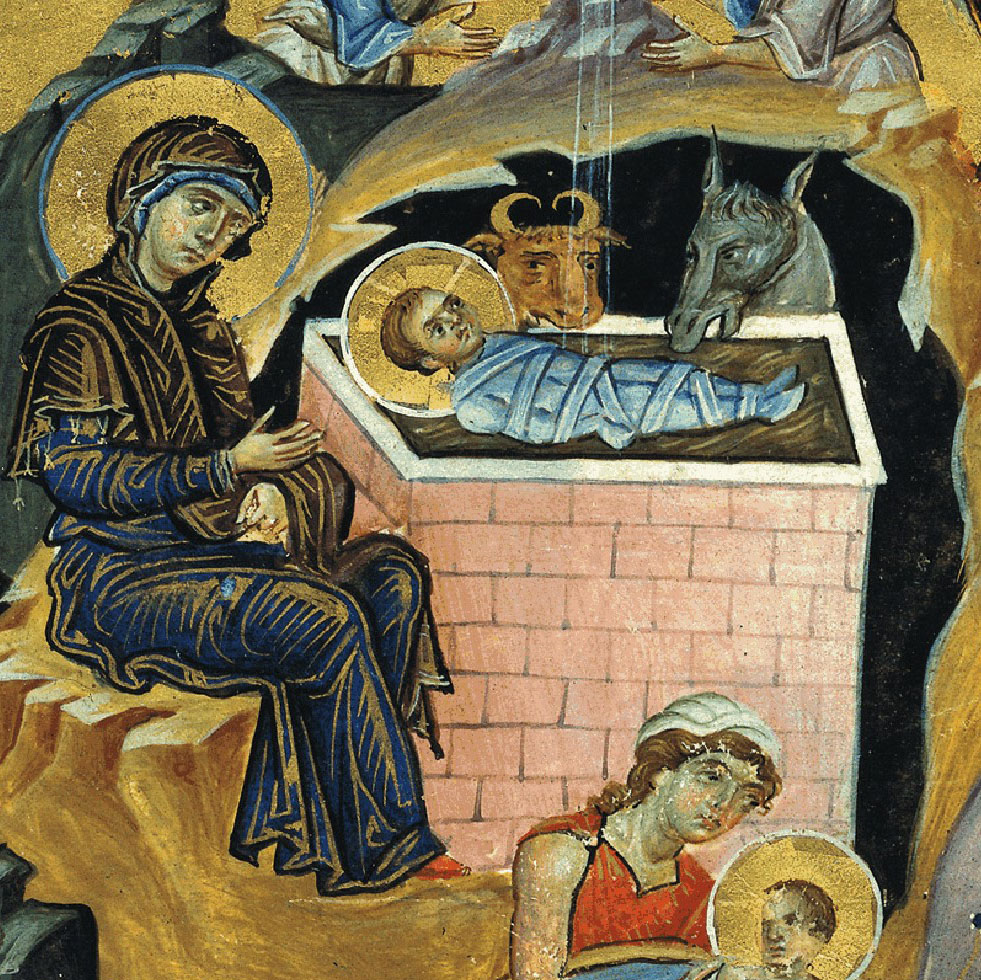
We were encouraged to study good examples of our chosen festal icon referring to frescos and manuscripts. At first, the variety of prototypes felt overwhelming (just google ‘orthodox nativity icon‘) but I have a particular love of manuscripts and one in particular spoke to me with its beautiful simplicity – the Armenian Nativity by Toros Roslin, painted in the 13th century, so much so that I painted a reproduction on vellum (blog post here).

Egg tempera painting of the nativity on vellum
Armenian Nativity, from the Toros Roslin manuscript, 13thC egg tempera painted on vellum

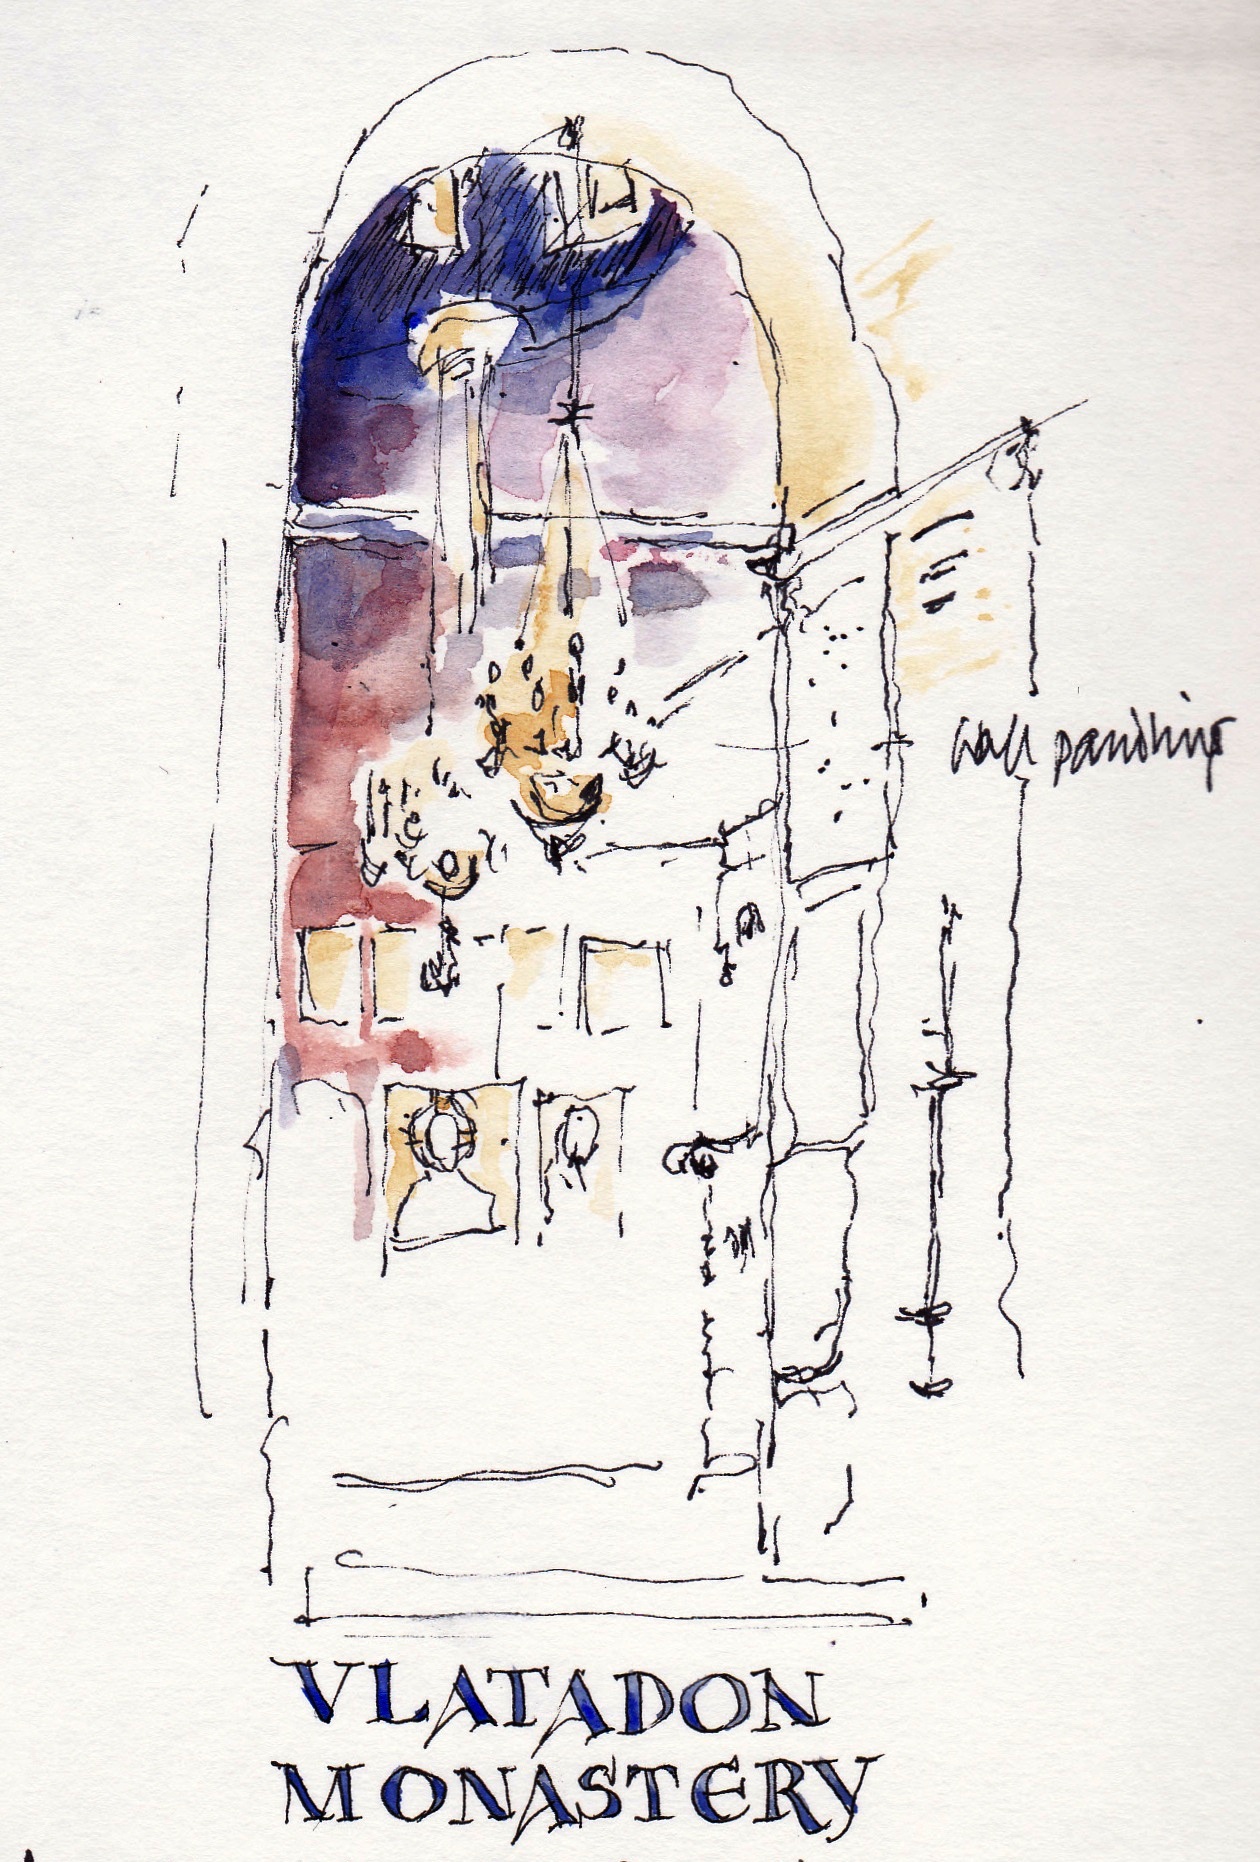
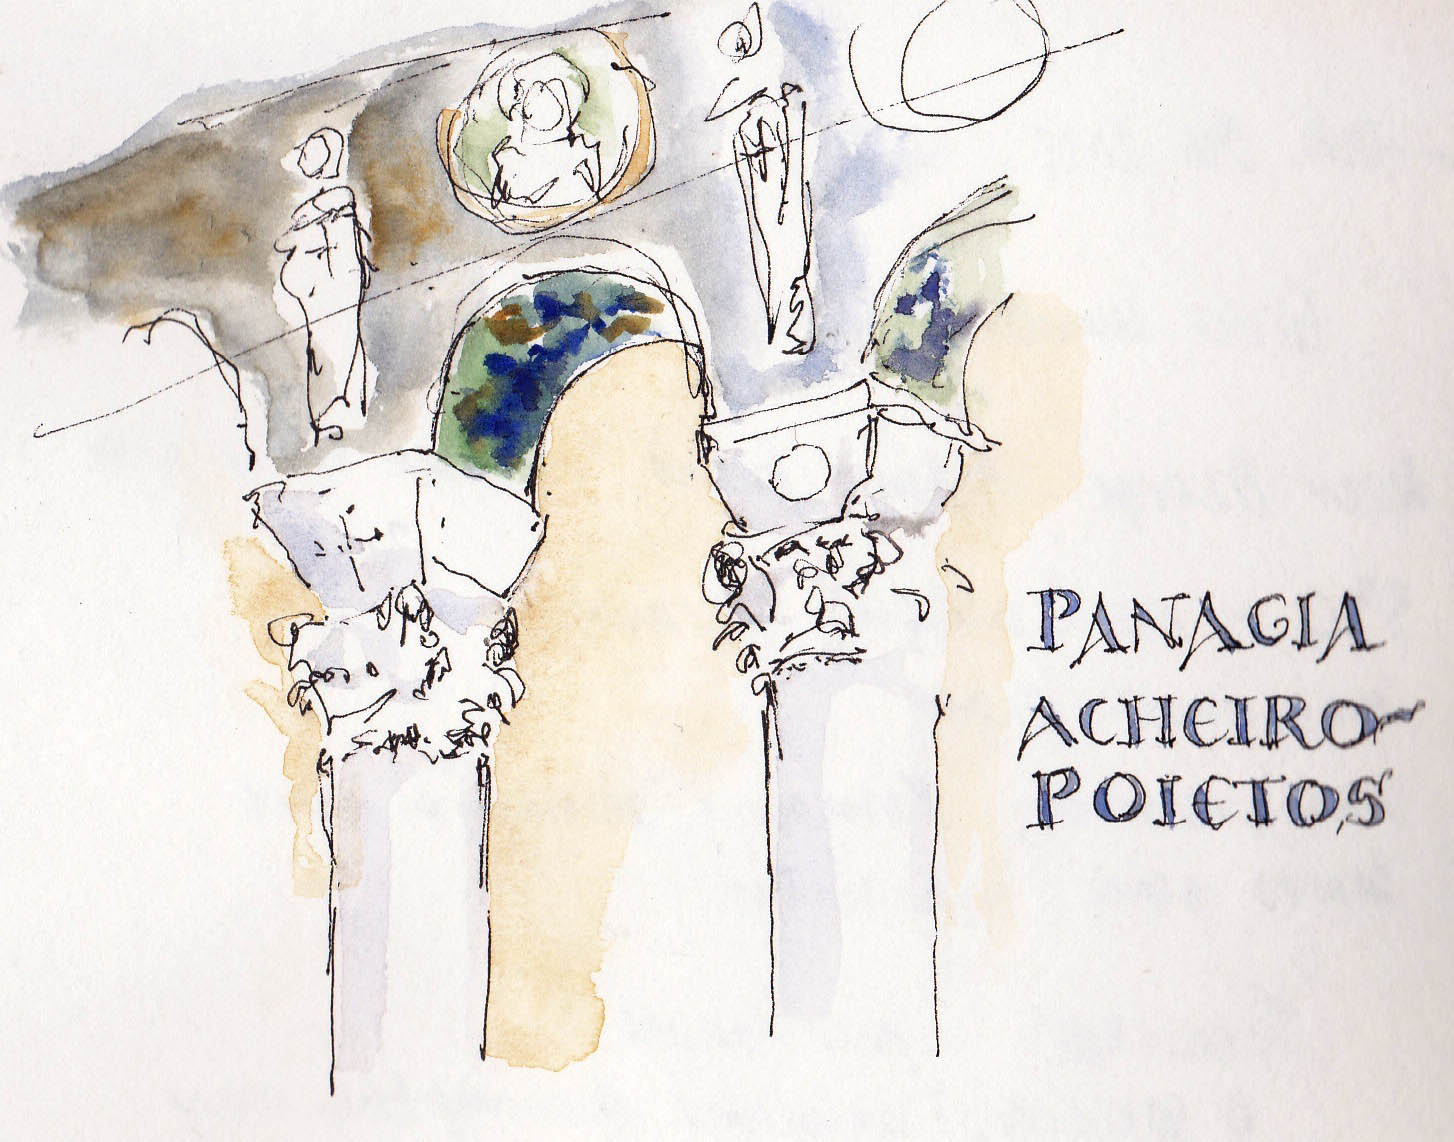
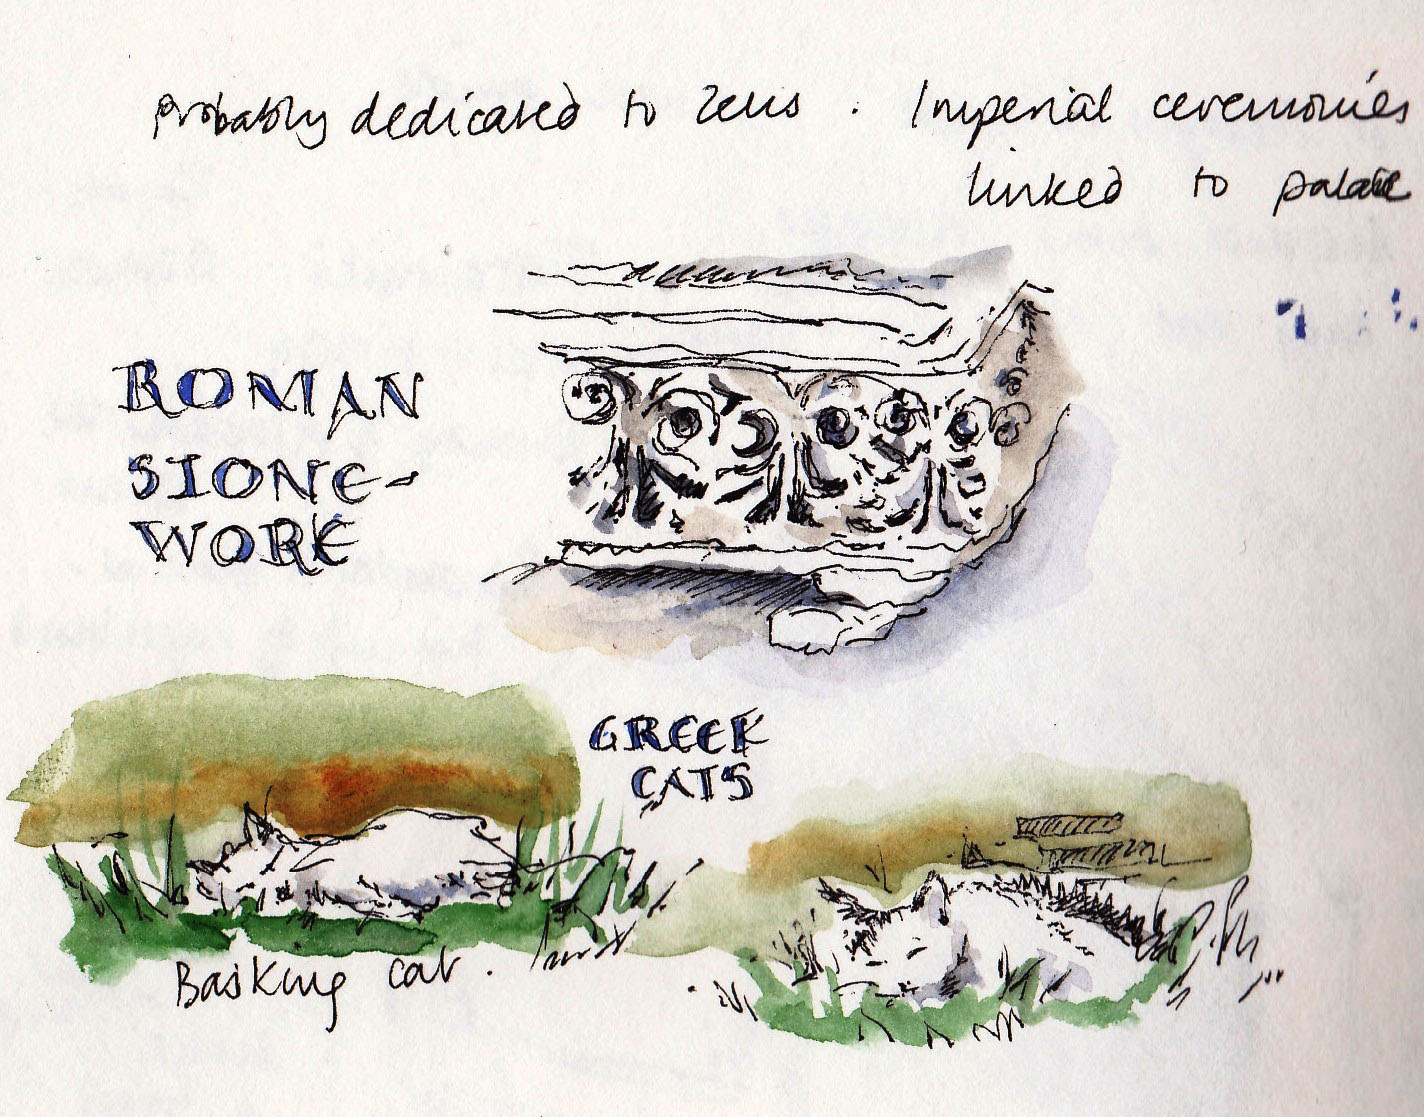
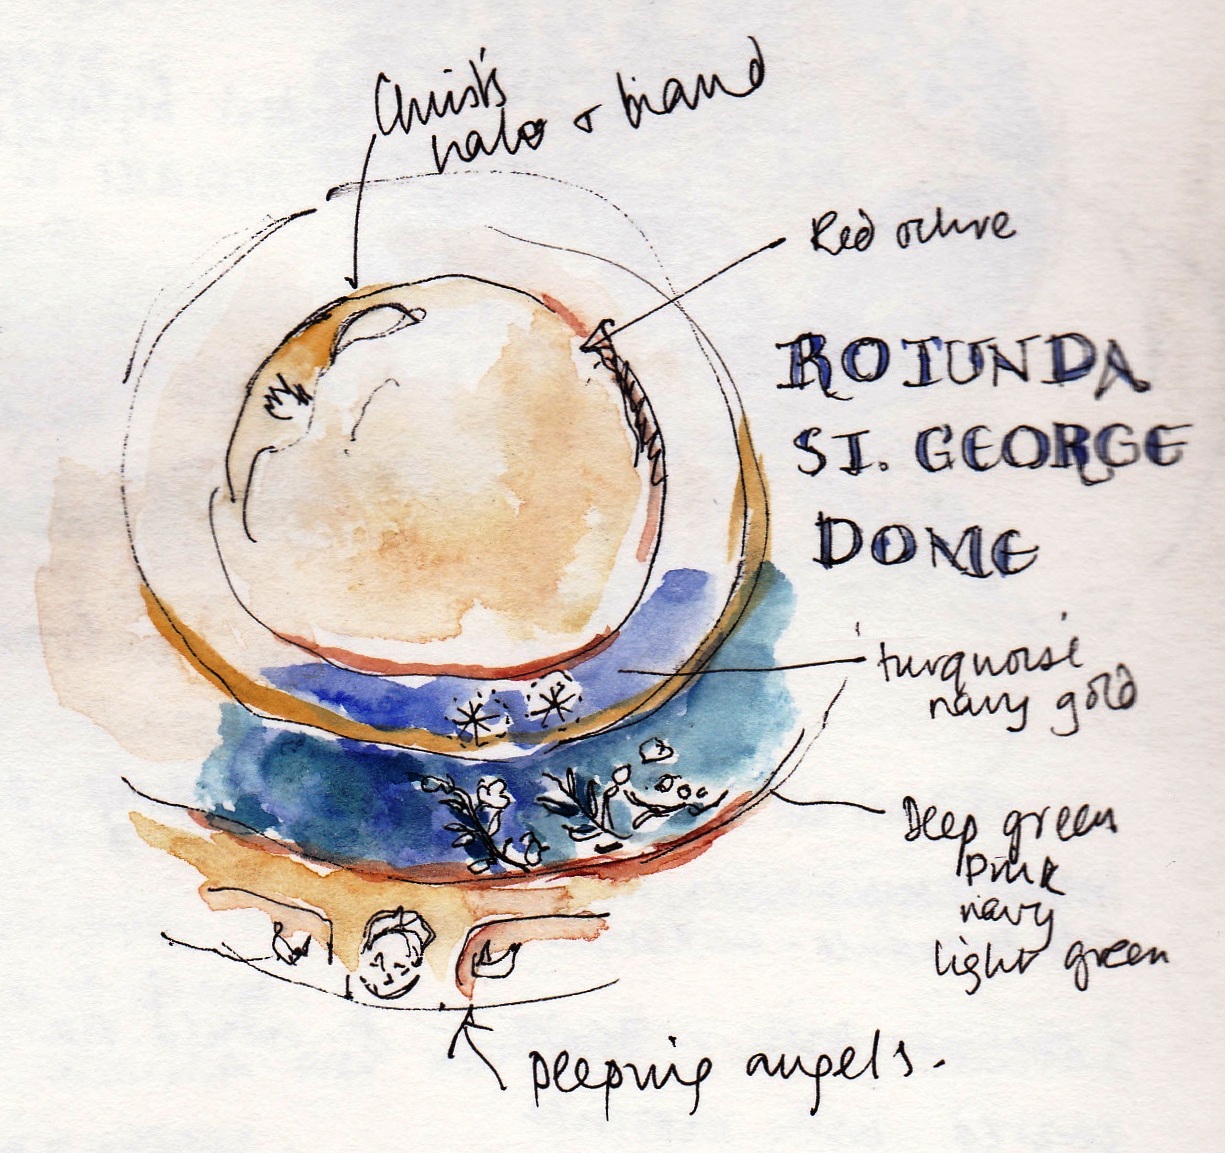
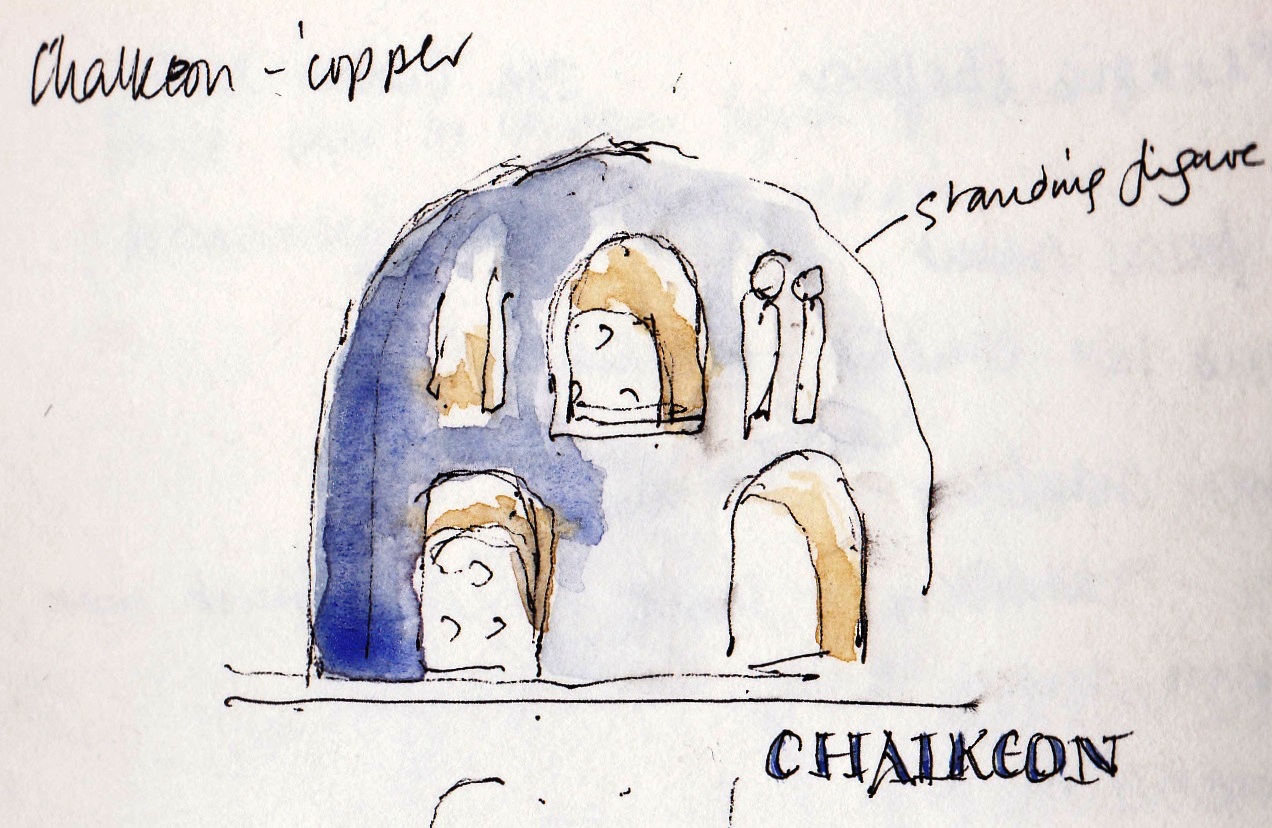
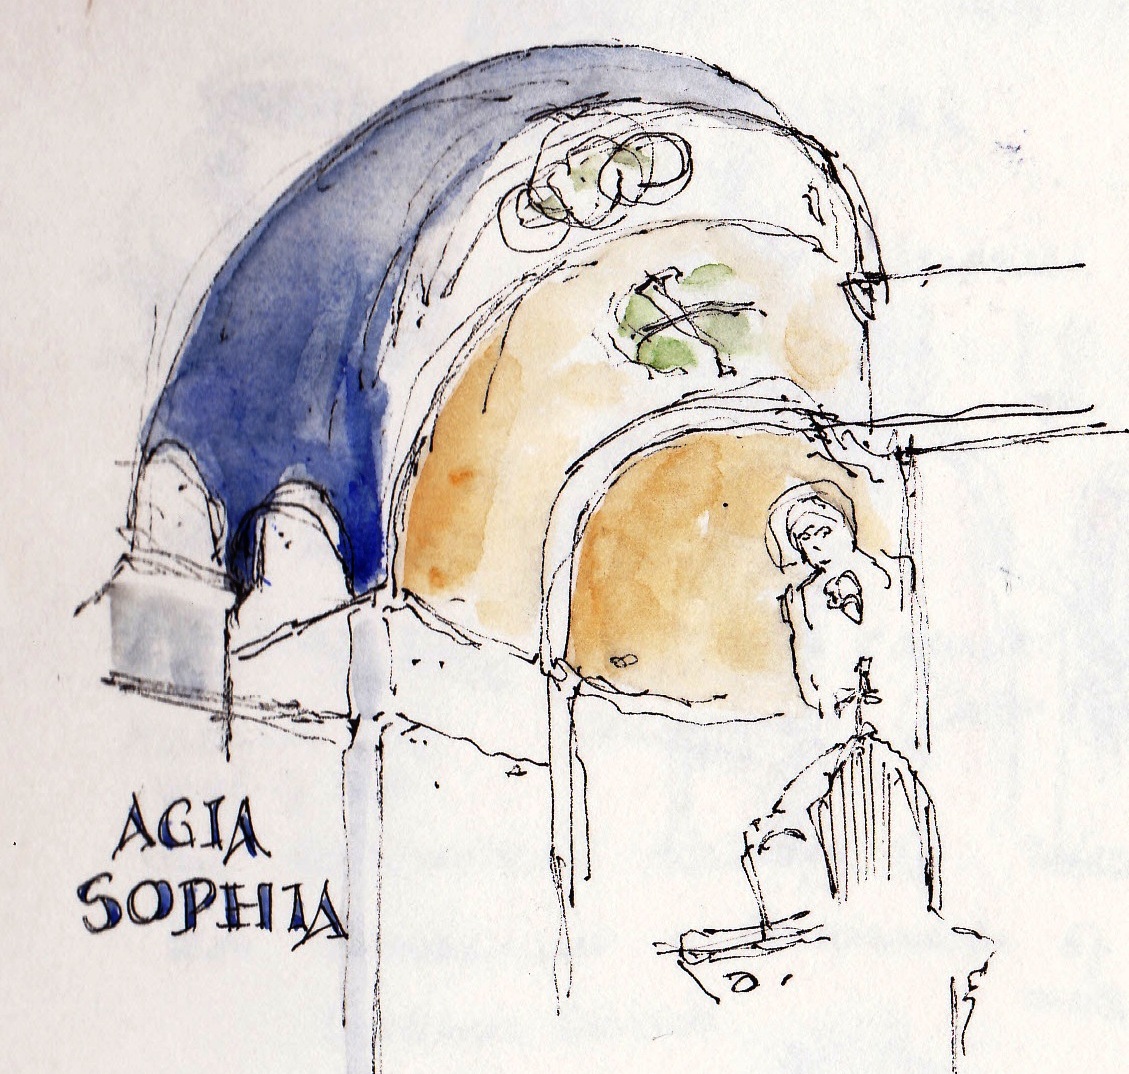
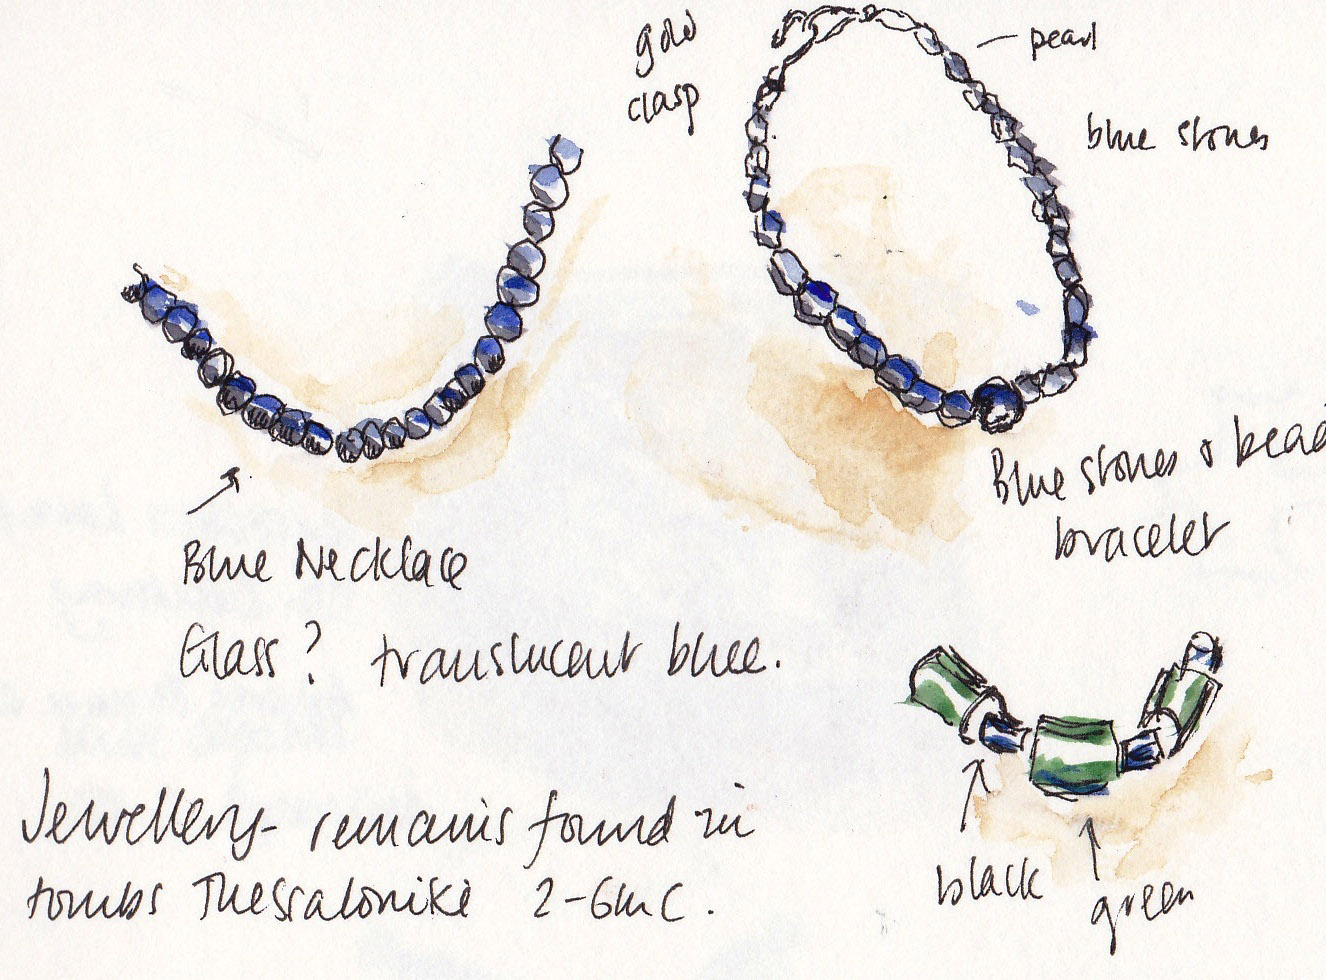
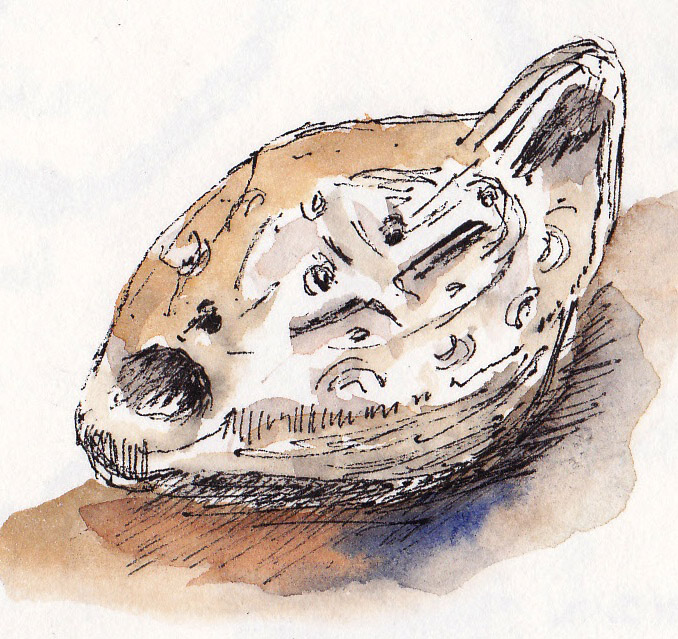
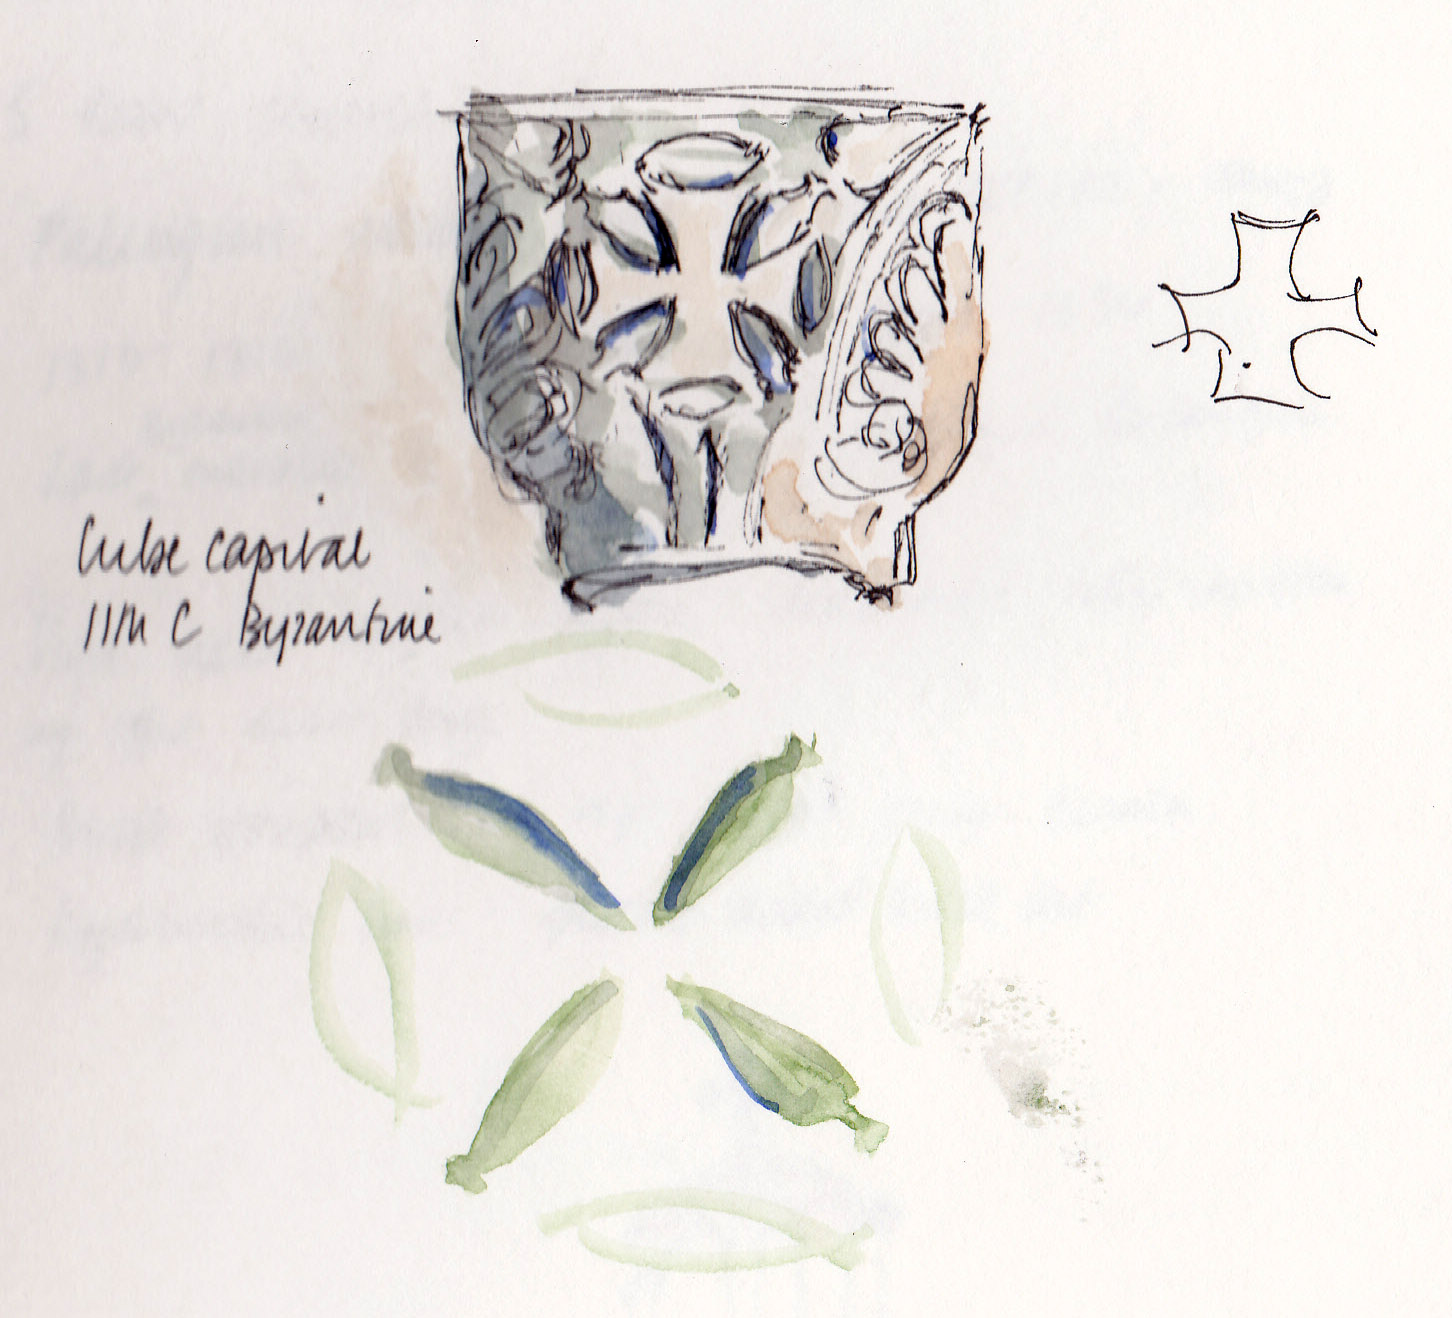
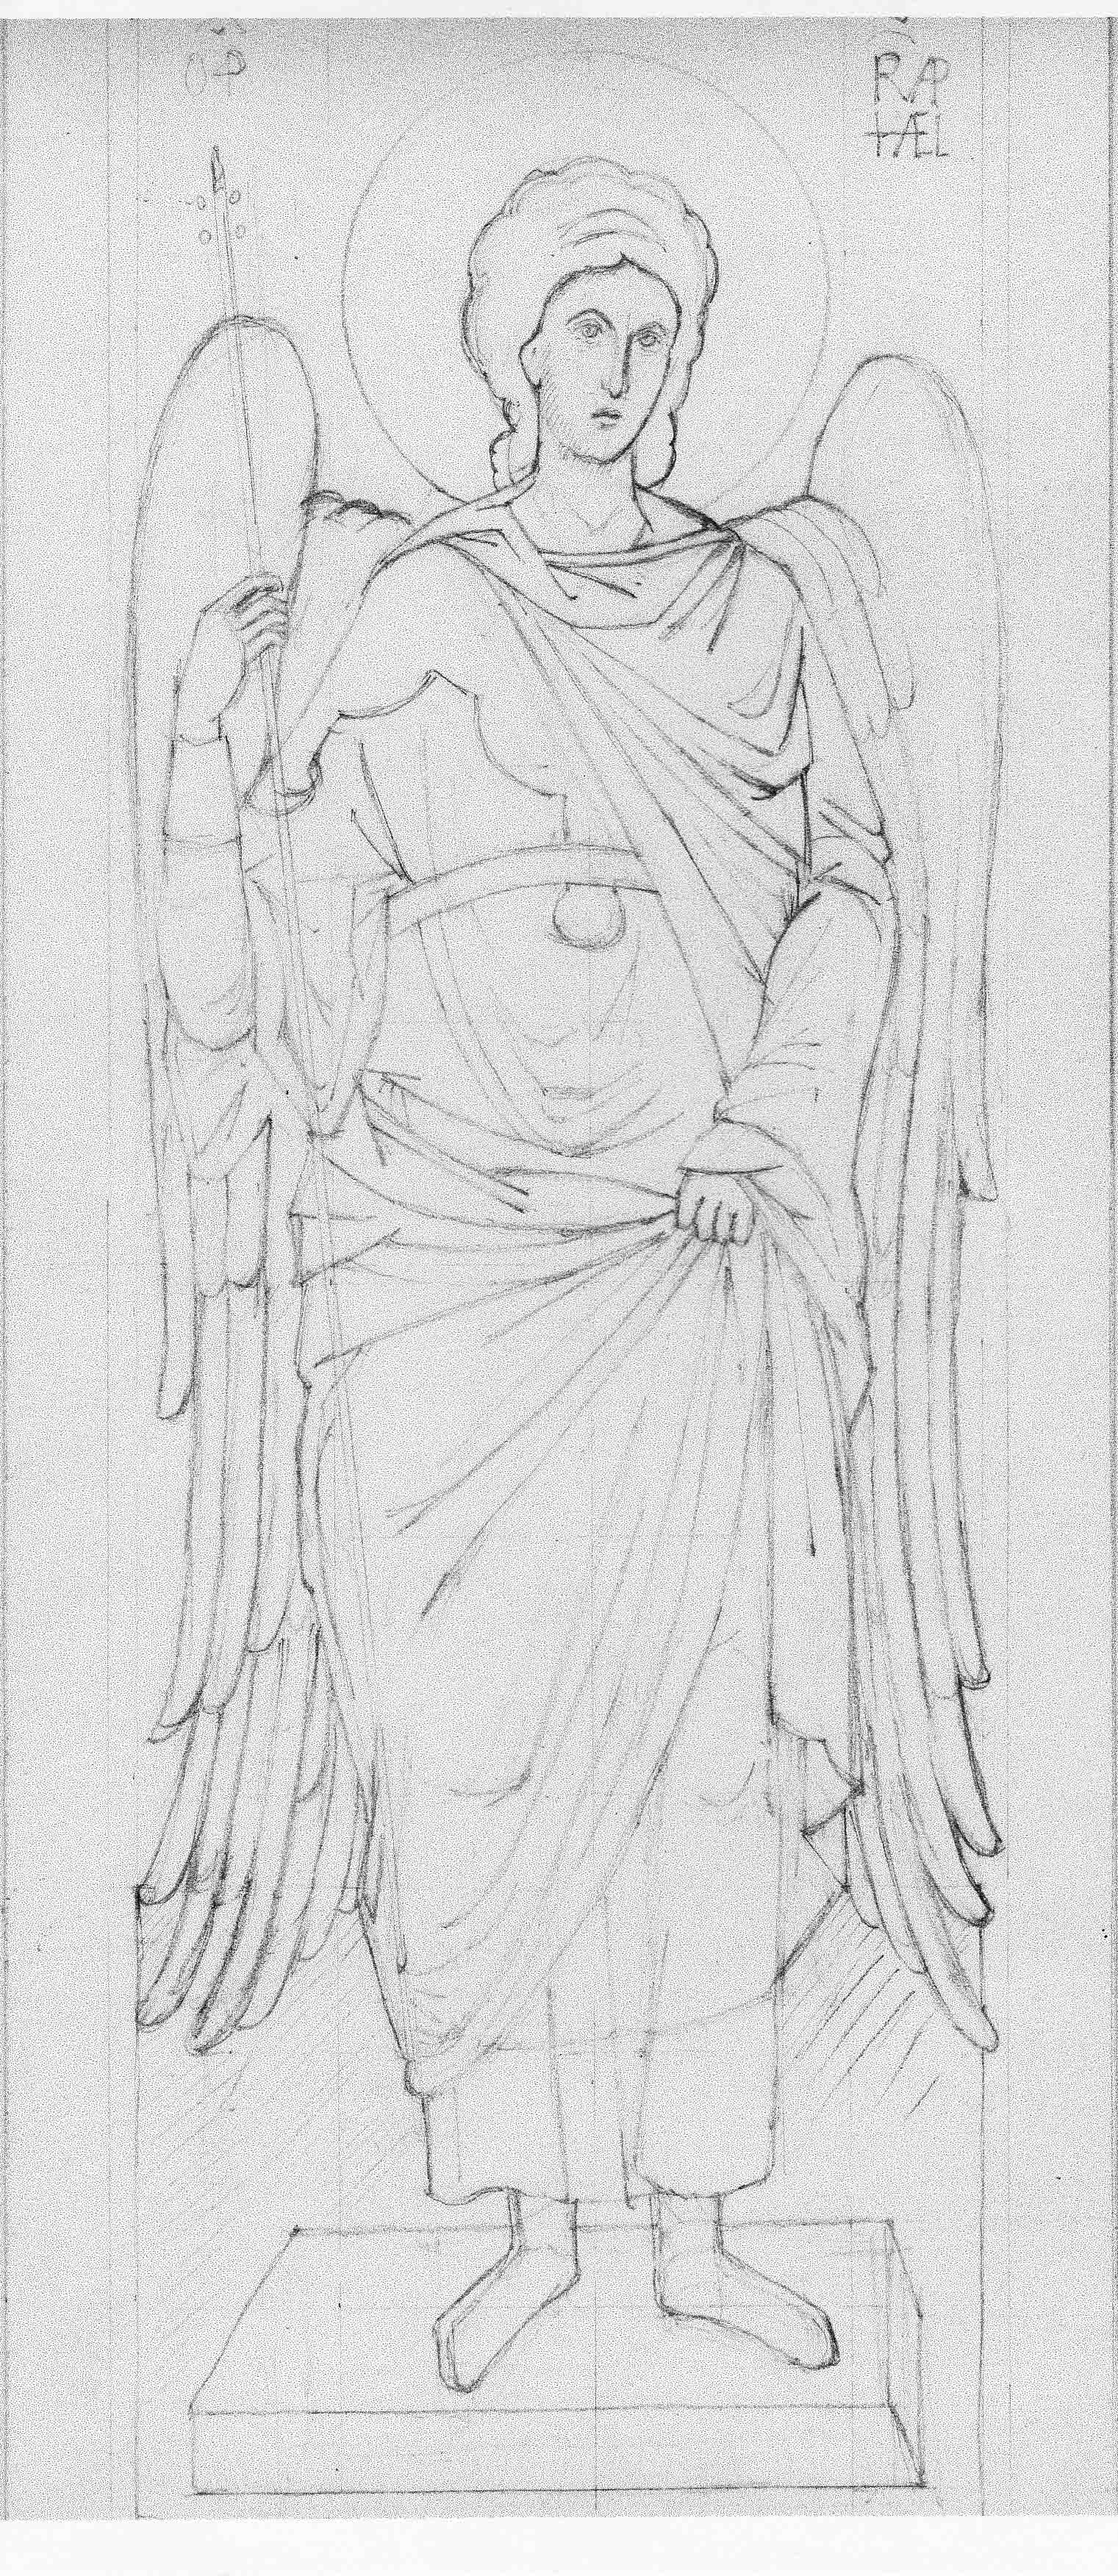
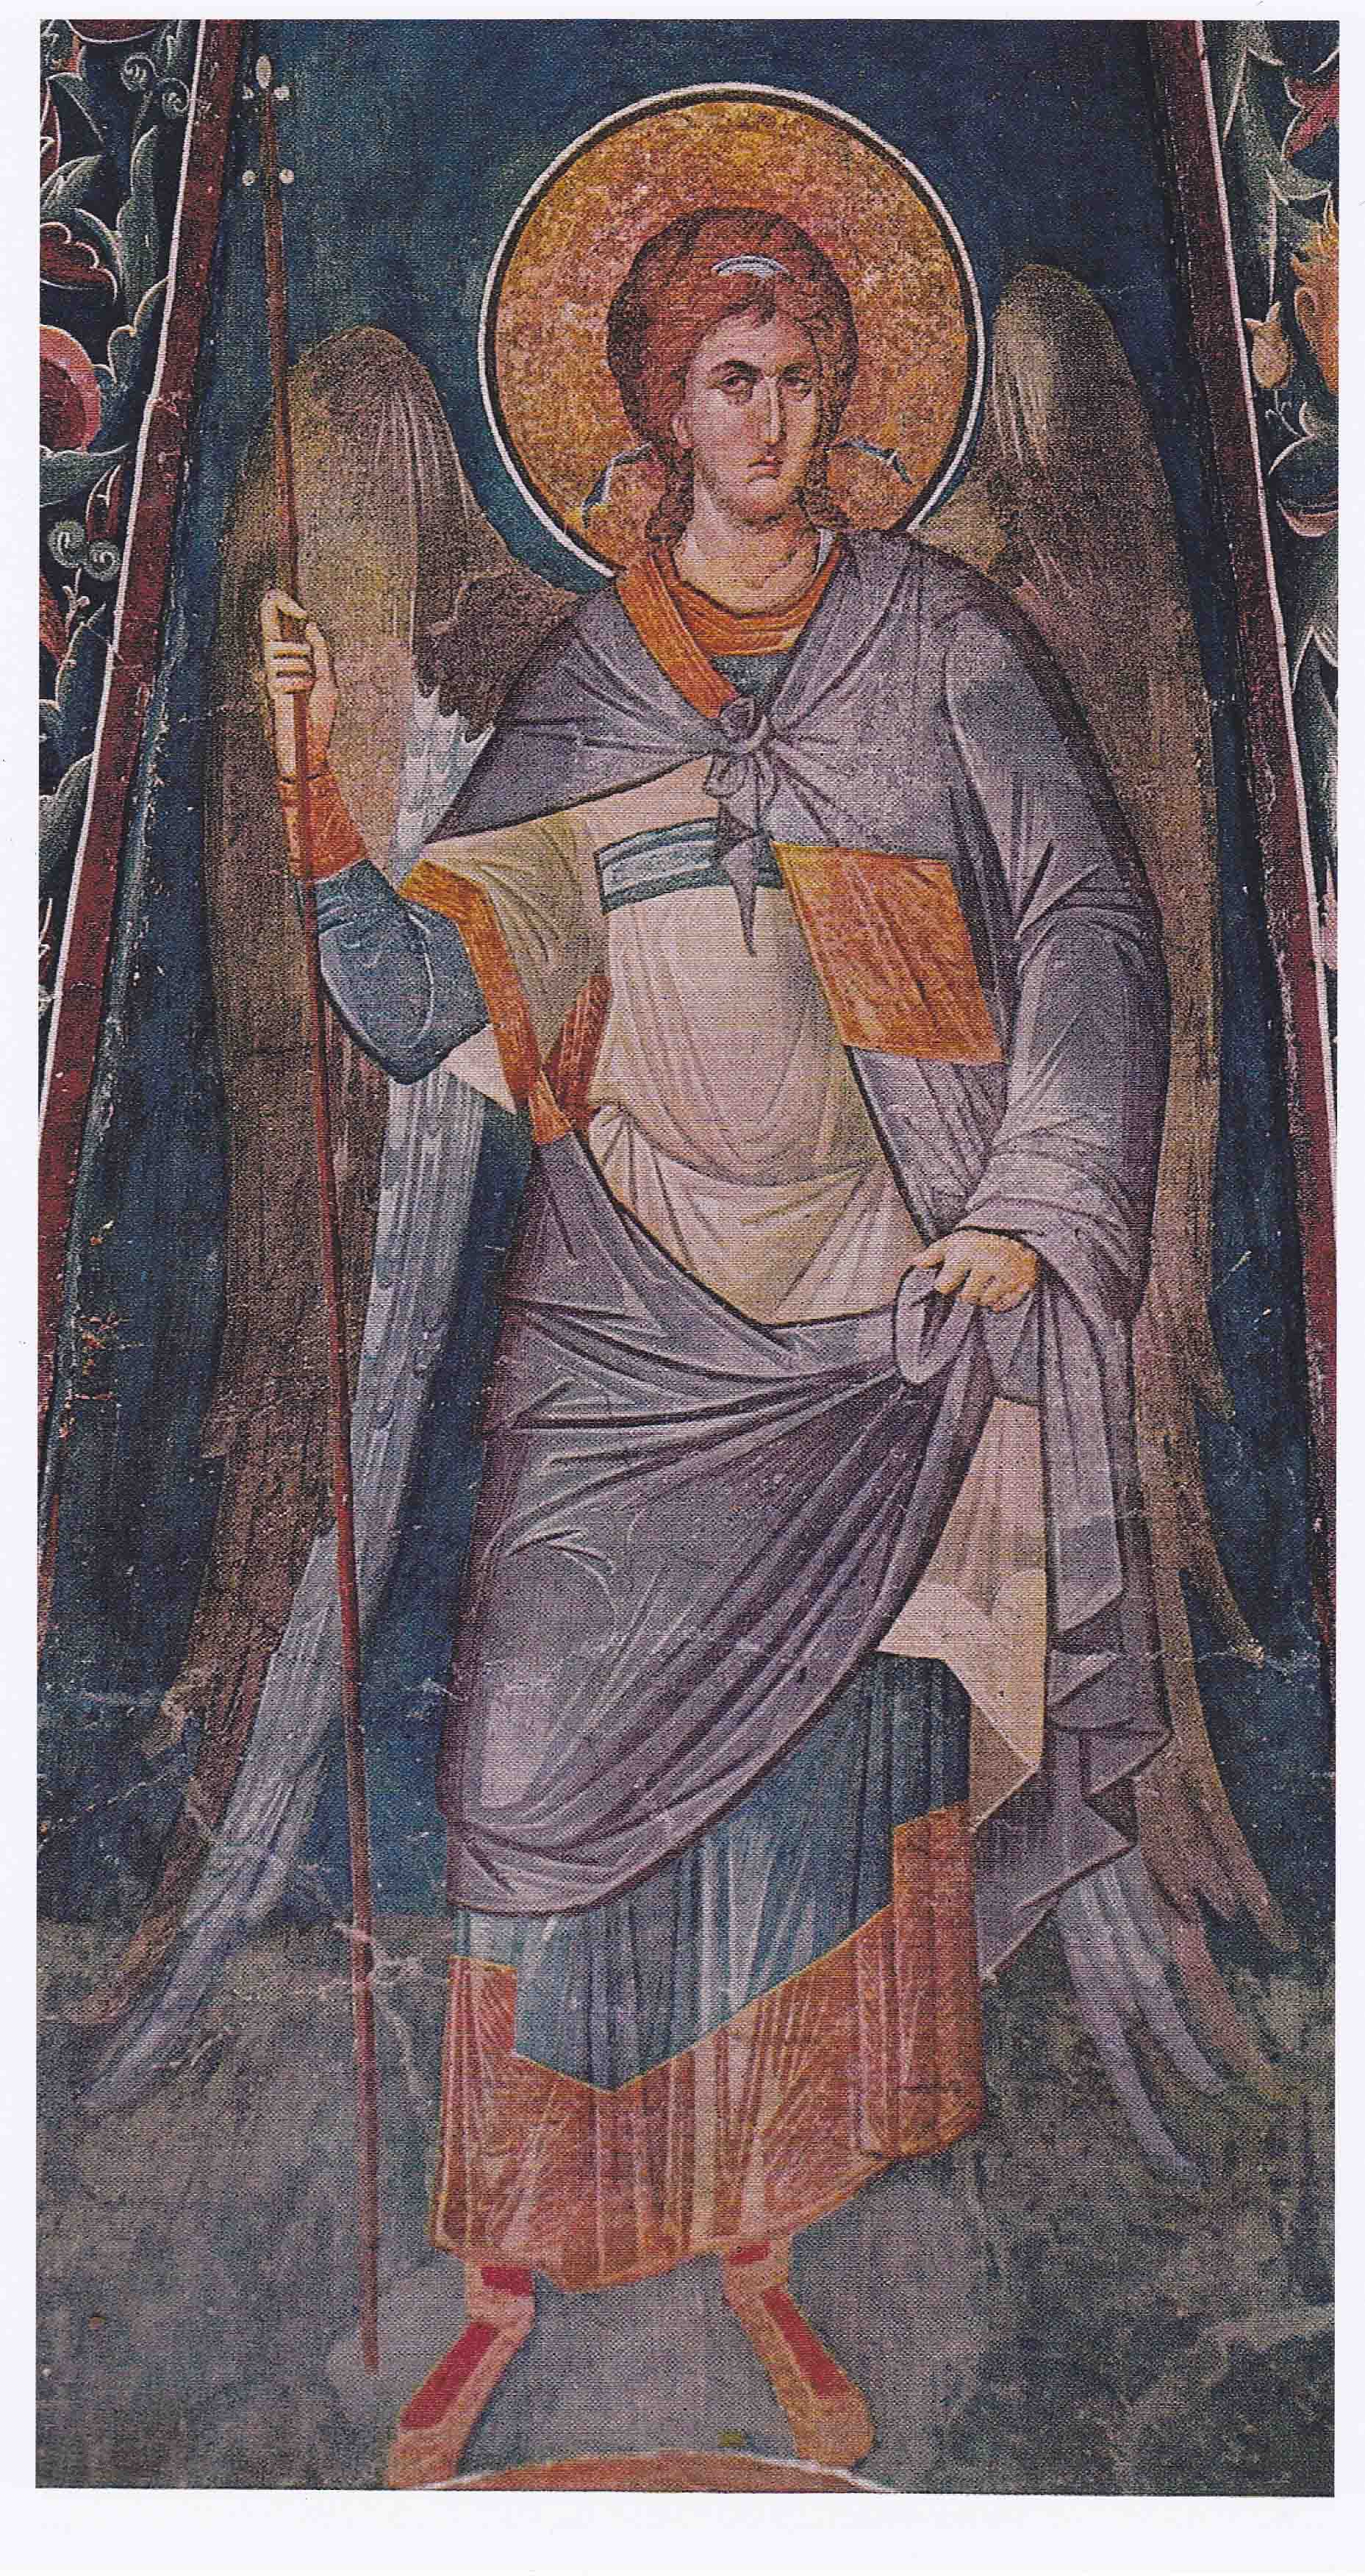
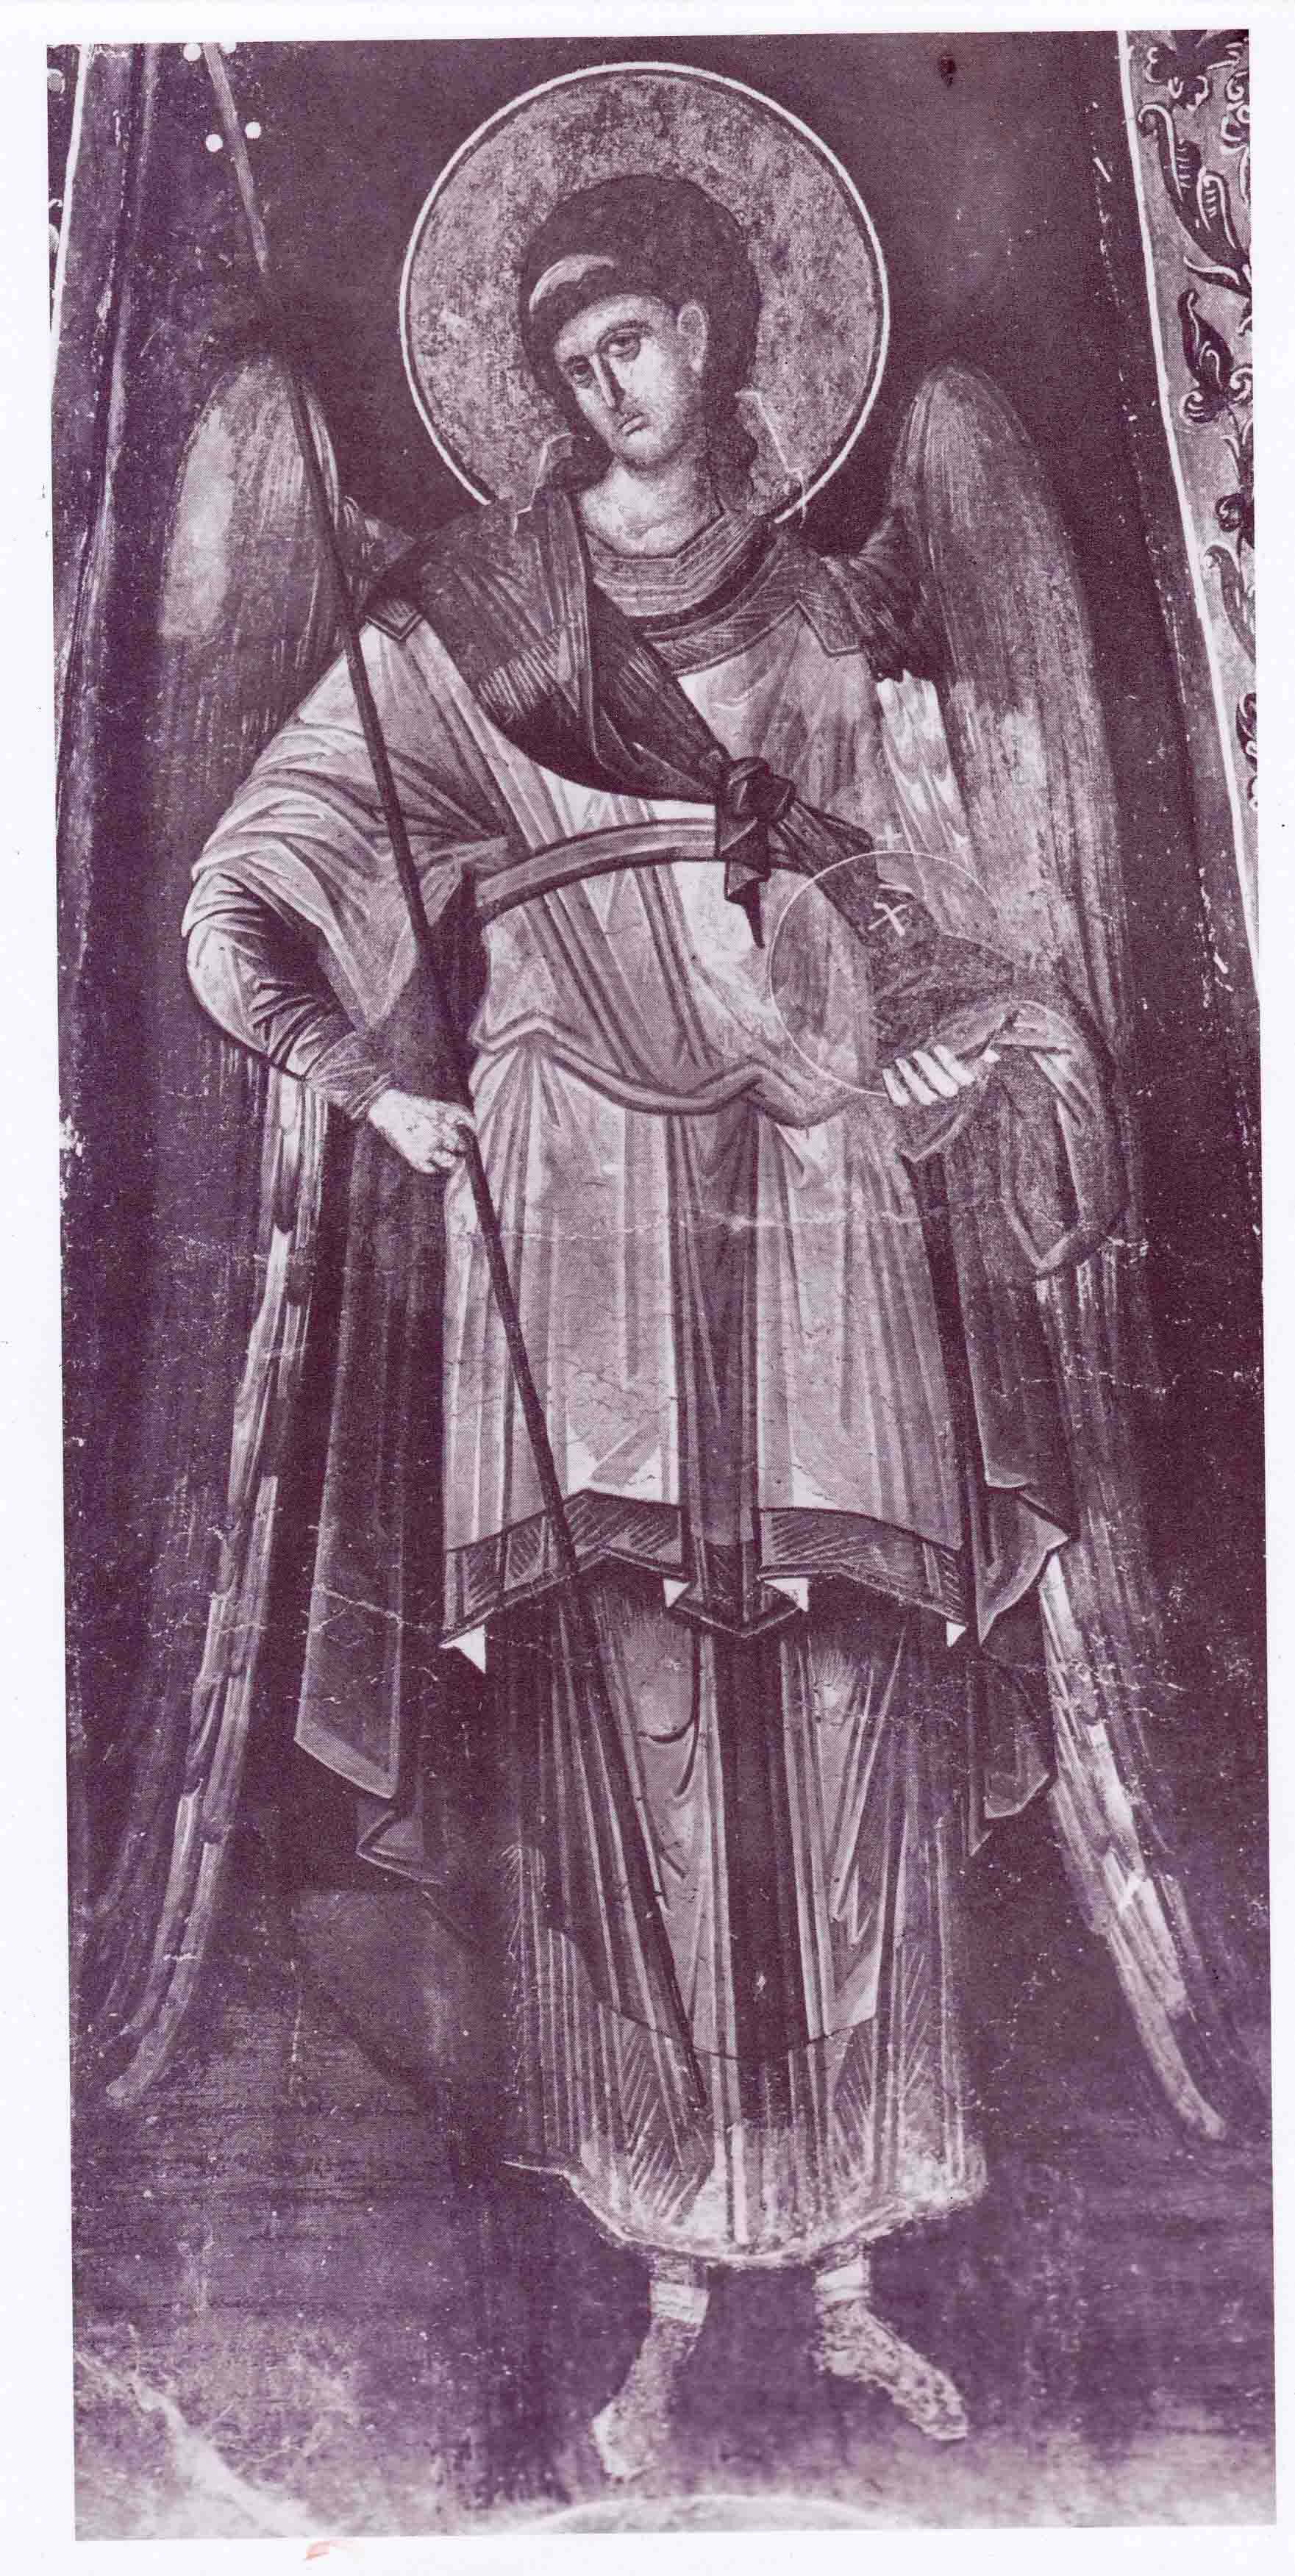
In October 2015, we made a course field trip to Thessaloniki to explore some of the beautiful icons and frescos that reach back into antiquity. In particular I loved the frescos of St Nicholas Orphanos Church (14thC), including this one of the Nativity. You can get a flavour of this trip in my post here.

St Nicholas Orphanos Church fresco, Thessaloniki showing the Nativity

Looking at the layout of the Orphanos fresco, light from heaven is directed vertically to the Christ Child, centrally placed in the heart of the cave where high contrast and curved lines frame the Blessed Virgin. Your eye is then led gently down and around to take in all the surrounding figures and back to centre.

The most perplexing aspect of the composition for me was settling on a layout of the Virgin and Child which are diverse as you can see from a few examples below. I felt that it was unusual for a mother to turn away from her child, let alone this one!

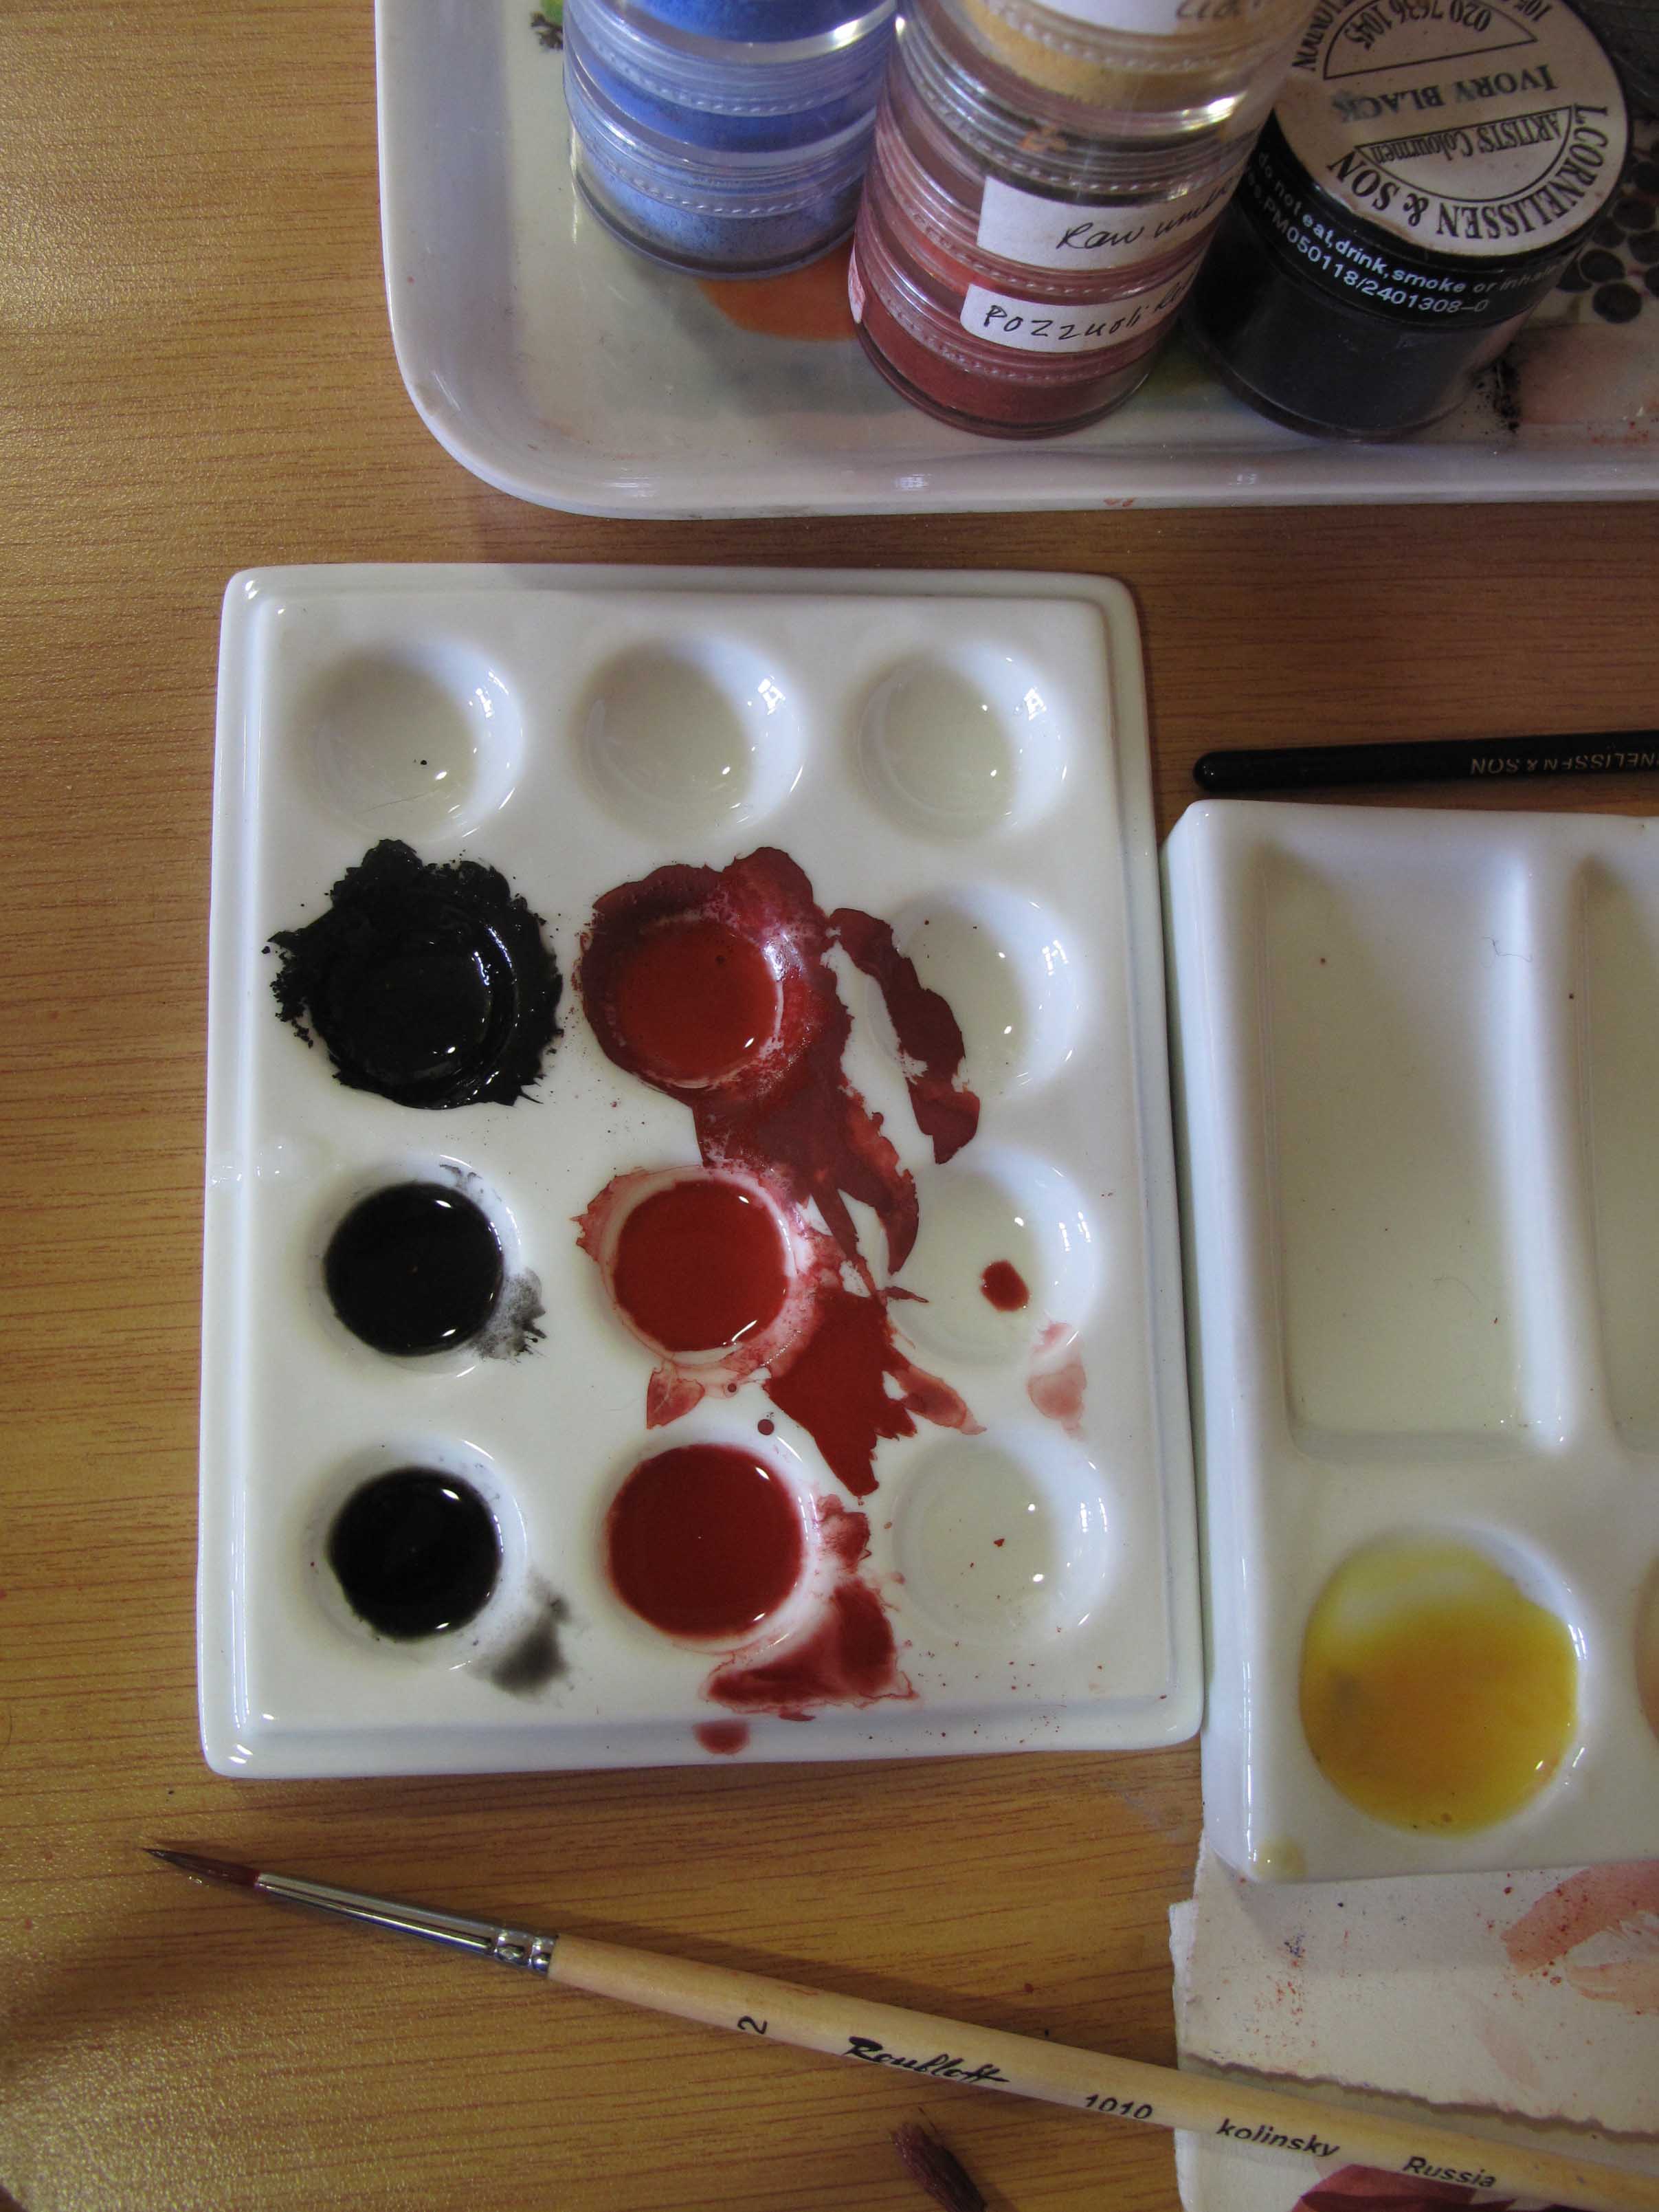
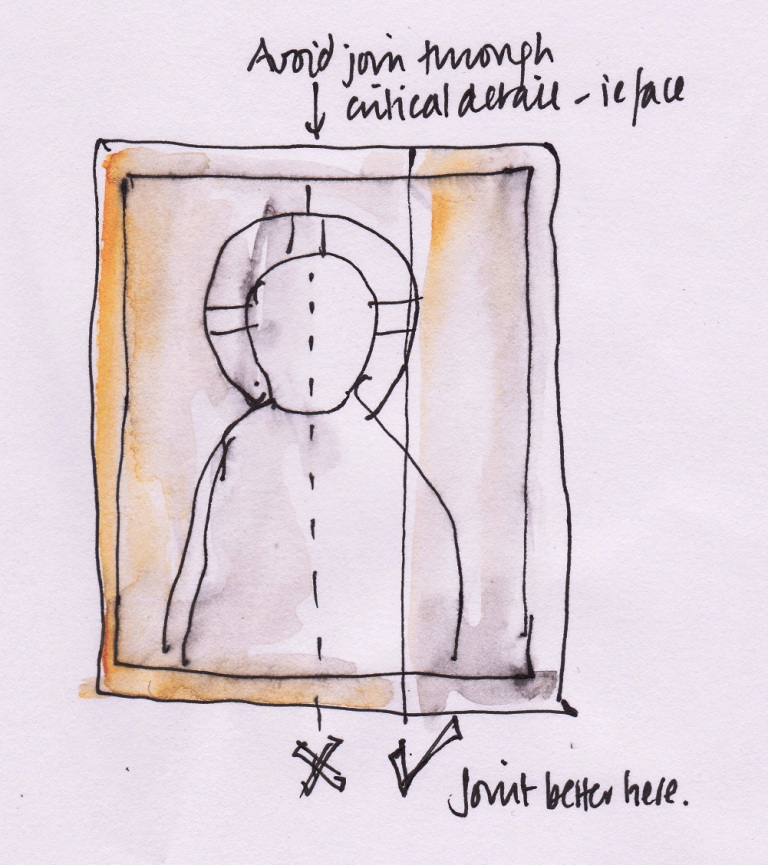
I made a start on the cartoon – sketching out the overall composition on a large sheet of cartridge paper cut to the size of my gessoed panel (53 x 42cm). To help keep things fluid at this stage, I made separate sketches of each cluster of figures which I was able to photocopy, cut out and move around. I had also been working on the figures and colours in a workbook (you can see some examples here).

It was important to align the composition with our chosen theme and to allow the viewer’s eye to flow and pause in a rhythmical and meaningful way around the icon. You can see on this example, I had shown the Virgin looking towards her infant being bathed by the midwives – I wasn’t entirely happy with this but this was the exploration stage.

Looking back at my notes I have found some helpful comments from Aidan and Sr Petra Clare:

  1. The mountains are not responding to the light of the star – move them to turn towards the light of the star and so they curve to contain the angels.
  2. The length of the Virgin’s legs not quite right, the knee to heel should be the same on both legs.
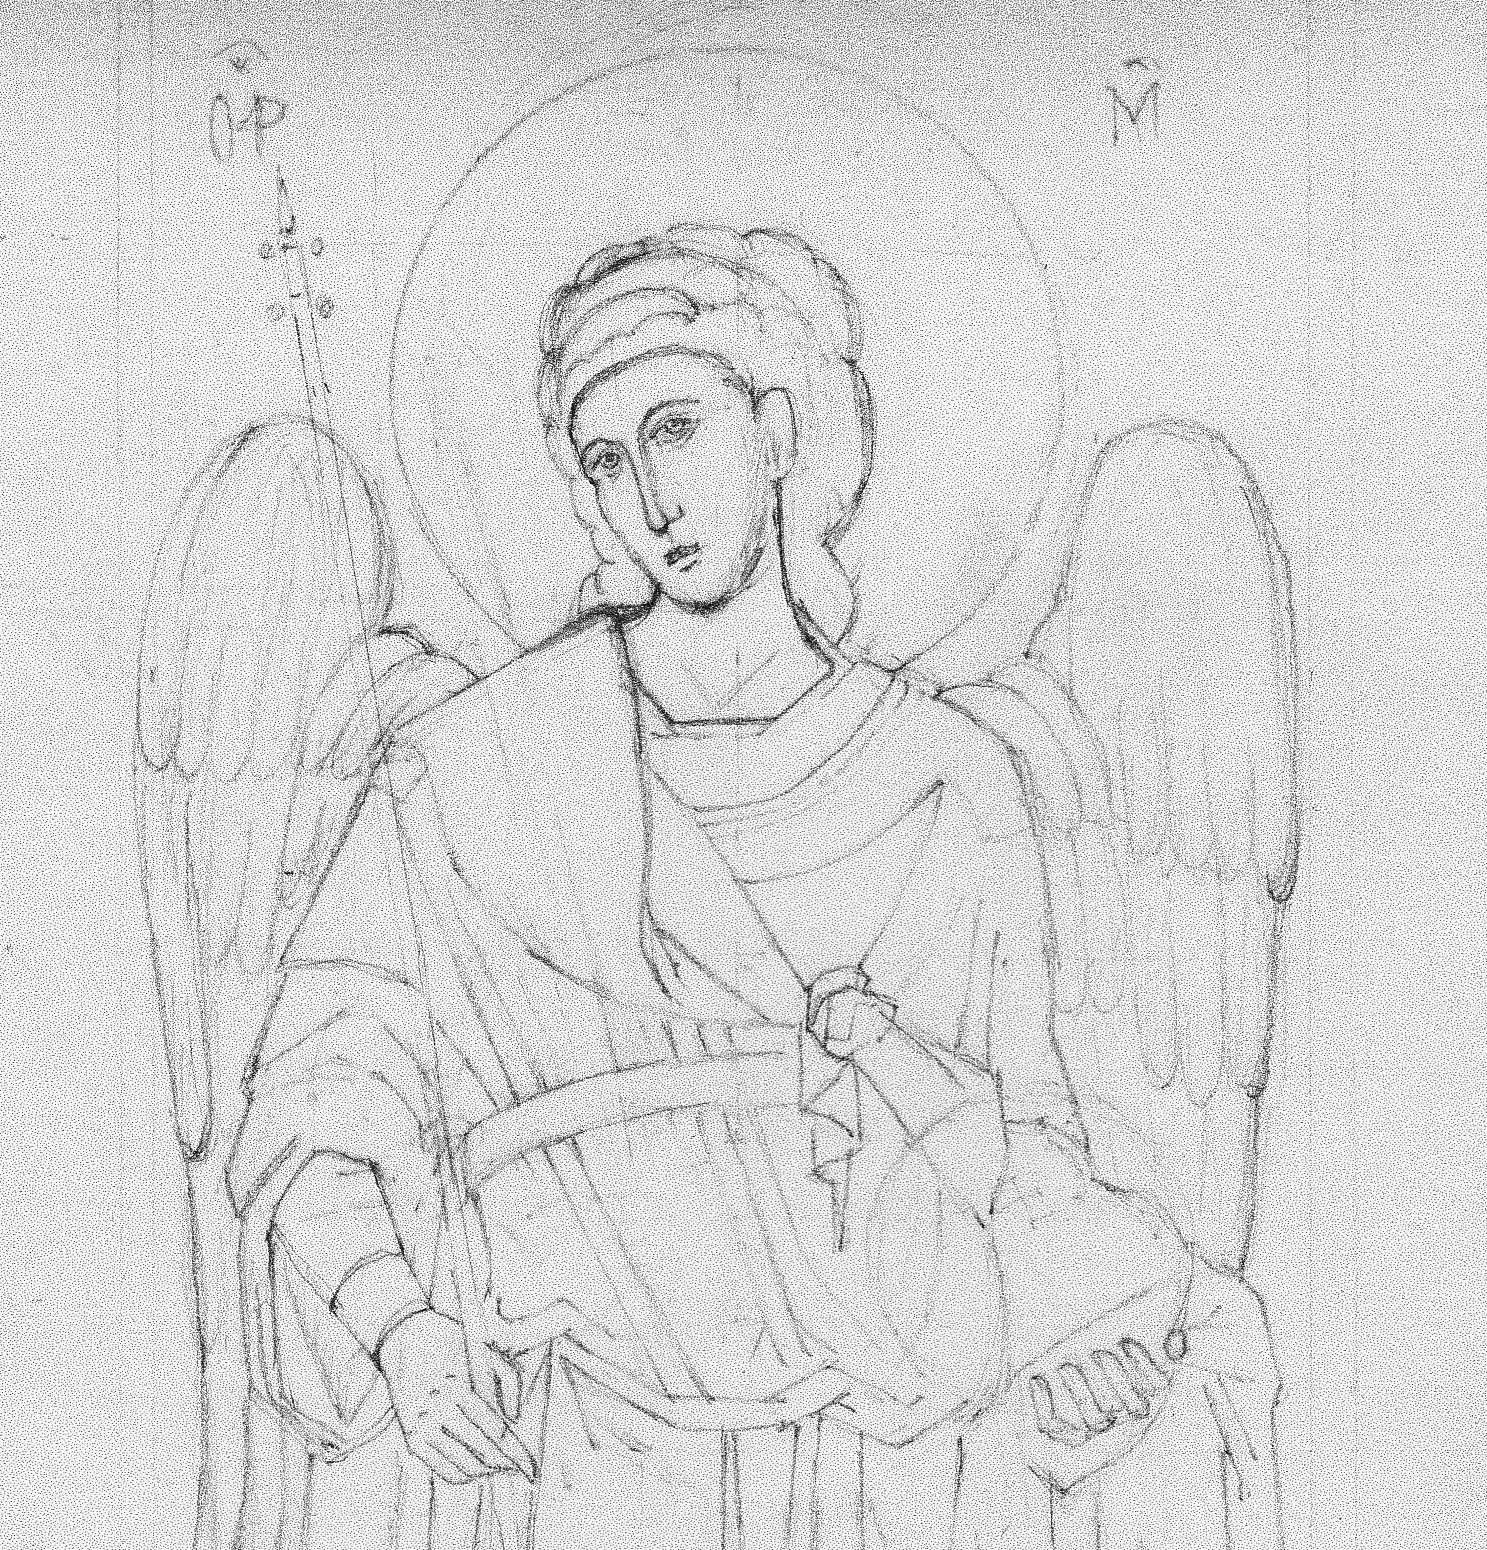
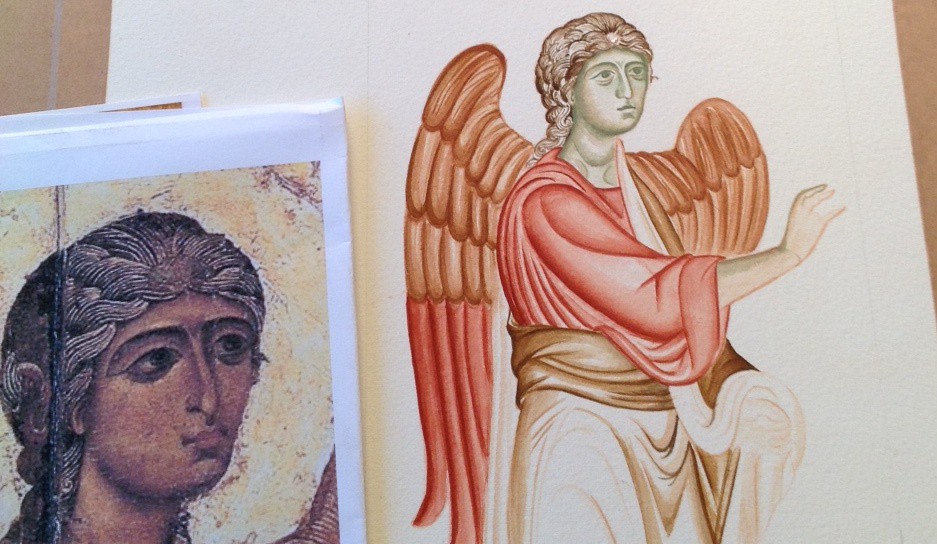
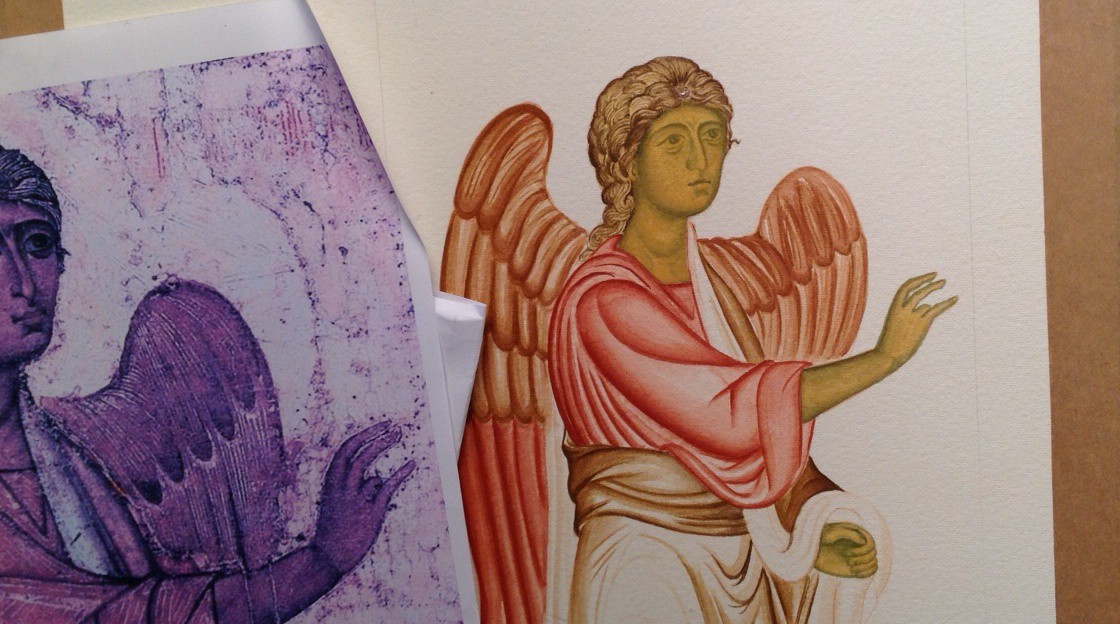
  3. Archangel Gabriel too high up the mountain and right wing not quite right.
  4. Adjust the shepherd cluster to flow directionally towards the Virgin and Child
  5. Magi better in a linear format to direct the eye back up the icon to the star.
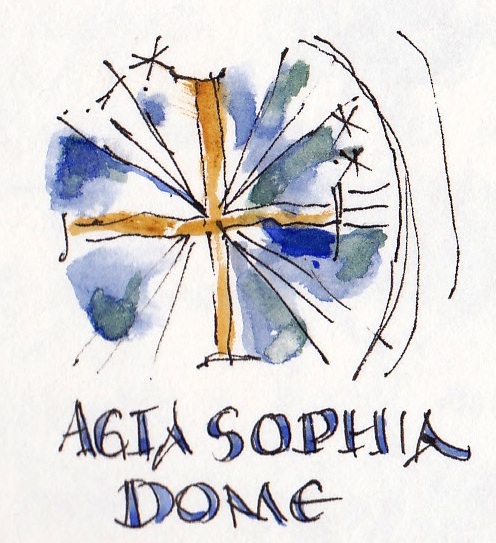
  6. Finally, Aidan reminded me that ‘the star represents heaven so it needs to be joined up to some form of half circle to show a connection between heaven and earth through the incarnation. A star in the sky by itself doesn’t convey this connection so well.’

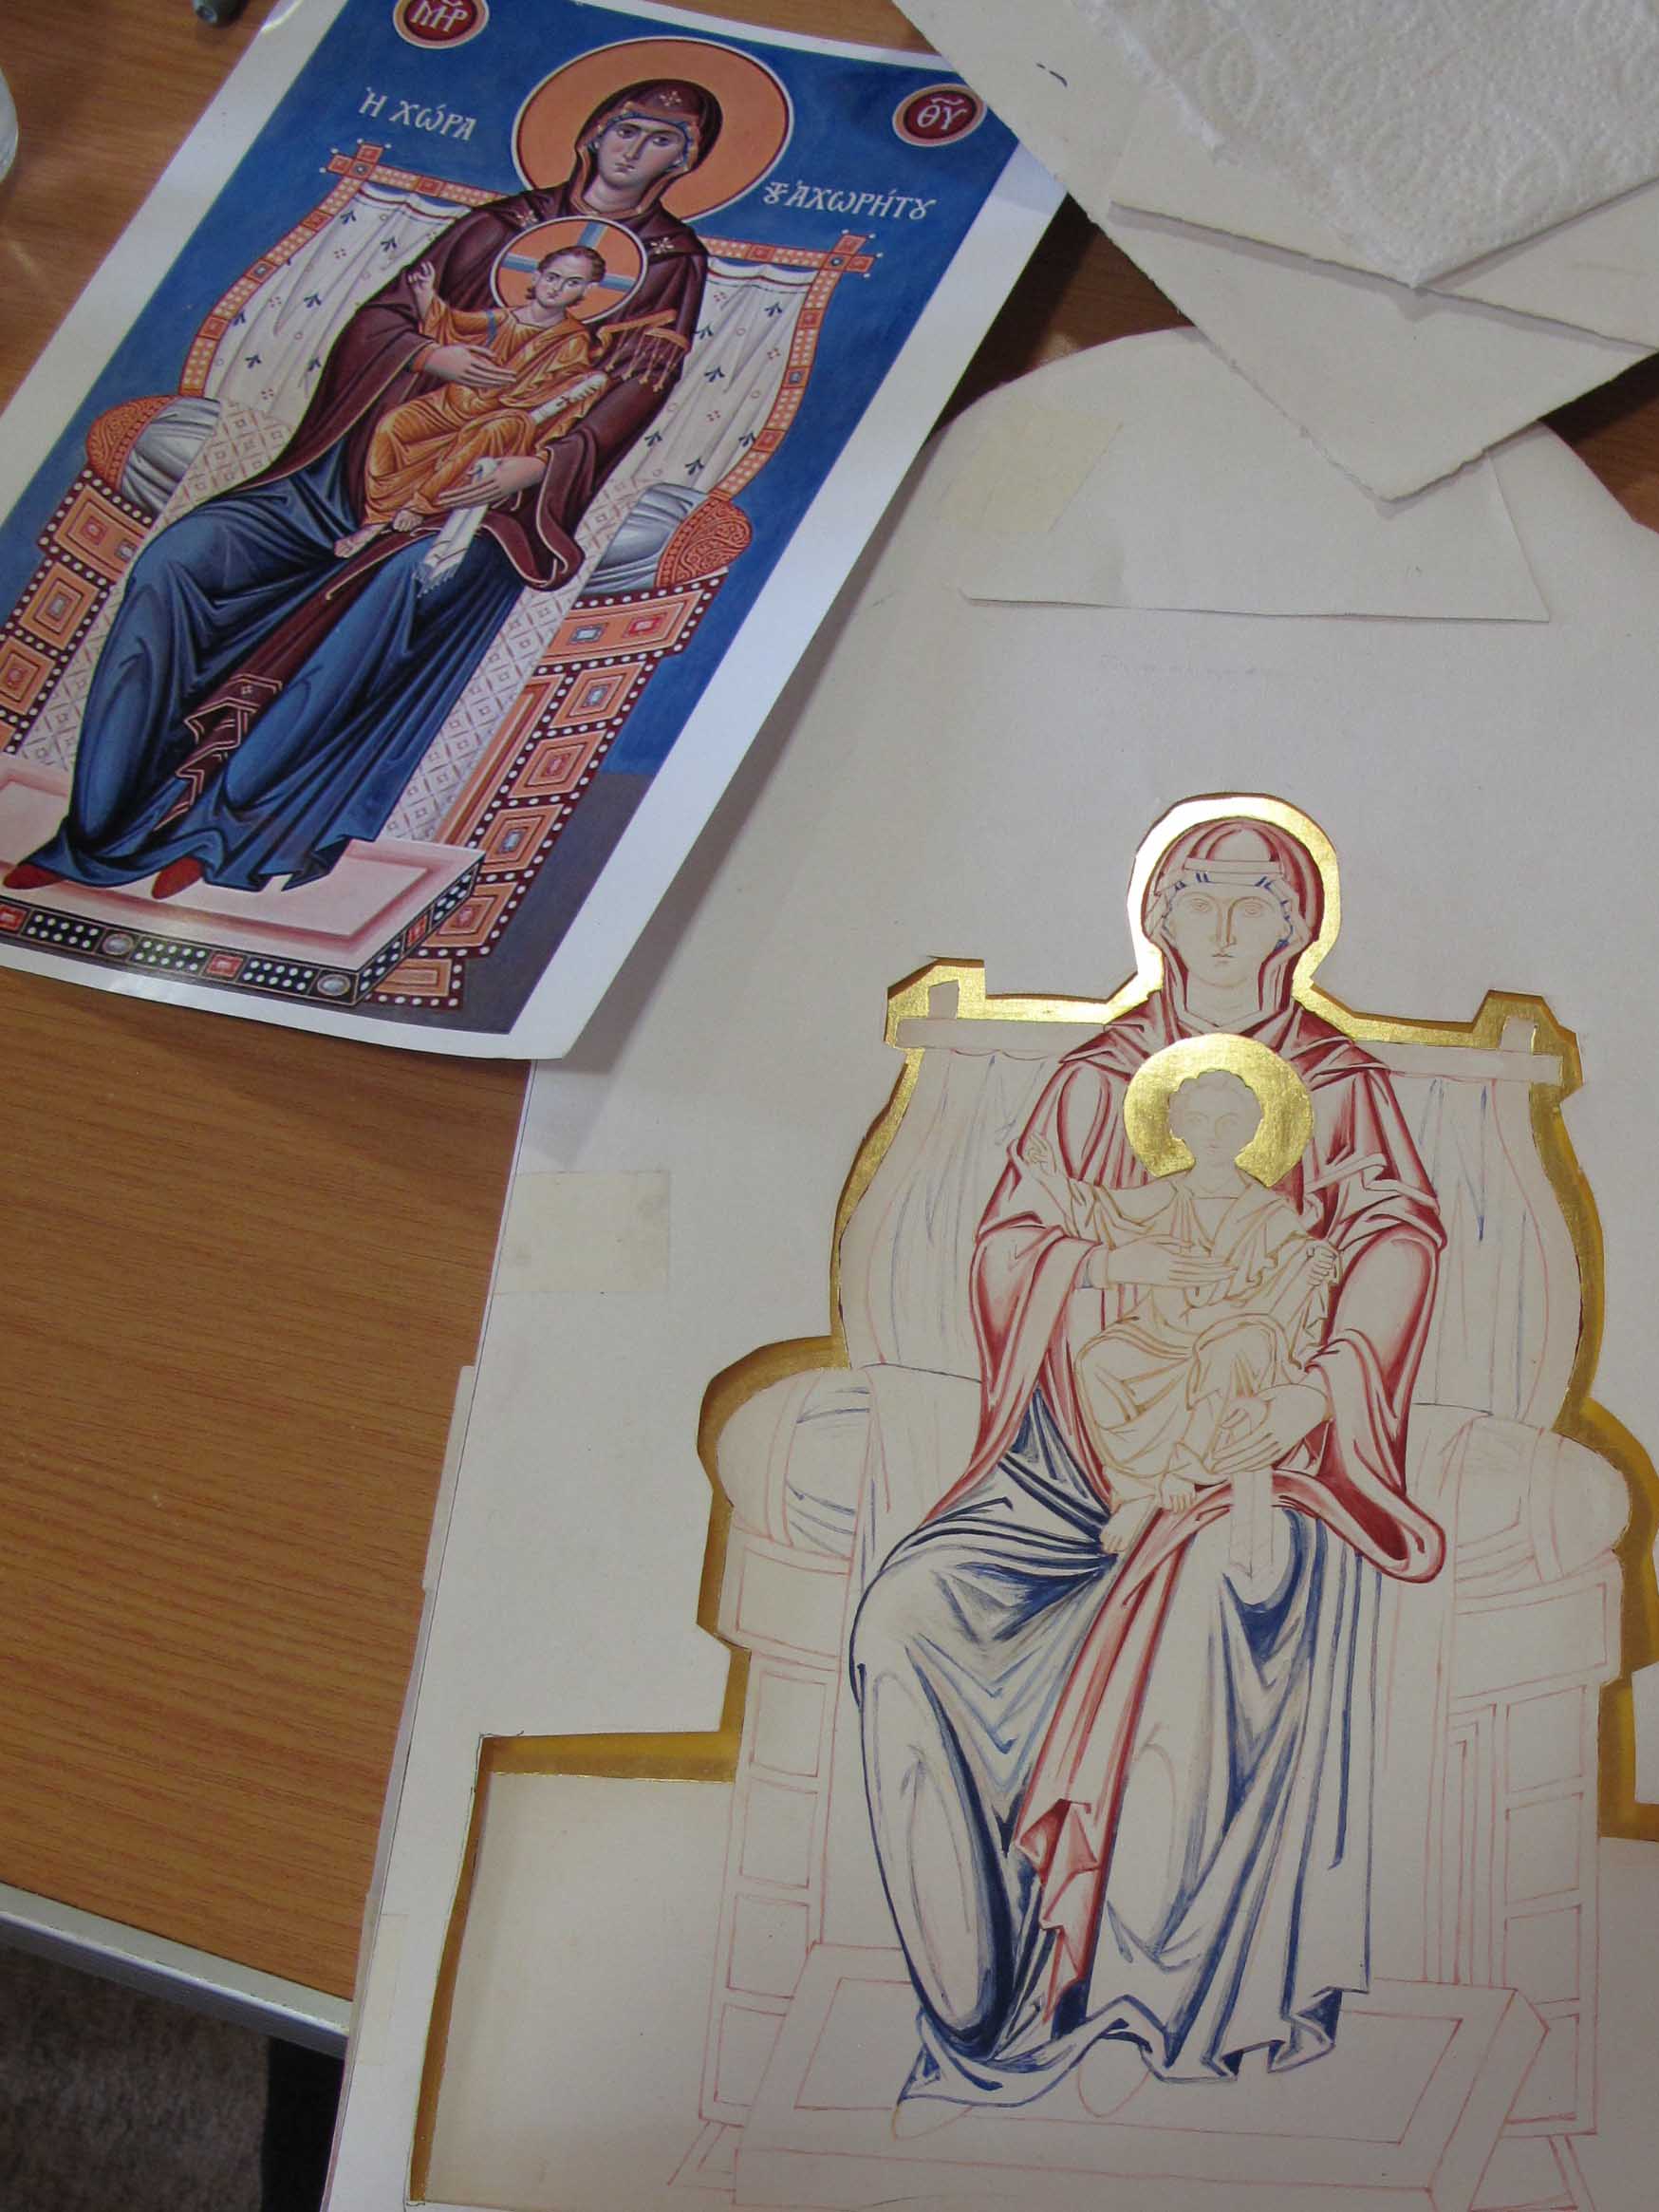
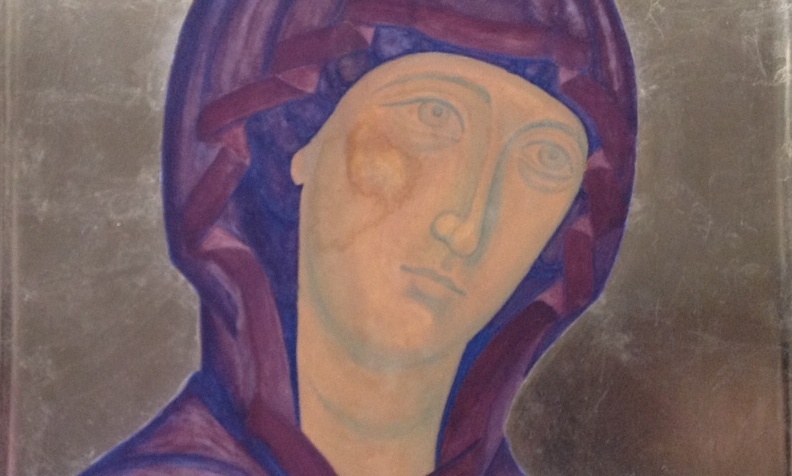
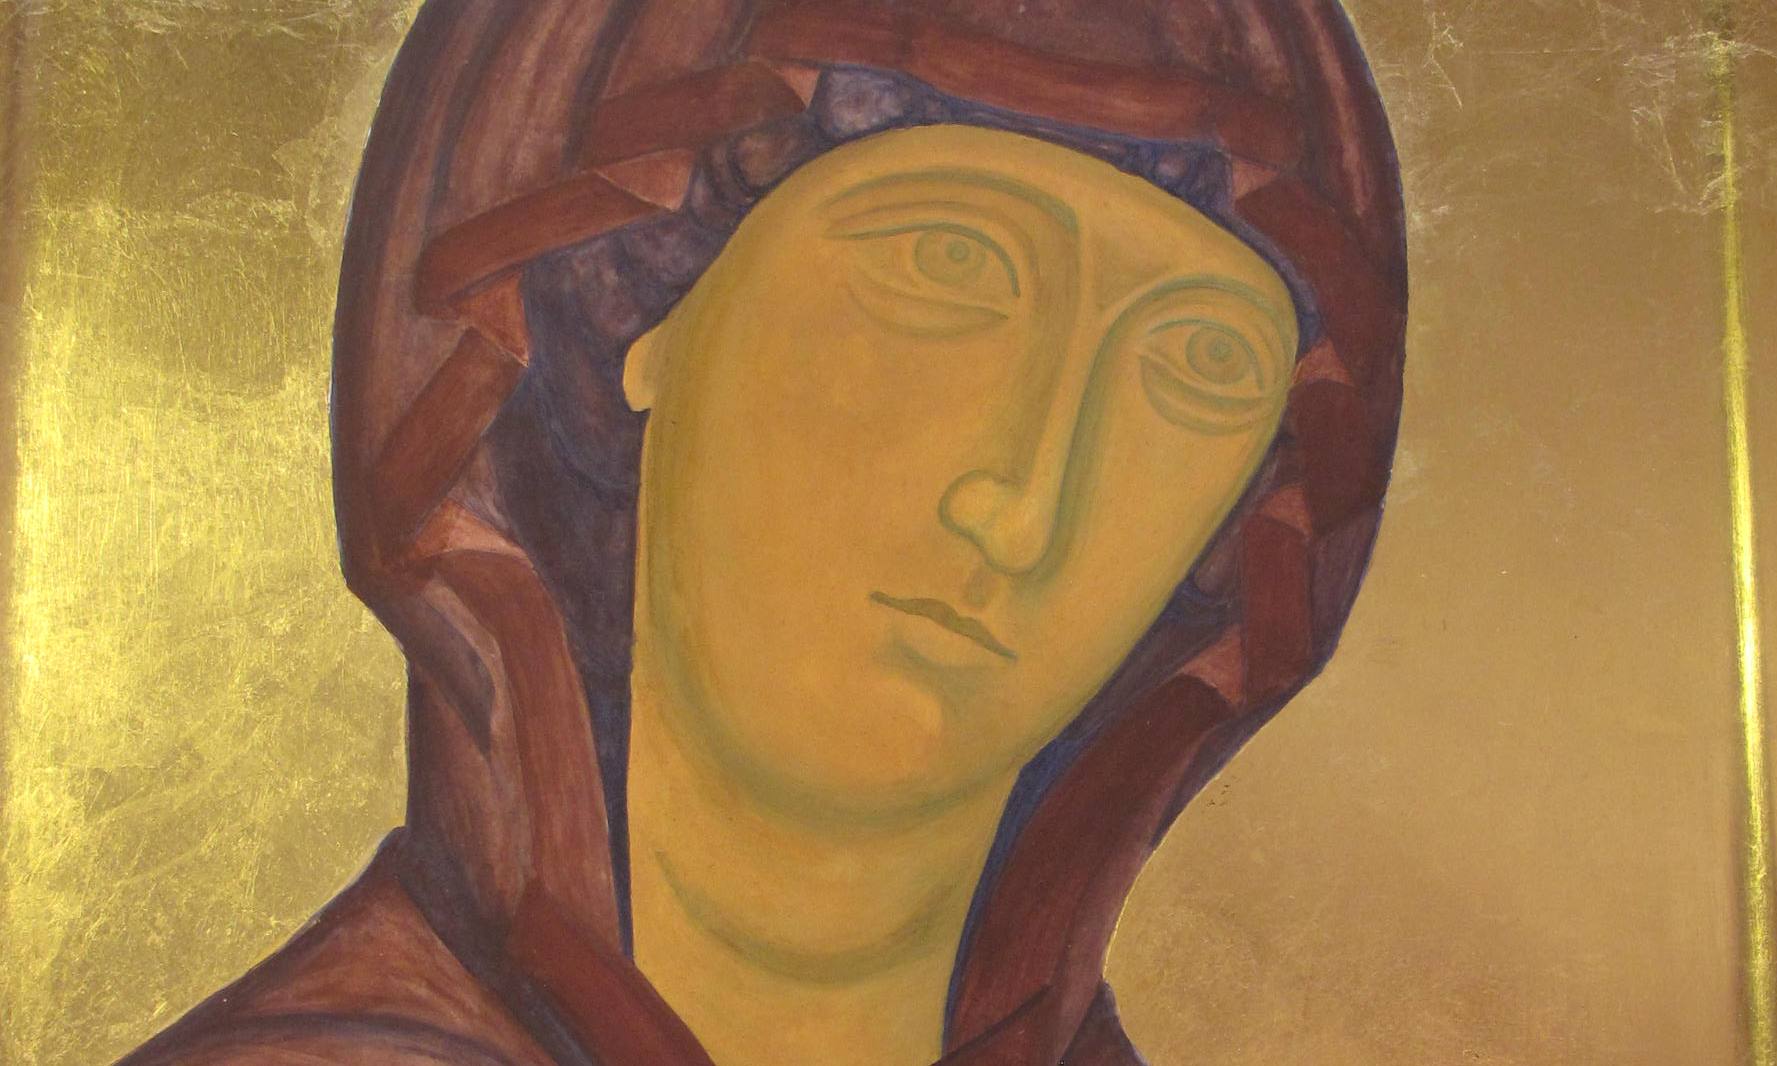
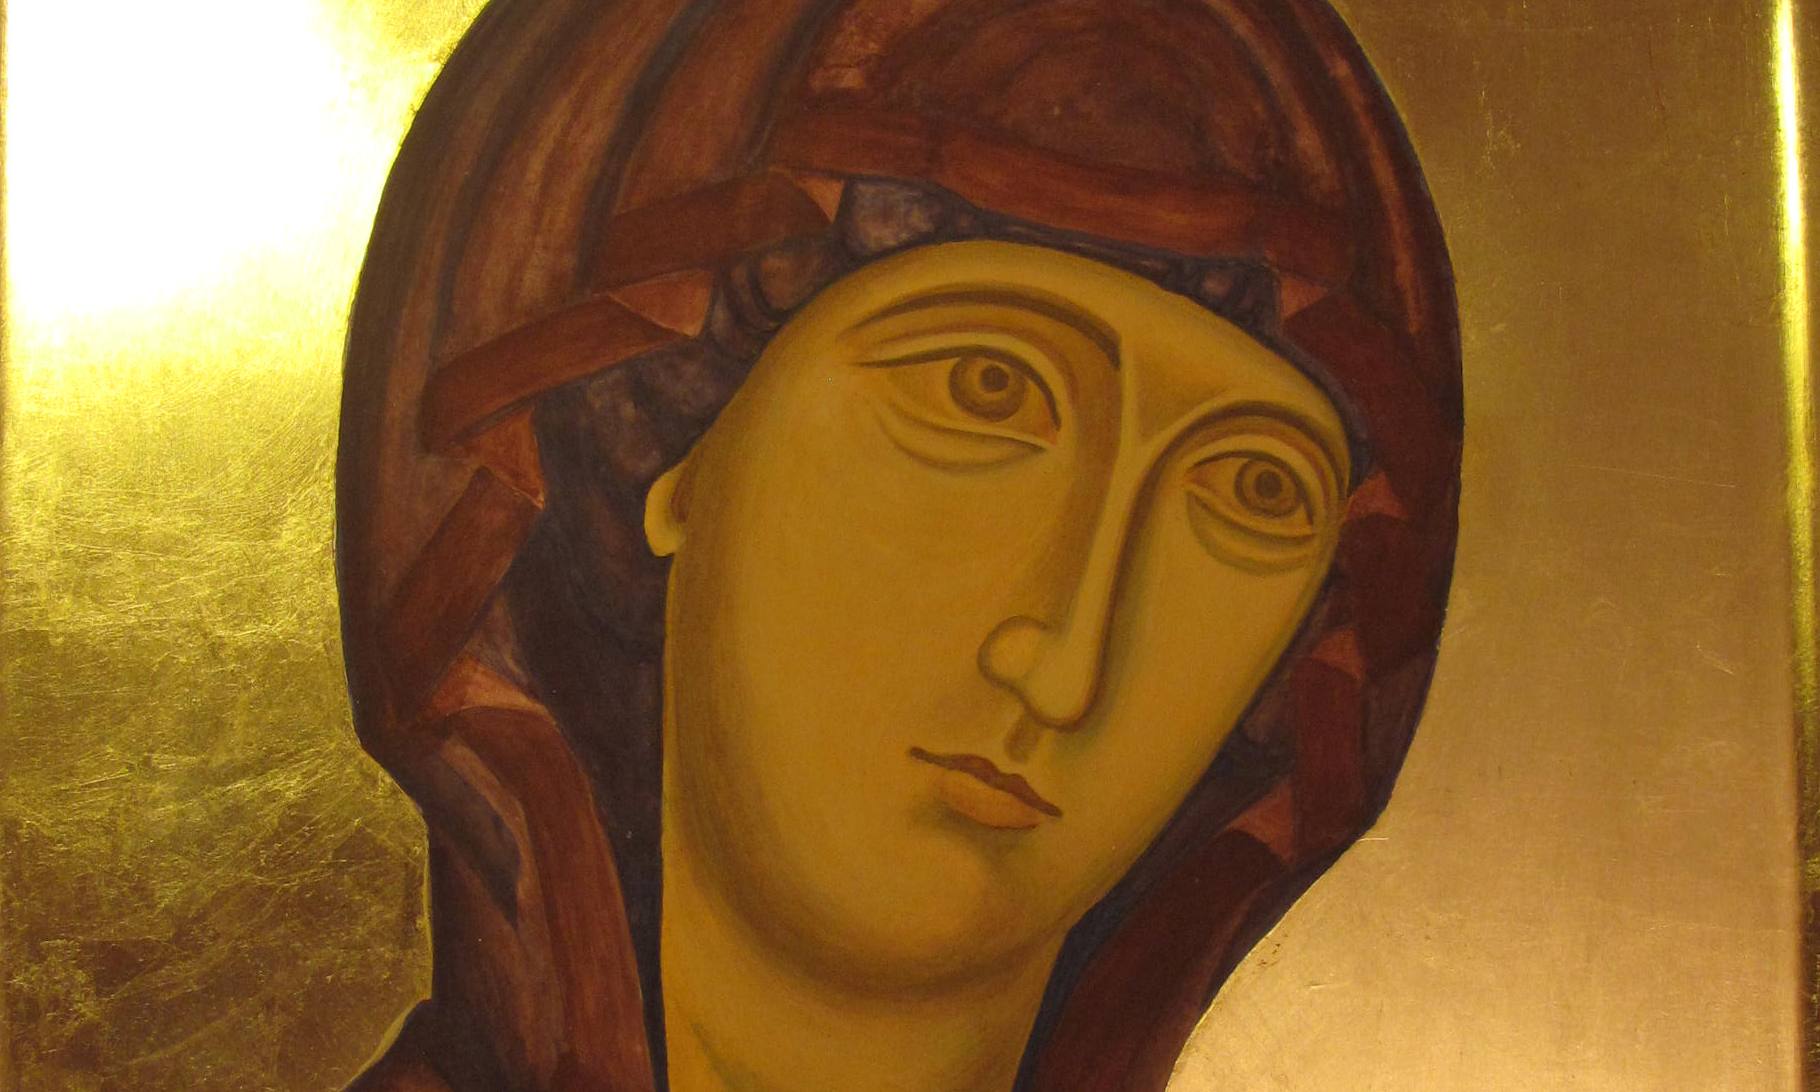
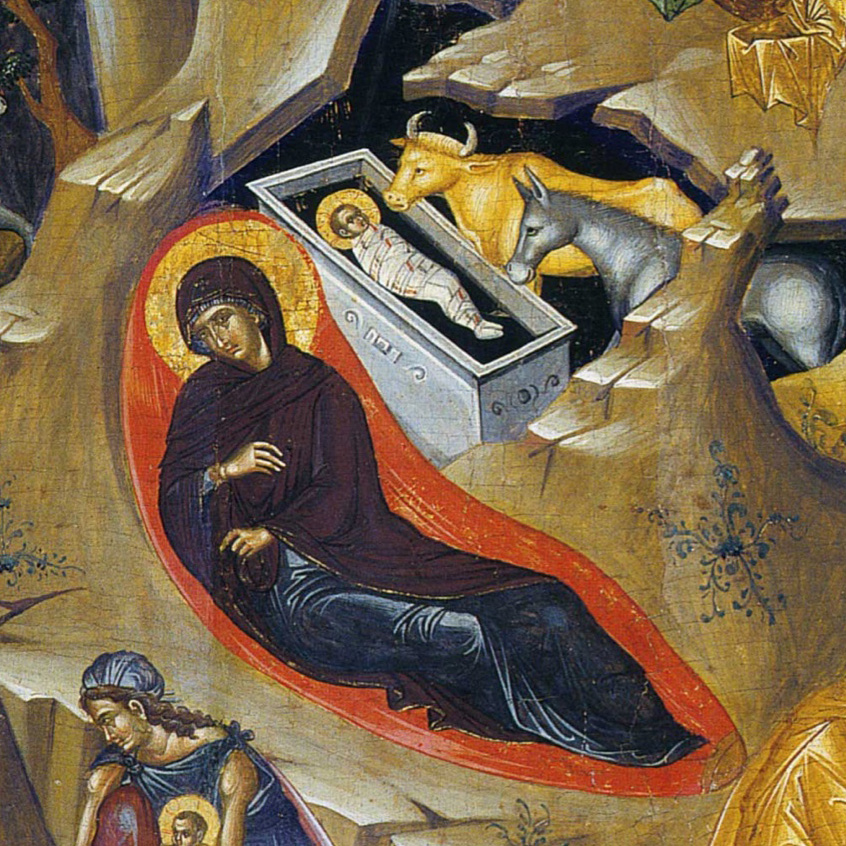
It was somewhere during this exploration stage that I came across the translucently beautiful work of the Romanian master iconographer Gabriel Toma Chituc. This detail from his Nativity icon was an answered prayer for me as it expressed so eloquently the union of heaven and earth, Mary placed vertically and the Christ Child horizontal with the light of the star reaching into the cave.

Nativity by Gabriel Toma Chituc
Progress on the cartoon but not amended the star yet.

For the ancient Greeks, the cave symbolised the convergence point of divine or cosmic energies and was considered a sacred point where the soul could enter earth and subsequently leave and return to earth.

Shorthand version of preparing the gessoed board! Tips on gessoing here.

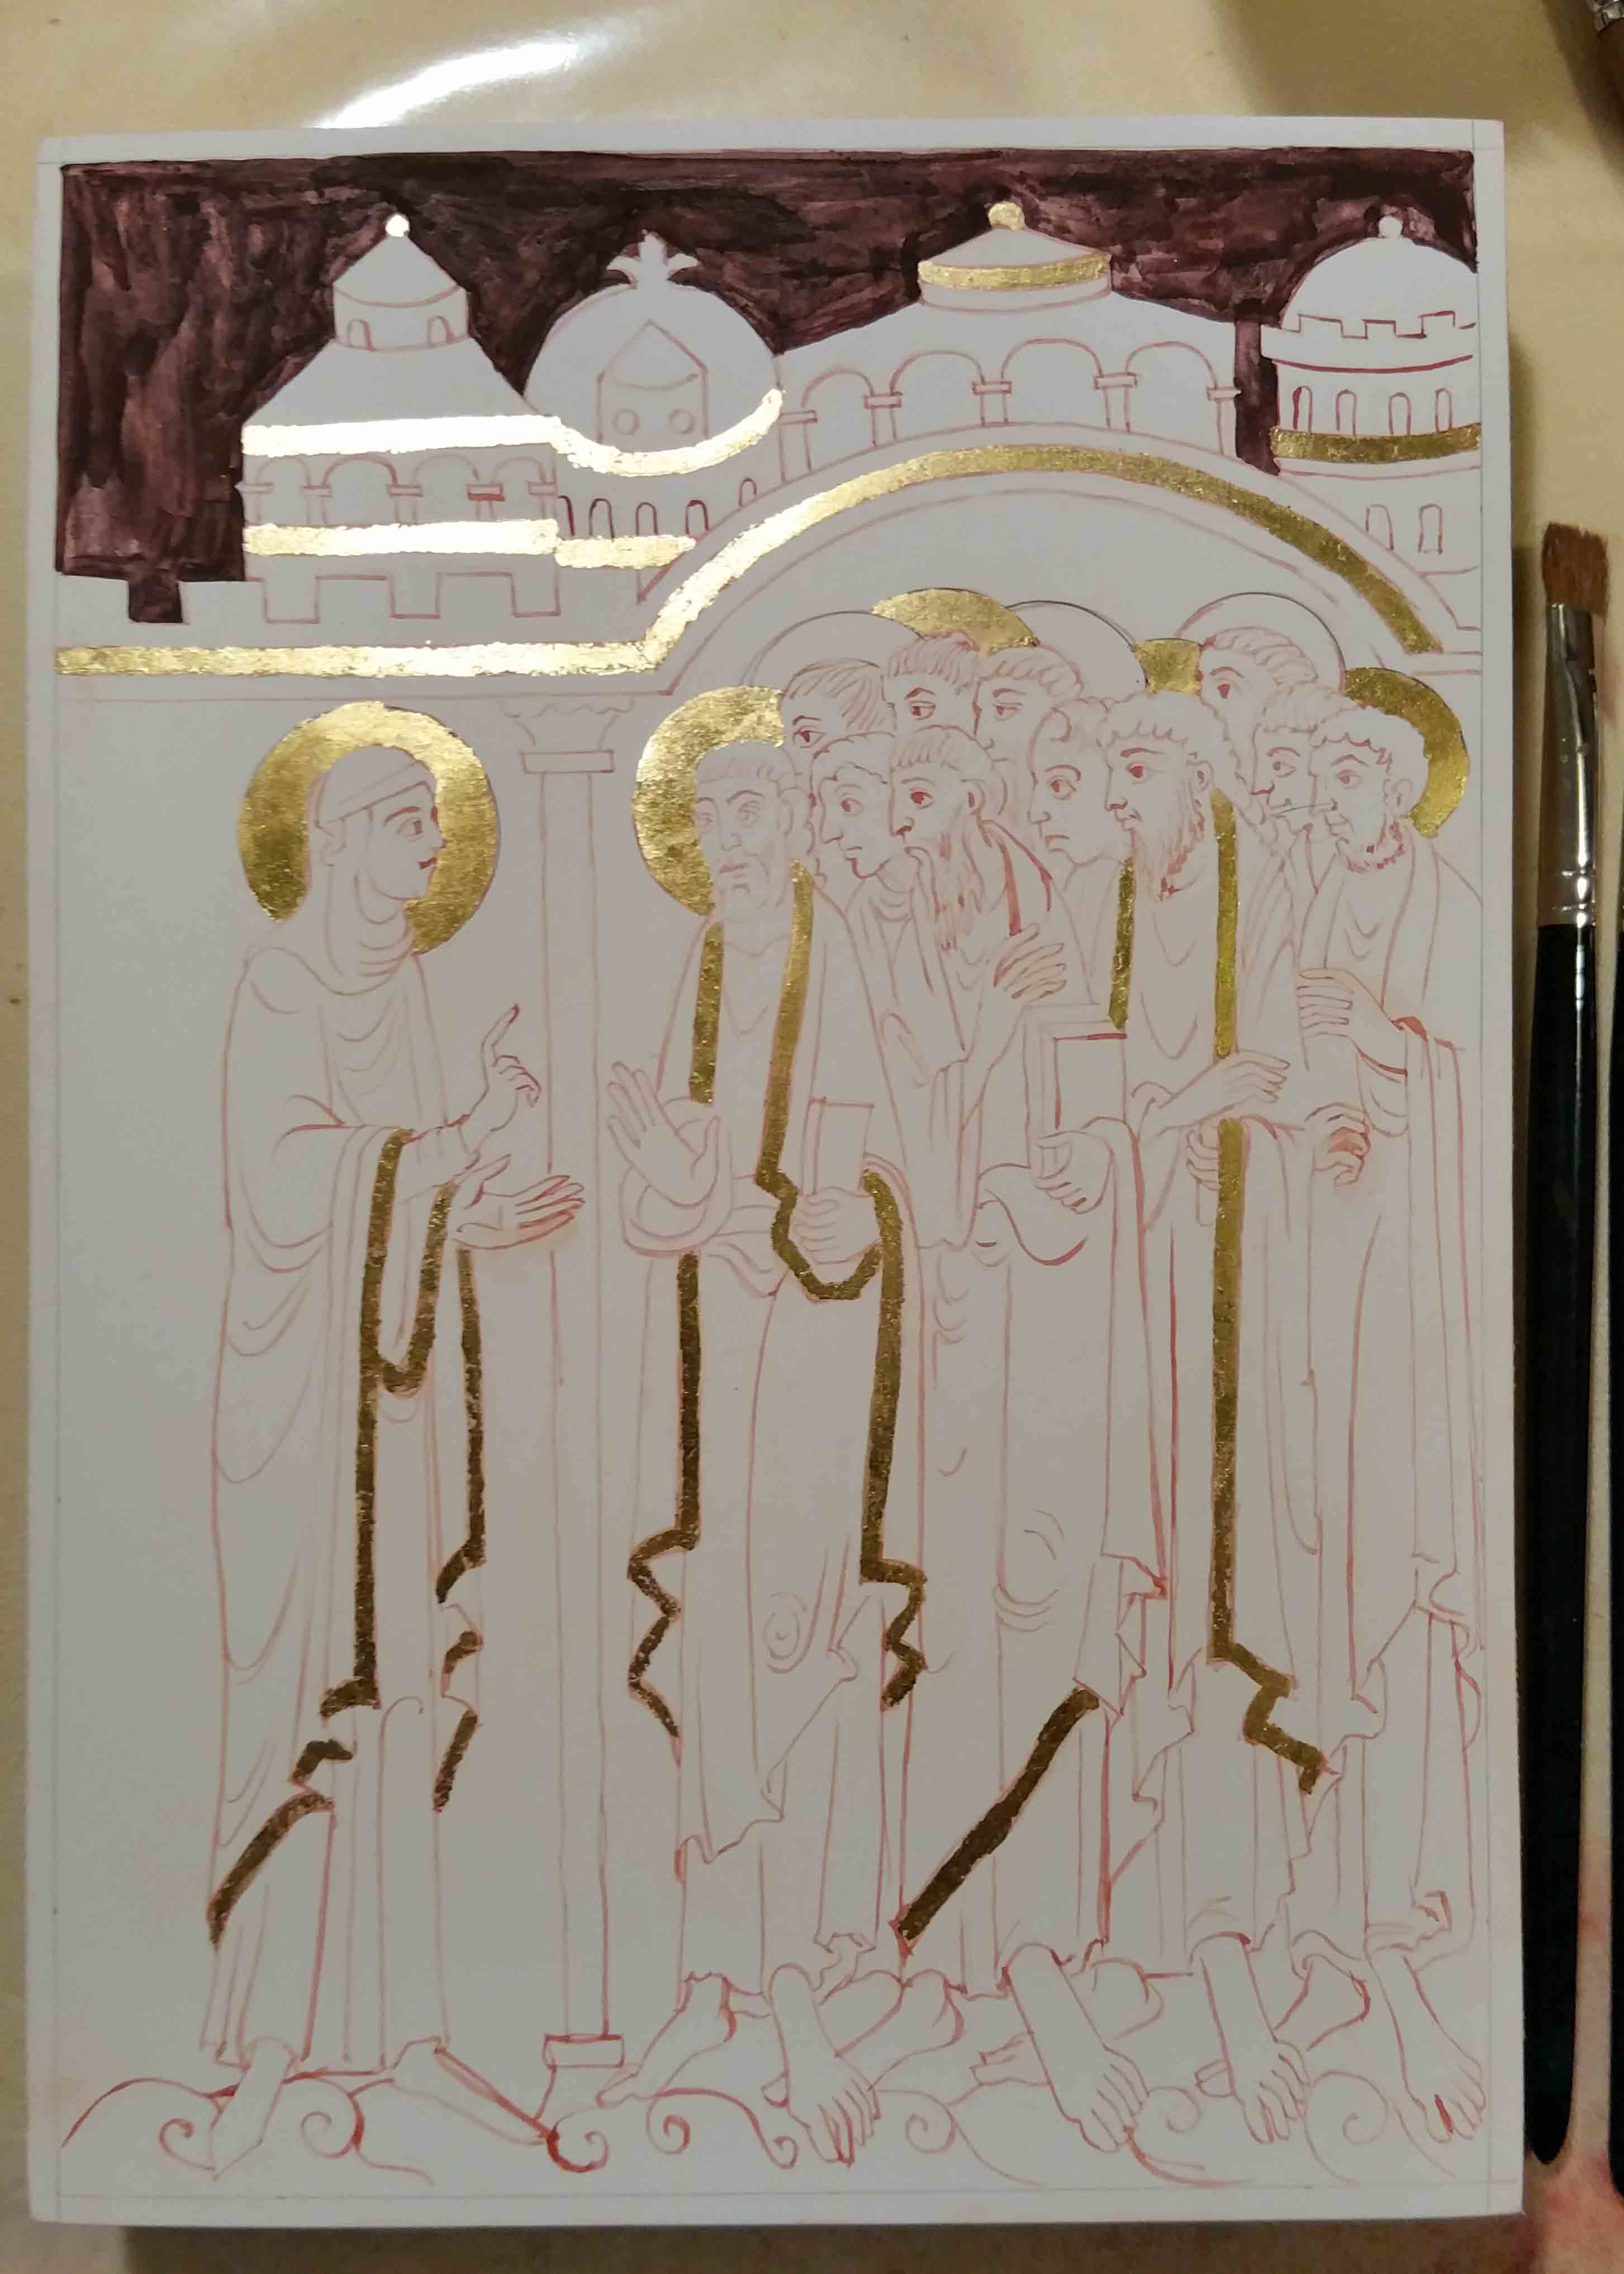
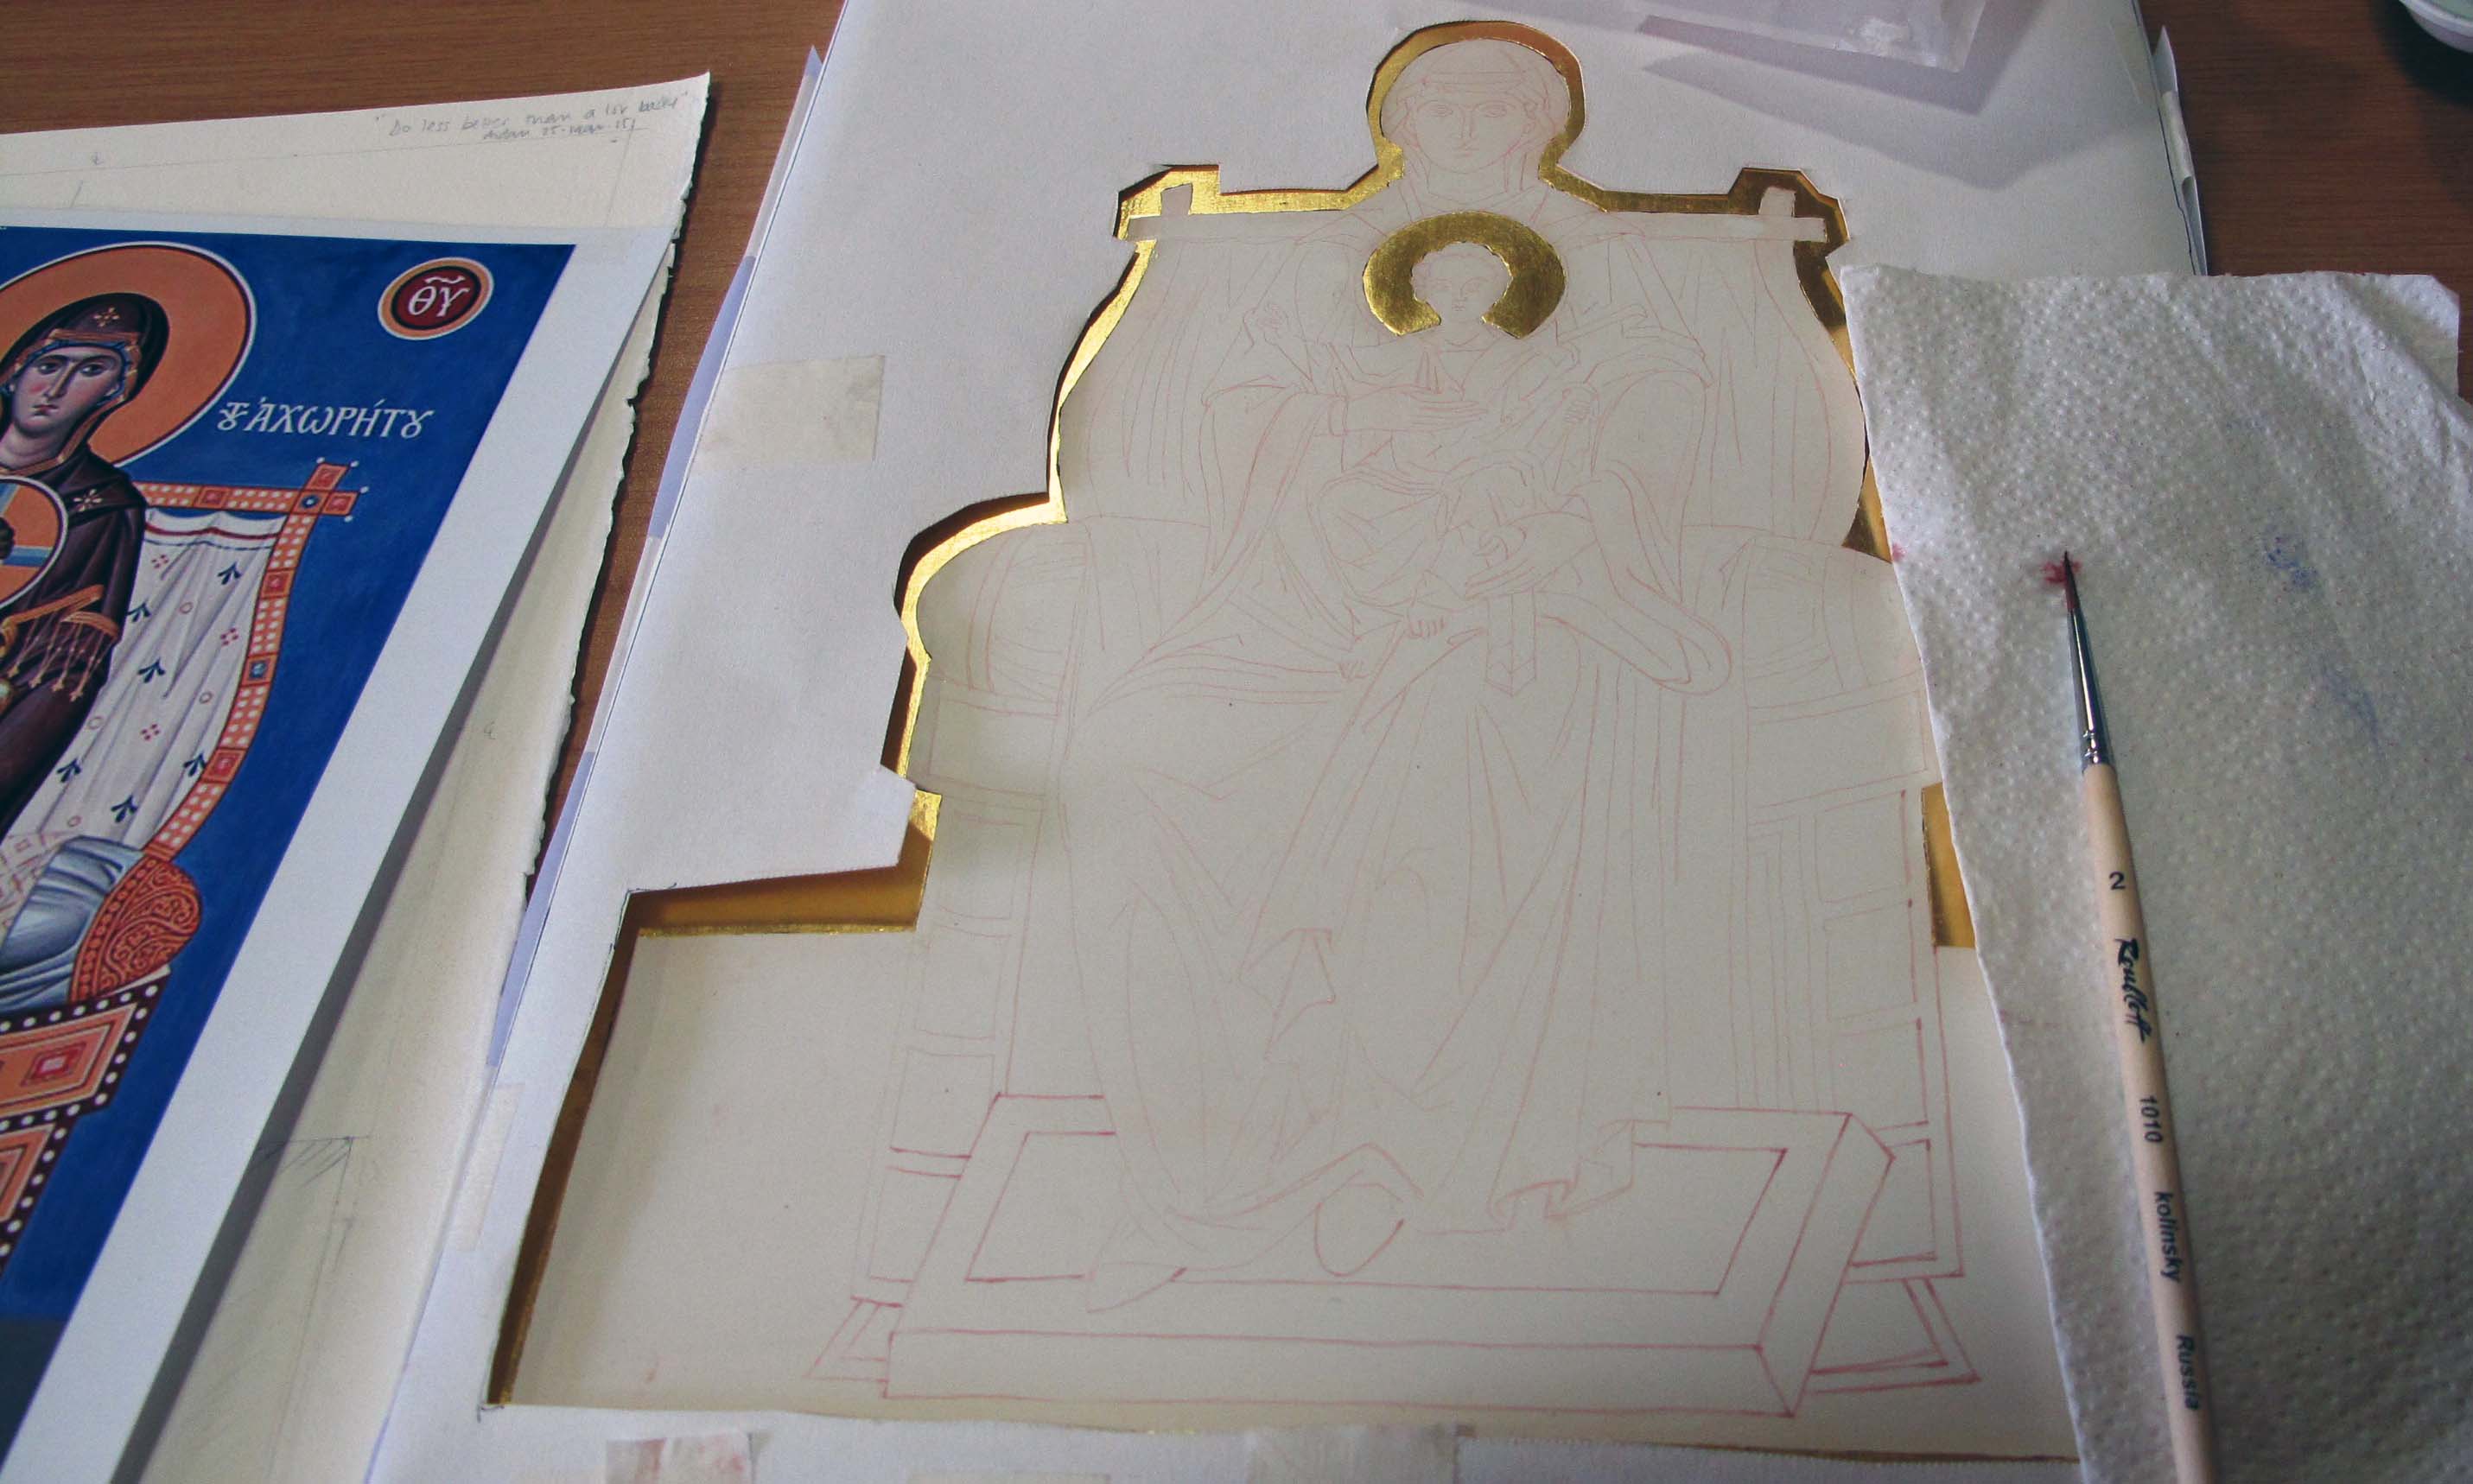
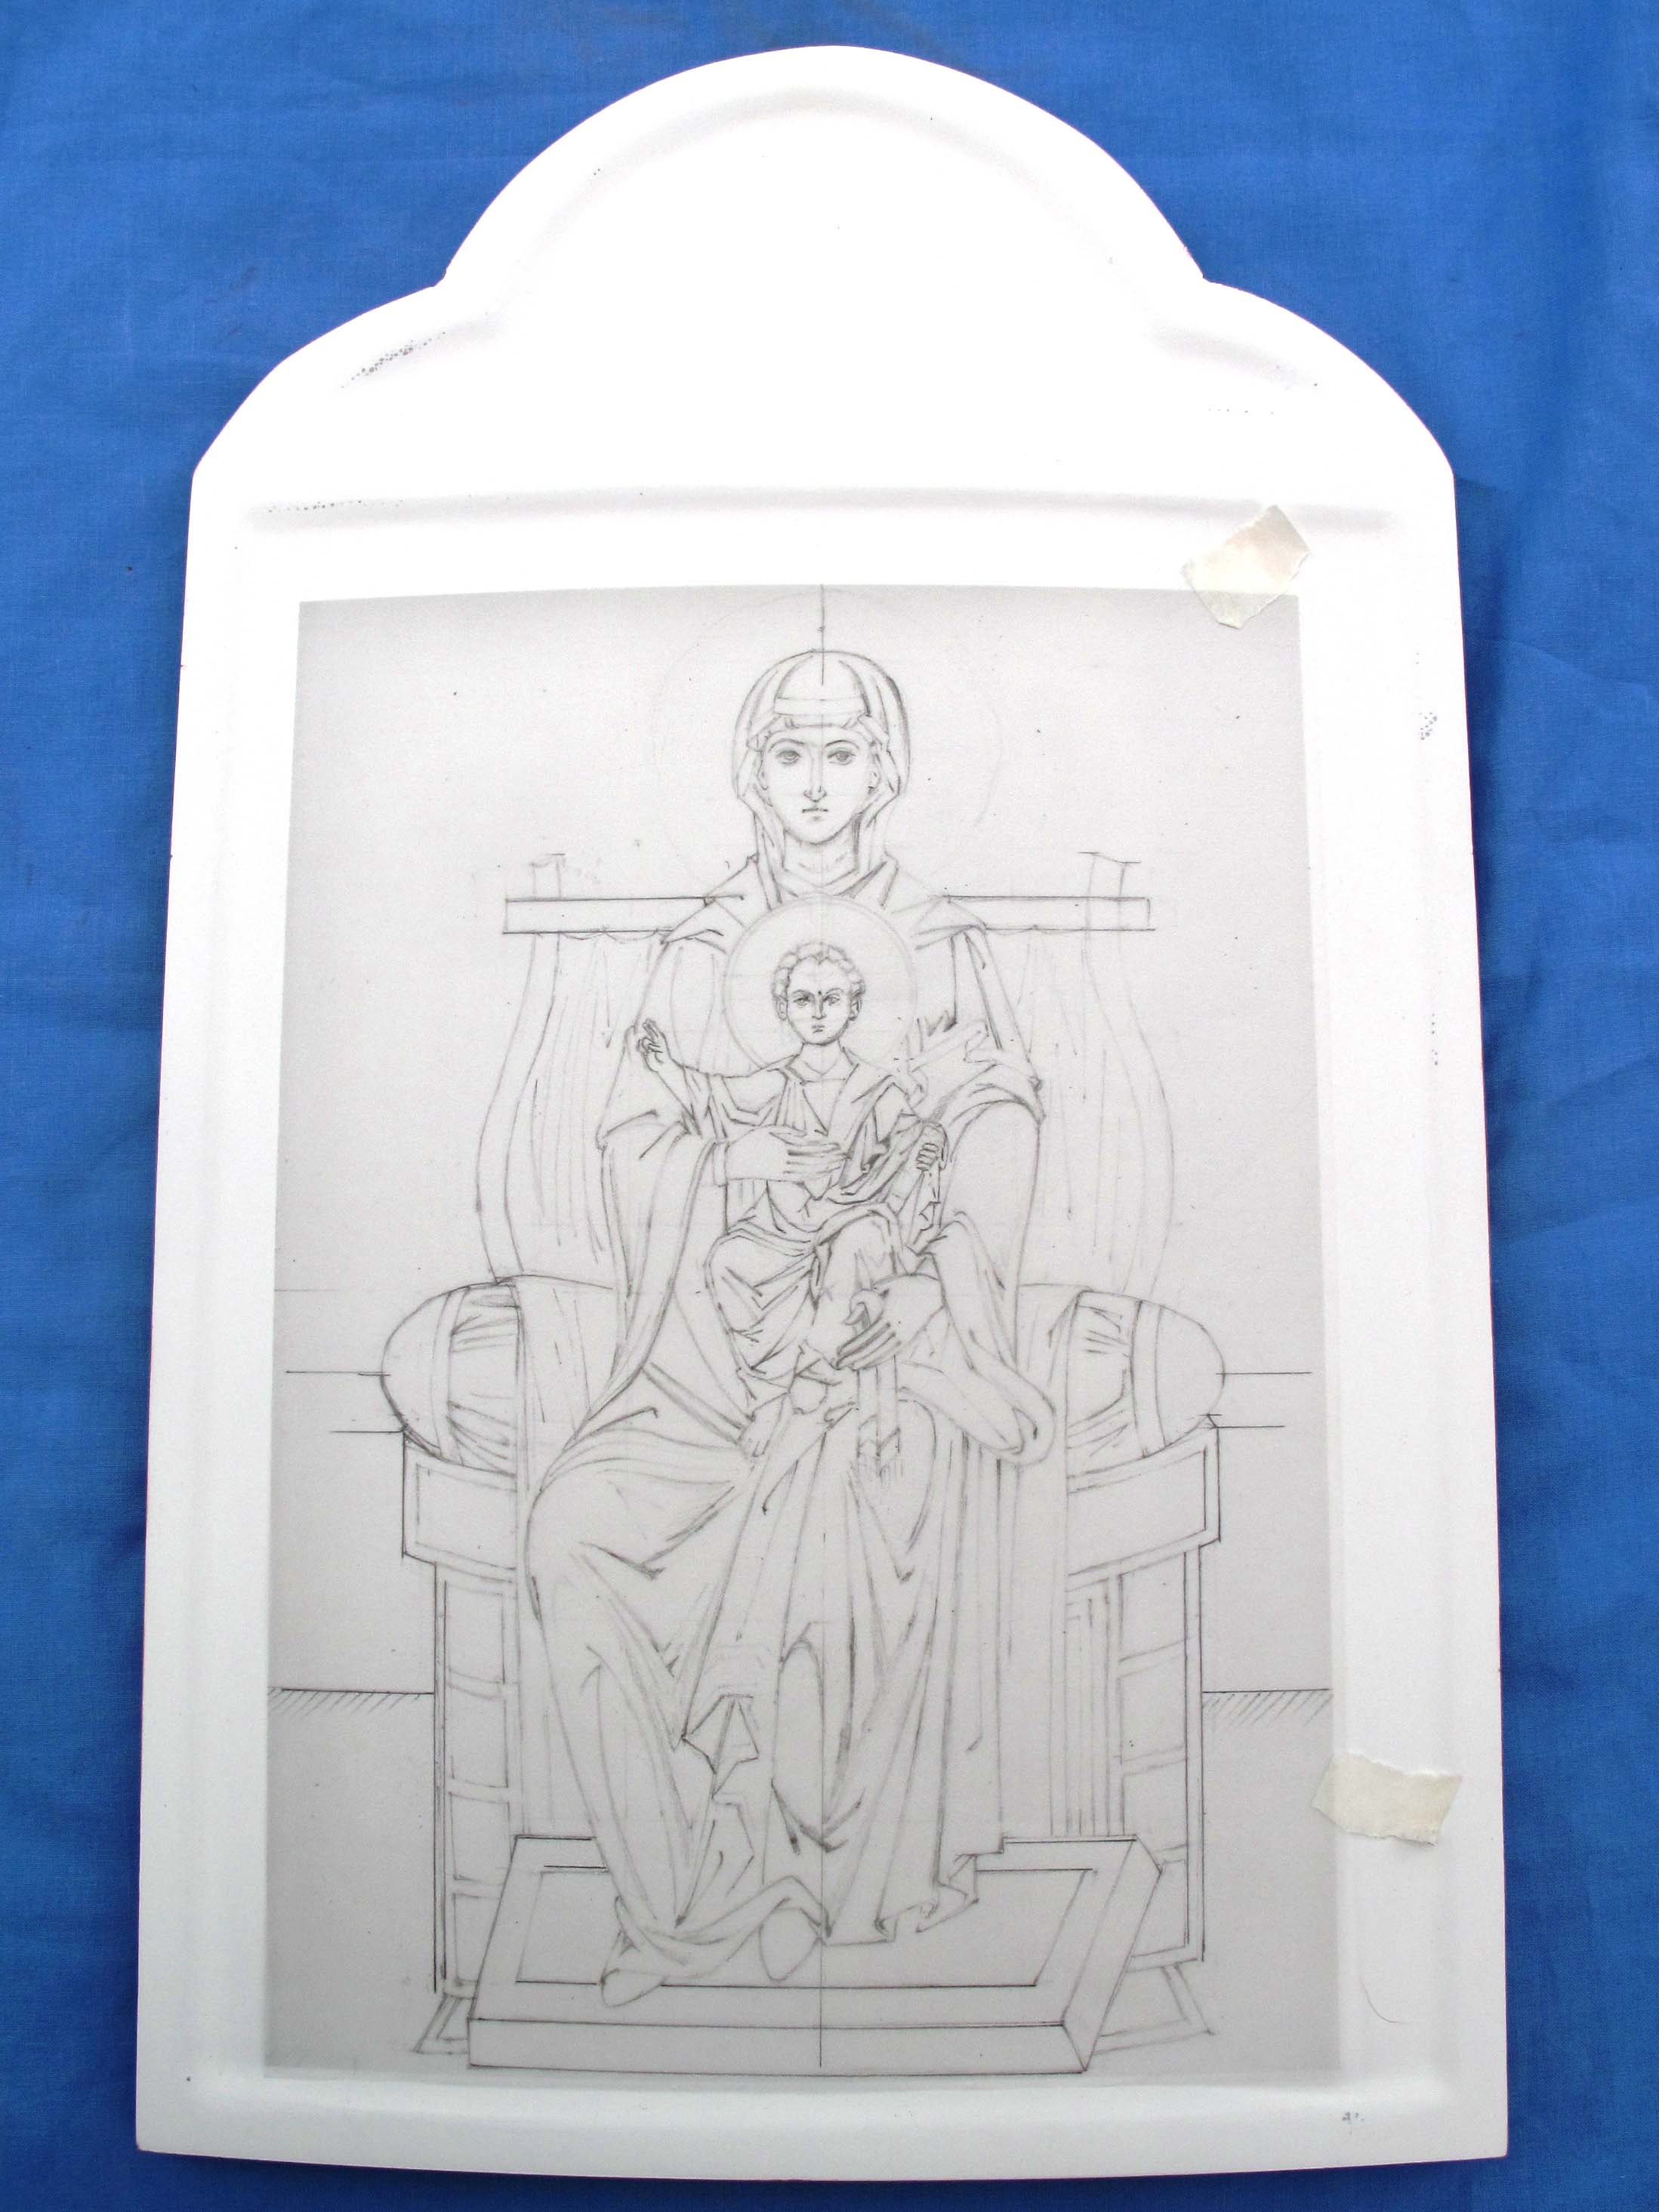
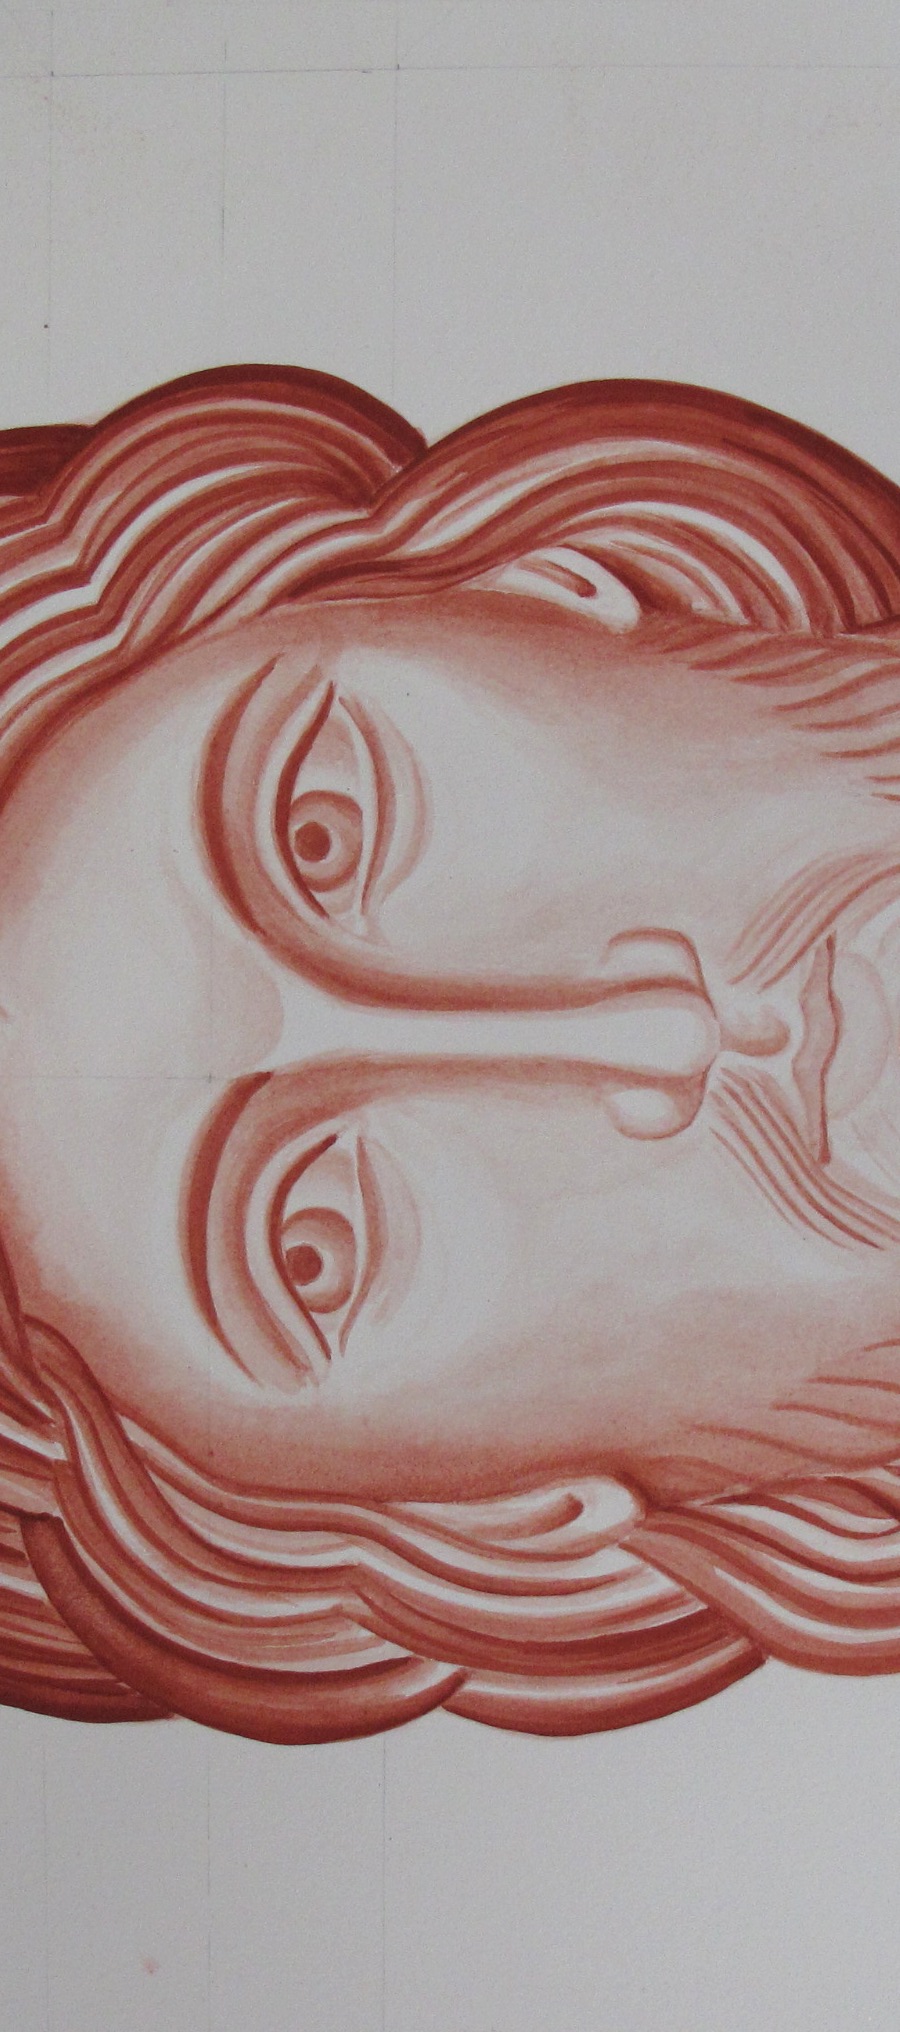
I will close here for now showing the cartoon transferred on to the panel, using red ochre rubbed on to the back of the traced paper image and setting the lines with a dilute mix of red ochre tempera. If you would like to see the finished icon, you can see it here.

As always, thanks for reading and wishing you a peaceful and blessed Advent.

Ronnie

Final composition settled and outline painted on to the panel

‘I Saw Him!’

mary Magdalene tells the disciples Christ has risen

Mary Magdalene is first with the good news ‘I have seen the Lord!’

Good morning and Happy Easter!

Romanesque manuscripts are a rich resource for iconographers. I have often wondered how a manuscript image would work painted on to a gessoed board instead of vellum. I had a small maple board (approx 6″x 8″) already prepared so I set aside the homework on my nativity icon to work on this small experimental piece during Lent.

I chose this image of Mary Magdalene announcing her news to the discples. It’s from the St Alban’s Psalter, one of several known to have been created at or for St Albans Abbey in the 12th century. I love their expressions and the long thin draperies contrasted with oversized hands and feet.

Icon board first stage of work for St Albans Psalter

Outline of figures added and oil gilding applied.

I transferred the outlines from my line drawing in red ochre then applied several layers of acrylic gold size (with some red ochre added to provide a contrast against the gesso) to adhere the transfer gold.

I then applied the base colours, including the richly coloured Caput Mortum for the background.

Ground terre verte azurite on icon board

Building up the layers of garment colours

7 a Magdalene and disciples st Albans

Gritty pigment

Some of my pigments are quite gritty. I like this varied texture on backgrounds but it’s hopeless to work with on tiny faces and details so I ground them up with a slab and muller and a spoon of water until they were very smooth.

The blue I used was a gift from my son who has recently been to Japan. While he was there he went to the new shop ‘Pigment‘ especially to buy me some! Here’s a sample of Azurite which I ground up and by levigating the mix I ground out three beautiful blues.

grinding up pigment from Tokyo PIGMENT

Kyojyo Gosu 6 Azurite from ‘Pigment’ in Tokyo

As the terre verte was too gritty to underpaint the small features on the faces, I used black and yellow to make green instead.

Underpainting faces

Underpainting faces using Maimeri yellow and a touch of ivory black

applying membrane to face painting

Adding the membrane to faces using maimeri yellow and white, a dash of red added later

6 face highlights

Building up highlights on the faces and adding the hair

The faces still seemed too pale so I added a few washes of French Ochre Havanna (also called Warm Ochre). Looking at the faces and hair this close up I can see there is still some work needed.

7 final faces

Deepening the shadows, adding vermillion to the eyes and white highlights

I added several layers of malachite over the terre verte to give this rich green.

8 St ALbans Psalter Magdalene announces news

The almost finished article.

To see the original manuscript, please visit the St Albans’s Psalter here and this icon is now available to buy from my Etsy shop here.

Wishing you all a blessed and happy Easter and as Mary Magdalene first said: ‘He is Risen!’

Thanks for reading

Ronnie

P.S. Prints and cards are now available of this icon from Smith York Printer


Hallowed be thy Name

Lettering on handmade book

Hand made book covers for the dissertation showing four different manuscript lettering styles.

Hello icon friends,

Part of  the icon course includes submitting a dissertation. This sounded quite daunting but Aidan has been great at keeping this in perspective explaining that it is really just an essay on a subject which we are passionate about – something we can share with the rest of the students. I will be sharing my subject in stages here and will start off with an overview of my subject.

I was encouraged early on in the course when Aidan spoke about illuminated manuscripts as a rich resource for western iconongraphers. I have loved calligraphy and illuminated manuscripts since I was at school and so my dissertation subject was waiting in the wings: ‘A comparative study of four illuminated manuscripts as a resource for lettering on contemporary western icons’.

Hand painted illuminated letters

Finished letter samples and bound lettering books

The best part for me about this subject was when, on the very first day of the course, Aidan explained how it is the name on an icon that makes it an icon:

We venerate the icon that bears the name”.

It struck me how important it was to apply the same care to naming the icon as given to painting the image itself. When we are named in Baptism, the sacrament leaves an indelible spiritual mark of belonging to Christ on the soul and thus our chosen name becomes an intrinsic part of who we are. Solomon declared that:

“A good name is rather to be chosen than great riches” (Prov. 22:1).

The significance of naming is a wonderfully rich subject but my dissertation is a practical one based on writing out alphabets interpreted from the lettering of four manuscripts, which I will briefly touch on here. I will go through each manuscript study in stages in subsequent posts.

The first manuscript I chose was a European example of an early 8th century uncial hand, taken from an unidentified manuscript from Mont St Michel which I named ‘Avranches‘ for the purpose of my study:

Avranches manuscript

Example of lettering from the Avranches manuscript

Avranches lettering

Samples of gilded lettering in the ‘Avranches’ style and the hand bound book of lettering.

Gilded letter G from Avranches

Gilded example of letter G from the ‘Avranches’ manuscript.

The second is the Anglo-Saxon Benedictional of St Aethelwold, written in Winchester 963-984, by the scribe Godeman.

gilded lettering

Examples of gilded letters and hand bound book of Aethelwold lettering

Aethelwold benedictional

Gilding the letter X from the Aethelwold Benedictional.

Gilded letter sample on heavyweight, hot-pressed watercolour paper, using gesso made from the recipe when I attended Patricia Lovett’s Gilding and Illumination skills course. Vellum makes the ideal surface for gilded letters but these are lettering studies rather than finished pieces.

Gilded letter X

Gilded letter X from the Aethelwold Benedicitonal

Gilded letters D and S

Letters D and S in the Aethelwold style

The third and fourth manuscripts were written about the same time but one written in Bury St Edmonds the other in the Holy Land – the latter providing context for my study.

lettering of the Bury Bible

Bury Lettering on the hand bound book of letters

The Bury Bible is an example of High Romanesque style, written c.1130-1135 AD, and is a spectacular work of art by the hand of Master Hugo, considered one of the earliest professionally documented artists in England.

letter A gilded in 23 ct gold leaf

Gilded letter A from the Bury Bible

letter N Bury Bible

Illuminated Letter N based on the Bury Bible manuscript

The Melisende Psalter was my fourth and final study.

melisend Psalter pic of dissertation work

Gilded letters and hand bound book of lettering based on the Melisende Psalter

It is written in the style known as ‘protogothic’ by a group of six artists and a scribe, thought to be of French or Italian origin, in the scriptorium of the Monastery of the Holy Sepulchre, Jerusalem, between 1134 and 1143 not long before the second crusade.

Illuminated letter A

Letter A from the Melisende Psalter, painted with Azurite and Terre Verte.

gilded letter B

Here’s B taken from the Melisende Psalter – painted in egg tempera with lapiz lazuli and terre verte.

My choice was also influenced by the availability of clear letter examples within the manuscripts. I was looking for enough images of each letter to study and compose an alphabet in the spirit of the original. That’s more than enough for now. Hope it has sparked a little interest in the subject!

letter C

Last example from the Melisende Psalter – letter C

Before I sign off,  I would like to say a big thank you to those who take the trouble to get in touch. I really appreciate hearing from you:-)

Thanks for reading.

Ronnie

Sketching Thessaloniki – a glimpse of an ancient land

Terracotta jars in Thessaloniki

Amphorae used in the wine and oil trade, 3rd to 6th Century, Thessaloniki, Greece

I’m not long back from our field trip to Thessaloniki, Greece; a once-in-a-lifetime experience. Travelling with a small group of icon diploma students, all passionate about our subject, we visited the mosaics and wall paintings in the ancient churches of Thessaloniki, led by Aidan Hart and supported by the Prince’s School of Traditional Arts.

The places we visited didn’t allow flash photography so most of my photos are a little too fuzzy to share here. However, I kept a sketch book and though most of these pen and ink drawings were done in 5-10 minutes, I hope they give you a flavour of the trip.

If you are really interested in looking at the wall paintings that we visited, here is a link which is well worth bookmarking and which I only discovered on my return, it’s a database of Byzantine art: Princeton University.

Hospitality from Harry at the Vlatadon Monastery

Hospitality from Harry at the Vlatadon Monastery – Greek coffee and ‘Greek Delight’

pen and ink sketch of 5th Century mosaics

Fragments of rich greens and blues of 5th century mosaics in the Church of Acheiropoietos

pen and ink sketch of Greek icon

500 year old icon of the ‘Hope of the Hopeless’

pen and ink sketch of Thessaloniki

Sketch of the apse and iconostasis in the Church of Archeiropoietos

pen and ink sketch of Greek cats

Basking Greek cats and a fragment of Roman archaeology

pen and ink sketch of Greek balcony

Balcony beside the Ecclesiastical Museum, Thessaloniki

agia Sophia pen and ink sketch

Looking toward the apse of Agia Sophia, Thessaloniki and the glow of the golden mosaics.

pen and ink sketch of Agia Sophia

Detail from the ceiling west of the dome of the Agia Sophia, Thessaloniki

tree sketch

Shape of a Greek tree in a planter

Well in the Crypt of St Demitrios, Thessaloniki, where the saint was martyred

Well in the Crypt of St Demitrios, Thessaloniki, where the saint (an officer in the Roman army) was martyred in AD303. The 7th C basilica was built on the ruins of a Roman bath complex.

Nicholas Orphanos

Nicholas Orphanos – wall paintings attributed to the school of Panselinos.

Hosios David Thessaloniki sketch

Mosaic of the ‘Beardless Christ’ in the apse of Hosios David, depicting the vision of Ezekiel, late 5th C

Finally, I will leave you with a few more sketches of life from the Museum of Byzantine Culture, Thessaloniki.

sketch of greek necklaces

Necklaces and bracelets – delicate and fresh colours from the 2nd to 6th centuries.

oil lamp Byzantine

5th century lamp of Thessaloniki – approx 80mm x 60mm

column capital

Cube capital engraved with a cross which is formed by four diagonally carved oil or wine amphorae.

Thanks for reading.

Ronnie

Drawing Heavenly Bodies: Virgin and Child Enthroned with attendant Archangels Raphael and Michael

pencil drawing of icon of virgin and child enthroned

Cartoon of the Virgin and Child Enthroned

Hello icon friends,

The summer before I embarked on the icon diploma course, I asked Aidan if there were any practical steps I could take to help my ability as a student icon painter. His answer was immediate: ‘Learn to draw!’ So I signed up to a really good local drawing class with David Brammeld and a year later Drawing the Street was born, not long before I was accepted on the Diploma course.

Drawing is becoming a way of life for me and I am always exploring ways to develop. There are many online classes and one which I have found refreshing and energetic is Sketchbook Skook

In the meantime, there is so much to learn with icon painting that I thought that I could share my cartoons of the figures for the triptych I’m working on, which might help you get started with your own icon studies.

You should be able to save these drawn images to your computers and print them off on A4.

The four images of the Angels of Chora are all borrowed from Aidan’s library. I hope to be able to credit the photographer in an update to this post.

Meanwhile, happy drawing!

Ronnie

pencil drawing of angel of Chora

Archangel Michael after one of the Angels of Chora

pencil drawing of Archangel Raphael

Archangel Raphael line drawing after one of the angels of Chora

Now for the full size images:

Virgin and Child Enthroned line drawing low res

angel of chora pencil drawing

Full length drawing of Archangel Michael taken from an angel of Chora

pencil drawing of Archangel Raphael

Archangel raphael full length line drawing

Image of Angel of Chora

Angel of Chora image courtesy of Aidan Hart’s image library

image of Angel of Chora

Angel of Chora images all courtesy of Aidan Hart’s image library.

Angel of chora

Angel of Chora images all courtesy of Aidan Hart’s image library.

angle of Chora black and white

Angel of Chora – images all courtesy of Aidan Hart’s image library.

Three days on a Triptych

icon class

Icon Diploma Students taken at Aidan Hart’s May session 2015

Hello icon friends and class mates,

I’m just back from a three day intensive painting our standing/seated figures. I brought my gilded triptych centre panel already prepared with the image transferred so I could start to paint in class.

icon outline drawing

Transferring outline on to gessoed panel

Just to rewind a little, I photocopied my drawing on to tracing paper to locate the outline prior to water gilding. After gilding, I rubbed red ochre pigment into the back of the tracing paper/drawing itself (rather than using an intermediary sheet), and using a fine propelling pencil with a fairly hard lead, transferred the image on to the board.

tracing paper drawing

Drawing of icon on tracing paper

Once all the main lines were transferred on to the board, a weak mix of pigment fixed the lines in place. I then began the underpainting and modelling of the garments.

underpainting icon

First stage of underpainting

Aidan suggested that I used Red Ochre for the Blessed Virgin’s upper garment as it has some blue in it. I also used Lapiz Lazuli Dark, a beautiful natural blue and Ivory Black to deepen both colours; all pigments are from Cornelissen’s.

ivory black and red ochre

Ivory black and Red Ochre pigments

Both pigments are very strong so I mixed them up separately first, then blended. For the underpainting I used a lovely size 2 Roubloff 1010 kolinsky sable brush which I had recently ordered from Vesta-k. It has a really sharp point and holds the pigment well.

underpainting garments

Building up the underpainting of the garments

I mixed black to the lapiz lazuli and red ochre in varying degrees to give depth to the underpainting. The deeper shadows are painted using a lot of black in the mix.

lapiz lazuli

First layer of membrane applied using a wash of pure Lapiz lazuli over the underpainting.

membranes on icon

Membranes on the garments

Pure red ochre and lapiz membranes washed over the underpainting with a very thin layer of lapiz washed over the red afterwards to unite the garments.

After several layers of membrane, I applied a nourishing layer of 20% egg 80% water and let it dry before going over the shadows and adding highlights. Aidan suggested fine layers of pure white dry-brushed over the membrane to give translucent layers of highlights.

The underpainting of the Christ Child is in English Yellow Ochre with a little Red Ochre added to model the form. The colours are painted quite densely as the garments will be gilded using shell gold assist. I understand from my class mate Lee that for the crispest, most gleaming gold lines, hand-made shell gold is the way to go – thanks Lee! Watch this space for adventures in making shell gold – I rang Wrights of Lymm for a couple of books of gold today!

three days work

Three days work

Thanks for reading.

Ronnie

An Archangel for Christmas

Archangel Gabriel on Watercolour Paper.

egg tempera painting

Archangel Gabriel on watercolour paper

Christmas greetings icon friends!

A few lines to say thank you for your companionship during my first year of icon painting. It has been lovely to have your quiet support and interest encouraging me to keep on posting and writing up notes etc!

There are a few more video clips of Aidan Hart’s in-class demonstrations over on You Tube and I have written up some supporting notes to go with them. These are not direct transcripts, simply notes to help as you try out the various stages of painting.

https://www.youtube.com/watch?v=N3a6puiMDuQ Aidan Hart demonstrates underpainting for the Membrane Technique Click here for Notes

https://www.youtube.com/watch?v=XaSi-WVHGaY Aidan Hart demonstrates applying flesh membrane to icon bust Click here for Notes

https://www.youtube.com/watch?v=Hr4R8BzMpPc Shadows and highlights on garments using membrane technique Click here for Notes

https://www.youtube.com/watch?v=CiFkJrsDS1s Aidan Hart demonstrating halos

https://www.youtube.com/watch?v=mFG-XxPqiSI Aidan Hart demonstrates painting Mandilion hair

https://www.youtube.com/watch?v=QbwE0QY1aOw Aidan Hart demonstrates painting garments Click here for Notes

I have enjoyed the monochrome icon studies on watercolour paper and thought I would have another go at the Archangel Gabriel based on the Annunciation of Ustyug. I stretched some Fabriano Artistico paper and painted using the membrane technique. The colours are much softer on paper – lines are not quite as crisp unless you go over them several times. However, it is a great way of practicing if you haven’t got a board prepared.

1 Angel gabriel study

Underpainting: the face is in Terre Verte and a touch of Yellow Ochre Maimeri, garments and wings in a mix of English red ochre, French ochre Sahara and Avana.

Yellow ochre Maimeri eith titanium white and red ochre light

Membrane applied to flesh parts.

Building up the hair and facial highlights.

4 Angel Gabriel study

Highlights added to wings and sleeves

Preparing to gild

Preparing to gild using Roberson’s gilders size – applied over the halo which has undercoat in red ochre.

Gilding the halo

Gilding the halo. Applying final facial highlights

9 Complete Angel Gabriel study

Finished angel with halo, staff and lettering.

It is a better attempt than my last one but there is a long way to go before I become fluent and produce anything nearly as elegant as the original. All the same, it comes with my very best wishes for a happy, peaceful and blessed Christmas wherever you are in the world. Thanks for reading.

Happy Christmas, Ronnie

PS…Some years later and I did revisit some of the finer details on Archangel Gabriel’s face – around the upper lip. I am now happy with this and it is listed here in my Etsy shop

Concealing a Blemish

Underpainting the icon of the Virgin

Building up the underpainting in terre verte and a dash of Maimeri yellow ochre

This post is going to consist mostly of photos to show how I dug a hole in the membrane making a terrible mess of our home project (mine is the Blessed Virgin) and then how I managed to repair the damage.

membrane layer number one

Adding the first membrane layer of maimeri yellow ochre and a tiny dash of titanium white.

Having stressed the phrase ‘do not fiddle’ in my last set of notes, I then went on to fiddle by trying to repair a hole and this is what happened:

stain damage

Stain appears on the cheek

A tiny bare patch had appeared on the upper cheek which I tried to mend very carefully by dropping some paint in from the tip of my brush. It made a big stain. If this happens to you – I suggest that you put the icon away for a day so the paint goes bone dry and you return to it refreshed.  I didn’t and ended up spreading the stain.

stain on icon face

Stain increases on the membrane and breaks through the underpainting

I tried to add more membranes but this seemed to increase the damage. At this point, I took a break. I decided to call it a day, wrap up and leave it overnight for the egg tempera paint to thoroughly dry out, in the hope that with fresh heart in the morning, I could somehow repair the damage.

Repeat the membrane process

Repeat the membrane process

Next day, the paint seemed to stay in place when I applied another membrane so I painted 4 or 5 more layers over the left hand side of the face from chin to brow and between nose and jaw, working with thin layers applied fairly quickly but allowing each layer to dry for at least 15 minutes. I was glad that I had painted quite a strong underpainting as I could still see the image clearly below.

add membranes to icon

Keep applying membranes, at least four or five layers, then begin to add Avana Ochre to the shadows

As soon as the stain was reasonably well covered, I stopped and began to add the shadows in Avana Ochre.

Avana

Add Avana to deepen shadows

8 Strengthen shadows

I then began to add the first of the face highlights, in Maimeri Yellow Ochre with a tiny dash of Titanium White. I haven’t finished yet, but at least the stain has been taken up in the fresh layers of paint. It was a useful lesson to me as I really thought I would have to remove the whole underpainting.

9 Begin to Add highlight layers

Developing the facial highlights

I’m uploading more videos to You Tube from the last class which should be ready in a few days but for now, thanks for reading!

Ronnie

Gilders’ Tips

scratched gilding

Thumbs down for the gilding. Mixing water and oil gilding too difficult to troubleshoot!

Hello Icon Friends, I have been quiet on the blog, sparing you the details of my gilding efforts until I had something useful to share.  I deliberately chose to work on bigger boards as I thought it would quickly show up all the places where I could go adrift. It did just that. Lesson one. Start with a small board, or even better, start with a practice board as Lee Harvey suggests. Water gilding is a difficult skill to master! Some of the students have made notes on their tips which you can read about here: Gilders Tips. Anyway, I wasn’t too pleased with the water gilding that I did in class for my mandilion so I sanded the lot off and applied 18 fresh layers of bole and started again – I think my bole consistency was a bit too thin. Once it had dried, I sanded and polished the bole and was really encouraged when I managed to get a deep shine. Good so far!

Bole layers

Fresh layers of bole applied to support water gilding – allow it to dry at least 24hrs before sanding and polishing.

However, the water gilding process got the better of me and even after quadruple gilding, four books of gold and five days solid of faulting and polishing, the results are still average! The final appearance looks much the same as one layer of oil gilding and only slightly better than what I had sanded off in the first place.

water gilding icon

Water gilding the mandilion

Third attempt at the monochrome of Christ for the Mandilion

Third attempt at the monochrome of Christ for the Mandilion

I also painted my third attempt at the monochromes of Christ (for the Mandilion) and the Virgin, which I was reasonably happy with, so all set to begin the transfer on to the gessoed icon boards next session. My next post will include links to another set of You Tube clips of Aidan Hart demonstrating the different stages of the membrane technique. My final note is to say a couple of farewells. We all wish our fellow student, Susan O all the very best. We will miss you on the course Susan and hope that you keep in touch. A fond farewell to my beloved pet Norman. He was a larger than life character who once trampled over my keyboard typing in the letters Vatopedi as he went and inadvertently googling images of a Greek Orthodox Monastery. He recently got sick with secondary poisoning and much as I tried to keep him indoors (shown here) this weekend he got killed on the road.

Norman the cat

Norman 1.8.13 to 27.9.14 – pictured after he sniffed up a leaf of gold which of course ended up down the hatch!

We are only ever their custodians and I am grateful for the delight he brought in his short life with us. Thanks for reading.

Dylan Hartley’s Top Tips for Gessoing Icon Boards

Dylan and Christina hartley with Icon Diploma Students

Dylan and Christina Hartley (seated) with Icon Diploma Students. Left to right Fran, Joan, Ekatarina, Olga, Ronnie, Rosie, Lee, Susan H, Janina, Michael. Martin is absent on honey moon!


icon diploma students

A quick shuffle up and this one includes Susan M!

We have been learning about the process of making and gessoing icon boards. I used to think that gessoing was simply a matter of applying a few layers of whiting to some linen on a board and Bob’s your uncle. I couldn’t have been more wrong!

Dylan Hartley demonstrating hown to mix gesso in slow cooker

Dylan Hartley demonstrating how to mix gesso to Icon Diploma students

Just as well our teacher Aidan Hart, had set up a three day session with Dylan Hartley, to demonstrate the technique in his Ironbridge workshop.

Chisels of an icon board maker

Tools of a Master

These were three full days – no slacking for a minute! Dylan was taught by Aidan and through years of experience, he has found Aidan’s method to be the most fail safe – as long as he follows the instructions to the letter.  This method is described in full in Aidan’s book ‘The Techniques of Icon and Wall Painting‘.

My notes/photos from the workshop are attached here: Dylan Hartleys Gesso workshop May 2014 but there is no way around it, gessoing boards is a labour intensive process. However, if done correctly, the results are of a very high standard.  The workshop has changed my view of icon boards and I now regard them as works of art of  in their own right.

http://youtu.be/hPqtXk3bEcc Link to a short clip of Dylan demonstrating the application of the first coat of gesso.

Dylan is always looking for ways to simplify the process or to avoid common pitfalls and he shared many of his tips with us during the workshop, ten of which are listed below. Dylan runs gessoing workshops from time to time, and I can thoroughly recommend attending. Not only is Dylan a very clear and wise teacher, but the workshops are held in Ironbridge – full of architectural and engineering treasures.

Encaustic tile details on the Jackfield Tile Museum

Encaustic tile details on the Jackfield Tile Museum

I have picked out ten of the best tips for you below.

1. Buy a slow cooker. Get one with a lift out bowl in a heated container, such as this one sold by Tesco for about £10 to £15. It keeps the gesso/glue mix warm for ages and is a lot simpler to use than a bain marie.

Slow Cooker

Slow cooker and cooking thermometer. Scrim has just been ‘dunked’ into the size.

2. Choose the best wood.  Given the amount of work that goes into the gessoing process, it is a false economy to skimp on the wood – only use the best quality.

3 Mix Plenty. Mix over and above the amount of glue/gesso mix required to allow for evaporation. You don’t want to run out just before you have finished!

4. Work in sequence.  Write numbers on the back of your boards then keep record sheets of when you apply the gesso coats. This is really important. You just have to get one distraction and you can forget where you were and scupper the sequence.

5 Prepare well in advance. Get all the materials and tools together. Turn off your phone, ignore the door bell,  pack sandwiches and have cold drink/flask beside you.

sketch of kit for gessoing icons

Sketch of the kit you need to gesso icon boards

6. Find the front of the (hardwood) icon board.  Pick up the wood and look at the short edge. If the curve of the end grain corresponds with the curve of your eye brow, then the side of the board facing you is the front. If not, then turn the board!

determining the front of an icon board

Finding the front of the icon board – look at the curves of the growth rings.

7. Mind where you position joins. If you are ordering (or making) an icon board which needs a join, it doesn’t have to be placed in the middle. Think about the image and ensure the join does not cross through a critical place (ie through the face).

position of join in icon board

Sketch to show how it is better not to have a central join in an icon board

8. Support your board.  A wooden plinth made out of battens helps to lift the icon board up from the surface and gesso drips/fallout building up below.

timber plinth for gessoing icon boards

Timber plinth for gessoing icon boards plus some chisels and a gauge to measure depth of kovchek

9. Work with the weather.  Gessoing is a job best saved until mild weather – too hot and the boards dry too fast, too cold and they take longer to dry. Ideal temperature is 18-24 degrees, so you can open and close the windows to help adjust the drying speed. Start early in the day. Get everything set up beforehand.

10. WARNING! Never let steel (or any metal objects for that matter apart from Stainless steel) touch the oak. The metal draws out the tannic acids a stain such as this below will gradually appear and you cannot get rid of it.

https://i0.wp.com/www.woodweb.com/knowledge_base_images/zp/removing_black_stains_from_oak_1.jpg

Thanks for reading!