Icon Diploma Student

Learning to see with the eye of the heart

Posts from the ‘Christian iconography’ category

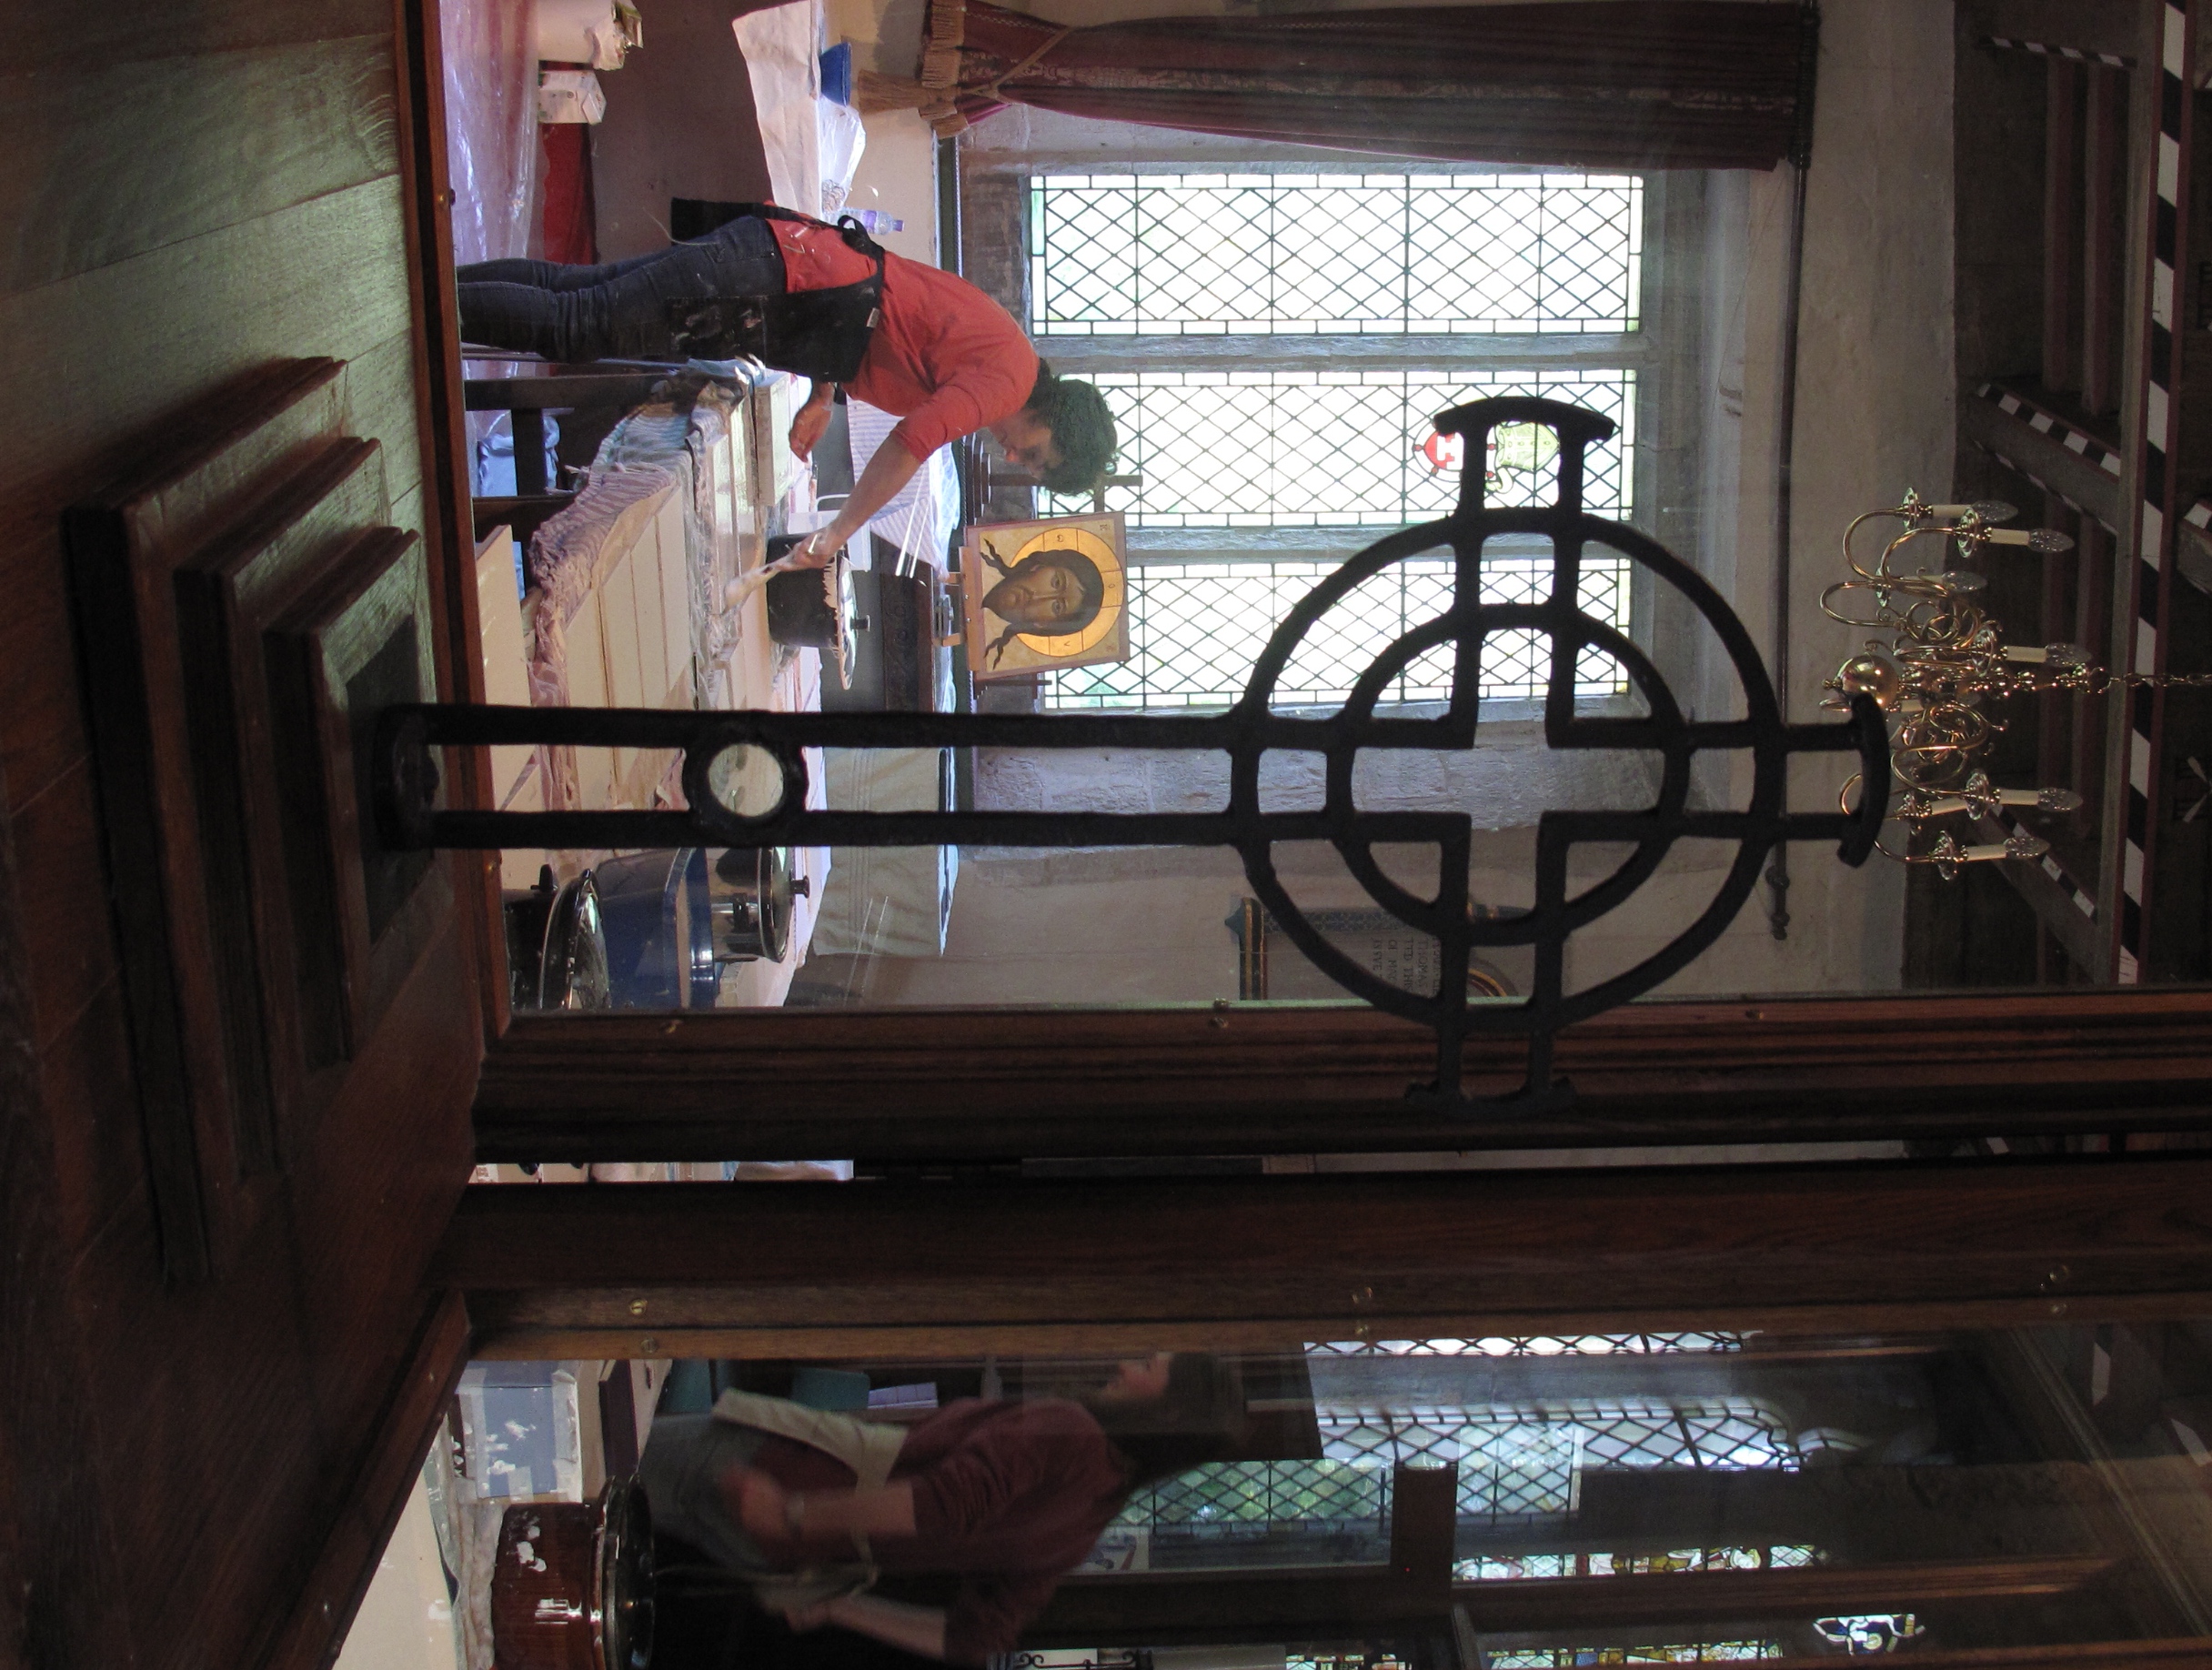
Working with St Francis

st Francis

Work in progress on St Francis of Assisi

Hello icon friends,

A very happy Easter to you all and a warm welcome to the recent people following my blog. You have nudged me back to the desk to post some work after being away for far too long. Thank you!

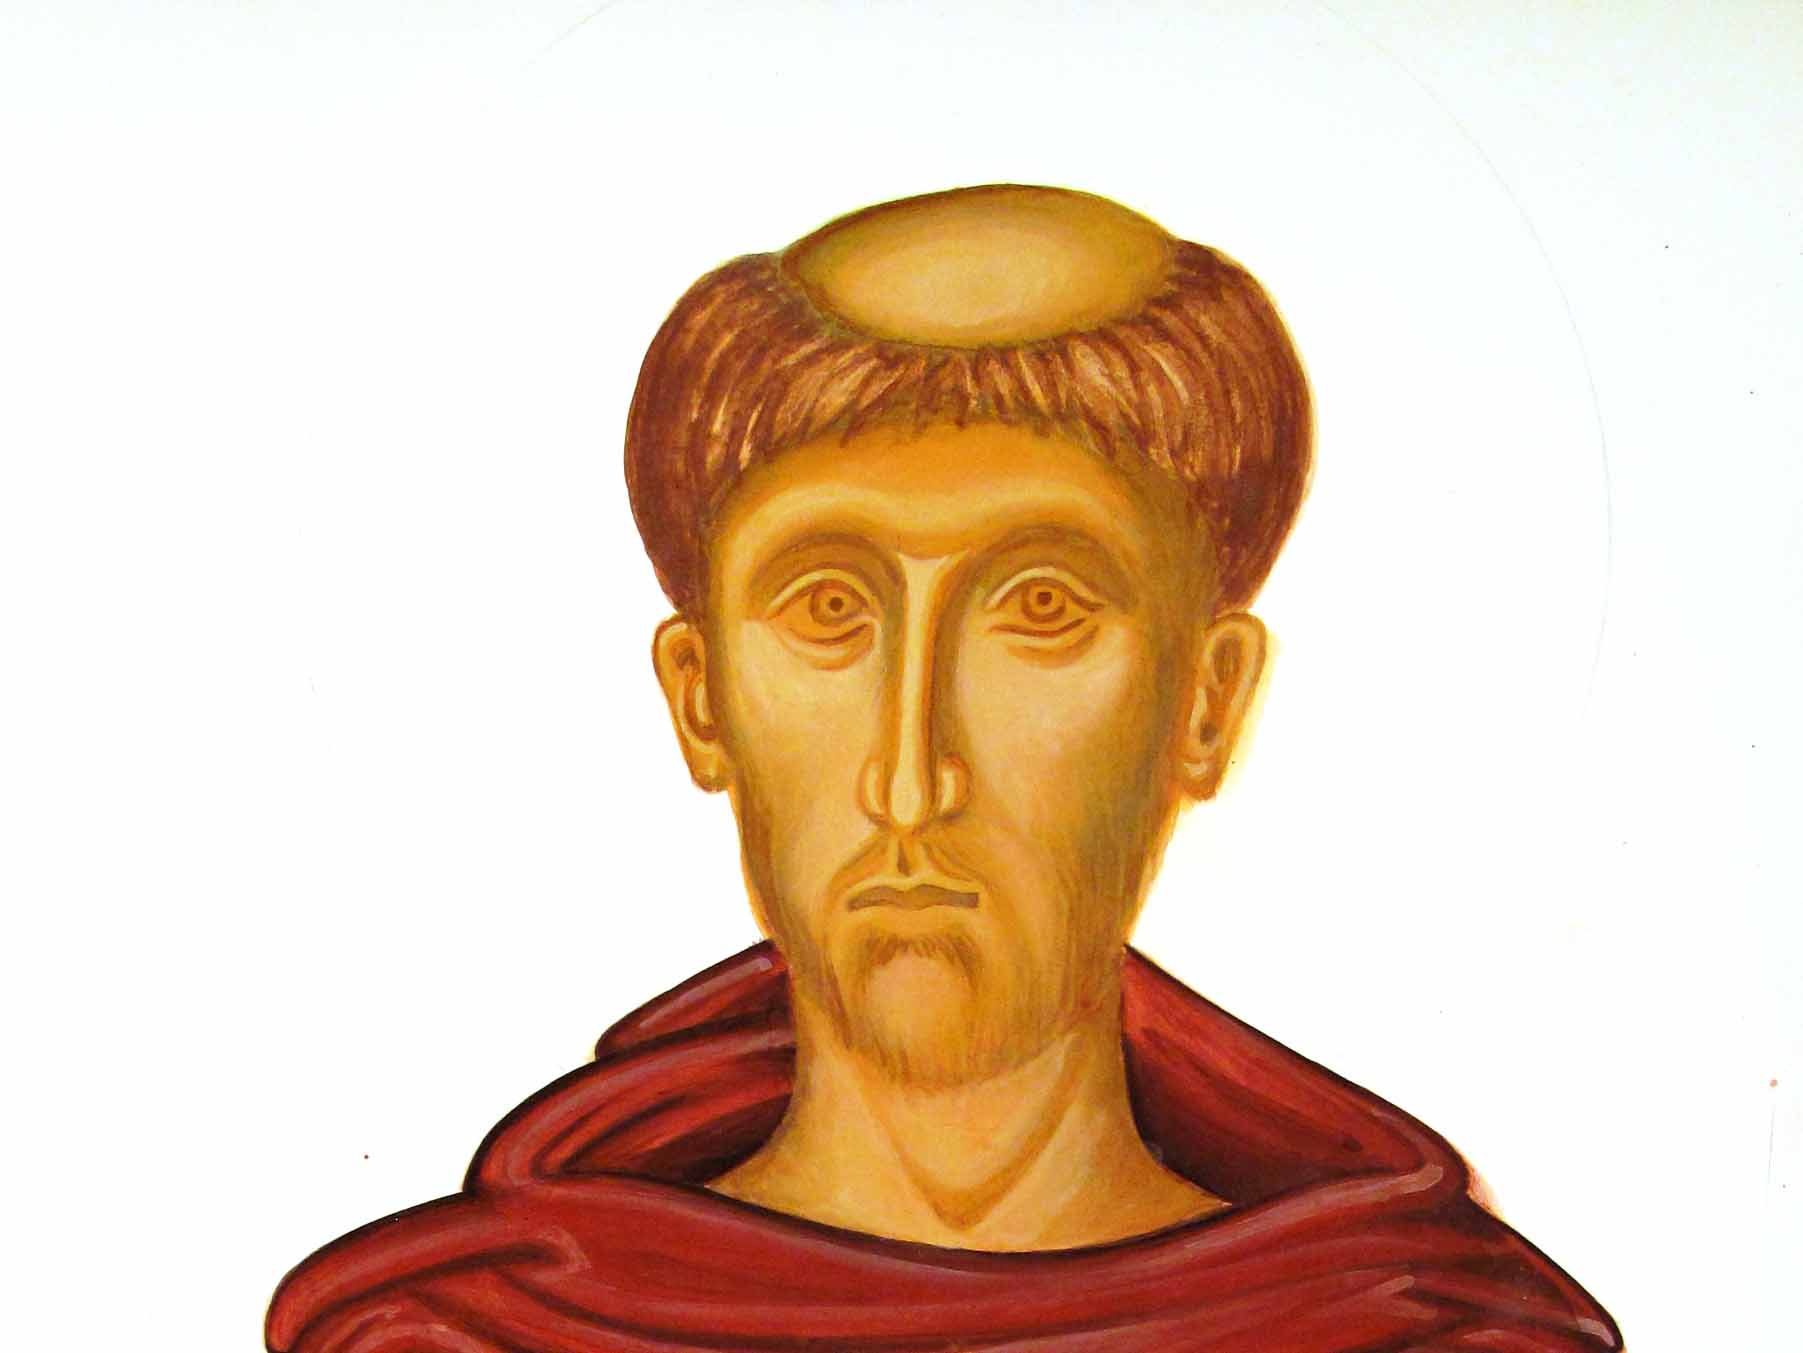
I have a backlog of four icon boards to finish but thought I would start with a summary of work to one of my half figure icons – St Francis, chosen as I am so often calling on his help with one or the other of our pets. I can only trust St Francis knows best as he doesn’t always answer prayers with what I want to hear.

pencil sketch over drawing

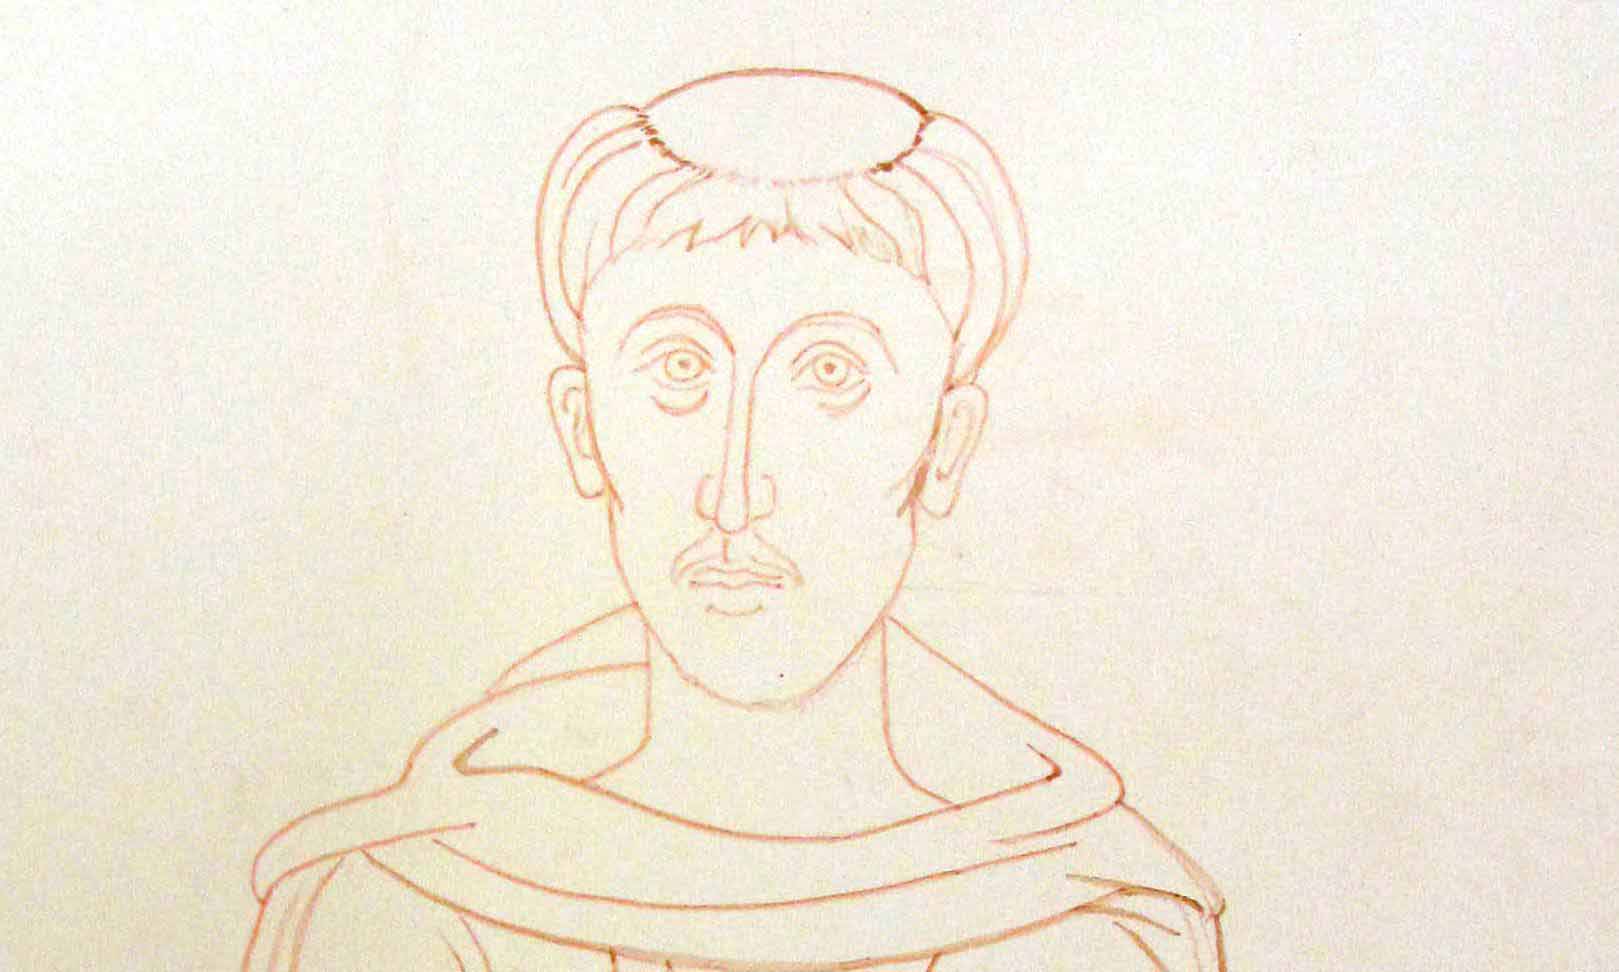
Starting with a pencil sketch

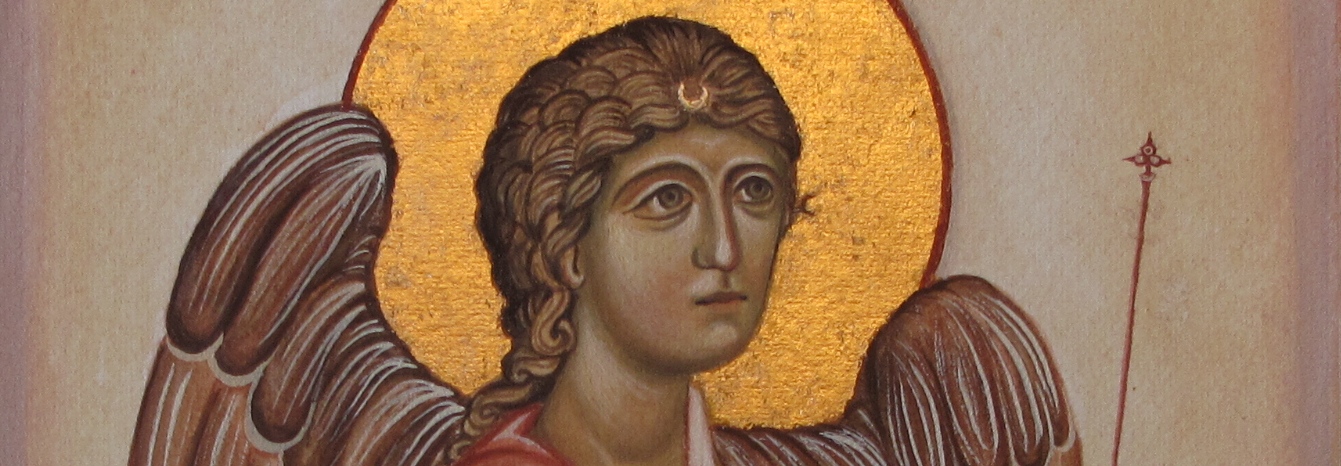
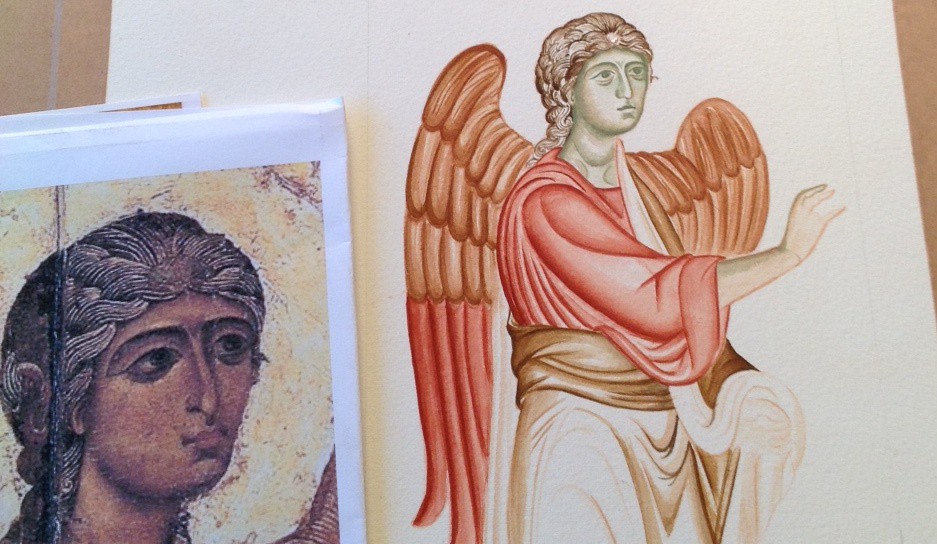
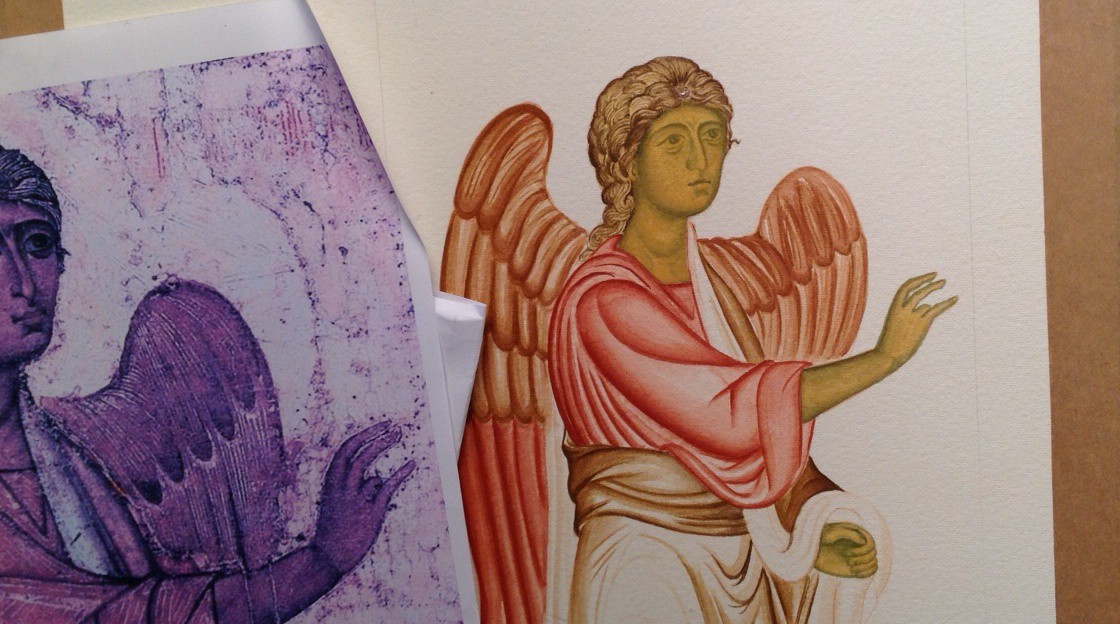
I am referring to Aidan Hart’s image of St Francis (the one with him holding a robin) for this icon and began with a pencil sketch which I photocopied and went over with a black line ready to transfer on to a birch ply board prepared by Dylan Hartley.

lines transferred

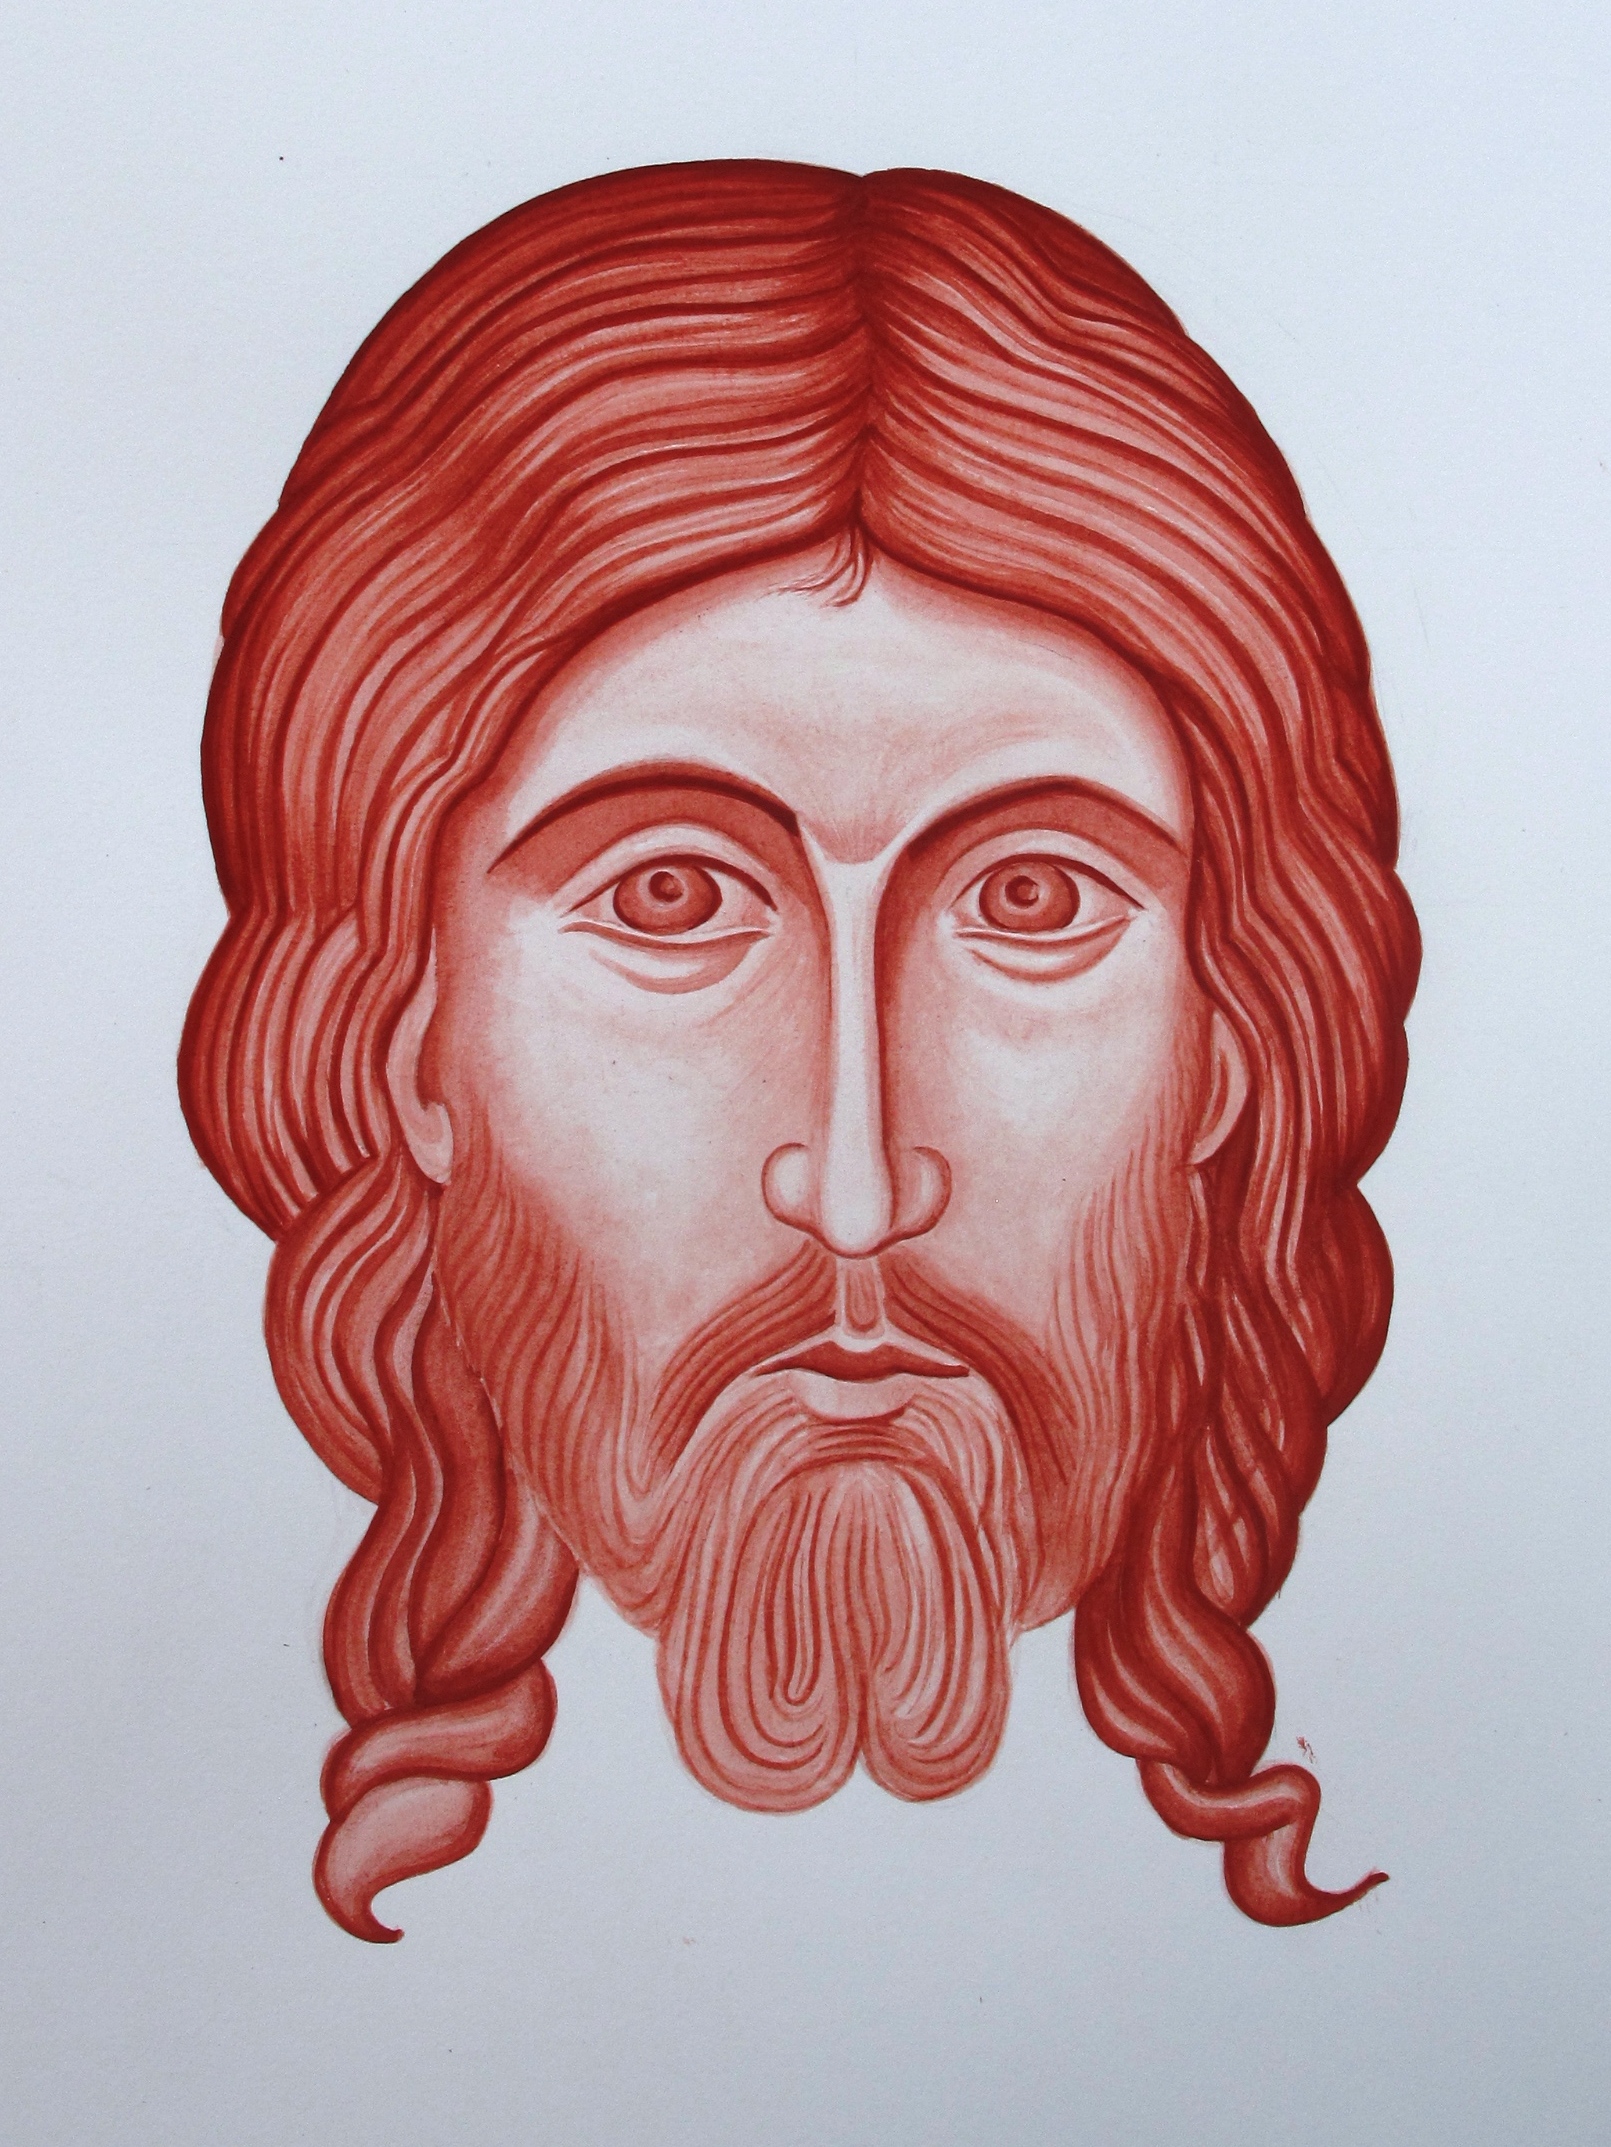
Transferring lines using red ochre rubbed into a sheet of paper

light wash in red ochre on icon

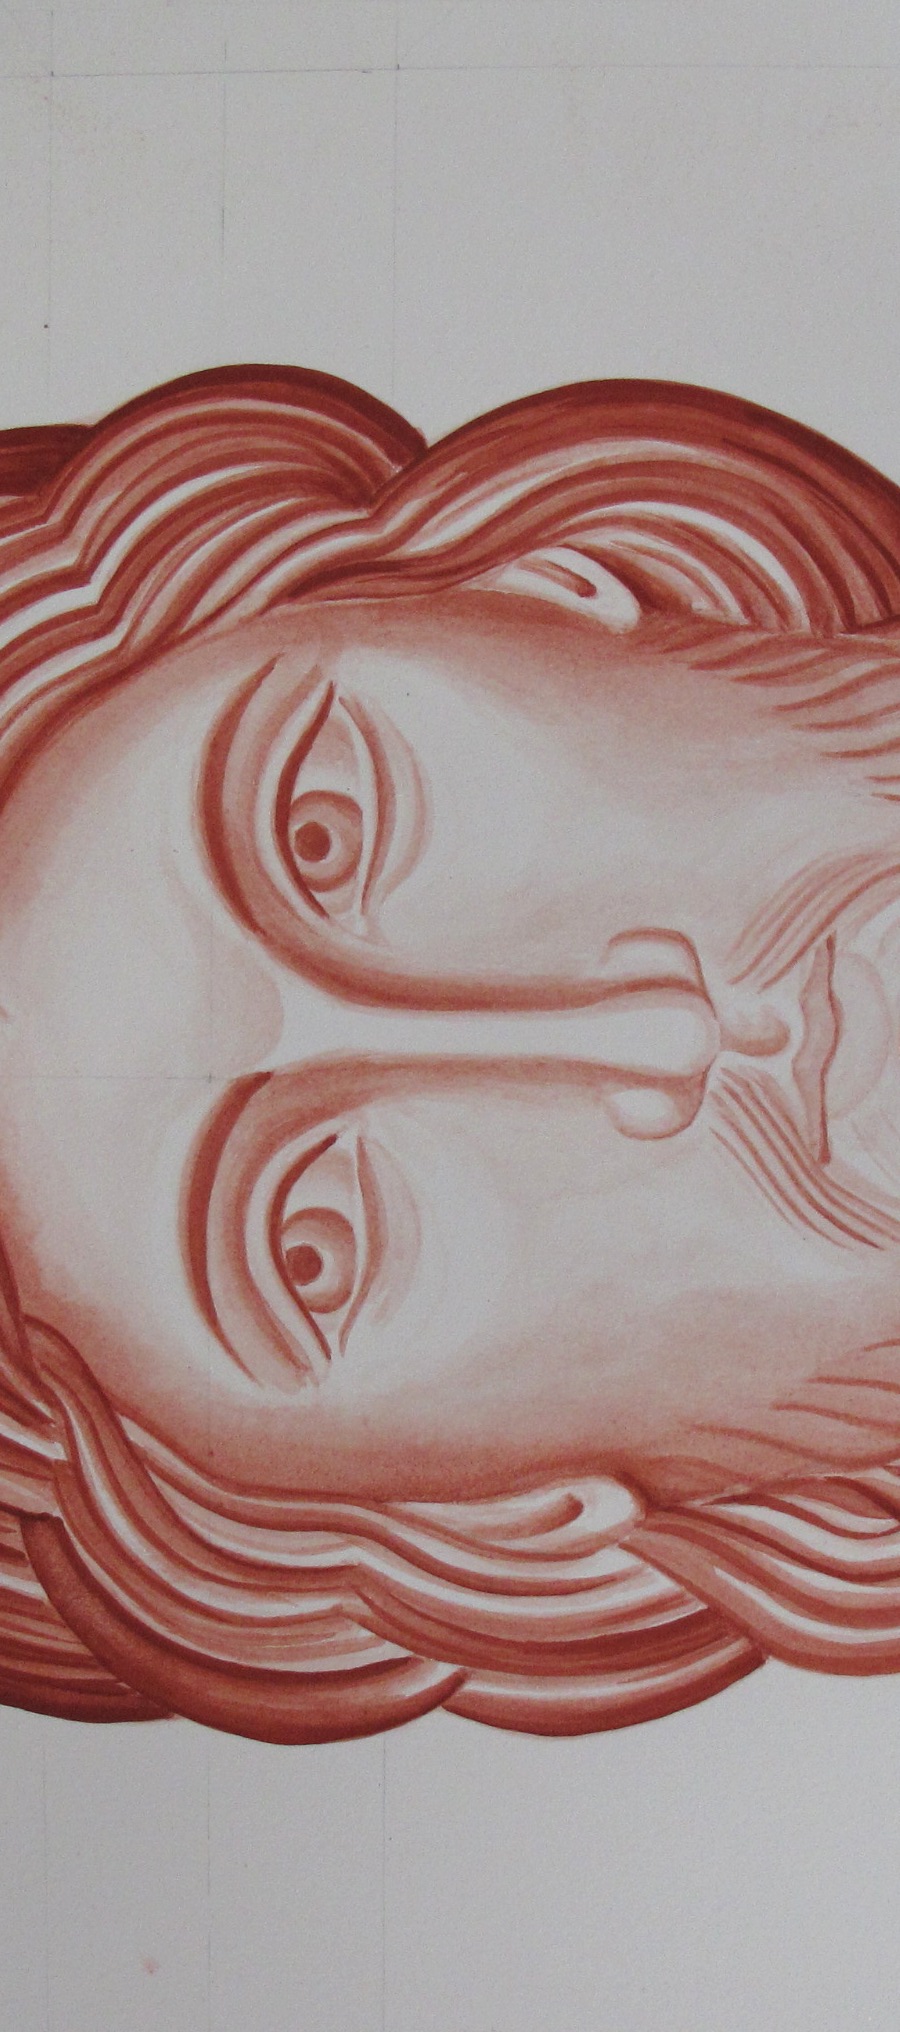
Light wash of red ochre to define the forms

I have learnt to go very lightly with these first lines on the face, especially the lines on upper moustache and below the eyes. Use pigment with no egg so that the lines aren’t fixed and hard.

face underpainting of st francis

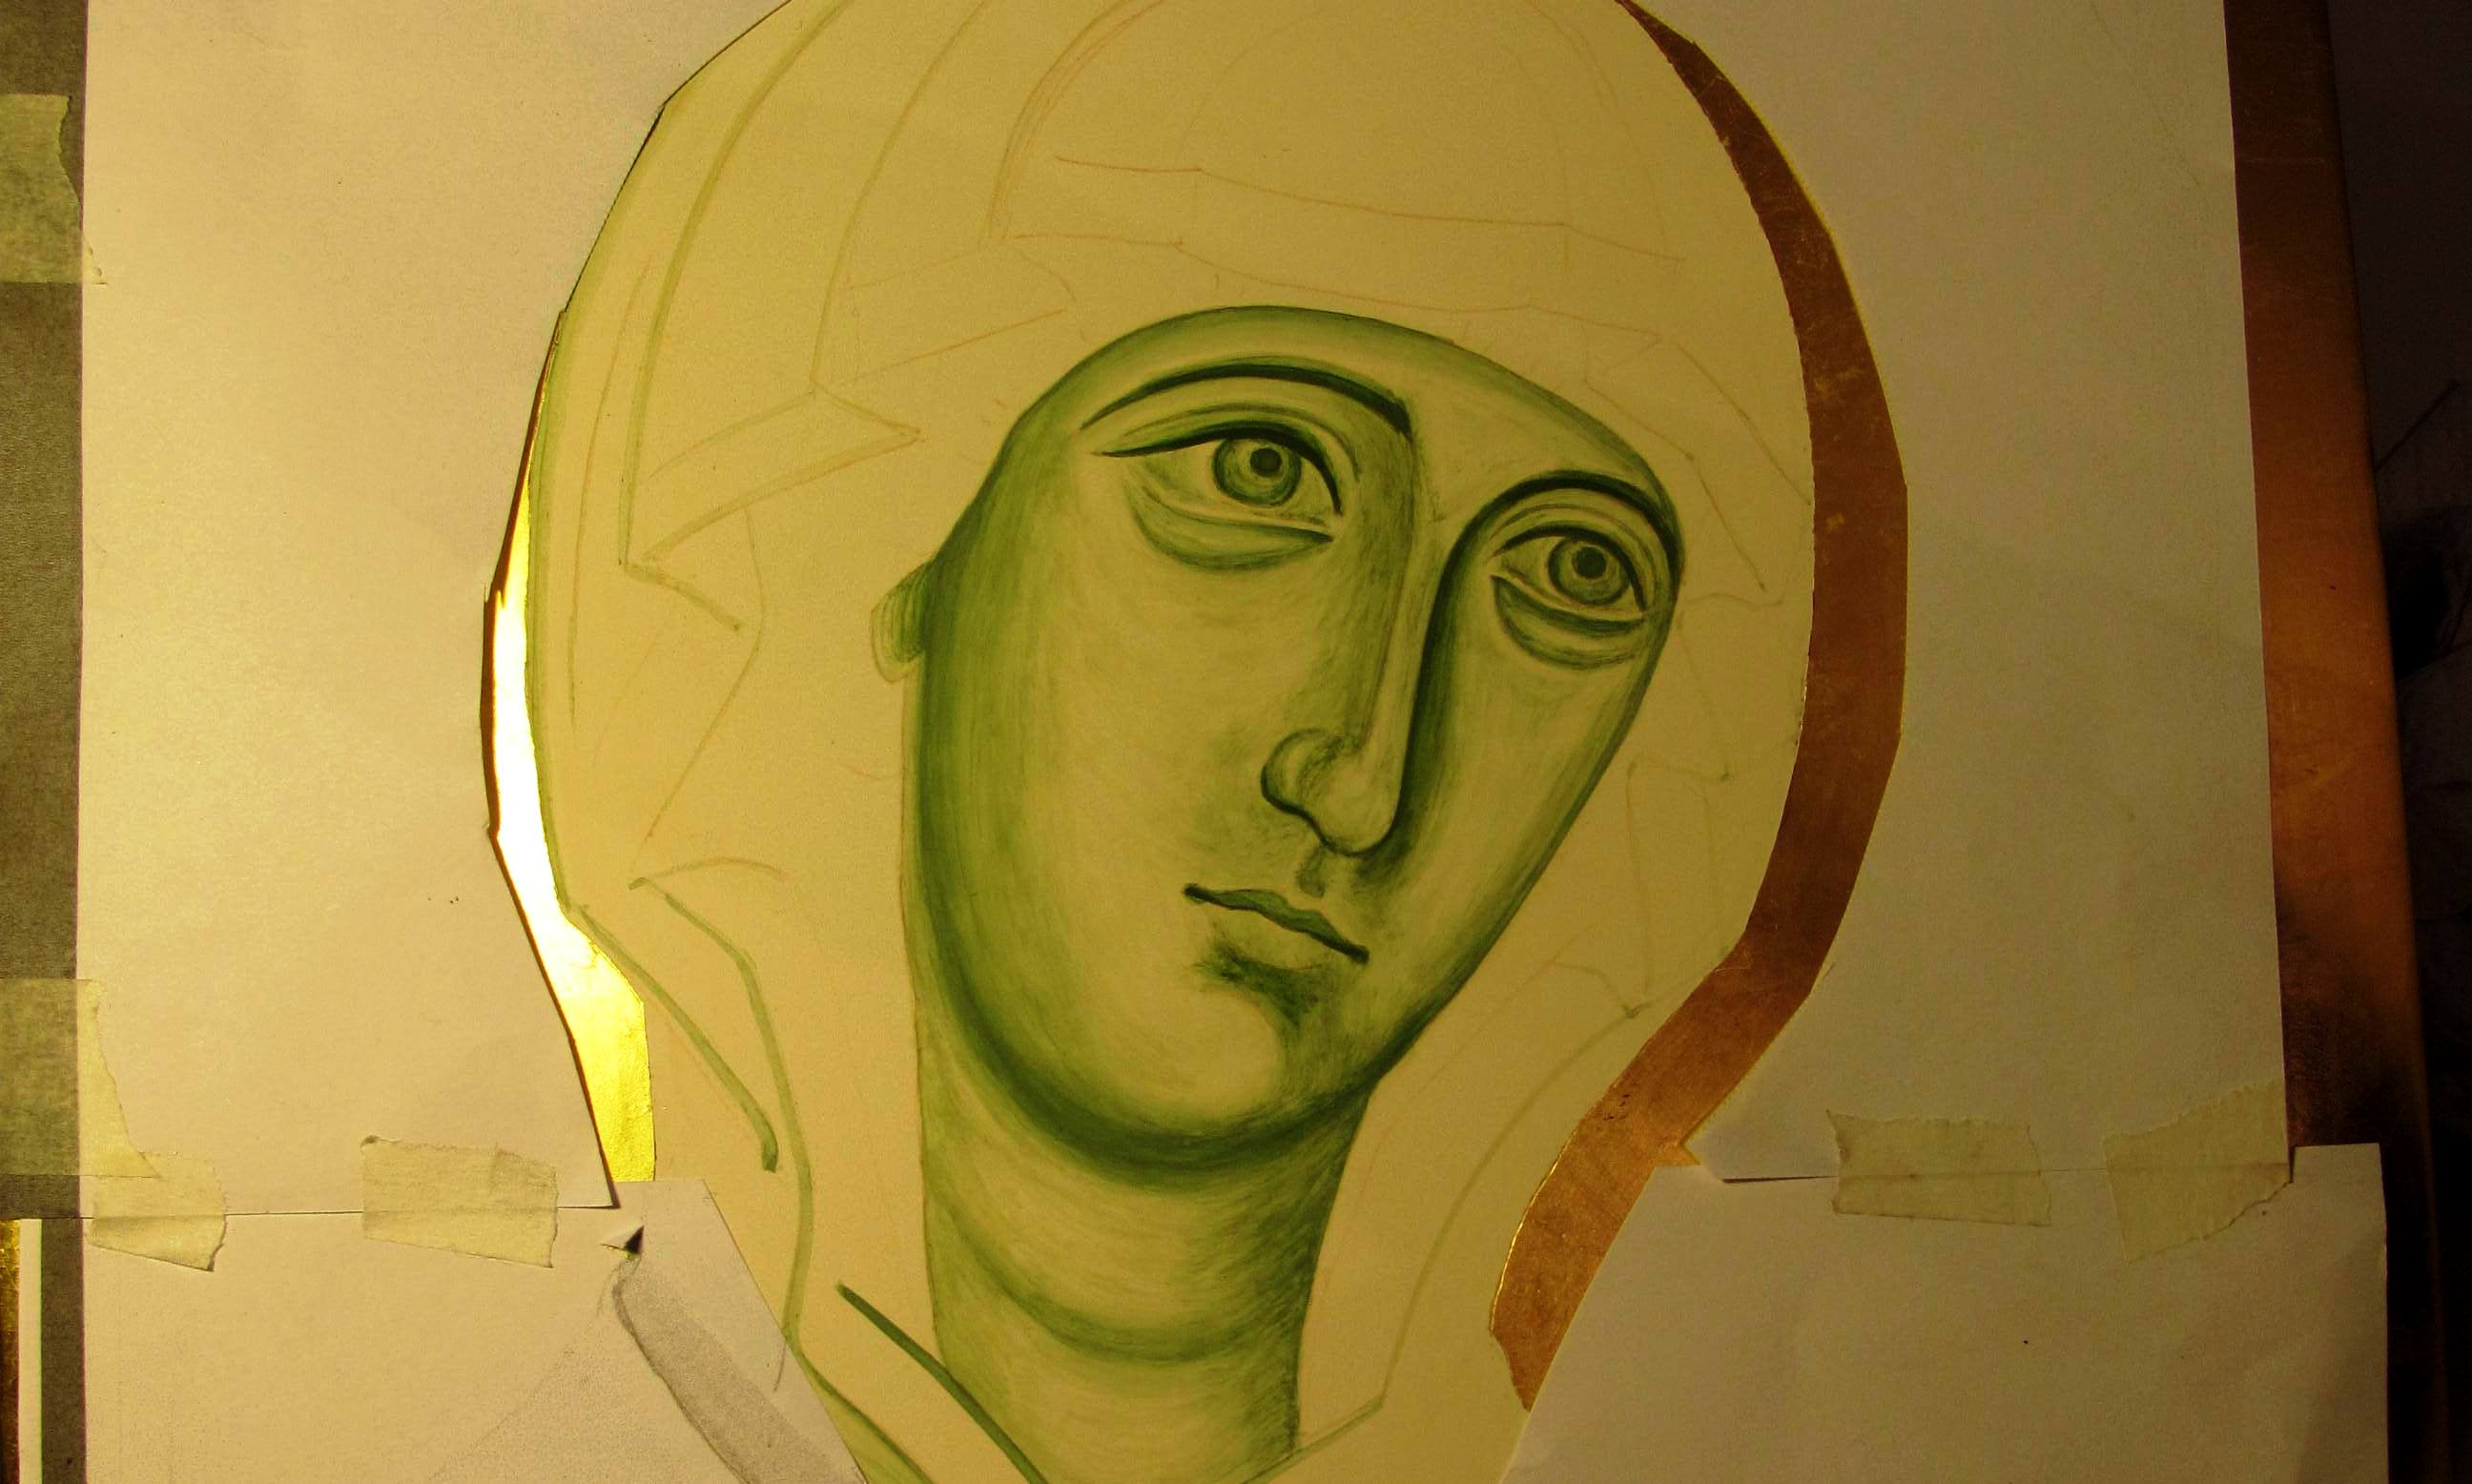
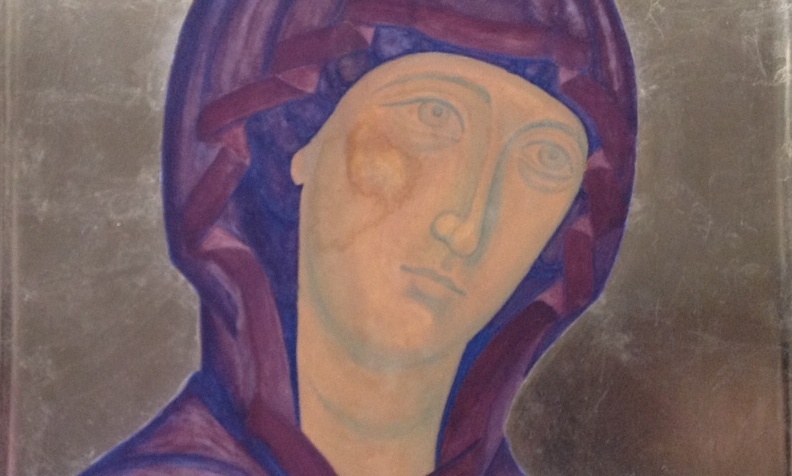
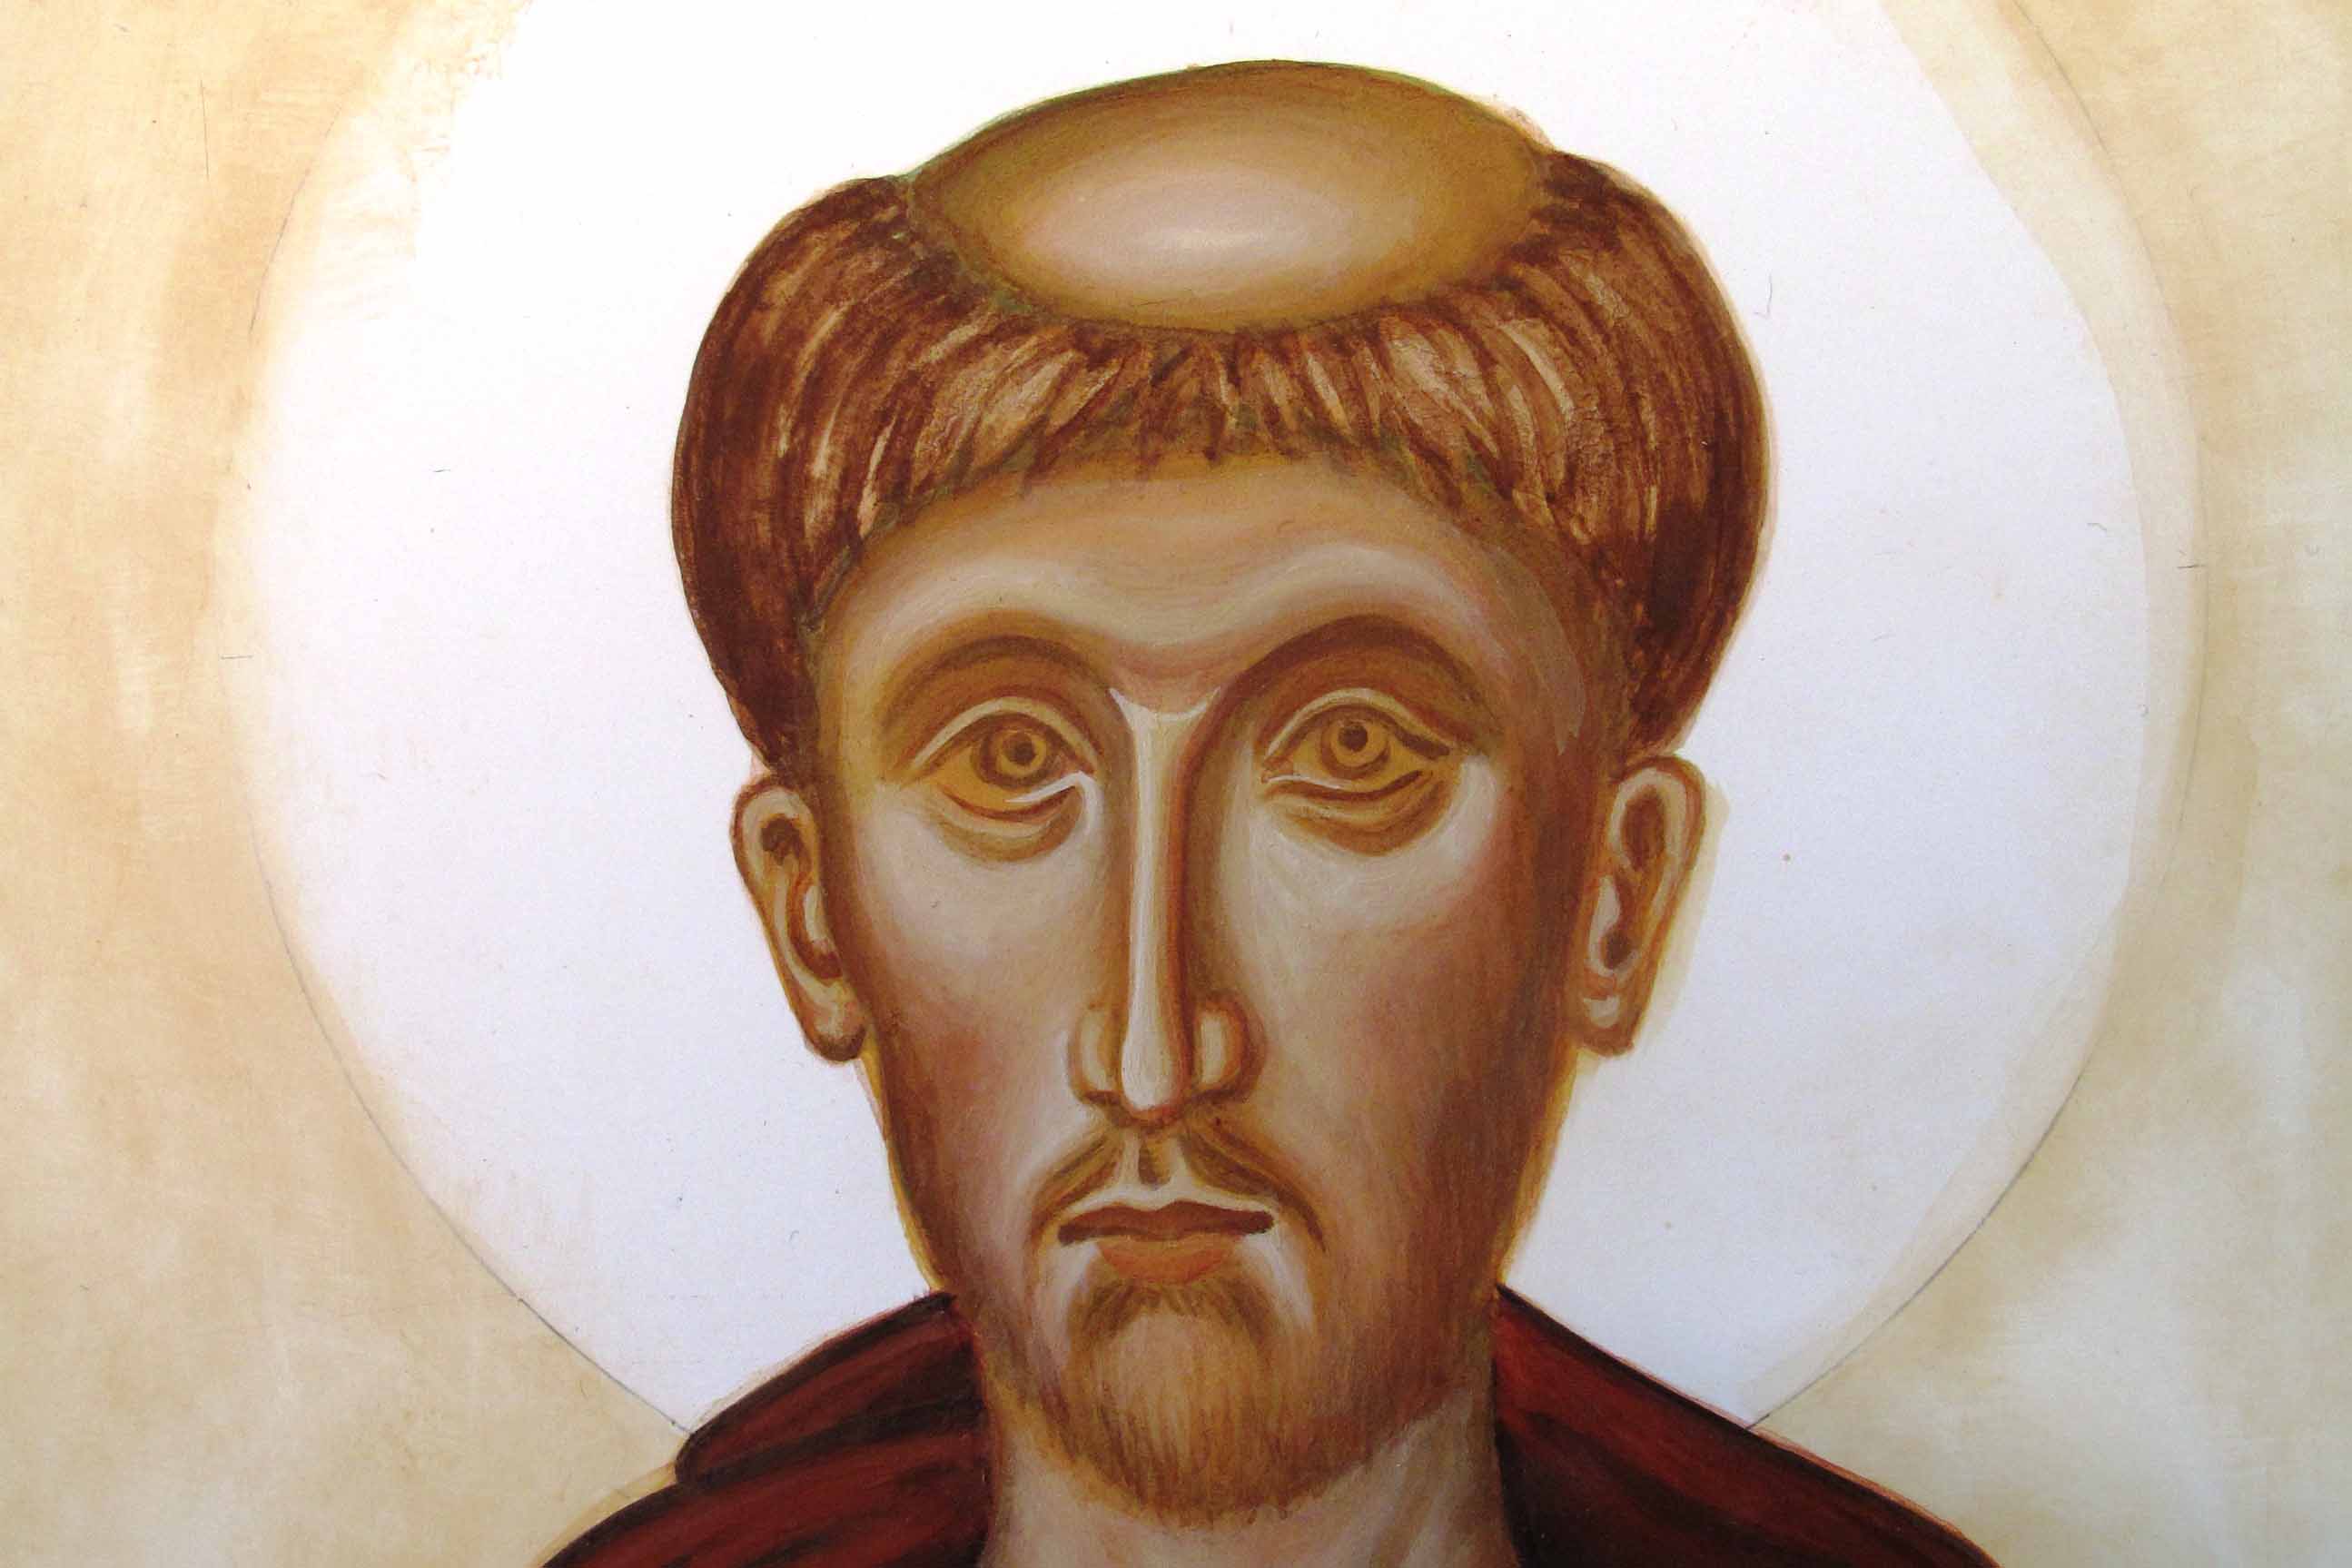
Underpainting the face and garments

I used Cornelissen’s Terre Verte with a dash of Stuart Stevenson’s yellow Ochre light to underpaint the face, making sure that it was dark enough to withstand 3-4 layers of membrane.The membrane was the same yellow ochre with a small dash of English Red Light.

membrane layer on face

First membrane layer applied to the face

membrane layers

Building up the membrane layers

I applied four membranes to the face as I was looking for a warm, even Mediterranean skin tone. The underpainting was just still visible. Some of the dry pigments brushed off as the egg tempera mix had got a little weak but I remembered the benefit of applying a nourishing layer of egg stock (approx 80% water 20% egg)  which helped stabilise the pigments.

face highlights

Adding highlights to the face

background layers

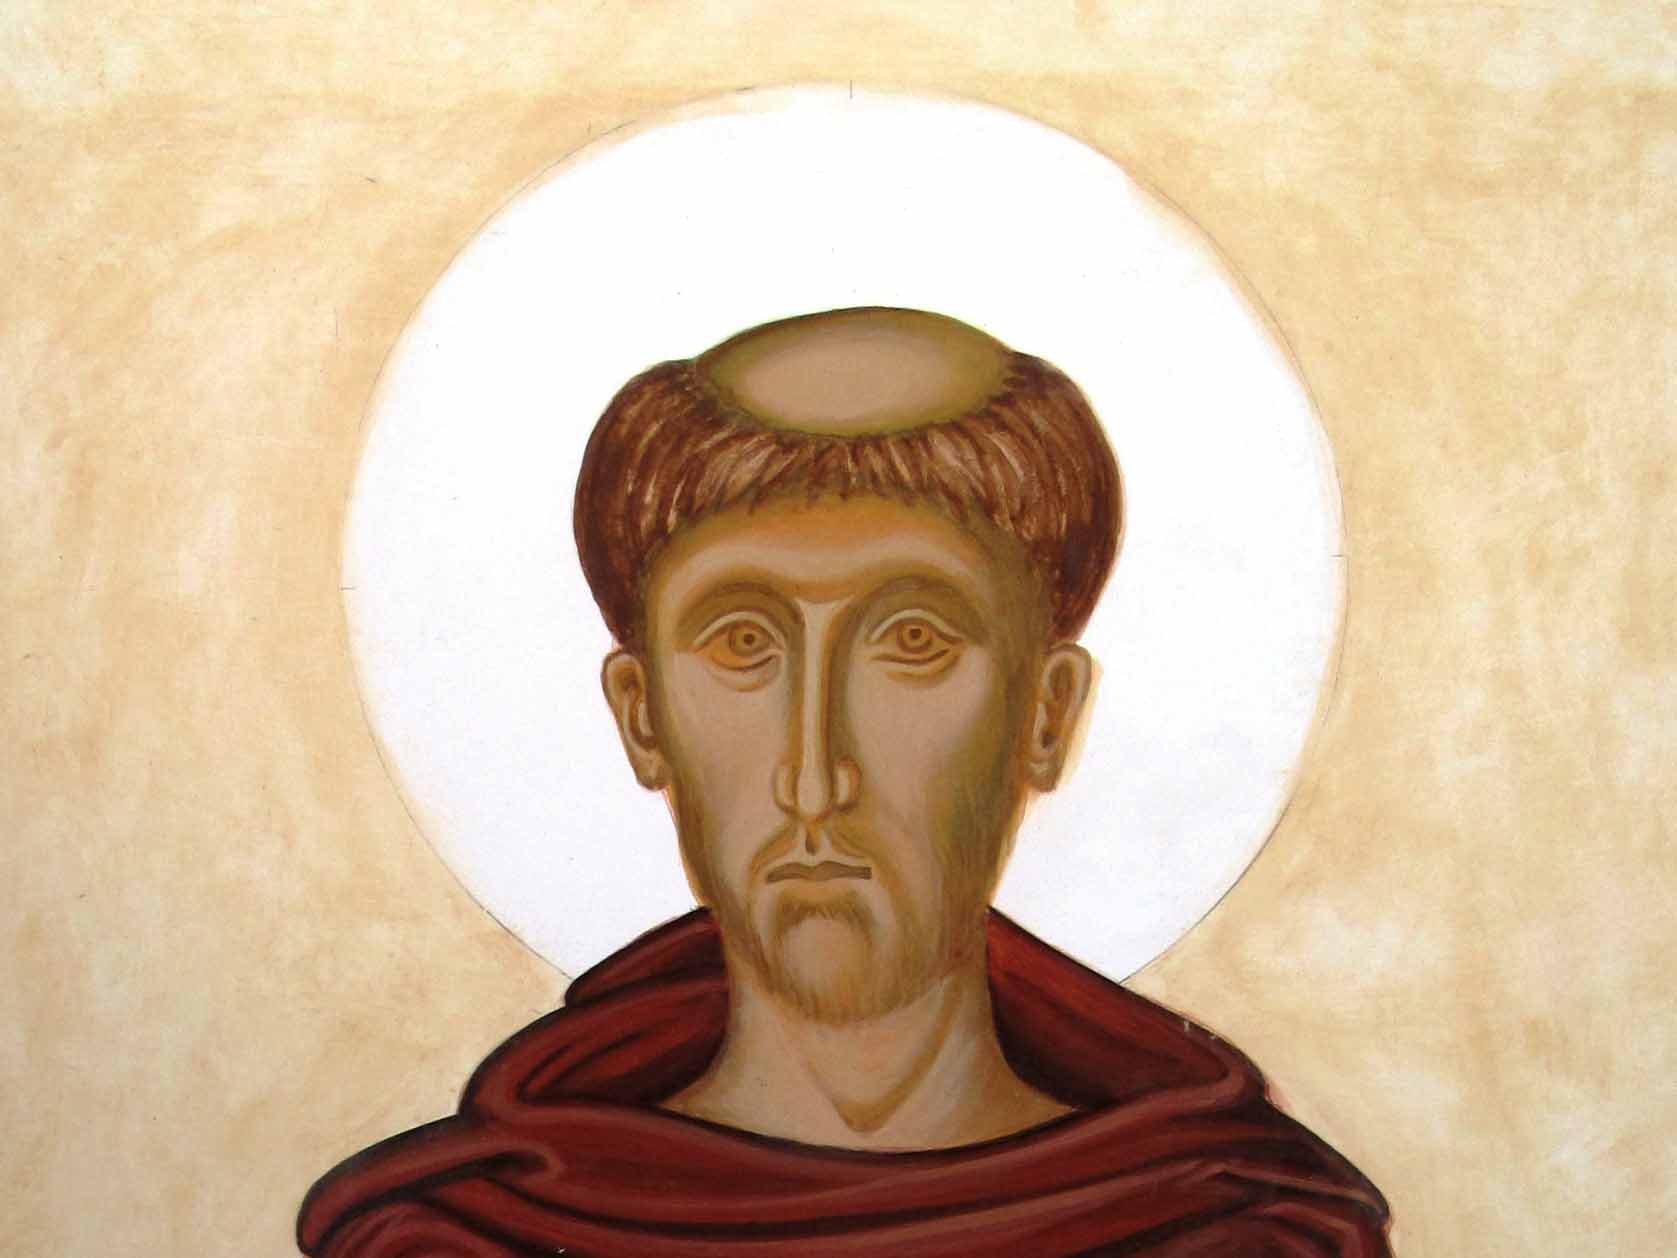
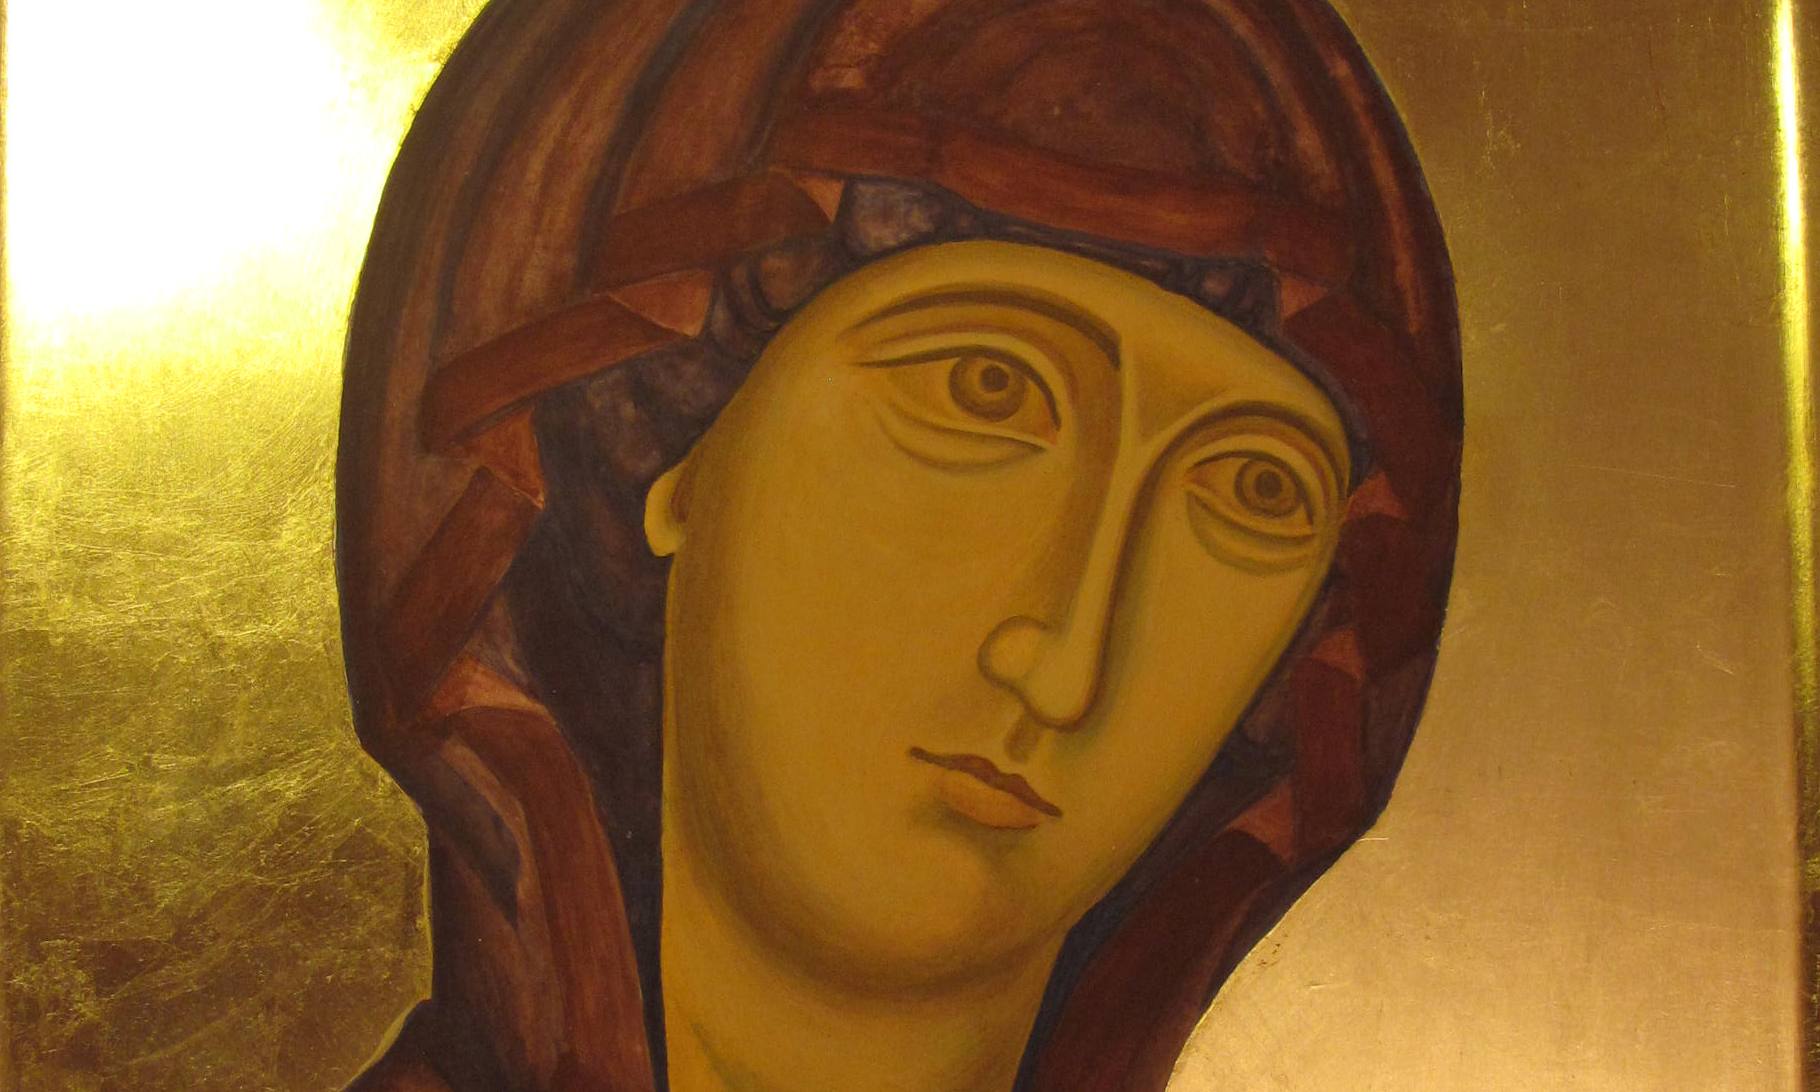
Building up the background layers

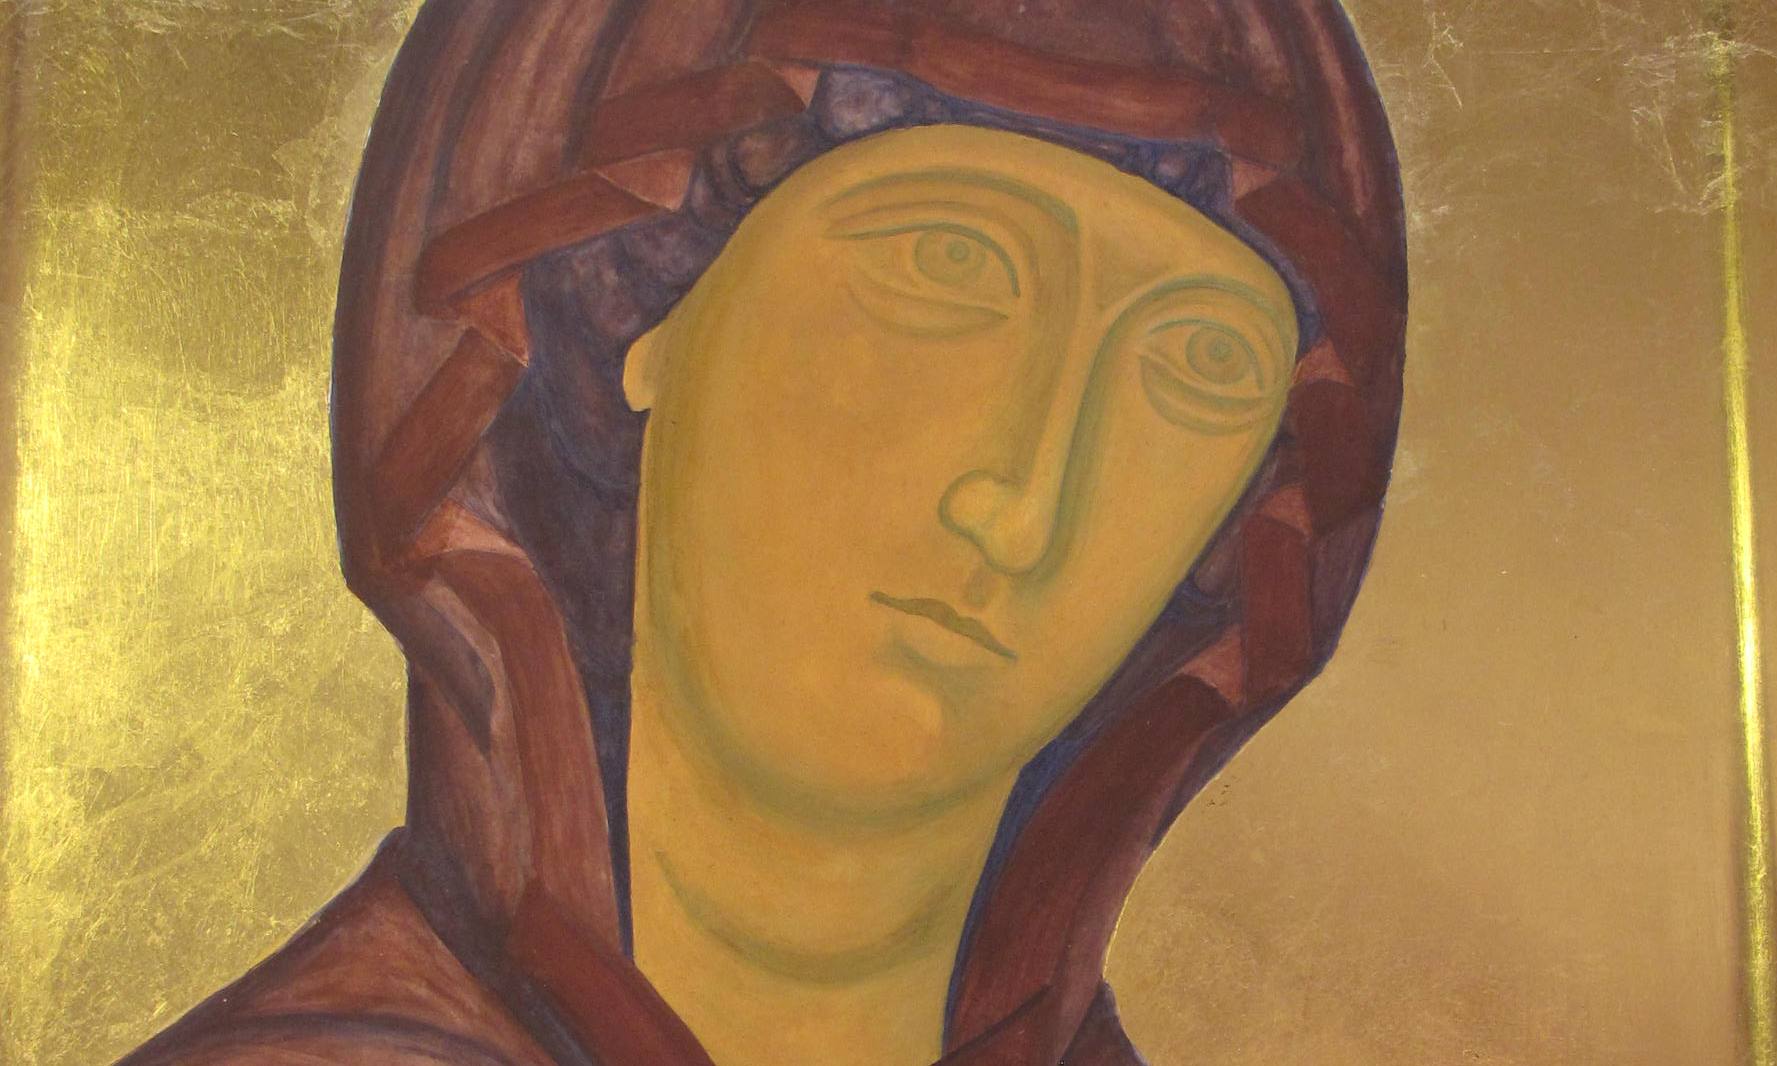
I am not going into the garments here as I made a bit of a hash of them! I used varying mixes of English Red Light and Ivory Black but I was too heavy-handed with the darks. I lost the translucency and almost sanded the whole lot off to start again, but Aidan thought they could be improved so I persevered. I am glad I did.  I recalled from one of the weeks spent at Walcott Hall that Avana is a pigment that can rescue many a difficult colour situation. I applied several thin washes and it seemed to soften the starkness of the red robes and evened the shading a little so I could almost start afresh with the highlights.

adding red ochre

Adding English Red highlights to cheeks, mouth, eyelids and nose

Adding light washes of English Red Light really adds warmth to the face. I still have the eyes to finish but the next stage is the background, halo and lettering and making good some of the highlights follwing my last class review.

Thanks for joining me here and if you are still reading, I am sorry I haven’t posted for so long as I had a bit of a set back when I fell and fractured my pelvis (in 3 places) and my drawing arm in two places – I only fell over our own back door step! I am well and truly on the mend now though and gradually catching up.

This post is dedicated to Leo; as I said not so long ago, we are only ever their keepers.

Thanks for reading.

Ronnie

Ollie and Leo

Ollie and Leo

Sanding for St Hilda of Whitby

Icon board

Highlight surface scratches on a gessoed icon board by rubbing in red ochre pigment

St Hilda of Whitby

St Hilda (c614-680) showing adjustments I need to make to head and shoulders

My homework for the next diploma session, is an icon of St Hilda, referring to an image painted by Aidan Hart. The icon can be seen further below and also on his website Aidan Hart Icons. During my childhood, Whitby was a favourite seaside destination from our home in York. The sight of the ruined abbey looming over the cliffs was a vivid landmark against what was often a cloudswept sky. This dramatic photograph courtesy of Mark Davis Photography shows how the abbey forms such a striking silhouette against the east coast sky.

Whitby abbey

Photo of Whitby Abbey by  Mark Davis Photography  http://www.mark-davis-photography.com/yorkshire/whitby-and-the-east-coast/

To think that St Hilda founded an an abbey and community in this wild landscape is remarkable and gives an insight into the strength of her character.

Icon by Aidan Hart of St Hilda of Whitby

St Hilda of Whitby by Aidan Hart

For this icon, I am using a flat plywood board.  I will oil gild the halo so the sanding only needs to be taken as far as 600 grit sandpaper. If you over-sand the gesso, the paint won’t stick.  I’m using an icon board which I gessoed last summer which I also sanded up to 120 grit paper. With hindsisght, I should have sanded it right up to 600 grit, as it is much easier to work outside in the warm than indoors in a UK January! Sanding gessoed boards is a dusty process so be prepared. Put a few sheets of newspaper over your worksurface and have your vacuum cleaner and a dust mask to hand. You will also need a medium sized dry paintbrush to brush the gesso dust out of the sandpaper, a cork sanding block and all the different grades of sandpaper to hand. Looking back on Dylan Hartley‘s notes which he gave us at our gessoing session last year (click here for a pdf copy SANDING ICON BOARDS by Dylan Hartley), Dylan reminds us that you should choose a place to sand where there is raking light ideally with one main light source. This helps to show up anomalies and scratches. The first sanding is done with 80 grit paper, then work up through 120, 180, 220, 320, 400 and 600 grades. It is important to use these in sequence and ensure that any grooves left by the gesso brushing are smoothed away.

Sandpaper

Splitting sandpaper sheets and filing them by grade

In the UK, sandpaper is sold in sheets about A4 size. I hadn’t realised until Aidan showed us, that if you fold and tear the paper in half lengthwise, then tear these strips into three, you can get six pieces ready to wrap around your block. Given that you go through sandpaper very quickly, it is worth spending time folding, tearing and filing the different sized papers into envelopes which does helps the flow of work.

brusgh off clogged sandpaper

Keep brushing off clogged sandpaper

It is really important to brush the sandpaper often – as soon as you have sanded the board a few times, lift the block and brush. You can also vacuum up the clogged paper to save dust clouds forming. The whole process is a bit of a faff as my glasses steam up when I wear a dust mask and they get covered with dust! Rubbing in a pinch of red ochre with cotton wool is a really effective way of seeing where the scratches are hiding. Even with good raking light, it is easy to miss a scratch until you start painting – and they are difficult to disguise later.

red ochre pigment on gesso

Identifying scratches in gesso by using red ochre pigment

Looking closely at the photo above, you can also see the horizontal marks made from clogged up sandpaper.

finished icon board

Icon board finished to 600 grit paper ready for painting and oil gilding

That’s the board now ready for me to trace on the drawing. More on that next time. Thanks for reading!   Ronnie

PS To see a demonstration by Dylan Hartley gessoing icon boards – there is a clip on You Tube here

An Archangel for Christmas

Archangel Gabriel on Watercolour Paper.

egg tempera painting

Archangel Gabriel on watercolour paper

Christmas greetings icon friends!

A few lines to say thank you for your companionship during my first year of icon painting. It has been lovely to have your quiet support and interest encouraging me to keep on posting and writing up notes etc!

There are a few more video clips of Aidan Hart’s in-class demonstrations over on You Tube and I have written up some supporting notes to go with them. These are not direct transcripts, simply notes to help as you try out the various stages of painting.

https://www.youtube.com/watch?v=N3a6puiMDuQ Aidan Hart demonstrates underpainting for the Membrane Technique Click here for Notes

https://www.youtube.com/watch?v=XaSi-WVHGaY Aidan Hart demonstrates applying flesh membrane to icon bust Click here for Notes

https://www.youtube.com/watch?v=Hr4R8BzMpPc Shadows and highlights on garments using membrane technique Click here for Notes

https://www.youtube.com/watch?v=CiFkJrsDS1s Aidan Hart demonstrating halos

https://www.youtube.com/watch?v=mFG-XxPqiSI Aidan Hart demonstrates painting Mandilion hair

https://www.youtube.com/watch?v=QbwE0QY1aOw Aidan Hart demonstrates painting garments Click here for Notes

I have enjoyed the monochrome icon studies on watercolour paper and thought I would have another go at the Archangel Gabriel based on the Annunciation of Ustyug. I stretched some Fabriano Artistico paper and painted using the membrane technique. The colours are much softer on paper – lines are not quite as crisp unless you go over them several times. However, it is a great way of practicing if you haven’t got a board prepared.

1 Angel gabriel study

Underpainting: the face is in Terre Verte and a touch of Yellow Ochre Maimeri, garments and wings in a mix of English red ochre, French ochre Sahara and Avana.

Yellow ochre Maimeri eith titanium white and red ochre light

Membrane applied to flesh parts.

Building up the hair and facial highlights.

4 Angel Gabriel study

Highlights added to wings and sleeves

Preparing to gild

Preparing to gild using Roberson’s gilders size – applied over the halo which has undercoat in red ochre.

Gilding the halo

Gilding the halo. Applying final facial highlights

9 Complete Angel Gabriel study

Finished angel with halo, staff and lettering.

It is a better attempt than my last one but there is a long way to go before I become fluent and produce anything nearly as elegant as the original. All the same, it comes with my very best wishes for a happy, peaceful and blessed Christmas wherever you are in the world. Thanks for reading.

Happy Christmas, Ronnie

PS…Some years later and I did revisit some of the finer details on Archangel Gabriel’s face – around the upper lip. I am now happy with this and it is listed here in my Etsy shop

Concealing a Blemish

Underpainting the icon of the Virgin

Building up the underpainting in terre verte and a dash of Maimeri yellow ochre

This post is going to consist mostly of photos to show how I dug a hole in the membrane making a terrible mess of our home project (mine is the Blessed Virgin) and then how I managed to repair the damage.

membrane layer number one

Adding the first membrane layer of maimeri yellow ochre and a tiny dash of titanium white.

Having stressed the phrase ‘do not fiddle’ in my last set of notes, I then went on to fiddle by trying to repair a hole and this is what happened:

stain damage

Stain appears on the cheek

A tiny bare patch had appeared on the upper cheek which I tried to mend very carefully by dropping some paint in from the tip of my brush. It made a big stain. If this happens to you – I suggest that you put the icon away for a day so the paint goes bone dry and you return to it refreshed.  I didn’t and ended up spreading the stain.

stain on icon face

Stain increases on the membrane and breaks through the underpainting

I tried to add more membranes but this seemed to increase the damage. At this point, I took a break. I decided to call it a day, wrap up and leave it overnight for the egg tempera paint to thoroughly dry out, in the hope that with fresh heart in the morning, I could somehow repair the damage.

Repeat the membrane process

Repeat the membrane process

Next day, the paint seemed to stay in place when I applied another membrane so I painted 4 or 5 more layers over the left hand side of the face from chin to brow and between nose and jaw, working with thin layers applied fairly quickly but allowing each layer to dry for at least 15 minutes. I was glad that I had painted quite a strong underpainting as I could still see the image clearly below.

add membranes to icon

Keep applying membranes, at least four or five layers, then begin to add Avana Ochre to the shadows

As soon as the stain was reasonably well covered, I stopped and began to add the shadows in Avana Ochre.

Avana

Add Avana to deepen shadows

8 Strengthen shadows

I then began to add the first of the face highlights, in Maimeri Yellow Ochre with a tiny dash of Titanium White. I haven’t finished yet, but at least the stain has been taken up in the fresh layers of paint. It was a useful lesson to me as I really thought I would have to remove the whole underpainting.

9 Begin to Add highlight layers

Developing the facial highlights

I’m uploading more videos to You Tube from the last class which should be ready in a few days but for now, thanks for reading!

Ronnie

Supplementary Notes for the Membrane Technique

Sketching the tiny Loch Lomond sea plane while we waited our turn

Sketching the tiny Loch Lomond sea plane out in the Autumn sunshine while we awaited our turn.

Hello Icon friends,

I have just returned from a wonderful short break in Scotland where my husband and I enjoyed our mutual birthday treats of a trip in a seaplane over some of the Scottish west coast. It was spectacular!

I have written up my class notes (7 pages) to share them here Class notes for the membrane technique as I will soon be picking up the brush to continue with the highlights on my mandilion. Notes are easy to refer to whilst working and I can add further comments as I go along.

They are supplementary to Aidan’s comprehensive book – Techniques of Icon and Wall Painting which is very clear in the sequence of work.

Thats all for now and thanks for reading.

Ronnie

Gilders’ Tips

scratched gilding

Thumbs down for the gilding. Mixing water and oil gilding too difficult to troubleshoot!

Hello Icon Friends, I have been quiet on the blog, sparing you the details of my gilding efforts until I had something useful to share.  I deliberately chose to work on bigger boards as I thought it would quickly show up all the places where I could go adrift. It did just that. Lesson one. Start with a small board, or even better, start with a practice board as Lee Harvey suggests. Water gilding is a difficult skill to master! Some of the students have made notes on their tips which you can read about here: Gilders Tips. Anyway, I wasn’t too pleased with the water gilding that I did in class for my mandilion so I sanded the lot off and applied 18 fresh layers of bole and started again – I think my bole consistency was a bit too thin. Once it had dried, I sanded and polished the bole and was really encouraged when I managed to get a deep shine. Good so far!

Bole layers

Fresh layers of bole applied to support water gilding – allow it to dry at least 24hrs before sanding and polishing.

However, the water gilding process got the better of me and even after quadruple gilding, four books of gold and five days solid of faulting and polishing, the results are still average! The final appearance looks much the same as one layer of oil gilding and only slightly better than what I had sanded off in the first place.

water gilding icon

Water gilding the mandilion

Third attempt at the monochrome of Christ for the Mandilion

Third attempt at the monochrome of Christ for the Mandilion

I also painted my third attempt at the monochromes of Christ (for the Mandilion) and the Virgin, which I was reasonably happy with, so all set to begin the transfer on to the gessoed icon boards next session. My next post will include links to another set of You Tube clips of Aidan Hart demonstrating the different stages of the membrane technique. My final note is to say a couple of farewells. We all wish our fellow student, Susan O all the very best. We will miss you on the course Susan and hope that you keep in touch. A fond farewell to my beloved pet Norman. He was a larger than life character who once trampled over my keyboard typing in the letters Vatopedi as he went and inadvertently googling images of a Greek Orthodox Monastery. He recently got sick with secondary poisoning and much as I tried to keep him indoors (shown here) this weekend he got killed on the road.

Norman the cat

Norman 1.8.13 to 27.9.14 – pictured after he sniffed up a leaf of gold which of course ended up down the hatch!

We are only ever their custodians and I am grateful for the delight he brought in his short life with us. Thanks for reading.

A Day at St Luke’s Icon Centre

St Lukes Icon Centre

Marcella, Susan, Jane and Chris at work applying layers of gesso

Hello icon friends!

Part of our homework over the summer has been to gesso our own boards from scratch to reinforce what we learnt at Dylan Hartley’s workshop a few months ago. By the way – Dylan sends his love to the group and wished us well for the day!

One of my fellow icon students, Susan Mobberley, runs a weekly icon painting session where members of the St Luke’s Icon Centre meet weekly to paint and pray in the sacred context of St Laurence Church, Rowington, Warwickshire.

St Laurence Church Rowington

13th century tower of St Laurence Church, Rowington, Warwickshire

Lee and I were delighted to be able to join the group on the recent ‘gesso day’. It was a treat to  experience the wonderful hospitality and companionship that is flourishing in this small but dedicated gathering.

Pray before an icon

Gathering to offer a prayer before work begins

Gessoing boards is messy and long-winded! It requires a lot of floor and fabric protection, at least 7 hours of even tempers and even temperatures, so once the dust sheets are down, the setting within the church is ideal. No phones or distractions, just concentrated effort.

measuring gesso

Marcella and Susan measuring out quatities of whiting

St lukes icon centre

Susan and Lee adding final layers of gesso

St Lukes icon centre

Susan and Lee still at work

dried icon boards

Results: Icon boards dried overnight with not a crack nor bubble in sight!

Dylan – if you are reading this – our thanks for your clear instructions and for drumming it in that for the best results, stick to the rules!

St Luke’s Icon team – a big thank you for making your guests so welcome.

Last but by no means least, it was the feast of St Lawrence of Rome yesterday, 10th August. There is an interesting blog written by the British Library on illuminated manuscripts and yesterday it featured St Lawrence as a tribute on his feast day.

Thanks for reading.

Ronnie


Gilding Demonstrations with Aidan Hart

icon diploma students

Sanding our icon boards

In this session, Aidan explained and demonstrated the two different techniques for gilding icons: water and oil gilding.

Two of our fellow students were absent due to close family bereavements so this time round I have filmed the demonstrations as gilding is quite tricky and this way, we can all refer back to the demonstrations later.

The following clips capture parts of the different stages of both gilding processes. The videos are pretty basic but if we watch them a few times and then read Aidan’s instructions in his book, they may help us on our way to mastering these techniques!

Homework notes etc will be on the next post.

I hope that the top link below leads to the overall play list, and the others to the individual clips.

http://www.youtube.com/playlist?list=PLFzuzMtzpZZhjM1ldgGDlyFm9rF7221rW

1 Aidan Hart applying shellac for oil gilding:  http://youtu.be/7DrT1bbu0Lk

2 Aidan Hart applying bole for water gilding 1: http://youtu.be/J-dj_XkzKi0

3 Aidan Hart applying bole for water gilding 2: http://youtu.be/y4F7h21qVBI

4 Aidan Hart applying bole for water gilding part 3: http://youtu.be/H7068I-OvI4

5 Sand sand sanding the boards!: http://youtu.be/BcaoYeJTH0Q

6  Aidan Hart applying gold leaf for water gilding  https://www.youtube.com/watch?v=0etKCemxQYg

7 Aidan Hart burnishing gold (water gilding) http://youtu.be/9KBi92P3euM

8 Aidan Hart faulting water gilding  http://youtu.be/s6CoUJoLKYs

9 Laying size for oil gilding  http://youtu.be/gSaqvVm-xJQ

10  Removing gold from gesso  http://youtu.be/7R-c4UMFMUA

11 Oil gilding flat board  http://youtu.be/JVdI7PXZ14A

12 oil gilding kivotos  http://youtu.be/NSxTfUPISJM

13 Grinding Azurite pigment http://youtu.be/y-FHvAxwg9w

Dylan Hartley’s Top Tips for Gessoing Icon Boards

Dylan and Christina hartley with Icon Diploma Students

Dylan and Christina Hartley (seated) with Icon Diploma Students. Left to right Fran, Joan, Ekatarina, Olga, Ronnie, Rosie, Lee, Susan H, Janina, Michael. Martin is absent on honey moon!


icon diploma students

A quick shuffle up and this one includes Susan M!

We have been learning about the process of making and gessoing icon boards. I used to think that gessoing was simply a matter of applying a few layers of whiting to some linen on a board and Bob’s your uncle. I couldn’t have been more wrong!

Dylan Hartley demonstrating hown to mix gesso in slow cooker

Dylan Hartley demonstrating how to mix gesso to Icon Diploma students

Just as well our teacher Aidan Hart, had set up a three day session with Dylan Hartley, to demonstrate the technique in his Ironbridge workshop.

Chisels of an icon board maker

Tools of a Master

These were three full days – no slacking for a minute! Dylan was taught by Aidan and through years of experience, he has found Aidan’s method to be the most fail safe – as long as he follows the instructions to the letter.  This method is described in full in Aidan’s book ‘The Techniques of Icon and Wall Painting‘.

My notes/photos from the workshop are attached here: Dylan Hartleys Gesso workshop May 2014 but there is no way around it, gessoing boards is a labour intensive process. However, if done correctly, the results are of a very high standard.  The workshop has changed my view of icon boards and I now regard them as works of art of  in their own right.

http://youtu.be/hPqtXk3bEcc Link to a short clip of Dylan demonstrating the application of the first coat of gesso.

Dylan is always looking for ways to simplify the process or to avoid common pitfalls and he shared many of his tips with us during the workshop, ten of which are listed below. Dylan runs gessoing workshops from time to time, and I can thoroughly recommend attending. Not only is Dylan a very clear and wise teacher, but the workshops are held in Ironbridge – full of architectural and engineering treasures.

Encaustic tile details on the Jackfield Tile Museum

Encaustic tile details on the Jackfield Tile Museum

I have picked out ten of the best tips for you below.

1. Buy a slow cooker. Get one with a lift out bowl in a heated container, such as this one sold by Tesco for about £10 to £15. It keeps the gesso/glue mix warm for ages and is a lot simpler to use than a bain marie.

Slow Cooker

Slow cooker and cooking thermometer. Scrim has just been ‘dunked’ into the size.

2. Choose the best wood.  Given the amount of work that goes into the gessoing process, it is a false economy to skimp on the wood – only use the best quality.

3 Mix Plenty. Mix over and above the amount of glue/gesso mix required to allow for evaporation. You don’t want to run out just before you have finished!

4. Work in sequence.  Write numbers on the back of your boards then keep record sheets of when you apply the gesso coats. This is really important. You just have to get one distraction and you can forget where you were and scupper the sequence.

5 Prepare well in advance. Get all the materials and tools together. Turn off your phone, ignore the door bell,  pack sandwiches and have cold drink/flask beside you.

sketch of kit for gessoing icons

Sketch of the kit you need to gesso icon boards

6. Find the front of the (hardwood) icon board.  Pick up the wood and look at the short edge. If the curve of the end grain corresponds with the curve of your eye brow, then the side of the board facing you is the front. If not, then turn the board!

determining the front of an icon board

Finding the front of the icon board – look at the curves of the growth rings.

7. Mind where you position joins. If you are ordering (or making) an icon board which needs a join, it doesn’t have to be placed in the middle. Think about the image and ensure the join does not cross through a critical place (ie through the face).

position of join in icon board

Sketch to show how it is better not to have a central join in an icon board

8. Support your board.  A wooden plinth made out of battens helps to lift the icon board up from the surface and gesso drips/fallout building up below.

timber plinth for gessoing icon boards

Timber plinth for gessoing icon boards plus some chisels and a gauge to measure depth of kovchek

9. Work with the weather.  Gessoing is a job best saved until mild weather – too hot and the boards dry too fast, too cold and they take longer to dry. Ideal temperature is 18-24 degrees, so you can open and close the windows to help adjust the drying speed. Start early in the day. Get everything set up beforehand.

10. WARNING! Never let steel (or any metal objects for that matter apart from Stainless steel) touch the oak. The metal draws out the tannic acids a stain such as this below will gradually appear and you cannot get rid of it.

https://i0.wp.com/www.woodweb.com/knowledge_base_images/zp/removing_black_stains_from_oak_1.jpg

Thanks for reading!


Back Down to Earth

Image

Hello Icon friends,

A lot has been going on since I last posted. We had a wonderful family gathering in Perth WA, for my niece’s wedding. It was an entire week of celebrating – not only over a very happy couple, but also over my sister, the bride’s mum, who has made a monumental recovery since her bone marrow transplant last year. She is living proof of answered prayer and we made the most of every minute together. I know I am digressing but this day was terrific and I have to share a photo:

Wedding of Sophie and Pat

Some of my siblings, left to right David, Margaret, Denis, Veronica (me), Anne (bride’s mum), Pat and Sophie. My younger sister Stephanie had nipped off – it is hard to round up all six siblings even when we are together!

One of the first things I did to help settle me back down to earth was to start on my icon homework. We have set pieces for our course, one of which is the Mandilion – the Face Not Made with Hands, which must be painted on a board with the kivitos – where the wood is chiselled out to form a raised wooden border (more about this in a later post). Our set pieces mean that we explore a full range of icons from close up faces, to busts, standing and seated figures and festal icons with groups of figures.

The hardwood icon panels with the kivitos are works of art in their own right, labour intensive though costly for the student. That said, I would really like to do the Mandilion close to life size together with a matching sized icon of Our Lady alongside. After a lot of searching through images, I was so excited to discover the perfect pair of images of the Virgin and Christ from the 13th C Grand Deeisis in amongst the icons of St Catherine’s monastery, Sinai. I will keep to the image of Christ for this post.

icon of Sinai Christ Pantocrator

Christ from the Grand Deeisis, St Catherine’s monastery, Sinai

So our homework was to sketch or paint a monochrome study of our chosen mandilion.  I will come clean on my drawing – I pencilled out a broad grid. Now this is not the way to go in the long run! Aidan is trying hard to get us to draw without a grid, by learning to observe. It is no excuse but I was short of time (see above!) and wanted to prepare at least two drawings for him to check at our May session.

pencil sketch of the mandilion

Preliminary pencil sketch – the grid is NOT the way to go!

I should have thought a bit more at this stage but I was concentrating on the face rather than the whole composition. We are given a fixed rectangular proportion for the mandilion board and I have chosen 310mm x 400mm for mine. The face sits neatly into a square and the hair falls into the lower part. As the image I have chosen doesn’t have the falling hair, I should have considered this sooner so as to weave it more naturally into the composition.

Mandilion first wash

First wash in dilute egg tempera

Building up the image in light washes

Building up the image in light washes

Egg tempera washes on the Mandilion

Building up the depth of washes

This is another point where I went adrift around the areas of flesh and beard. The moustache should taper more to the right to leave a channel of bare skin.  I also should define the beard and soften the edges. As you see, this is not the stage to paint on plaits!

Finished egg tempera mandilion

Mandilion study complete

In addition to these obervations, Aidan also showed me there was work to do on the nose, at the bridge and round the bowl and at the tip where the shading should be dark only below the nostrils.  The jaw line needs better definition too and the hair should fall further down to balance the composition.

I am really glad that I worked on this study and will repeat the process again soon as I need to increase the whole image by about 10% to fit more comfortably on my board. Painting the icon in monochrome first is a great way to become familiar with the subject and there is no better way than just getting stuck in and doing your best.

Thanks for reading!