
Cherubim: Golden Face Vermilion Wings
With the swirling clouds in place, I moved on to the central part of the icon of the Council of Archangel Michael and the red winged Cherub below. I’m going to zoom close up on what is quite a small face – about 2cm diameter.

For clarity, I’ve mentioned previously that on historic examples of this icon, there has been some fluidity in the colours, positions and naming of cherub(im)/seraphim/standing angels. If you google ‘The Synaxis of Archangel Michael‘ you will see some of these but for now, I’ll refer to the multi-winged angel here as Cherub.
Each phase of icon painting is a fresh start. I find it helpful to start with something simple and here I picked up by underpainting the hair of the standing angels in English Red Ochre pigment. I also used it for the Cherub’s hair even though this figure will be mostly painted in Vermilion.
I painted the wings in thin layers of Vermilion and Italian Gold ochre. This reflects the sphere of red-gold surrounding the Christ child. There are many yellow ochres – any of the brighter ones will work.

The clump of masking tape left sitting in the blank face is now going to be useful – for a reminder I wrote about this here. The layers of tape protect the gesso from the compass tip puncturing it and the tiny centre point is still there to locate the compass again. For the line around the gold halo, I mixed Titanium White egg tempera to a consistency of single cream – it’s worth testing the paint flow before you start.

When the paint on the upper wings has fully dried out – at least overnight, set up a compass with a dip nip. Scribing lines around halos takes practice – do a few trial runs before you go for it! If the paint hasn’t fully dried, the white line will spread or bleed. If this happens, just remove the paint with a brush and do something else and revisit it a good bit later!
When the line is in place, you can remove the masking tape and go back to the drawing and transcribe the face ready for the underpainting.

Here’s my drawing of the Cherub.

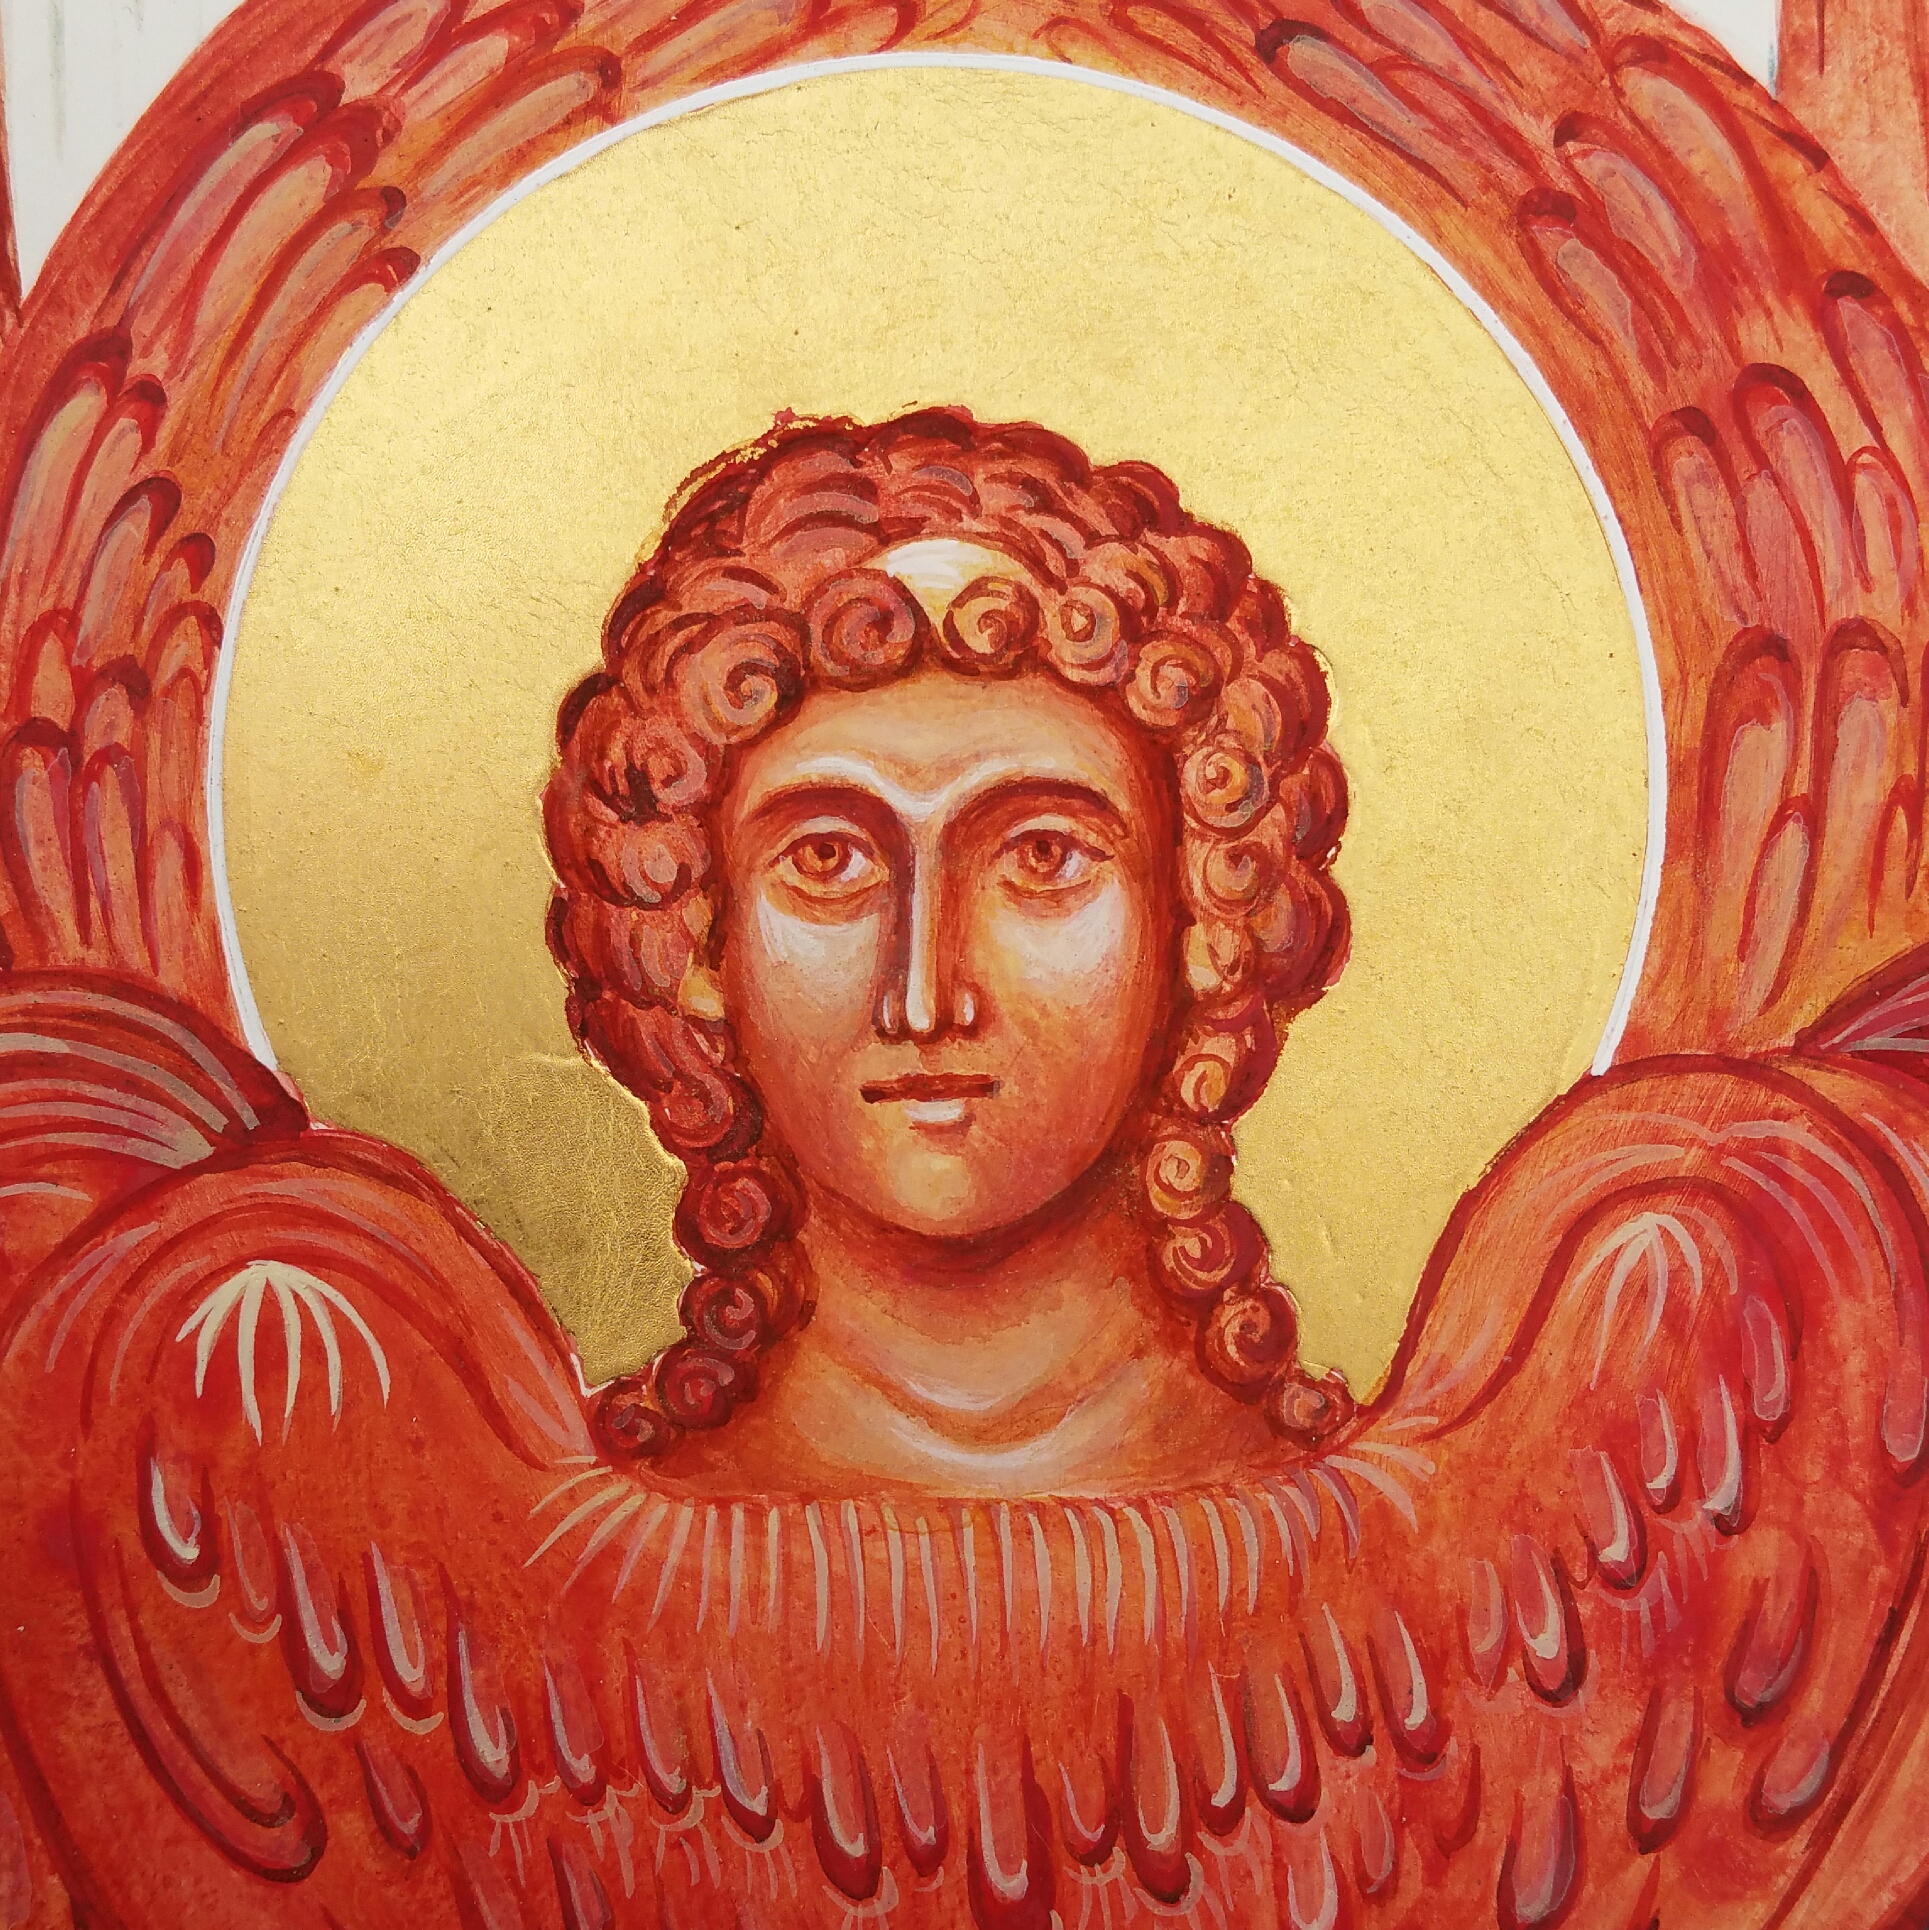
Working with English Red Light pigment I under-painted the Cherub’s face. I’ve learnt over the years that although egg tempera dries fast, it isn’t that stable to work over for at least for 24 hours. It’s all too easy to apply a membrane/glaze over a finely painted face but then if I apply a little bit too much brushwork, the under-layer can move!
It helps to paint several other things at the same time – in this instance I had plenty of other angel faces to underpaint.


The rest of the faces are under-painted in a mix of Yellow Maimeri and a tiny dot of Ivory Black to make a soft green.
Here’s a little bit of work-in-progress with the rest of the icon.

I’ve used English red deep for the darkest parts of underpainting the Cherub’s face and hair. Every now and again, apply a thin glaze of clear egg mix.

Build up a strong face with deep shadows and bright light areas – then you are ready to apply the membrane layers.

I used Italian yellow gold pigment in several thin glazes over both the face and hair.

Gradually add thin layers of highlights in white to the brow, eyelids, cheekbones, nose tips, lower lip and neck.
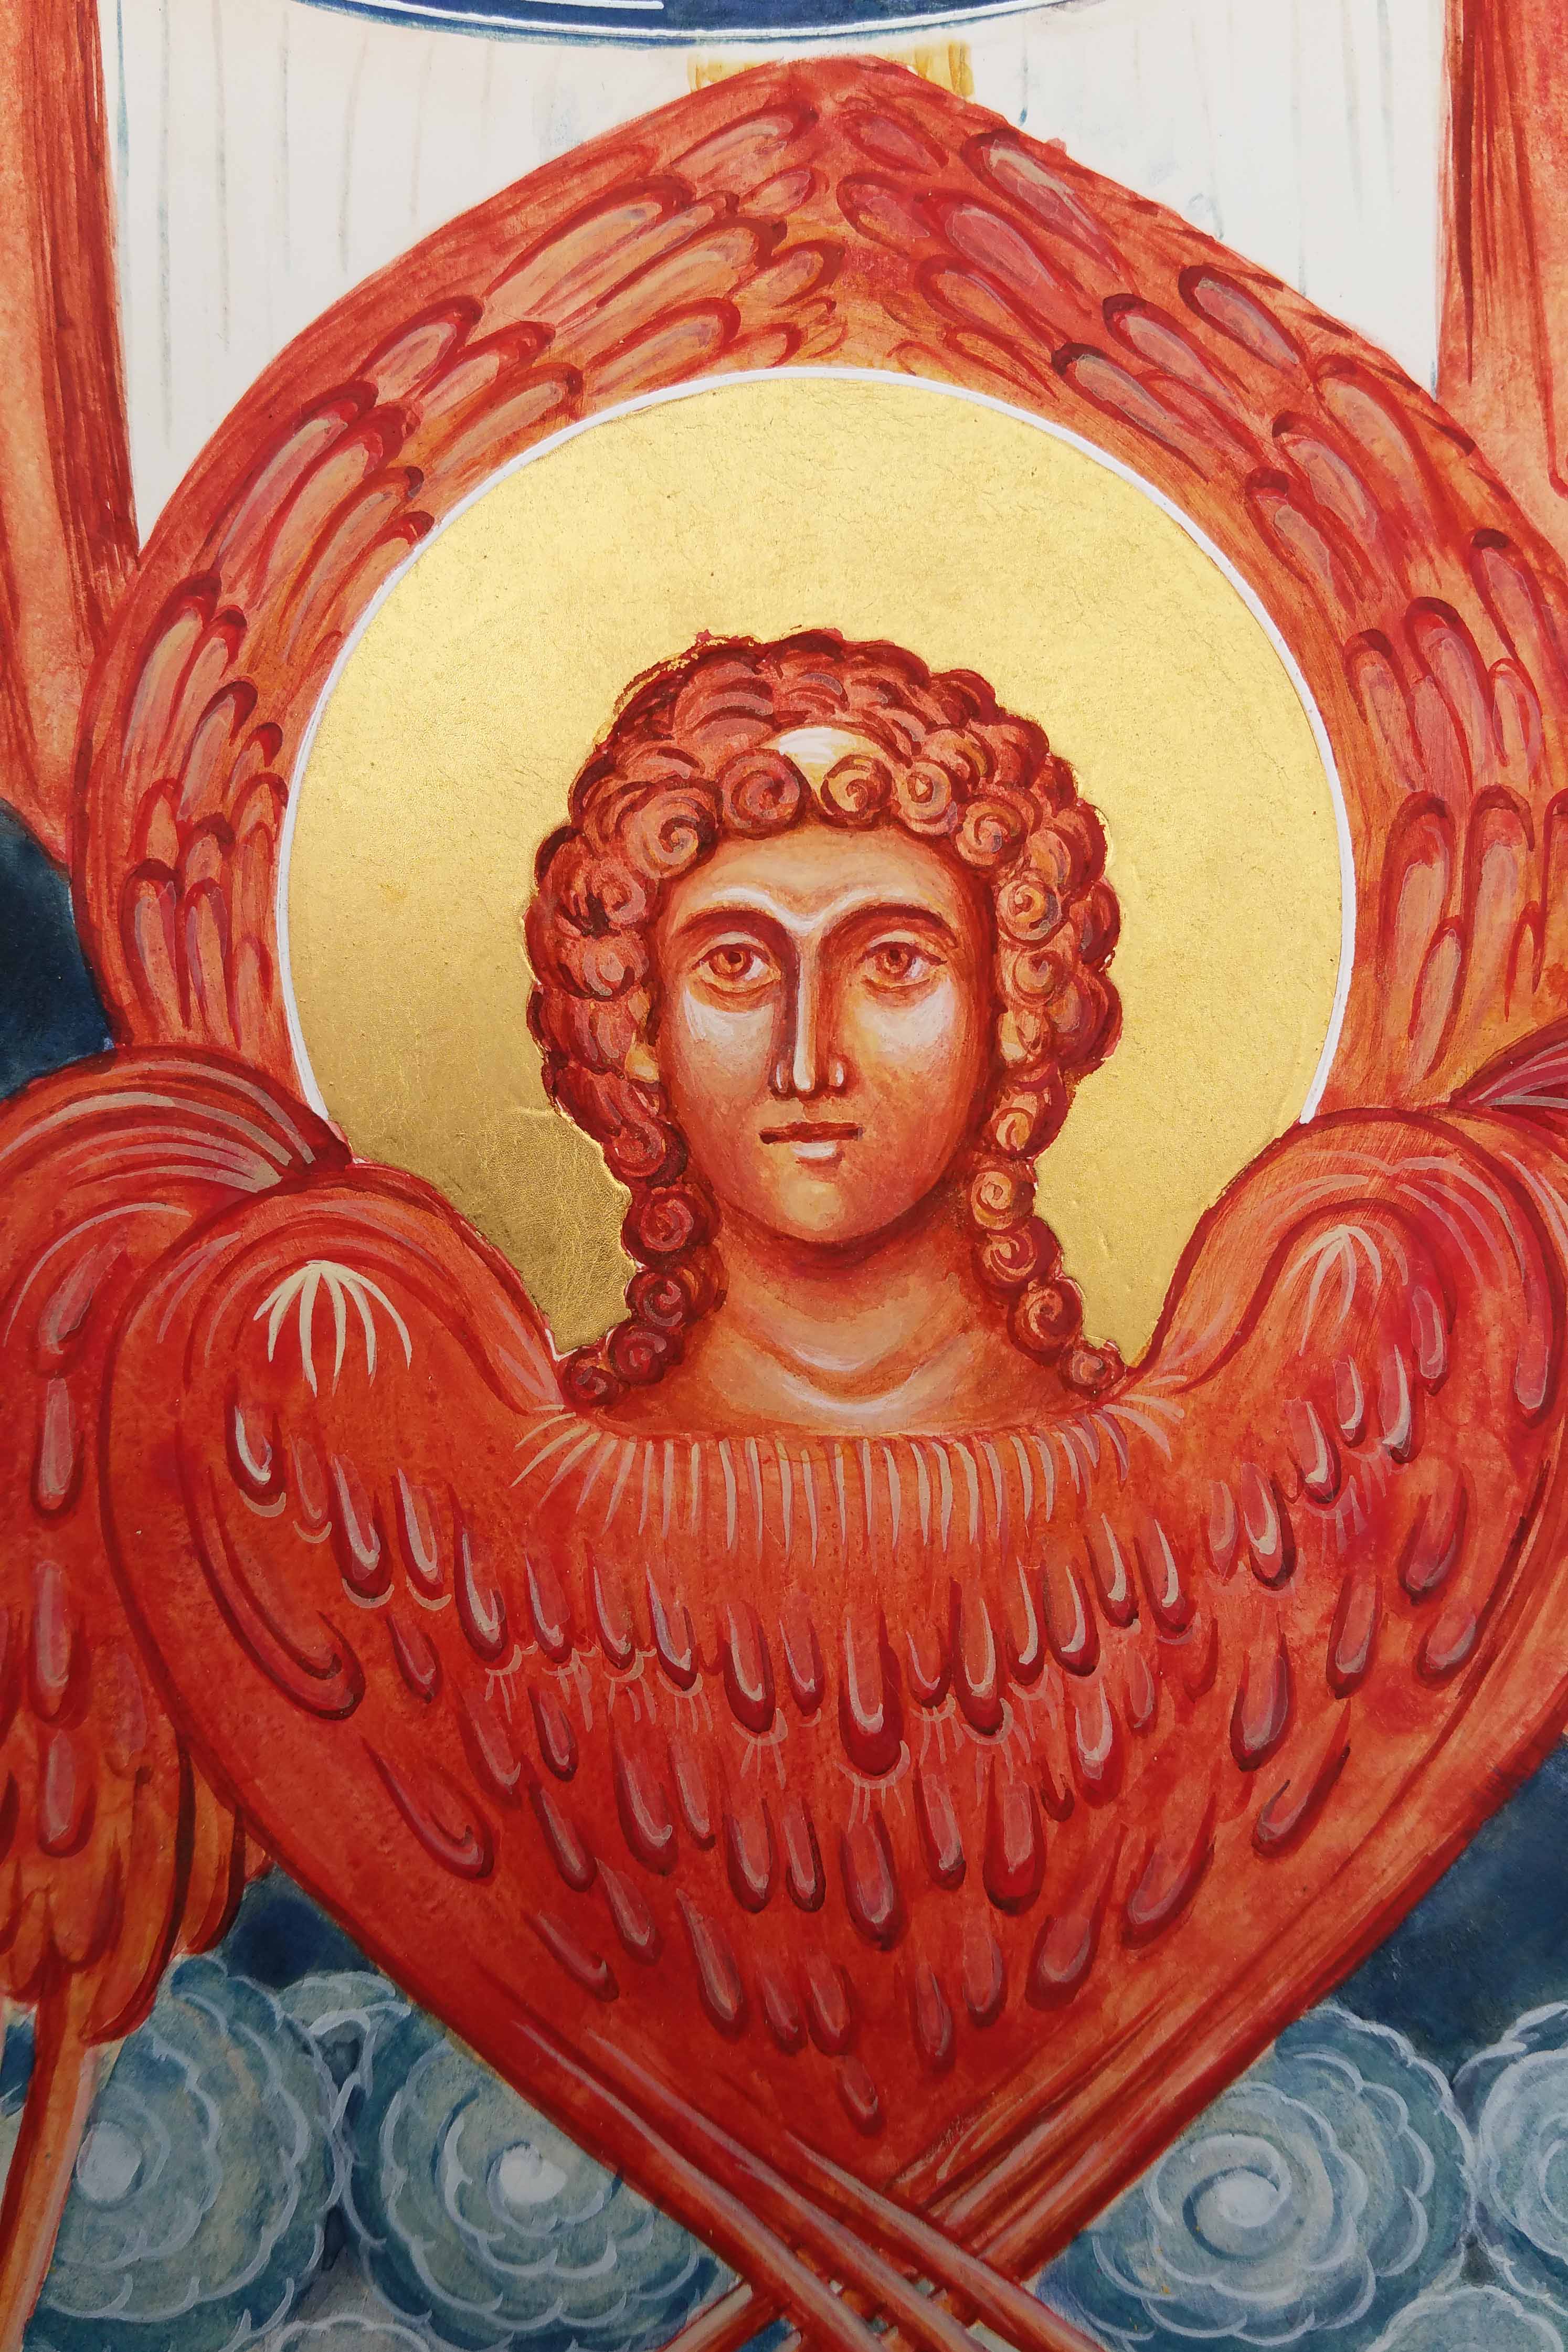
Finally, there are the highlights to the wings, the sides of the eyes, headband and a little light gold to highlight the curls.
I hope this has been a help or given you a nudge to pick up your brush.
Next up will be the standing angel faces
Thank you for reading
Ronnie 🙂

Leave a comment