Icon Diploma Student

Learning to see with the eye of the heart

Posts tagged ‘Archangel Raphael’

10 Years Painting Icons – 50% off!

Ten years is quite a milestone and it can’t go past without some celebration that you have been keeping me company for all or part of the way! Anyone following this blog will realise how long it takes to paint an icon and the full price doesn’t in any way reflect the time invested in these treasures. However, these days most of us have to watch our budget so, in order to open these up to finding new homes, I am halving the price of ALL the icons that I hold in stock. Price of postage will be added at cost.

I have chosen a few here to show you what’s available and the rest are all listed here.

The offer runs from 1-28th February 2023.

If you would like to enquire about an icon or purchase one, please email me at ronnie.cruwys@btinternet.com

Thanks for reading,

Ronnie

Michaelmas

As September gives way into darker evenings and mornings, it pulls back many memories of the ancestral hearth for our family. It’s a time of remembering our loved ones and lighting a candle. It is the time to honour the Archangels on the feast of Michaelmas.

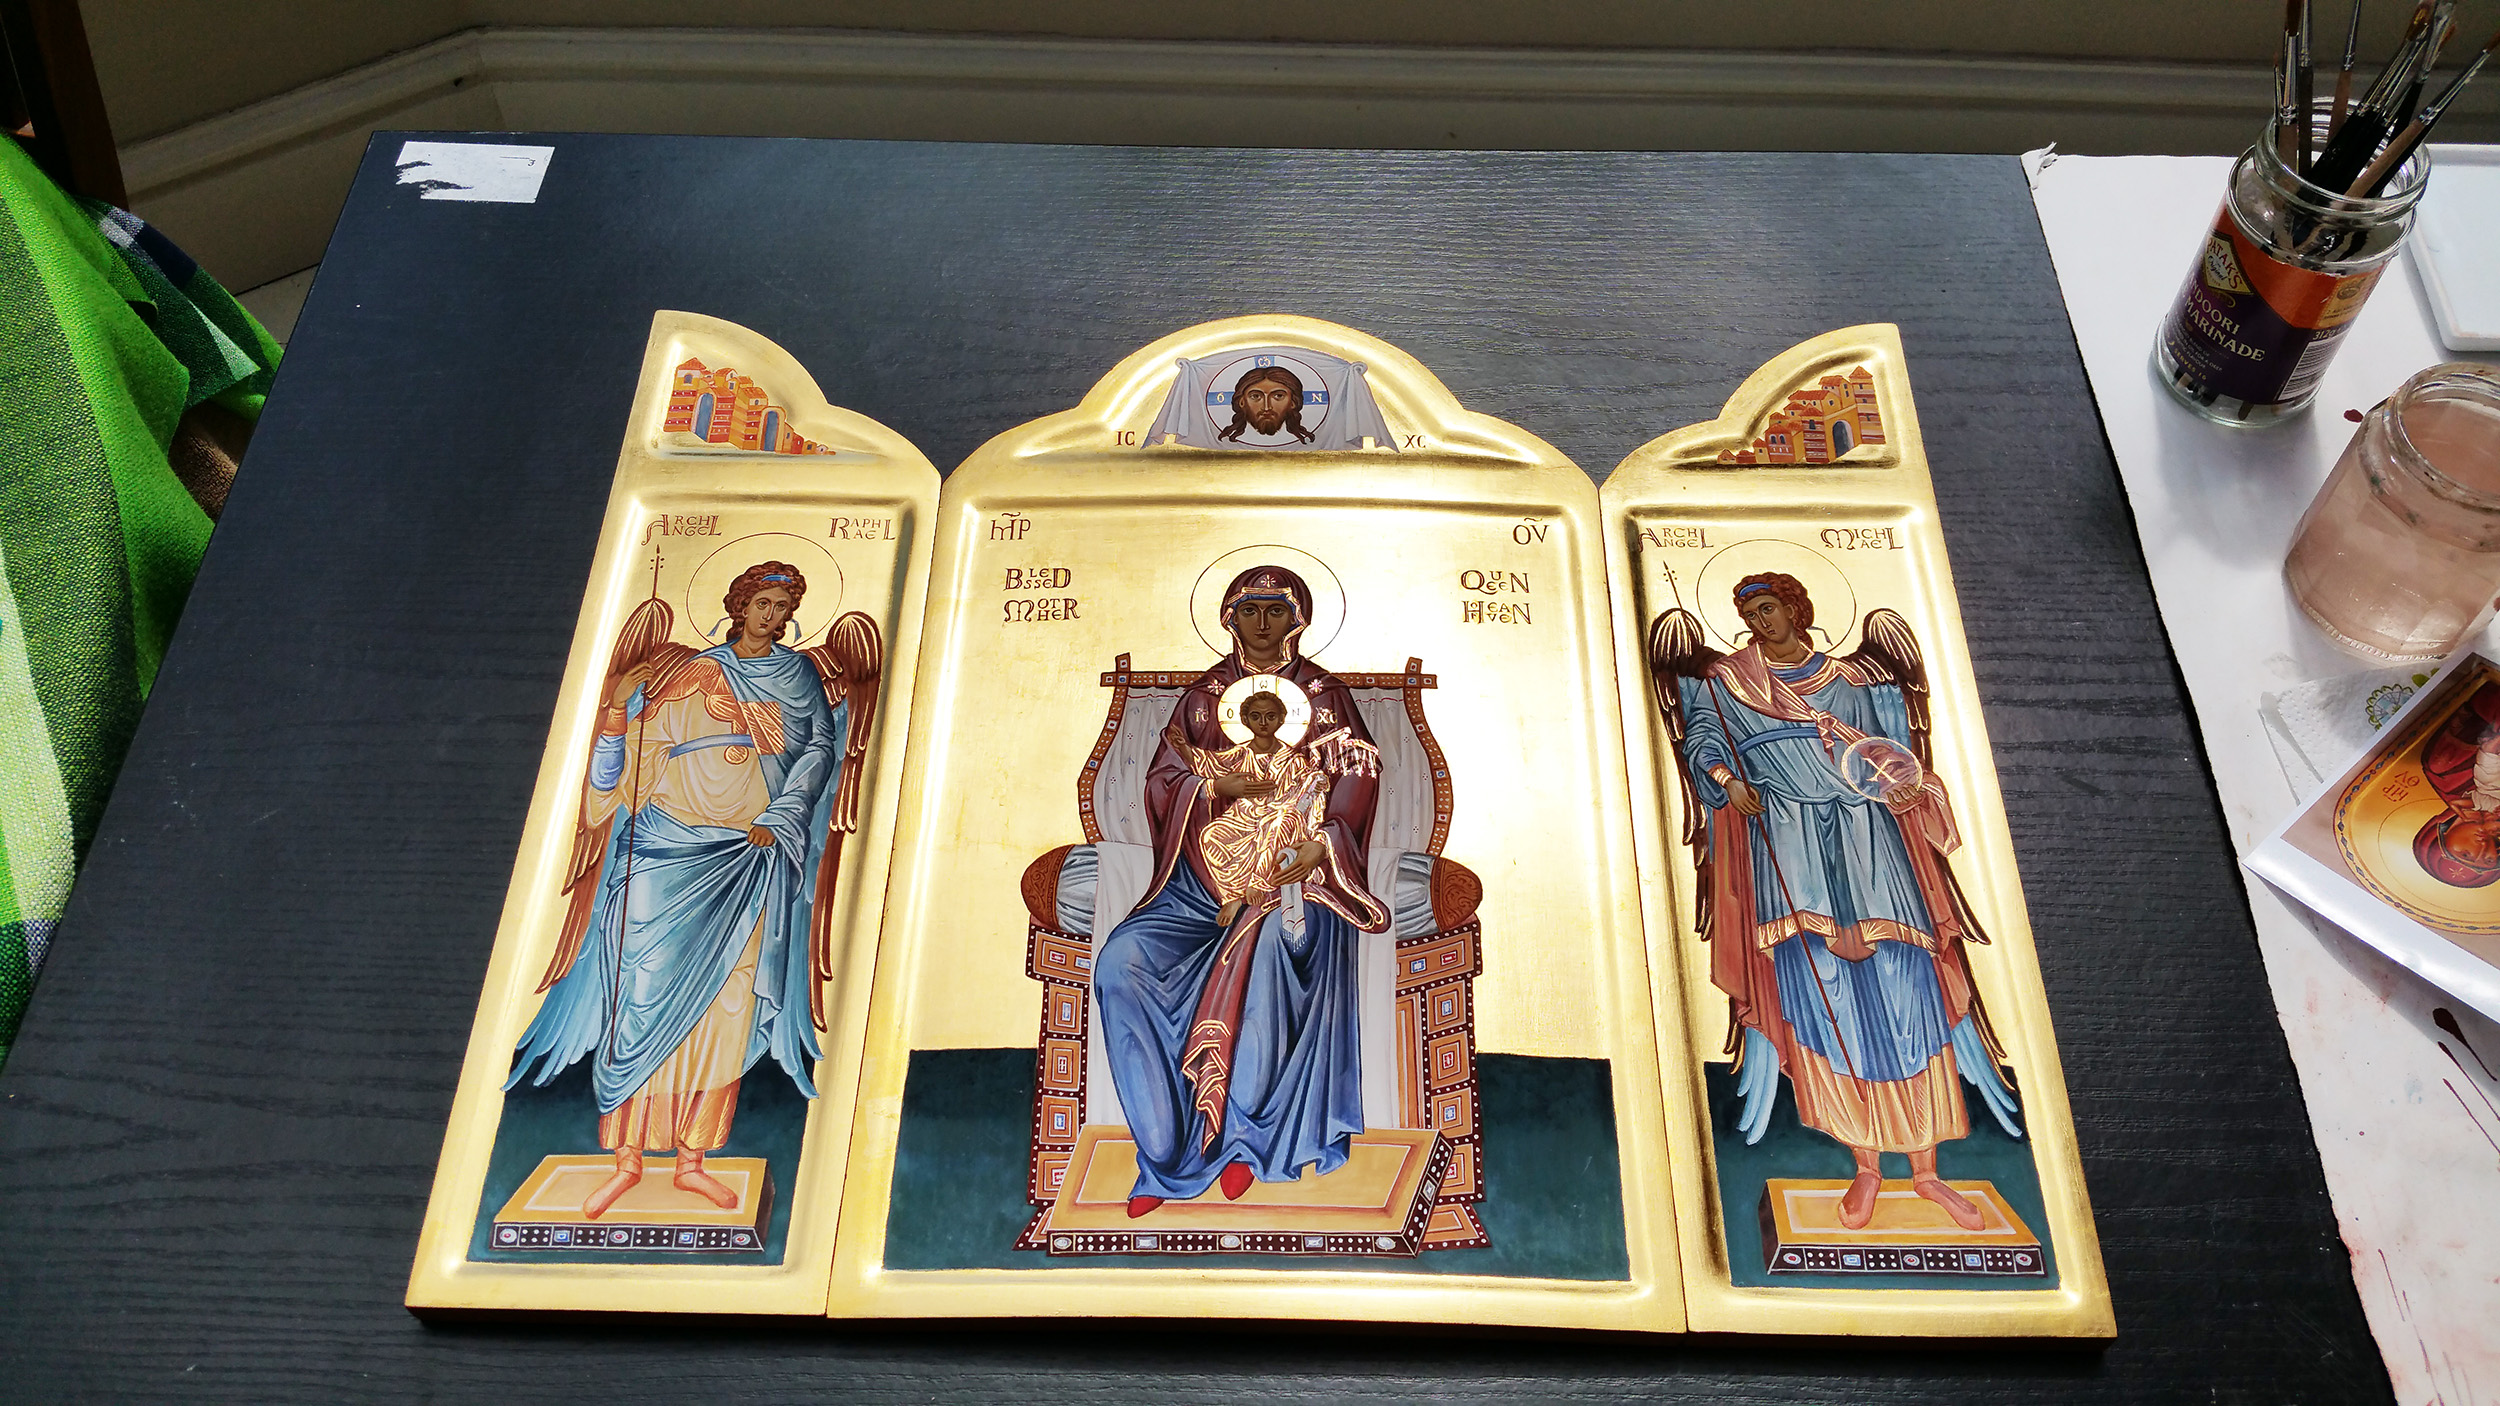
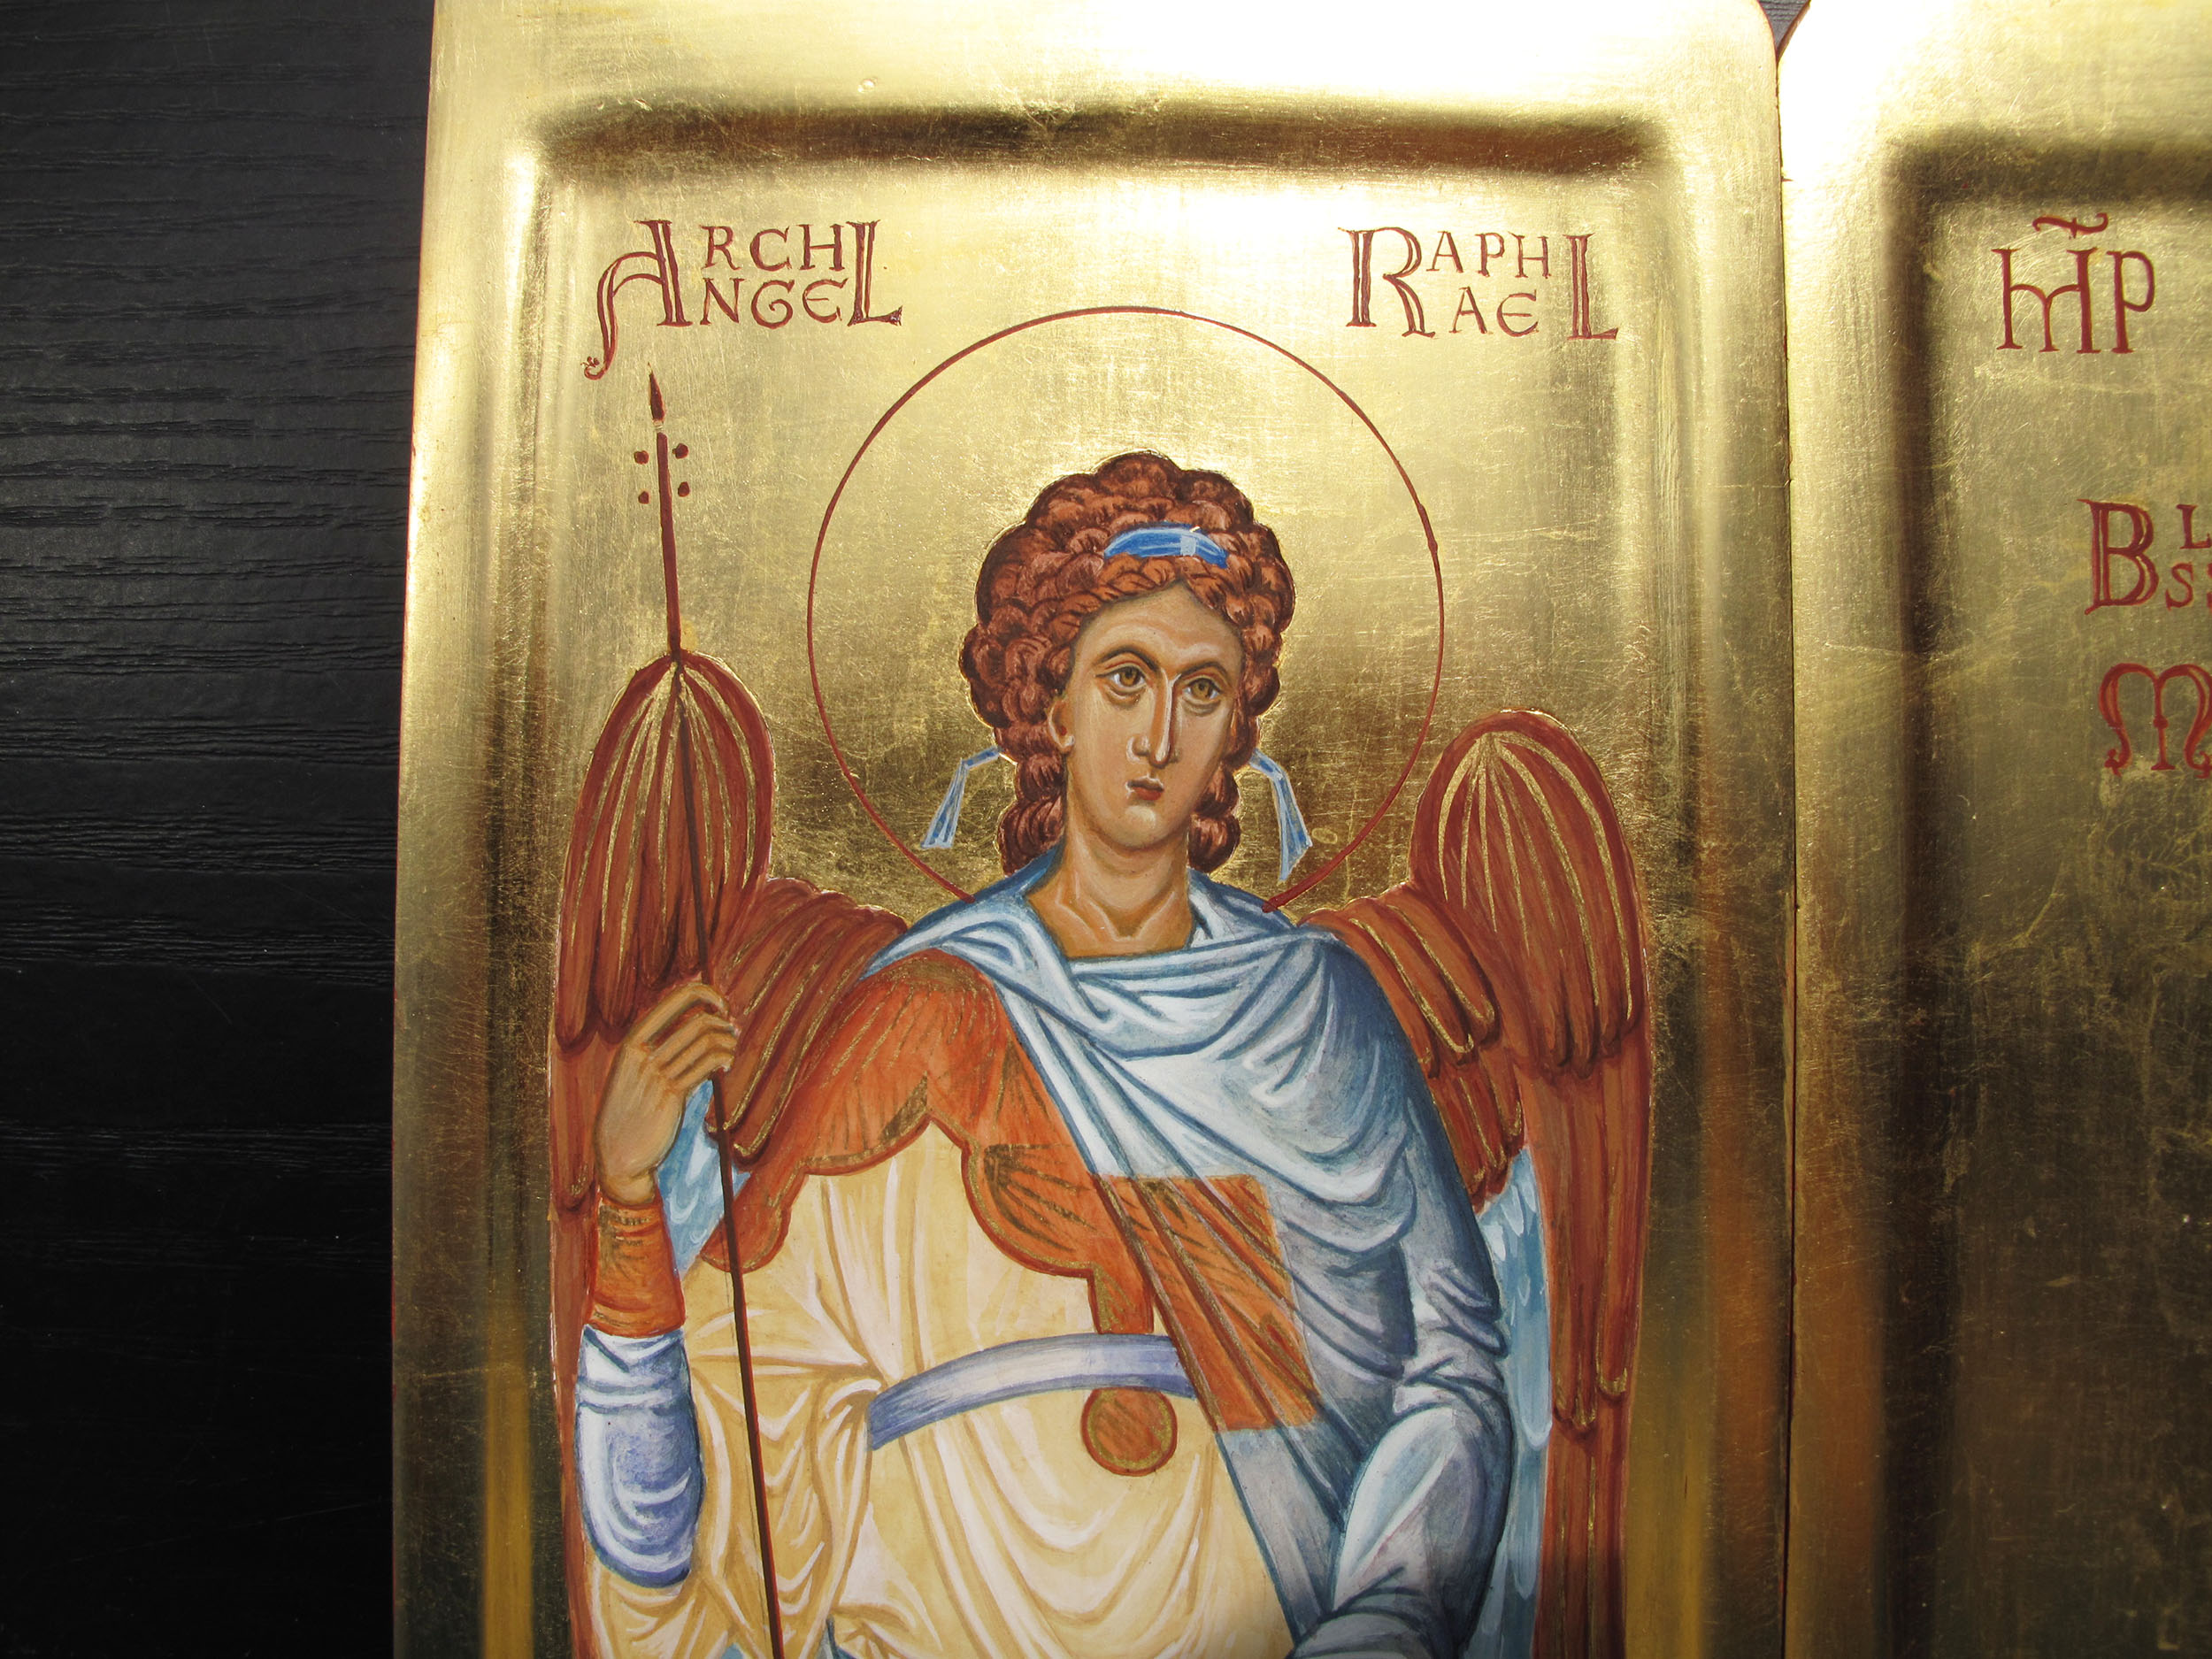
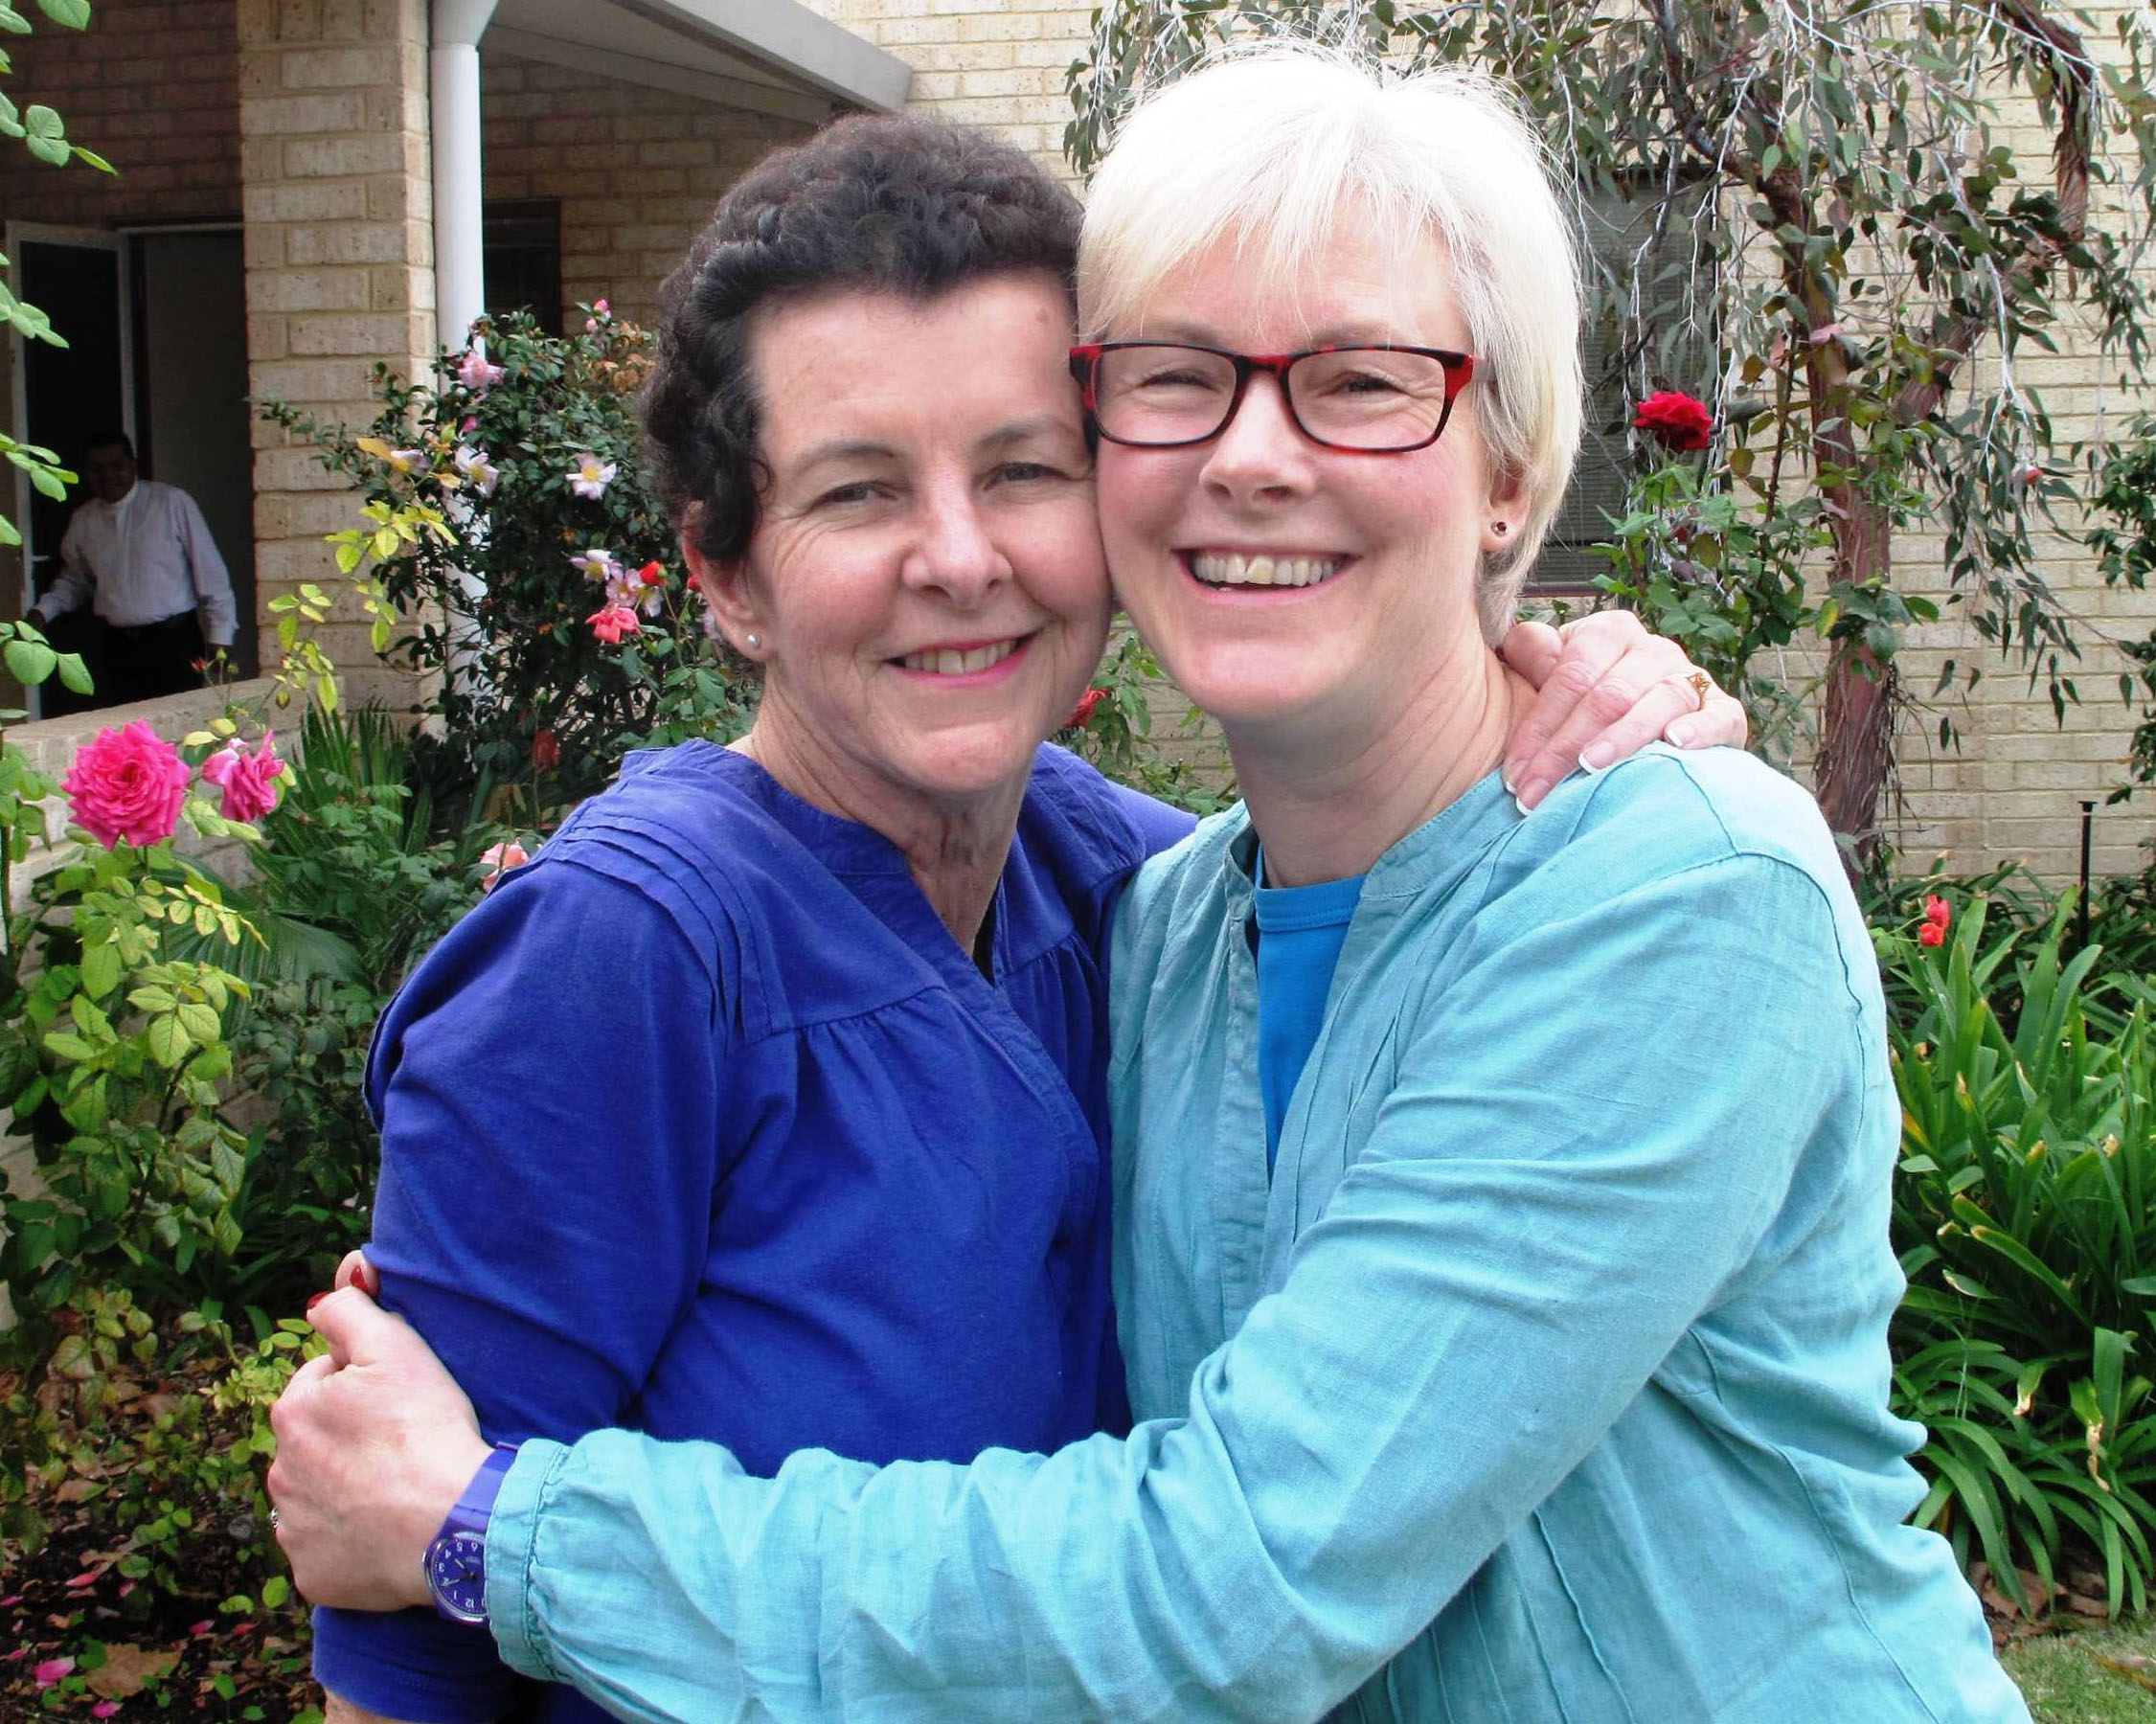
This was a triptych which I painted for my sister – she had seen a small version years ago and loved the way the doors opened up for the big reveal and had wondered if I could ever paint one for her one day. I’m so glad I did!

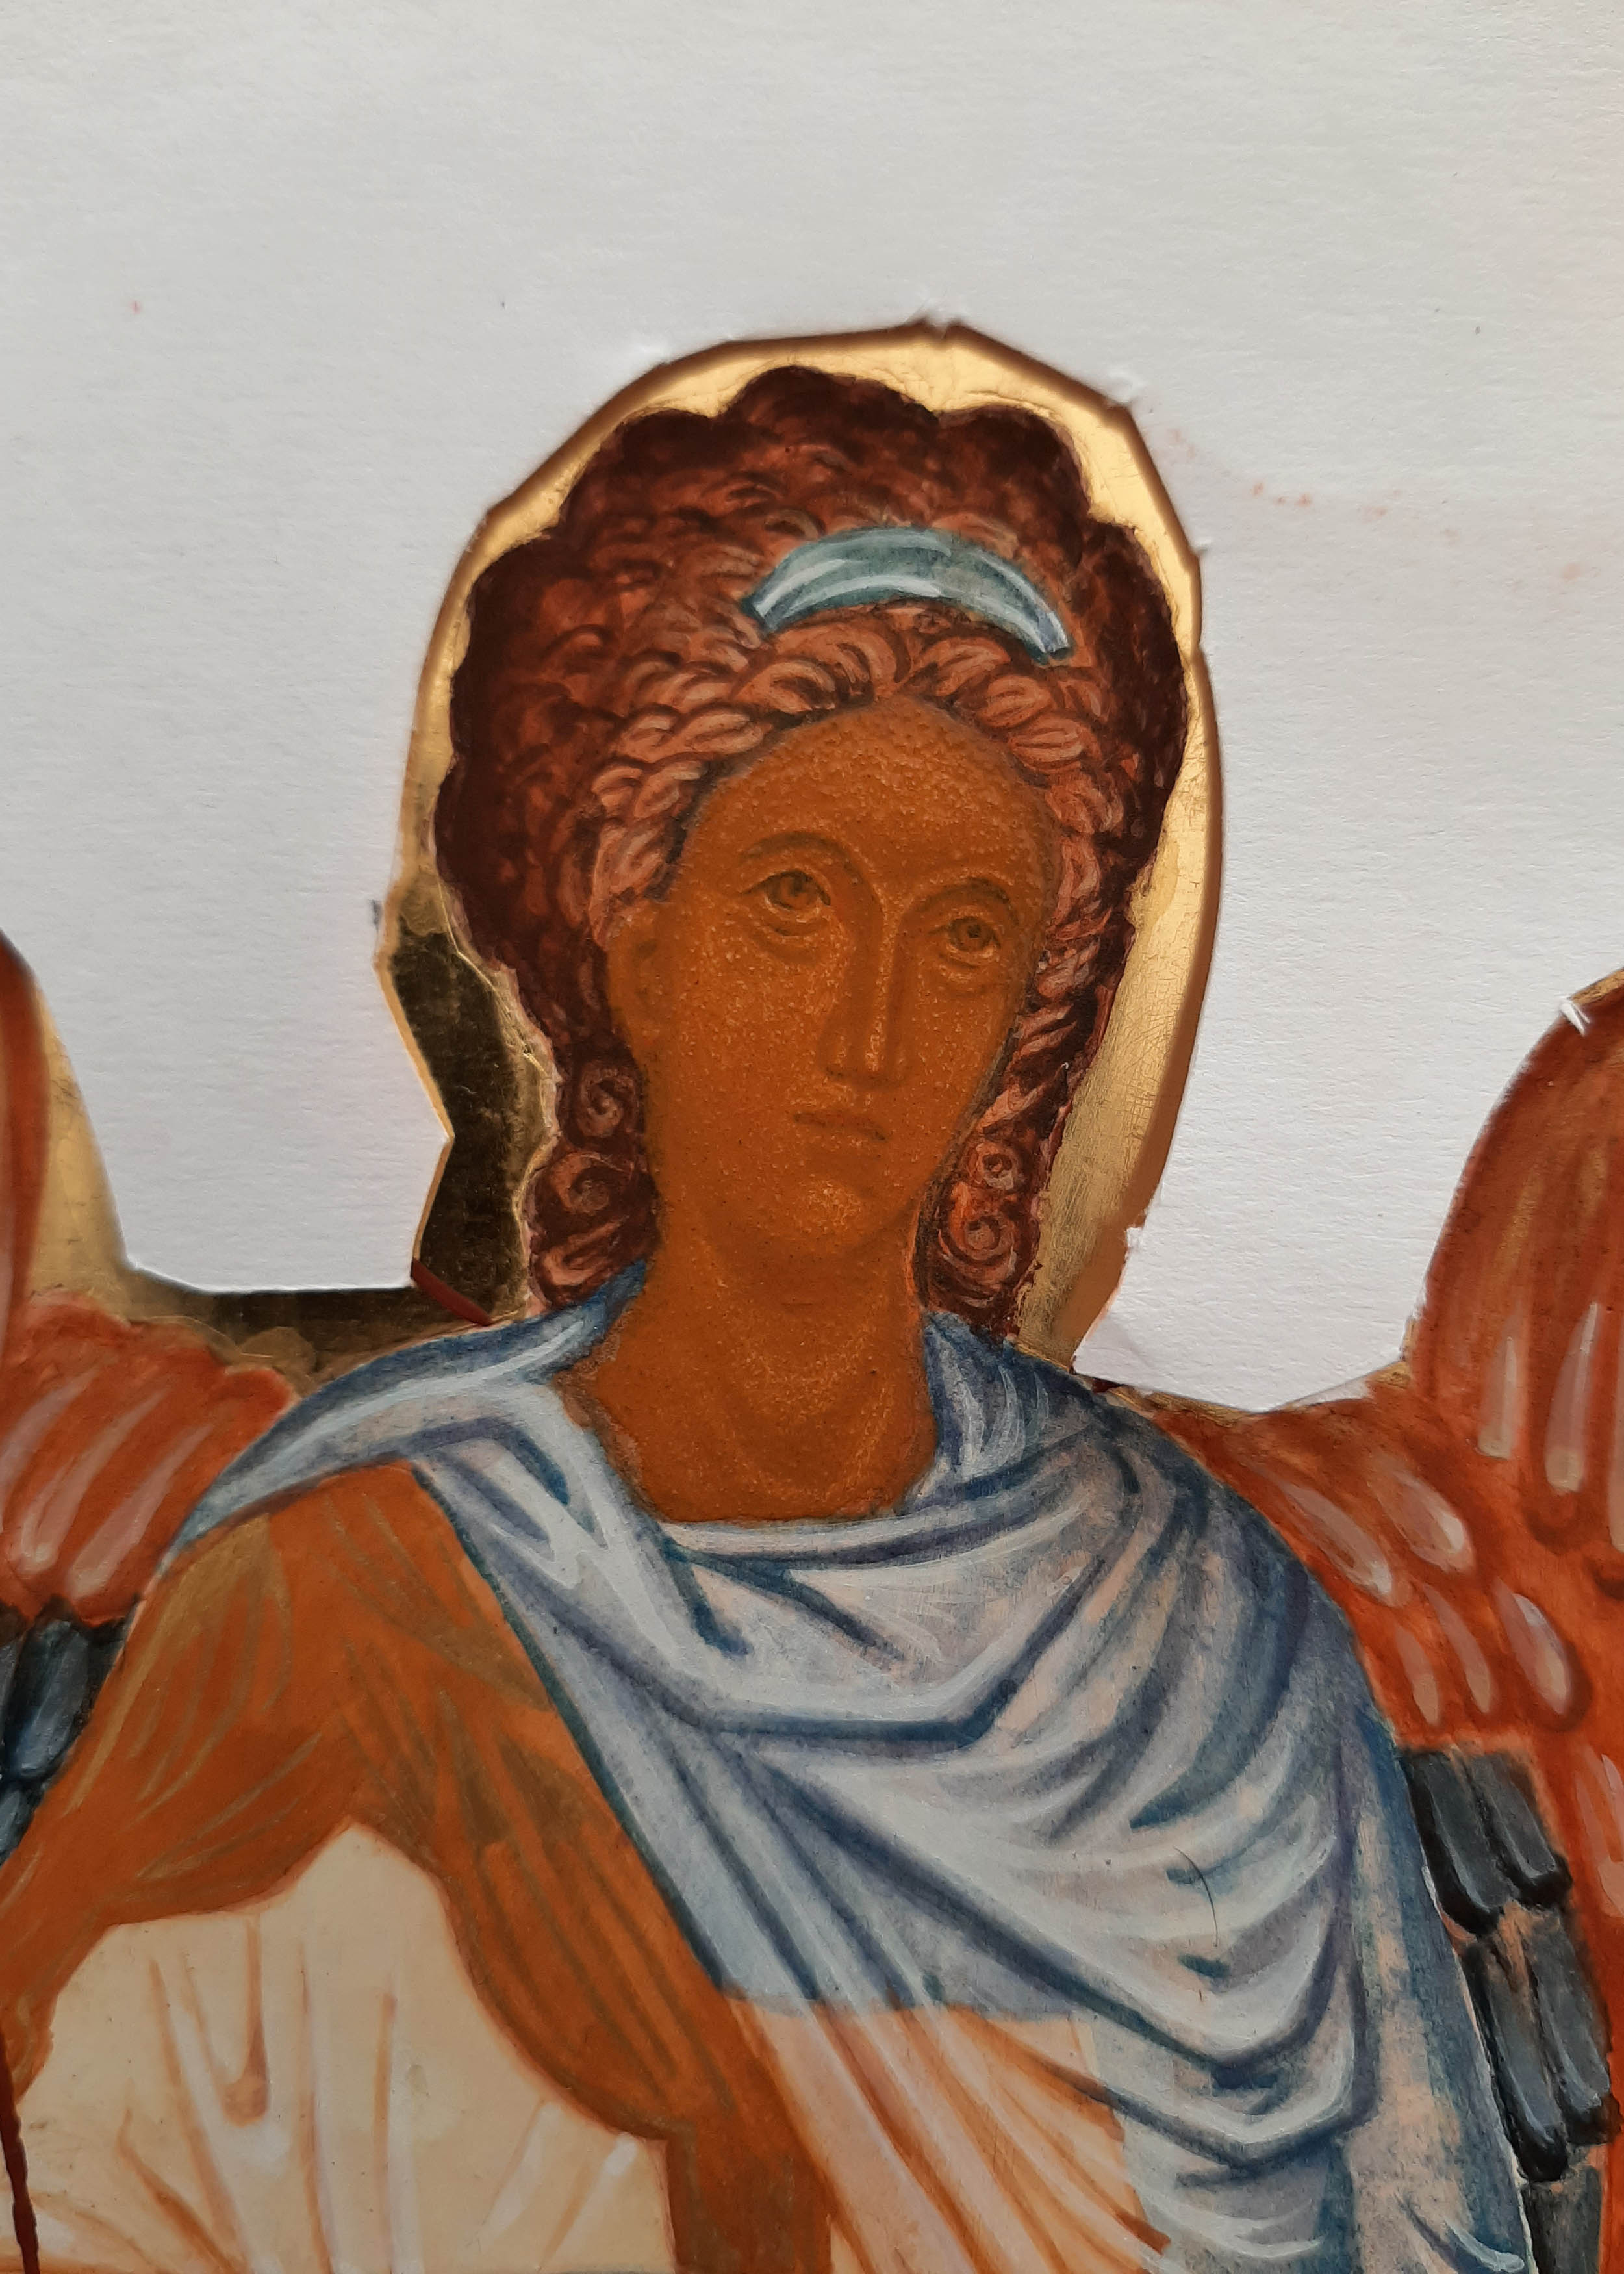
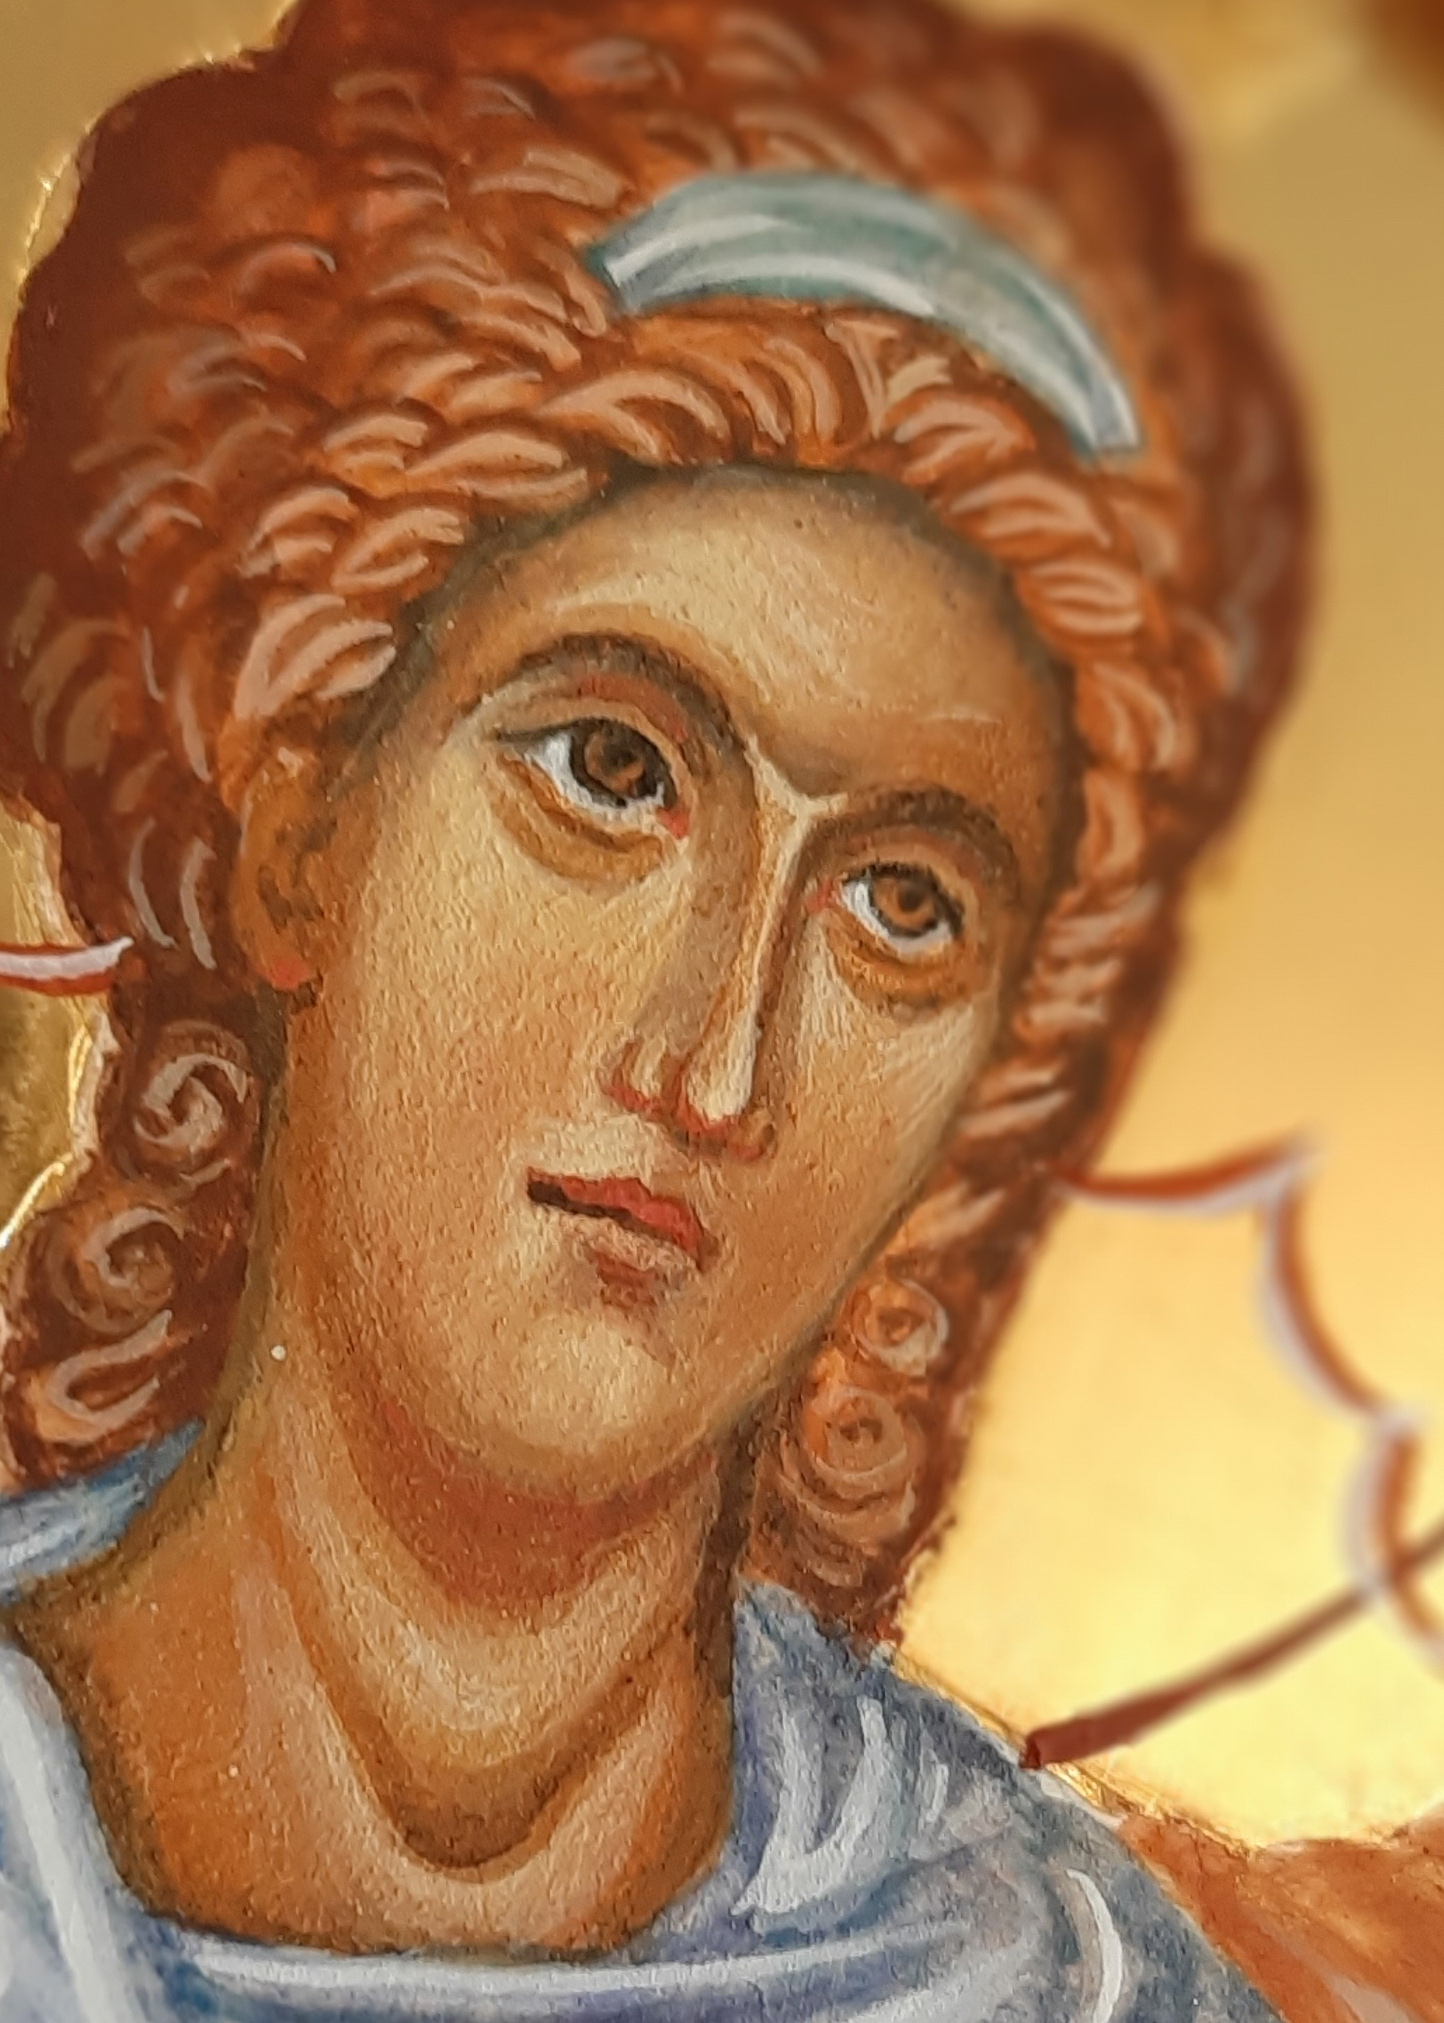
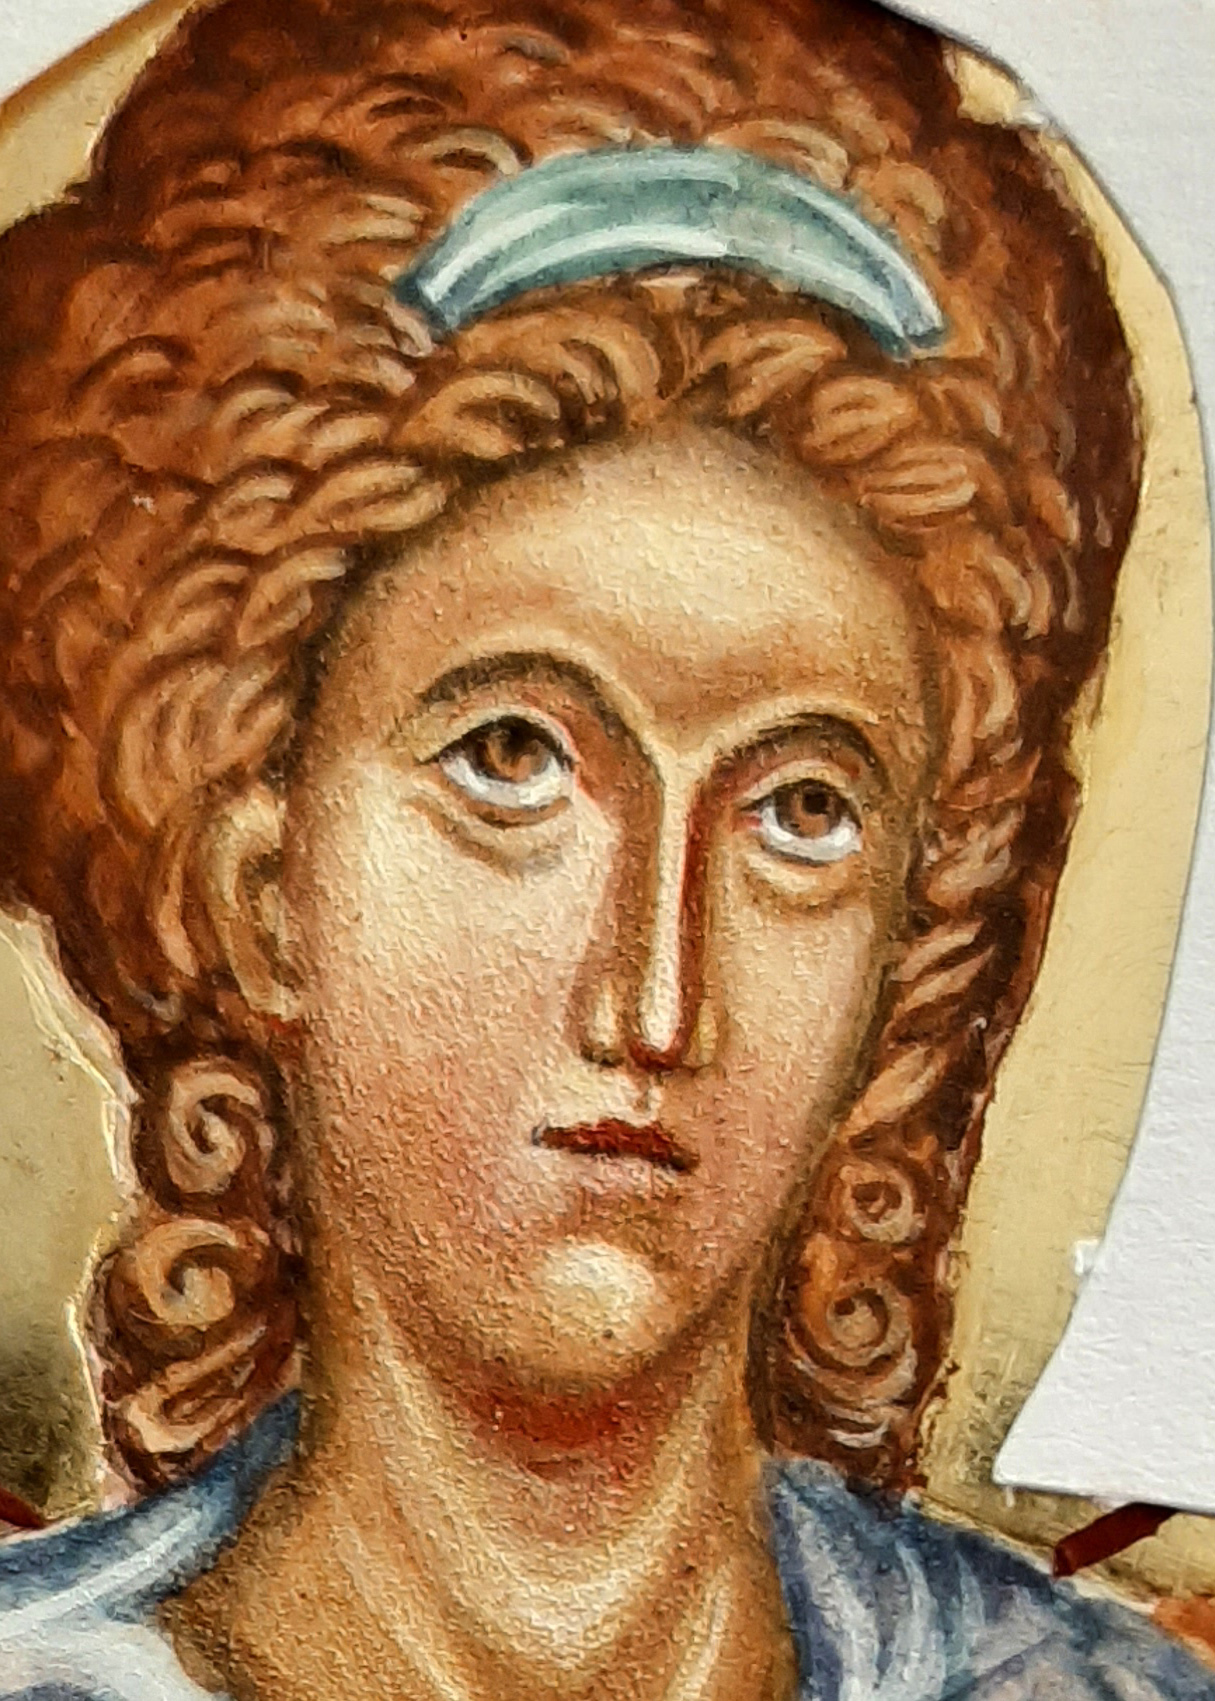
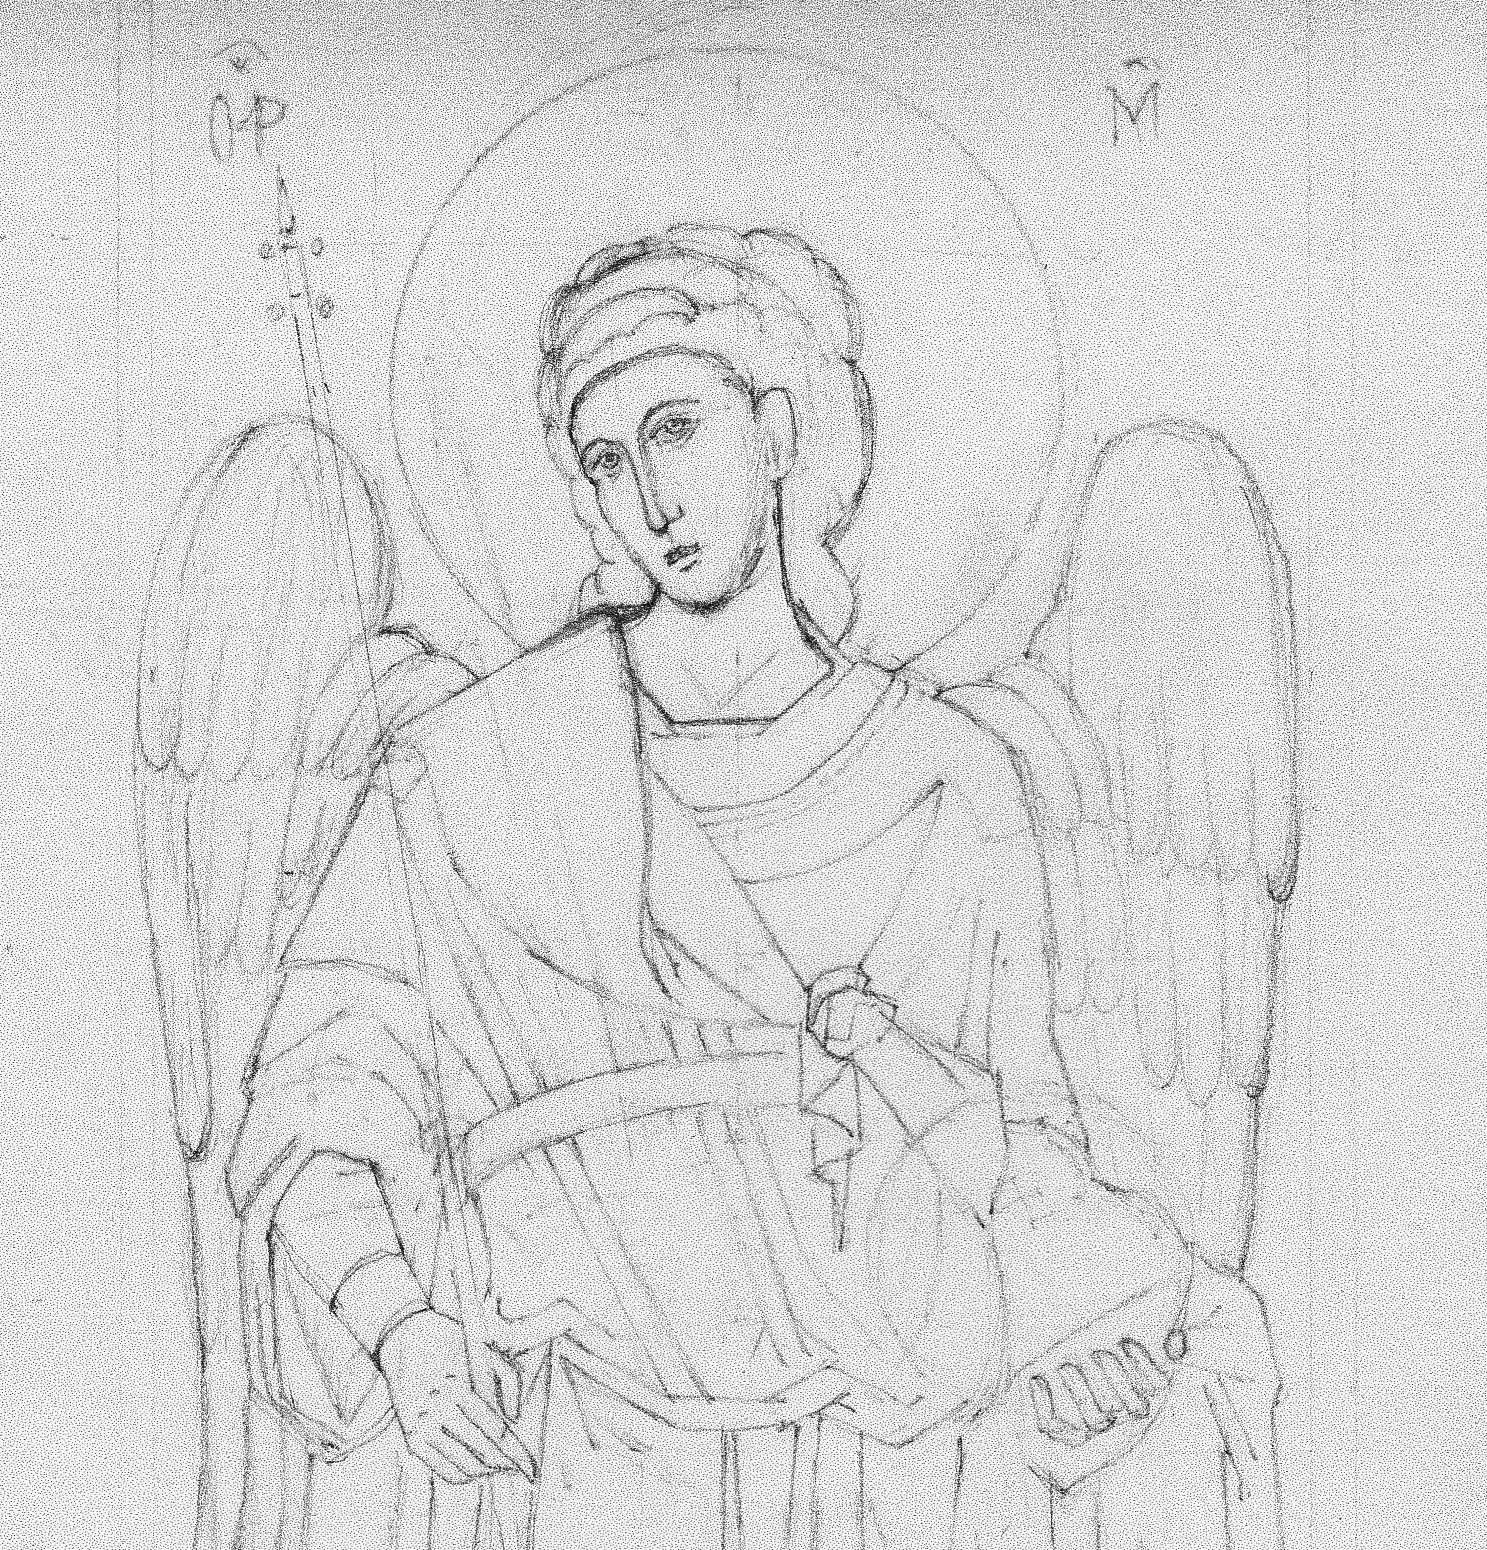
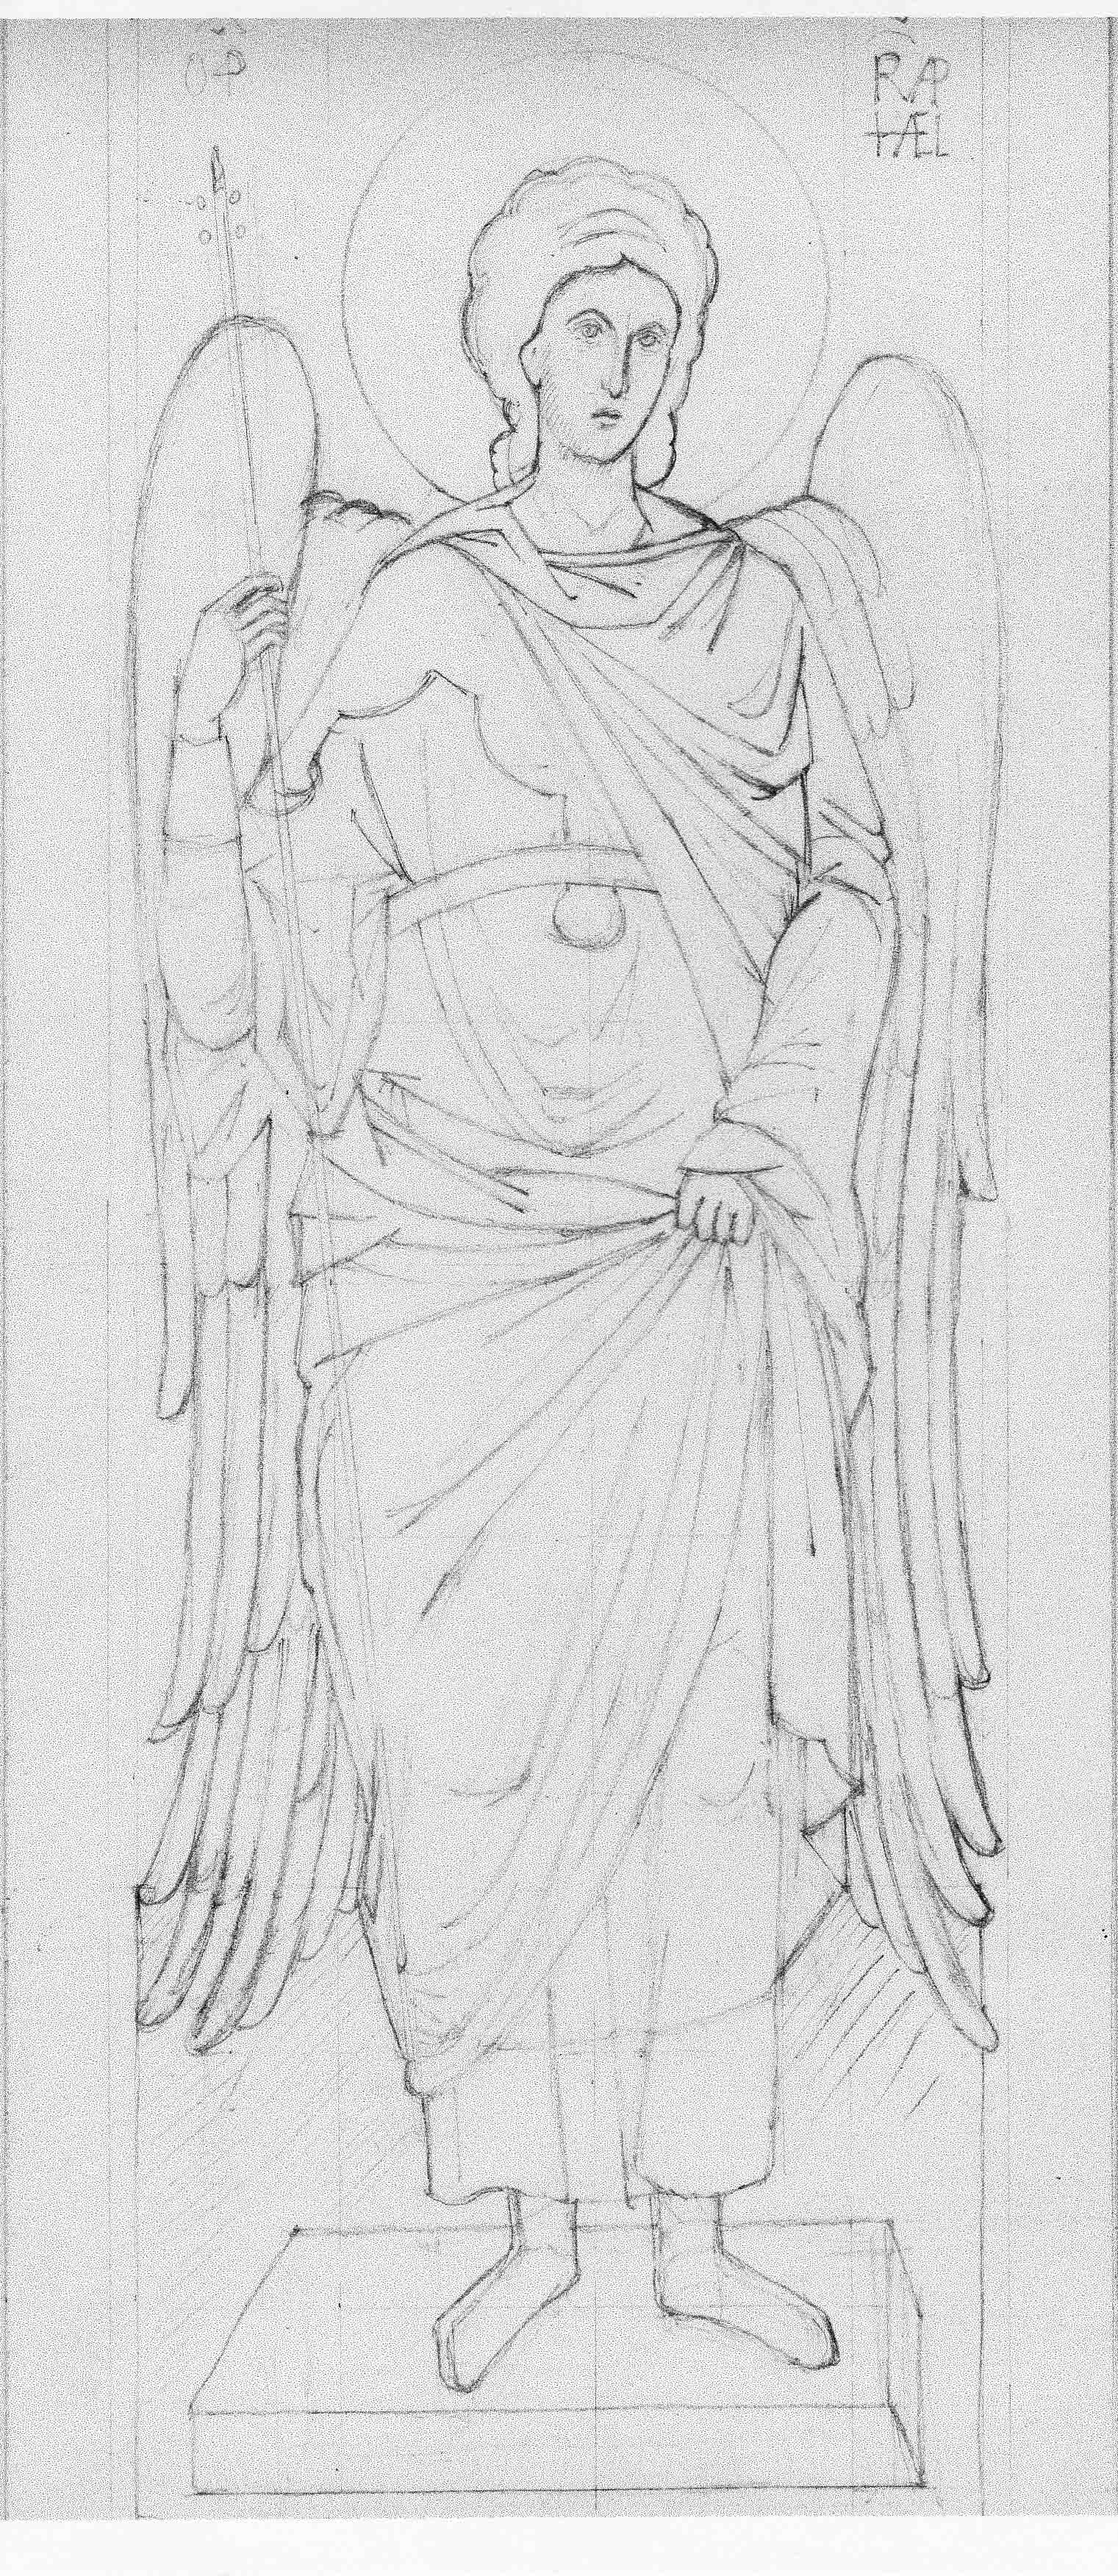
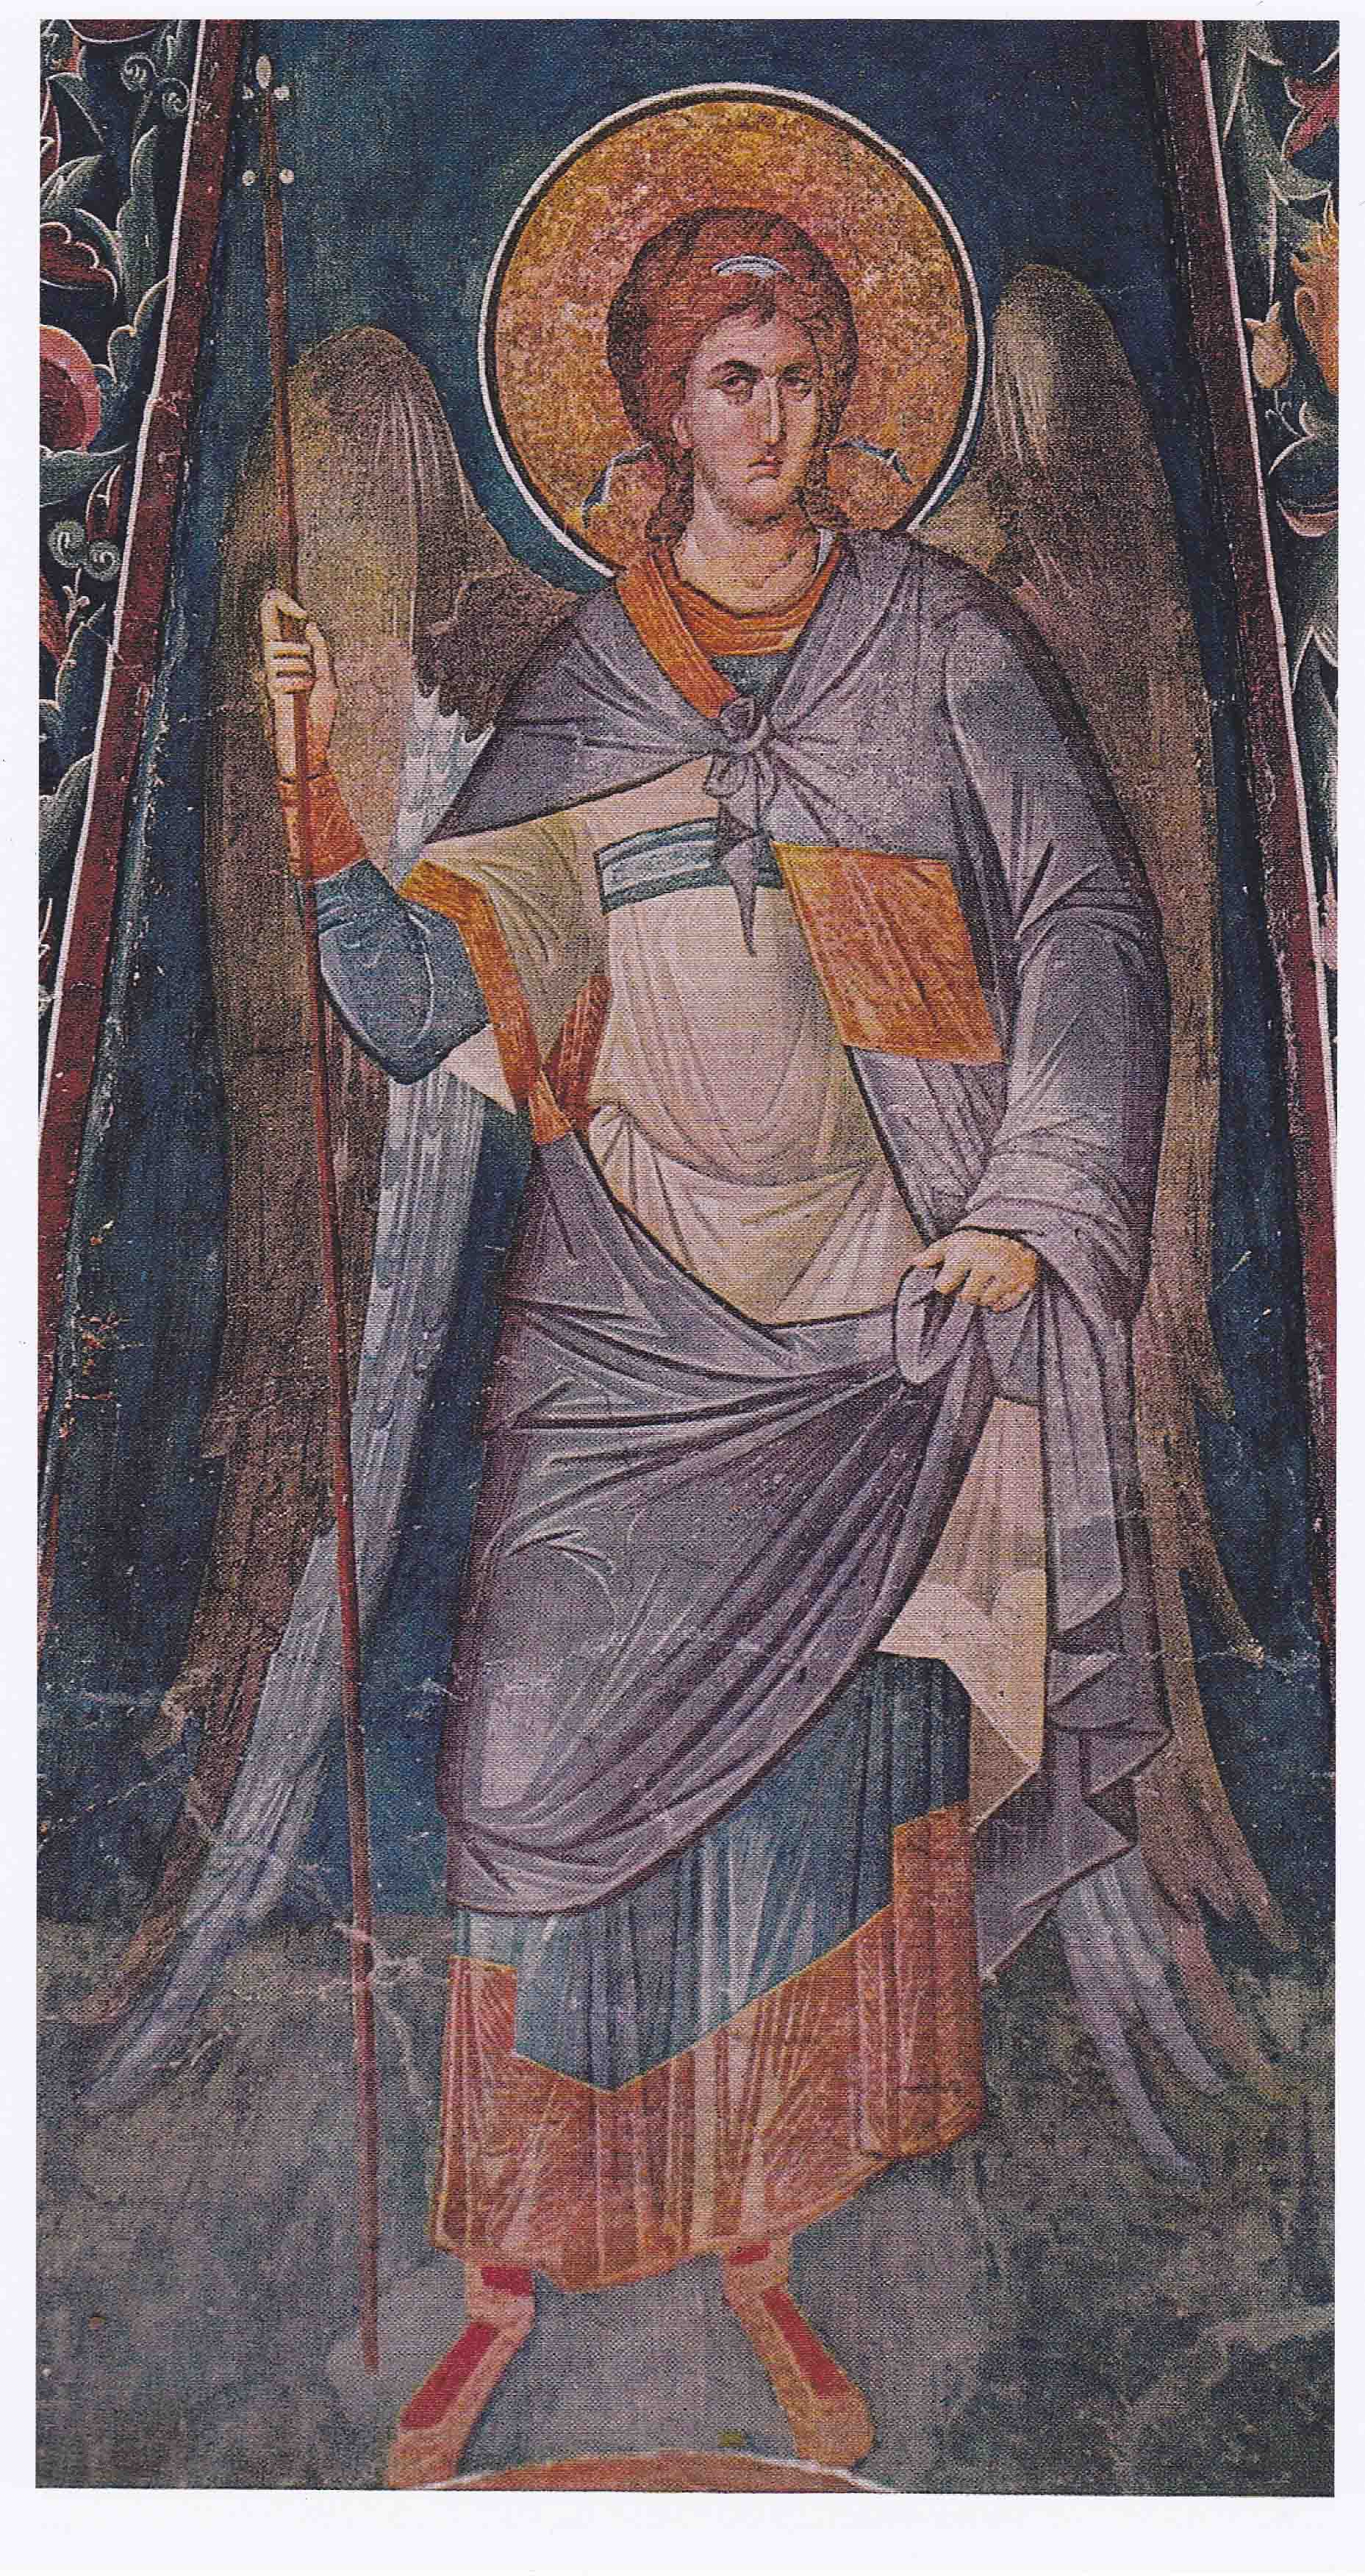
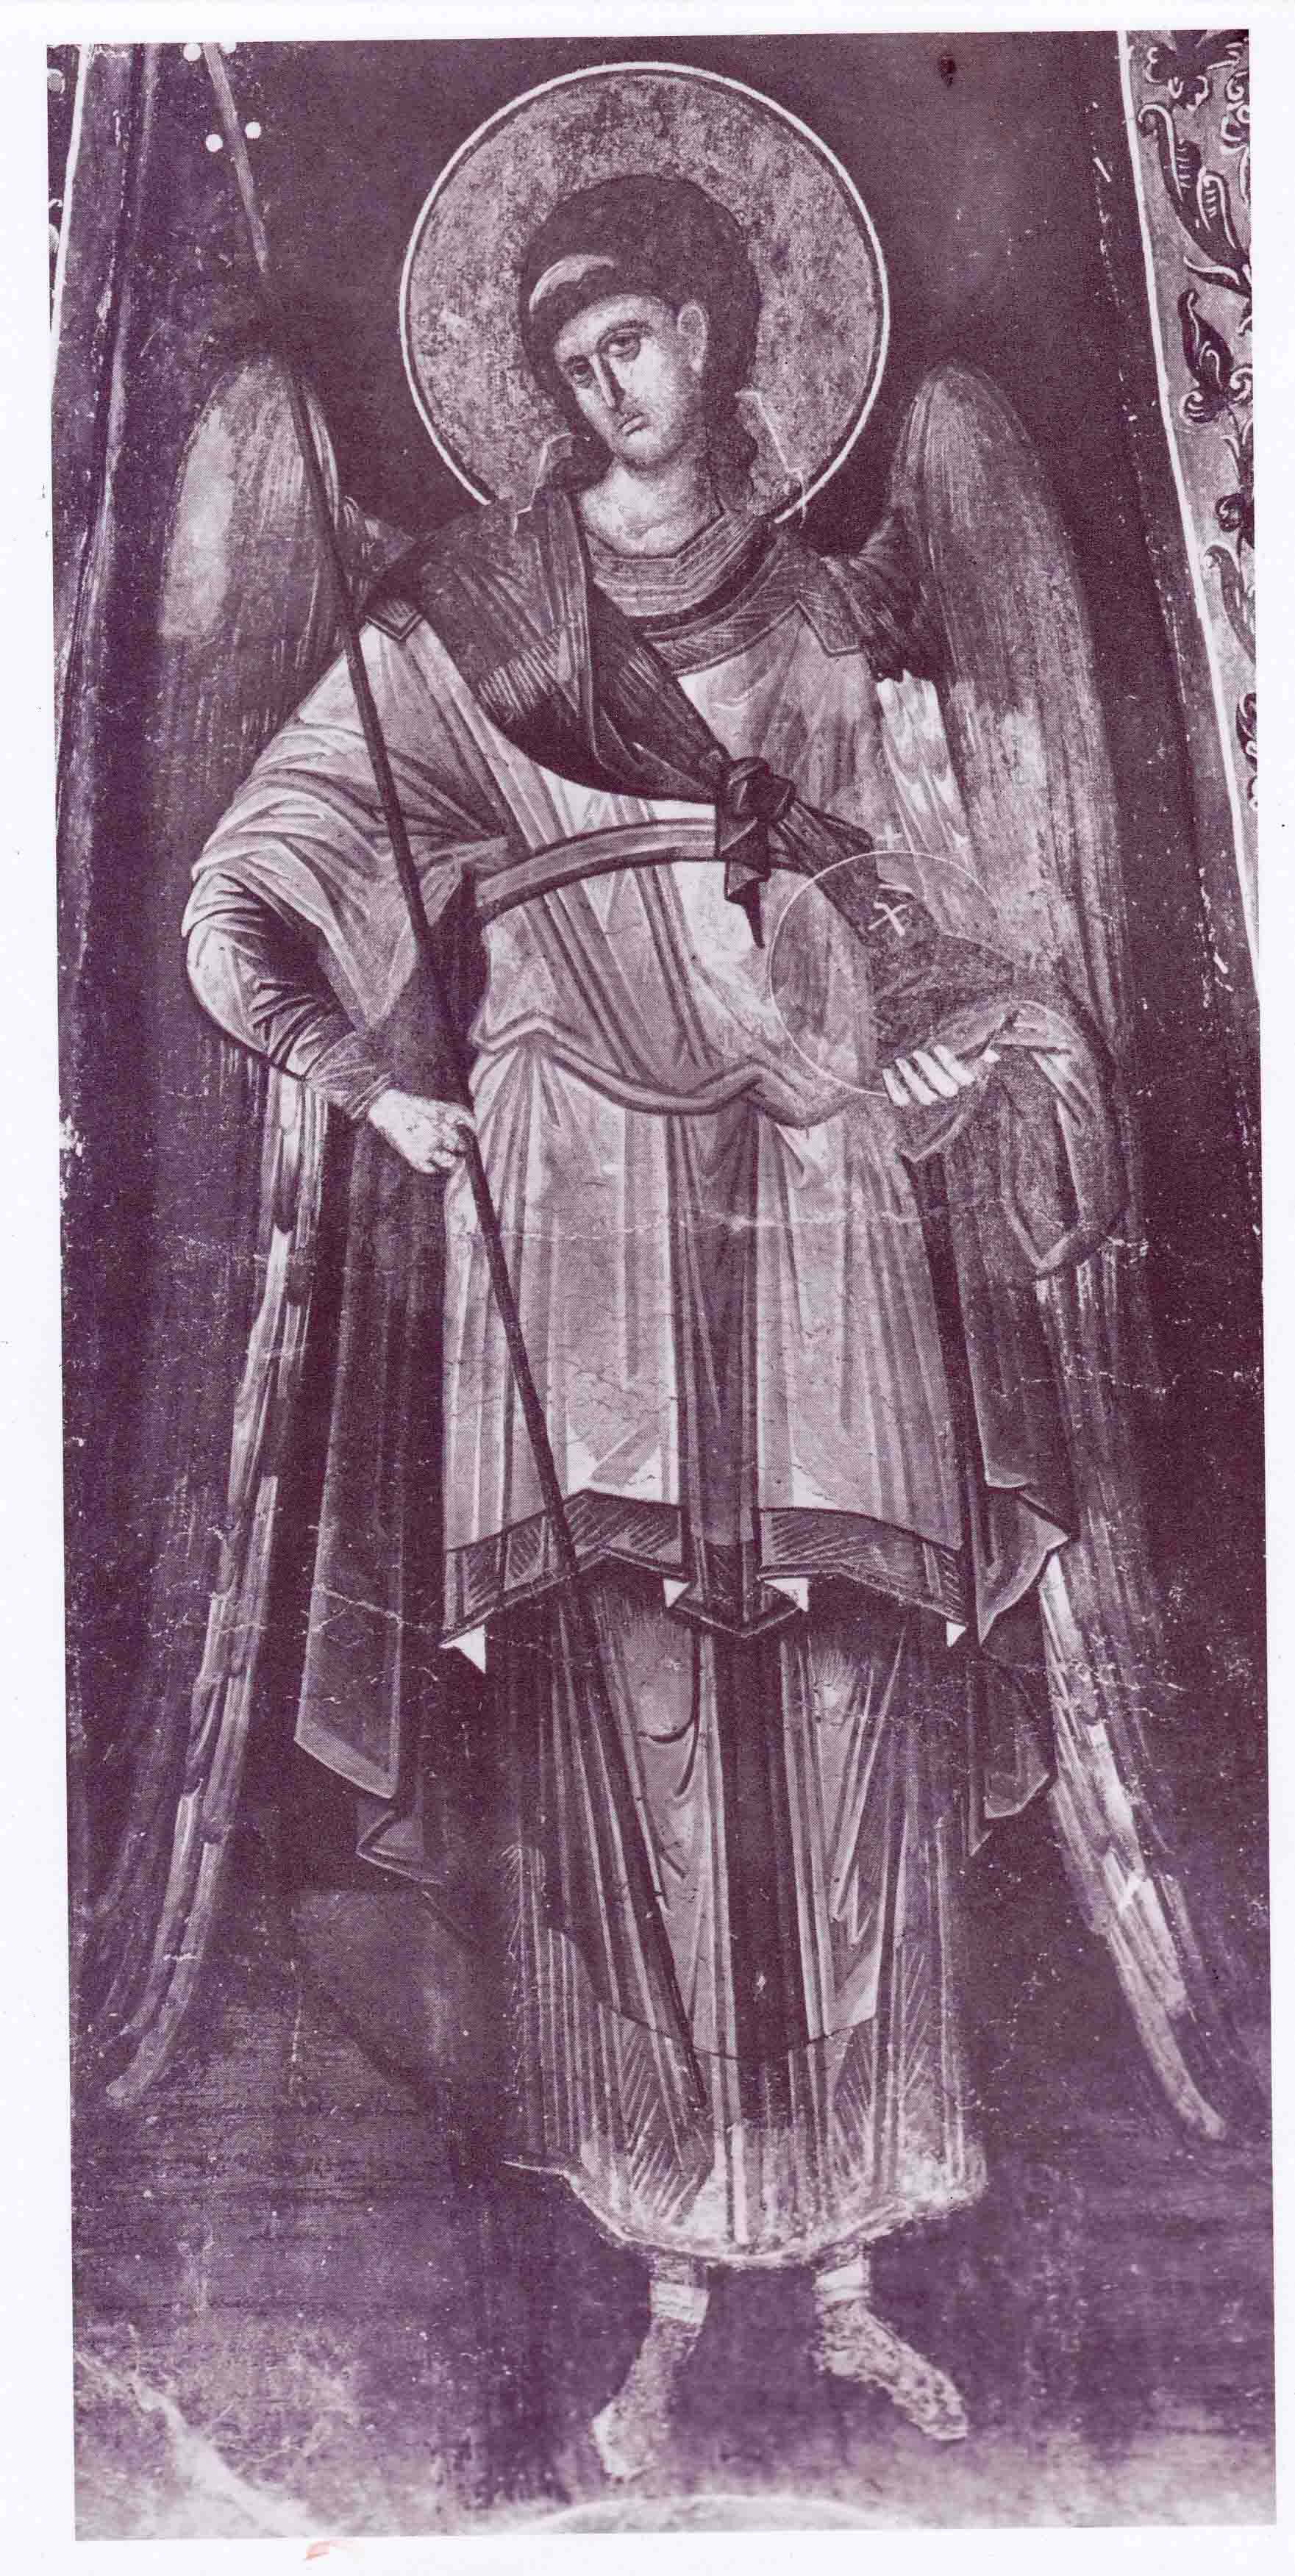
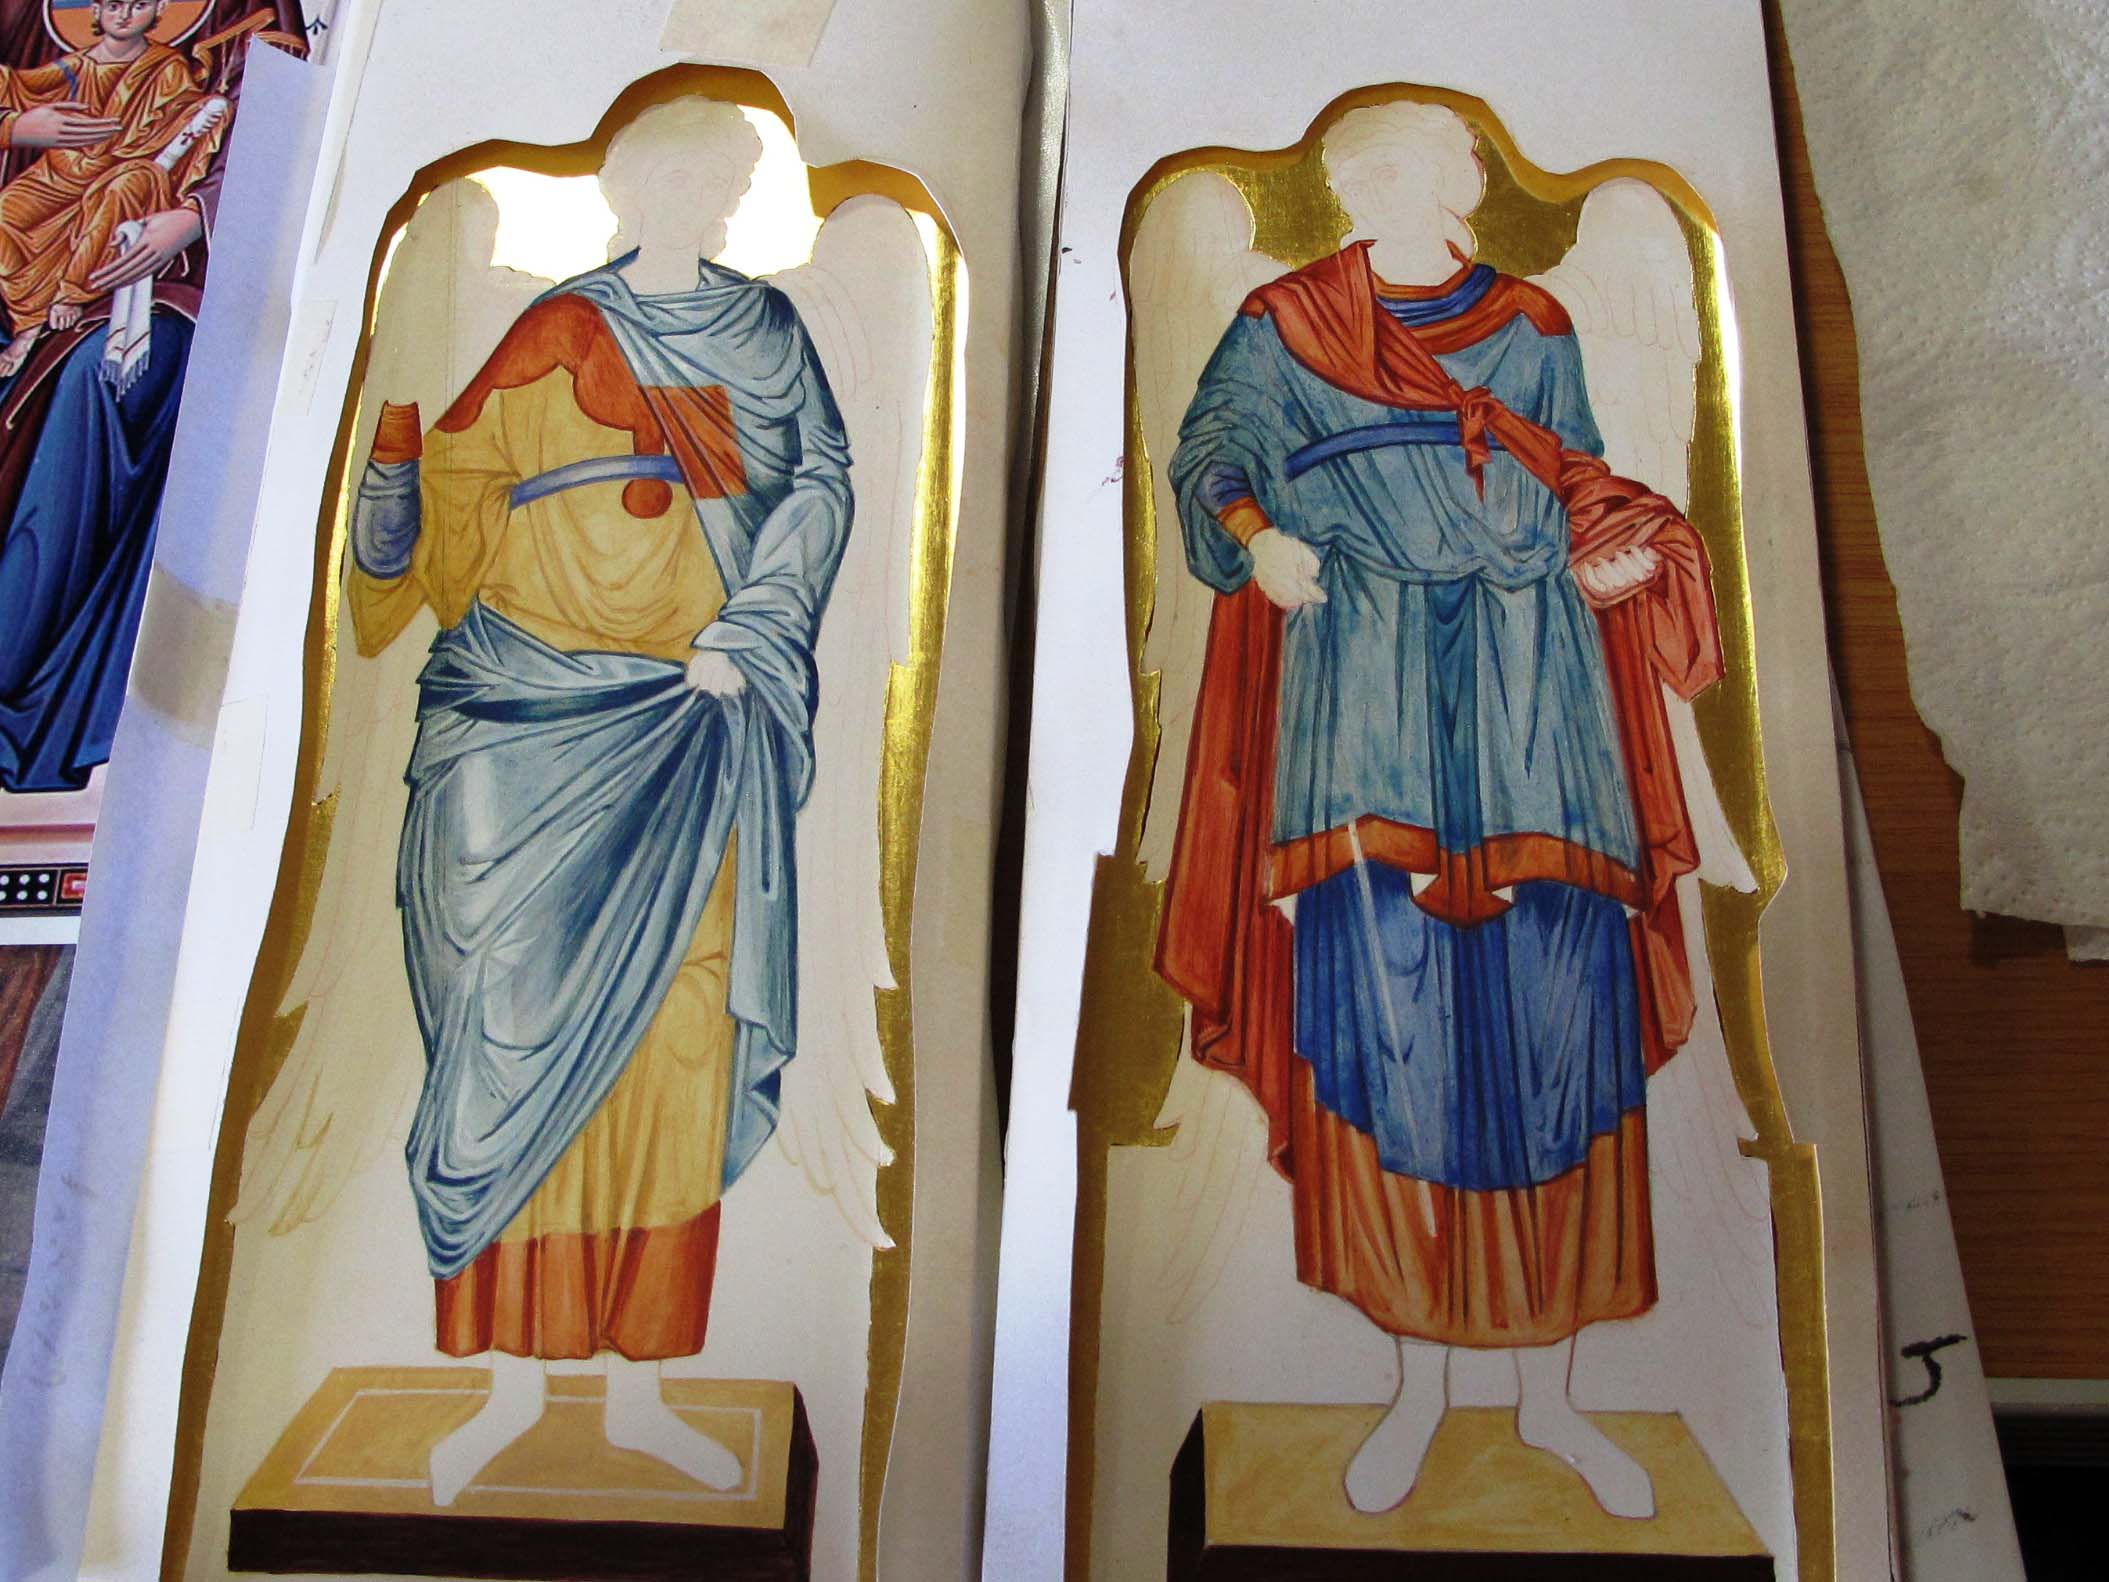
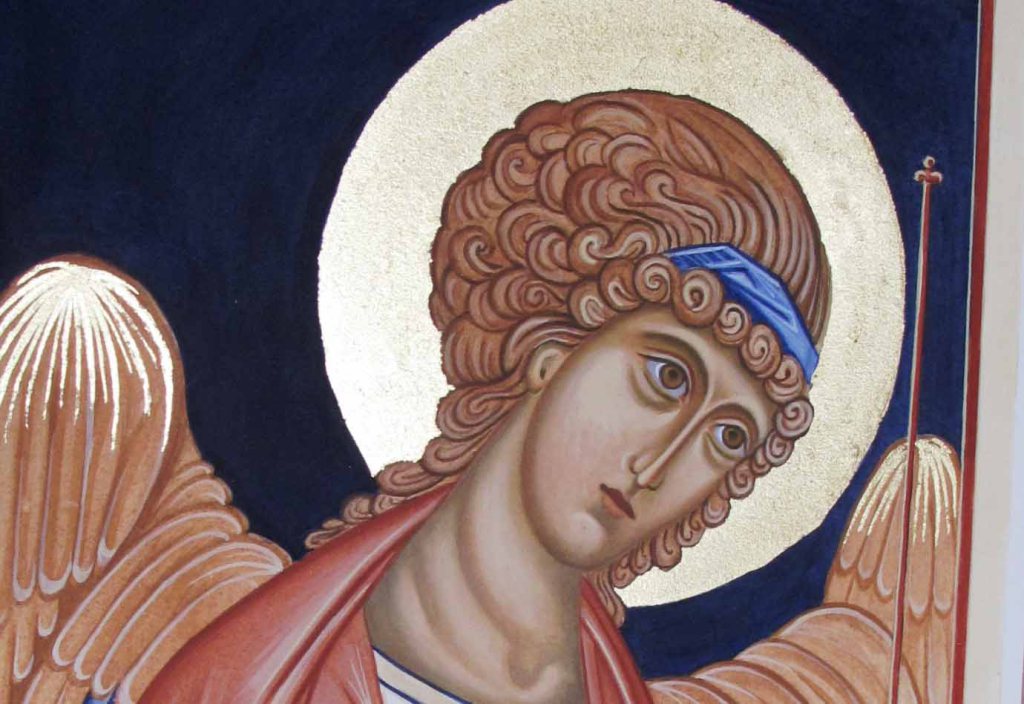
The images for these two Archangels which stand either side of the Blessed Mother and the Christ Child are based on the frescoes of Chora in Istanbul, seen high up in the dome.

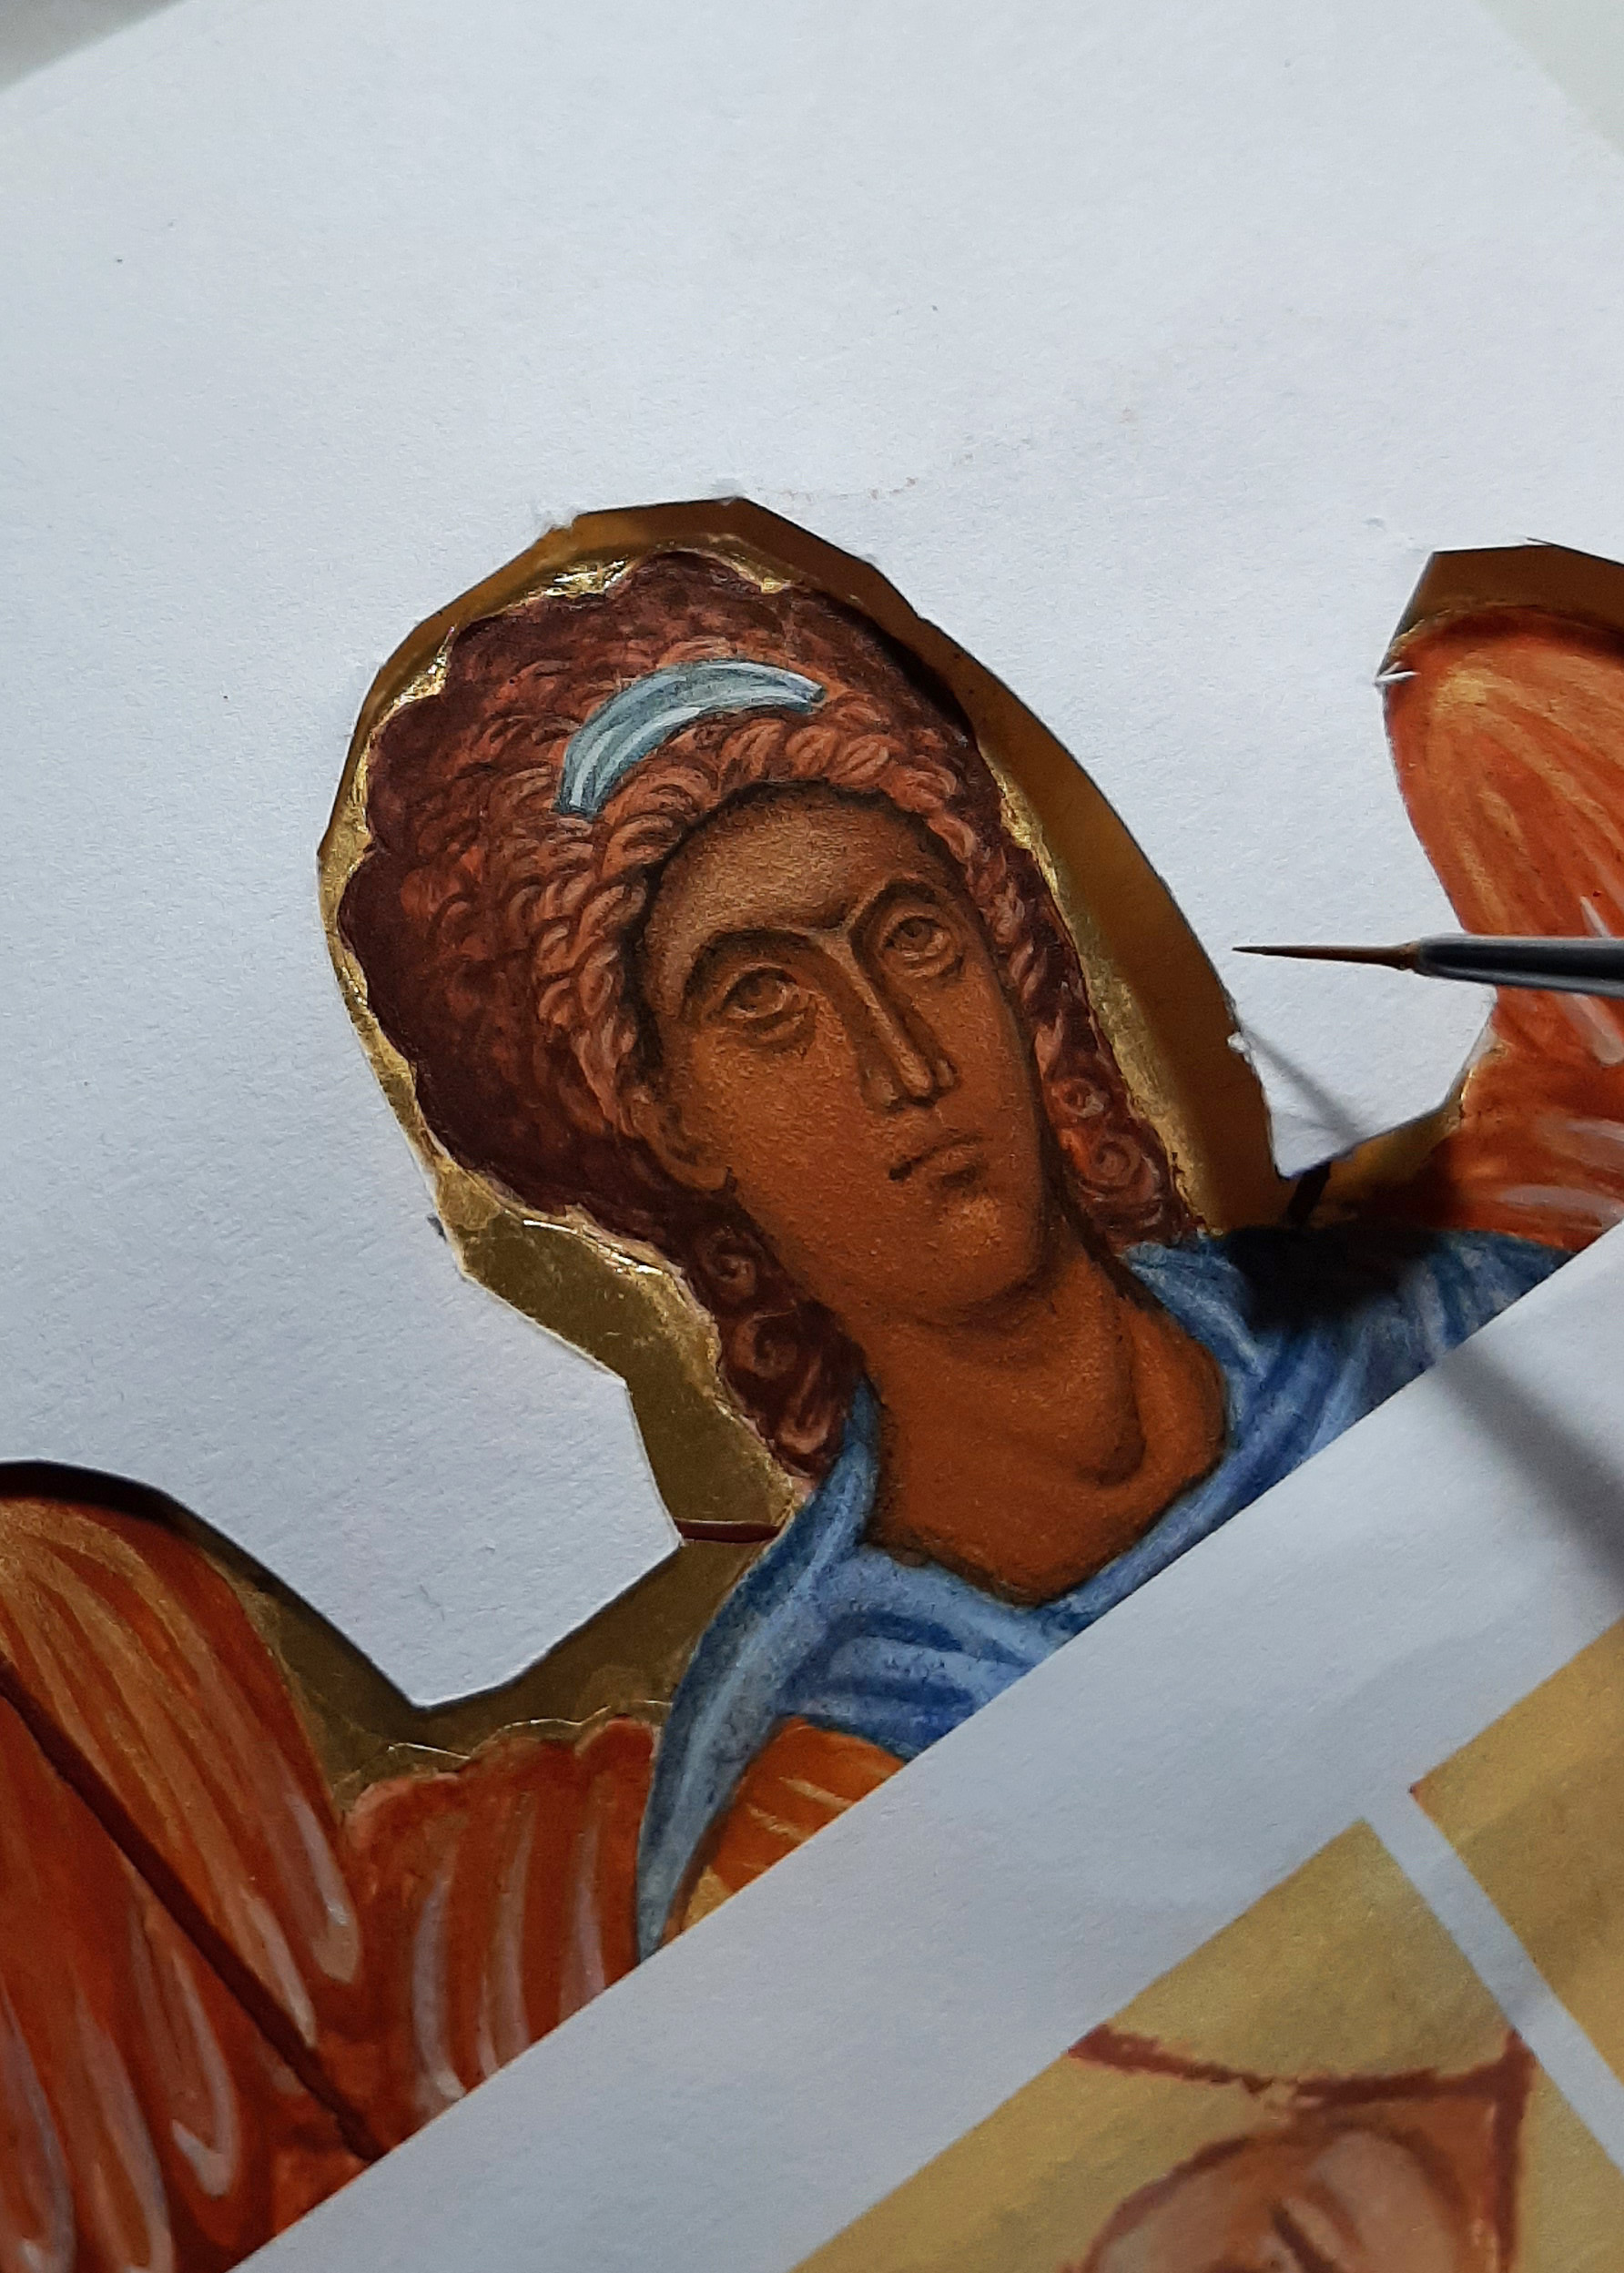
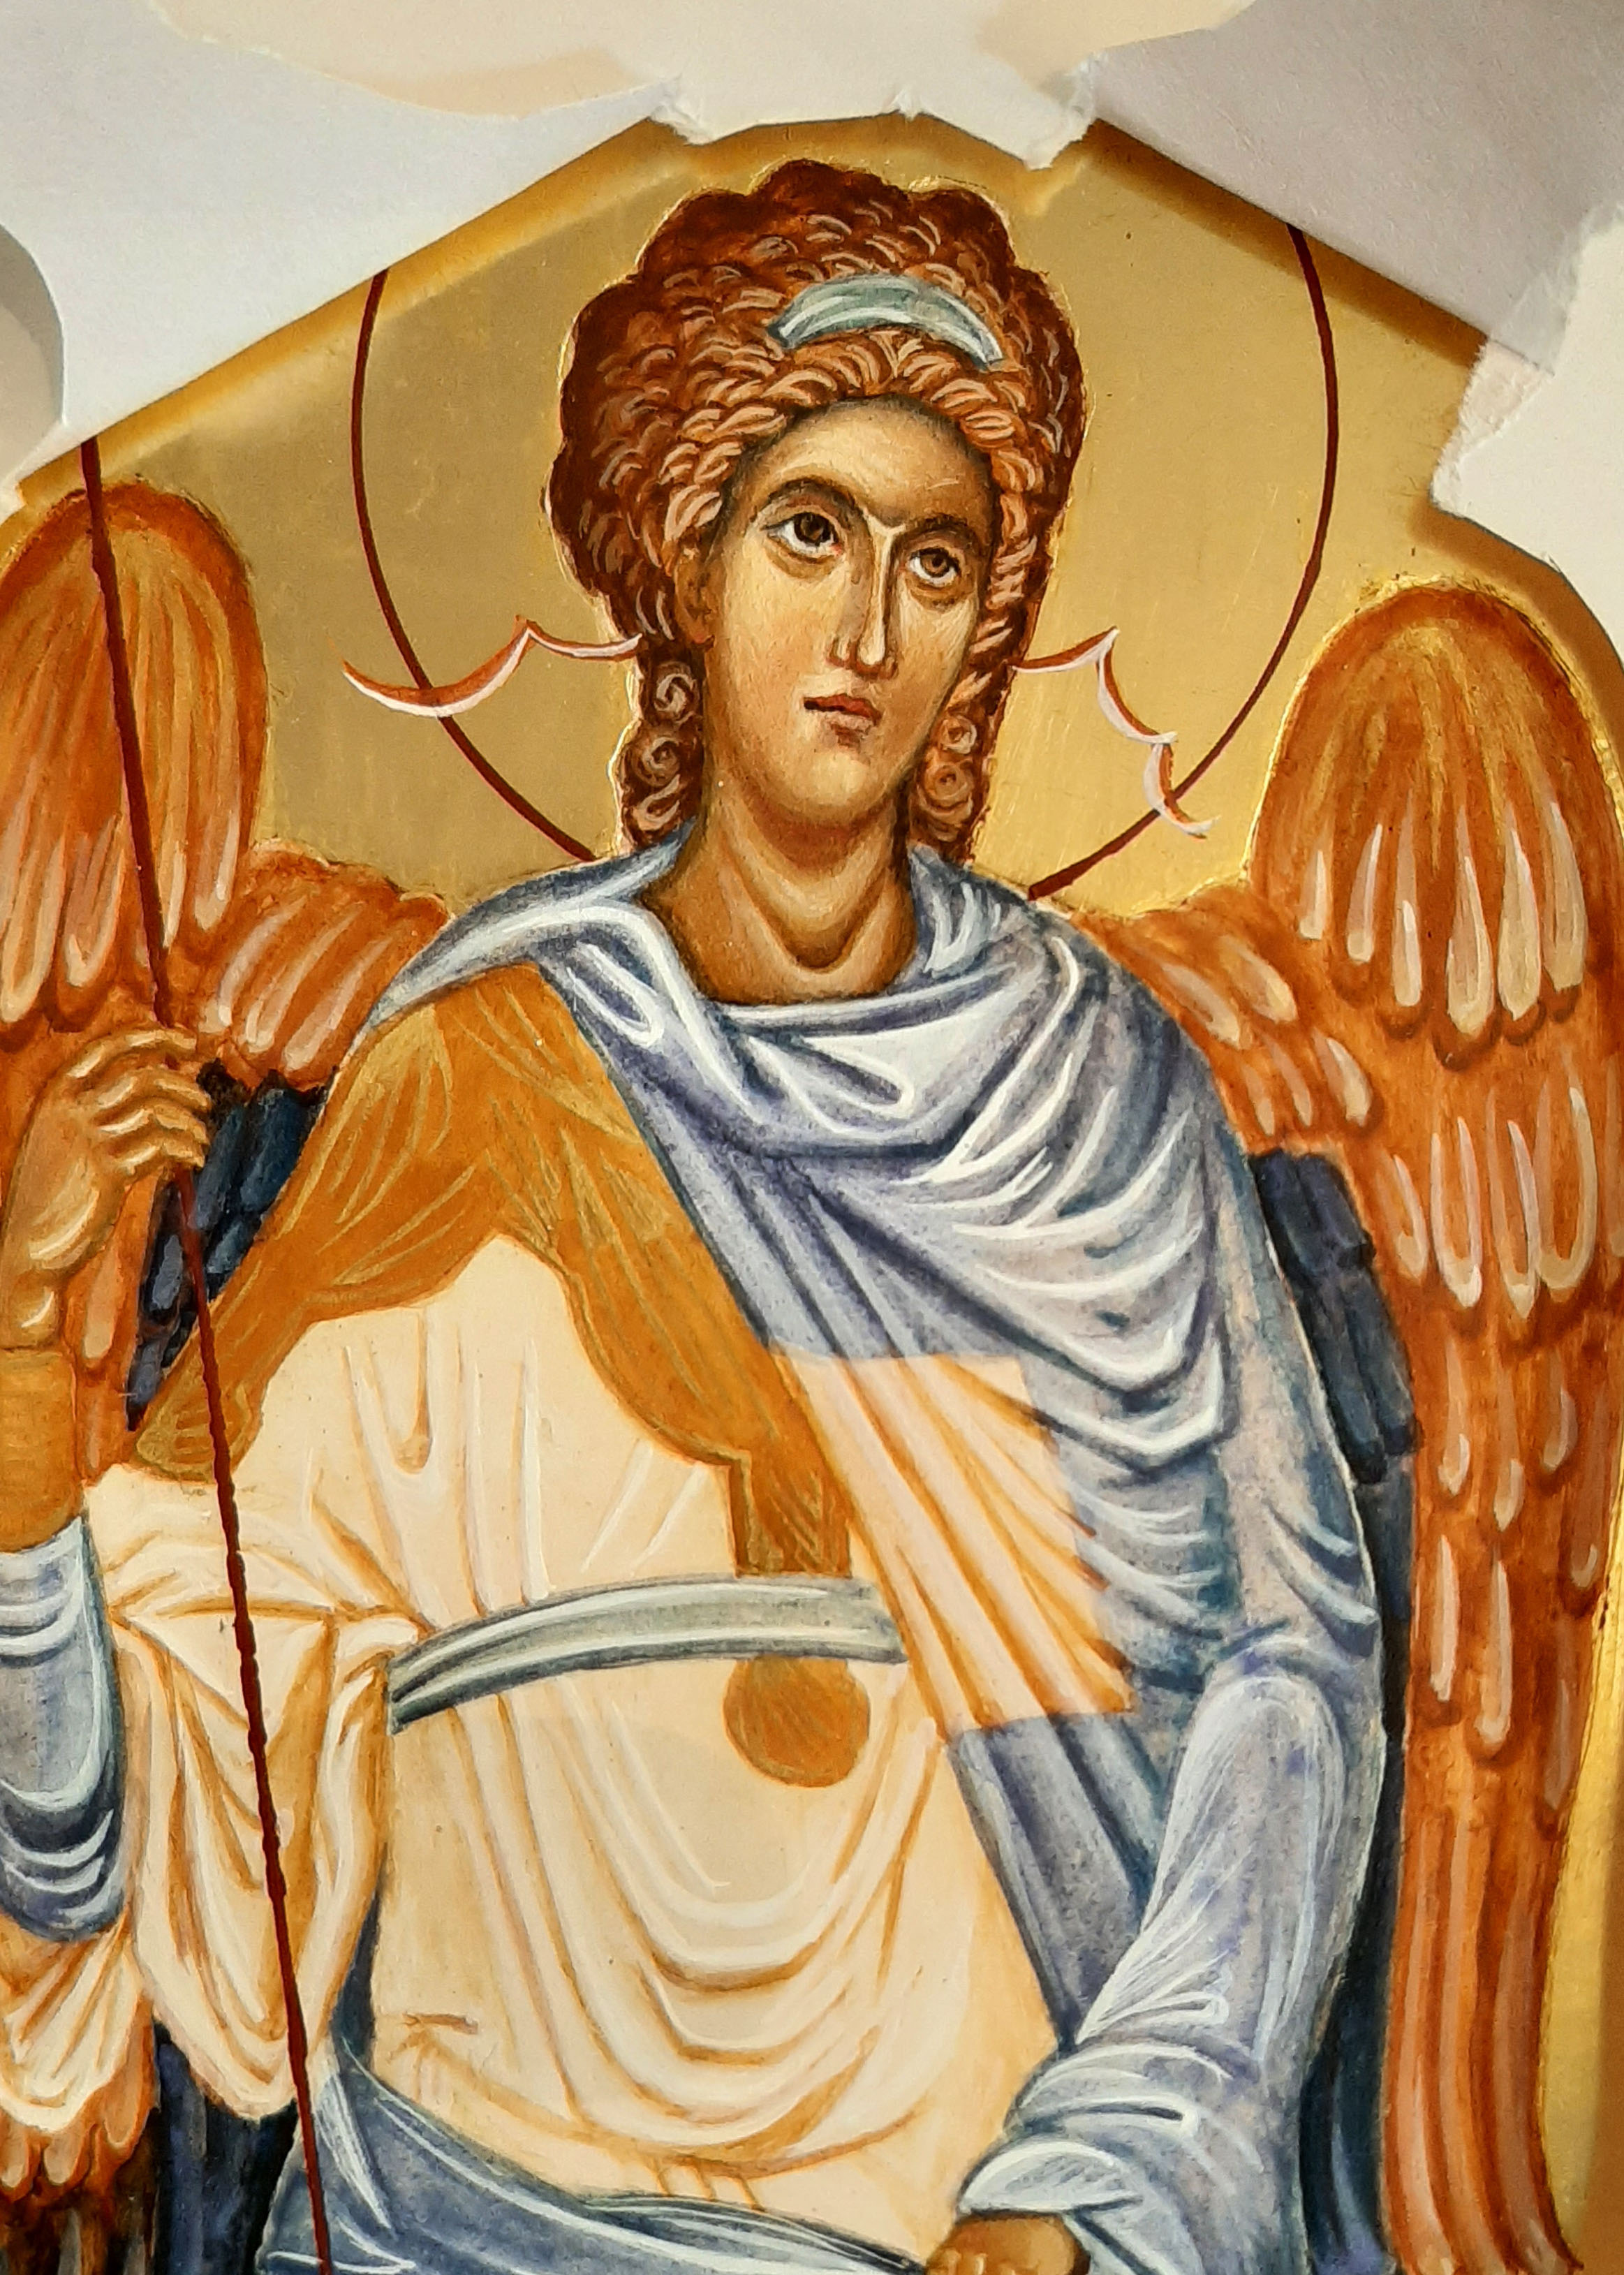
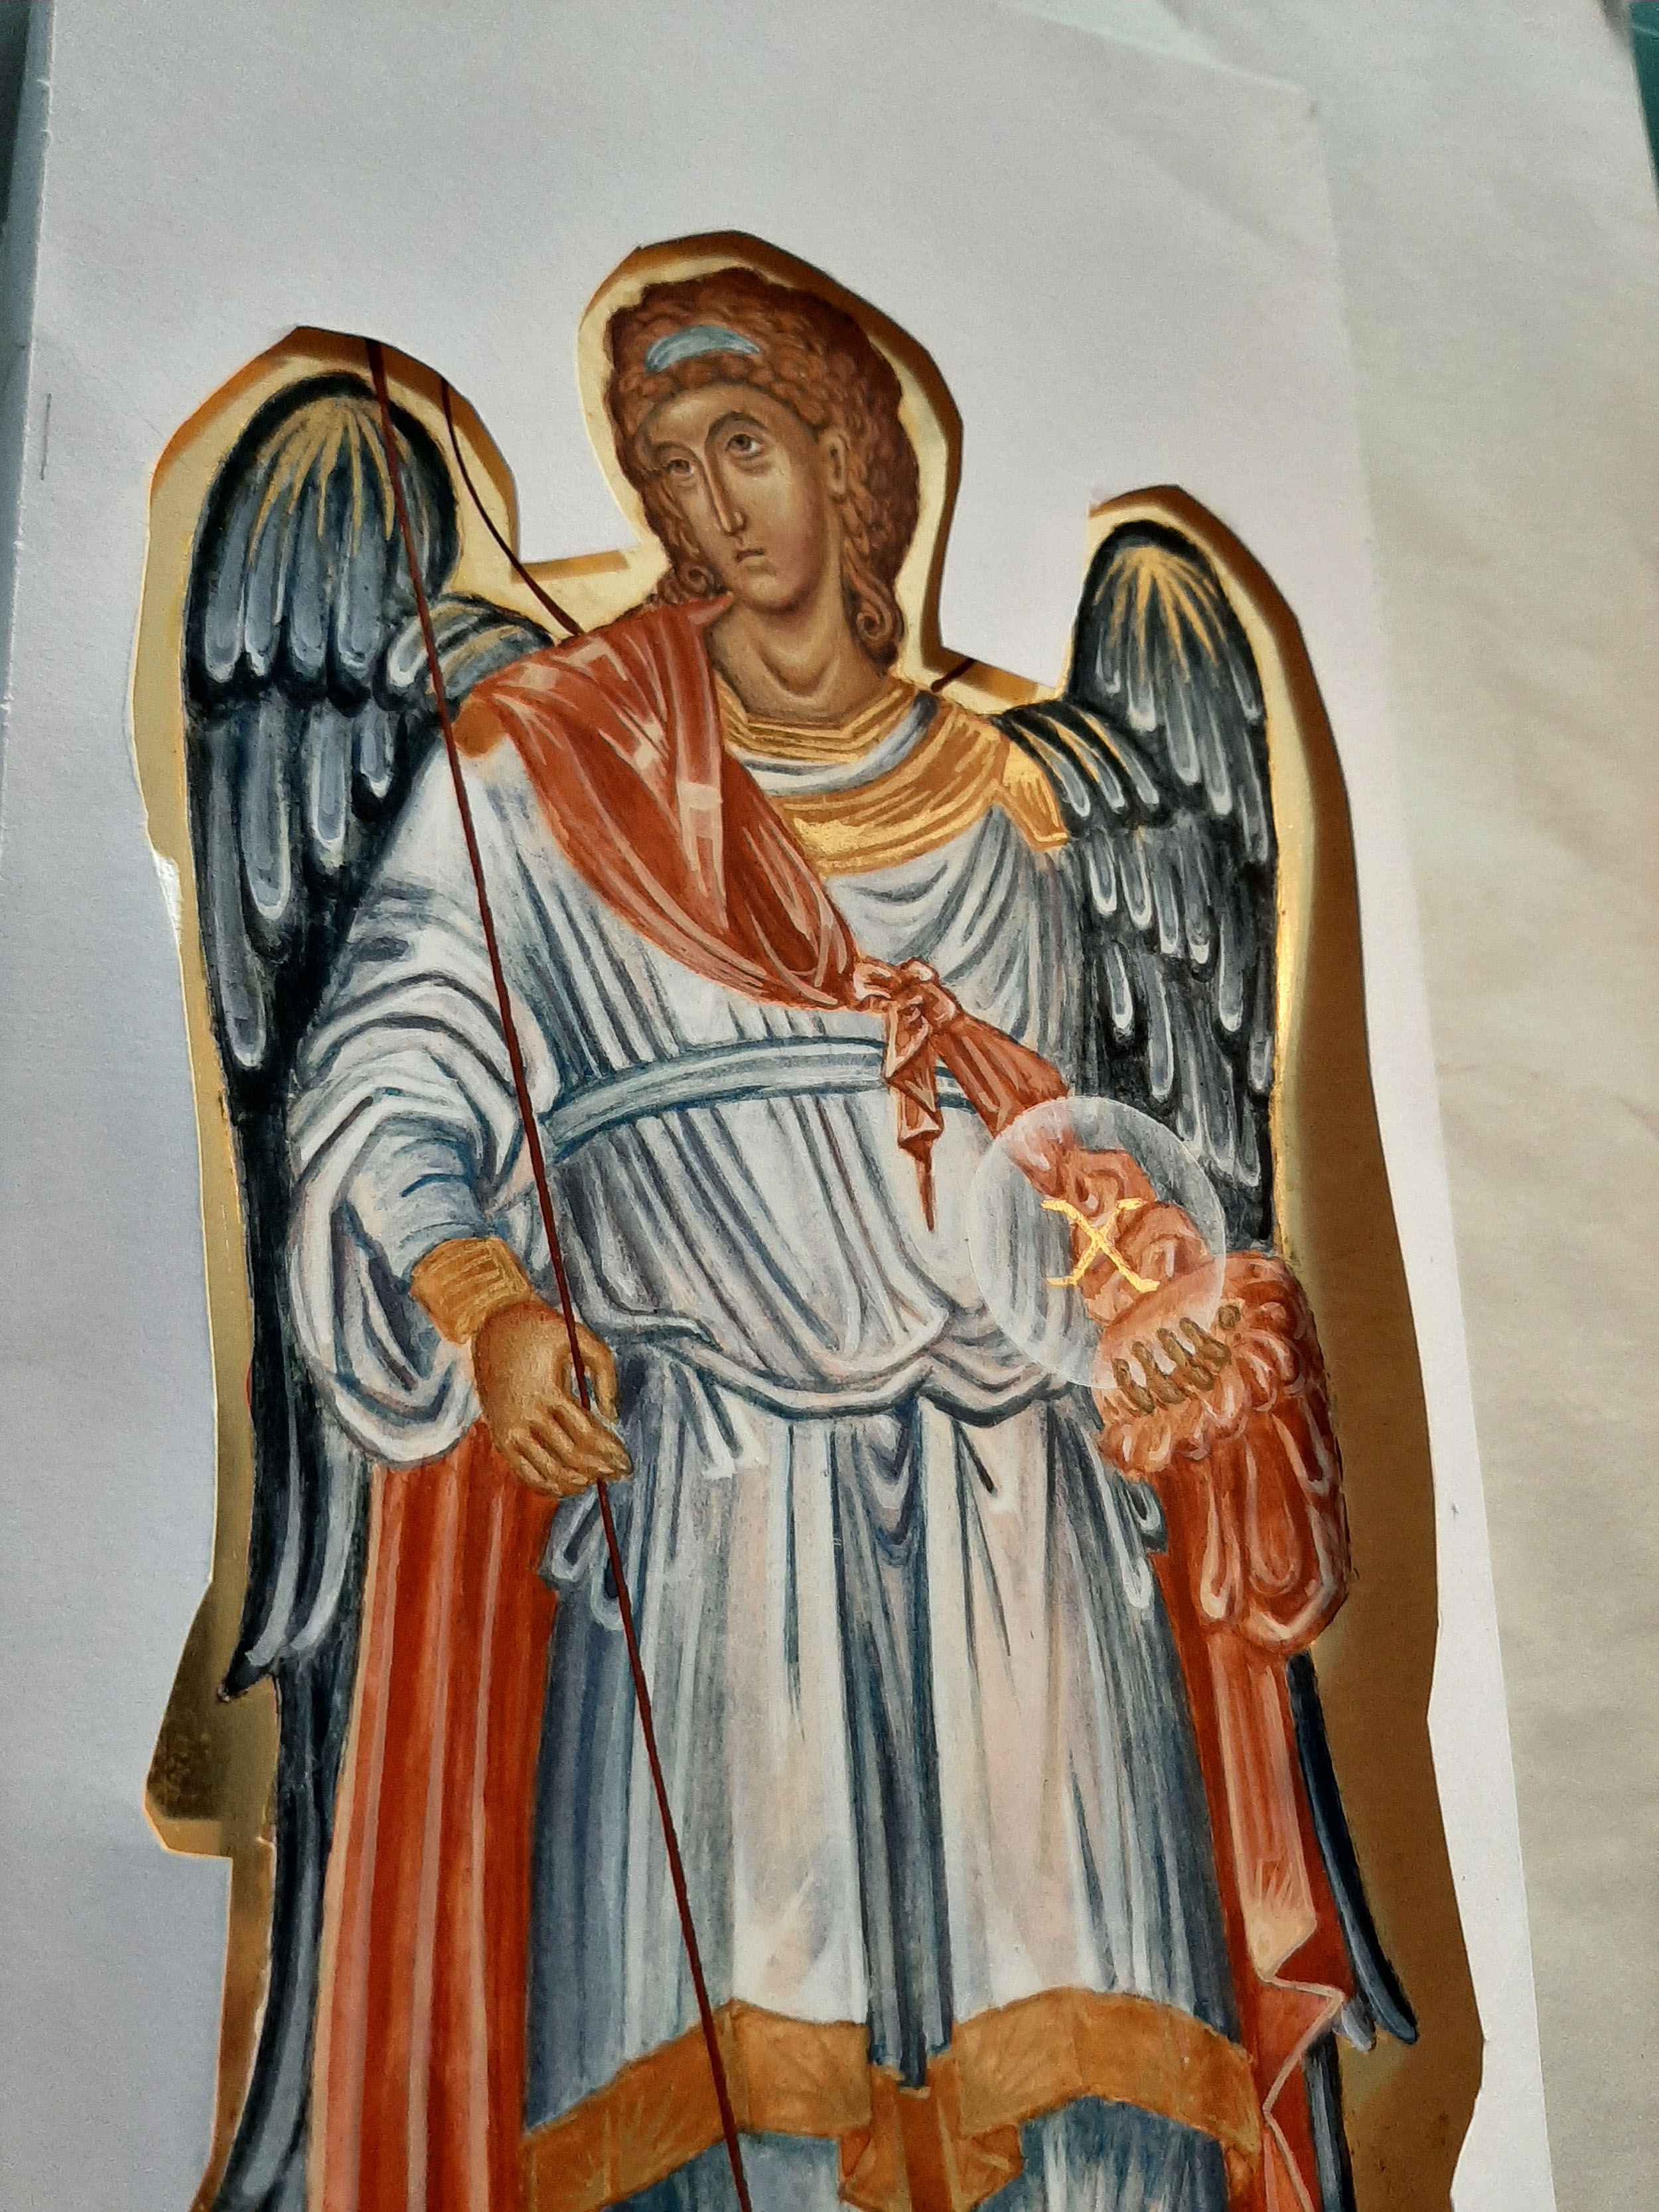
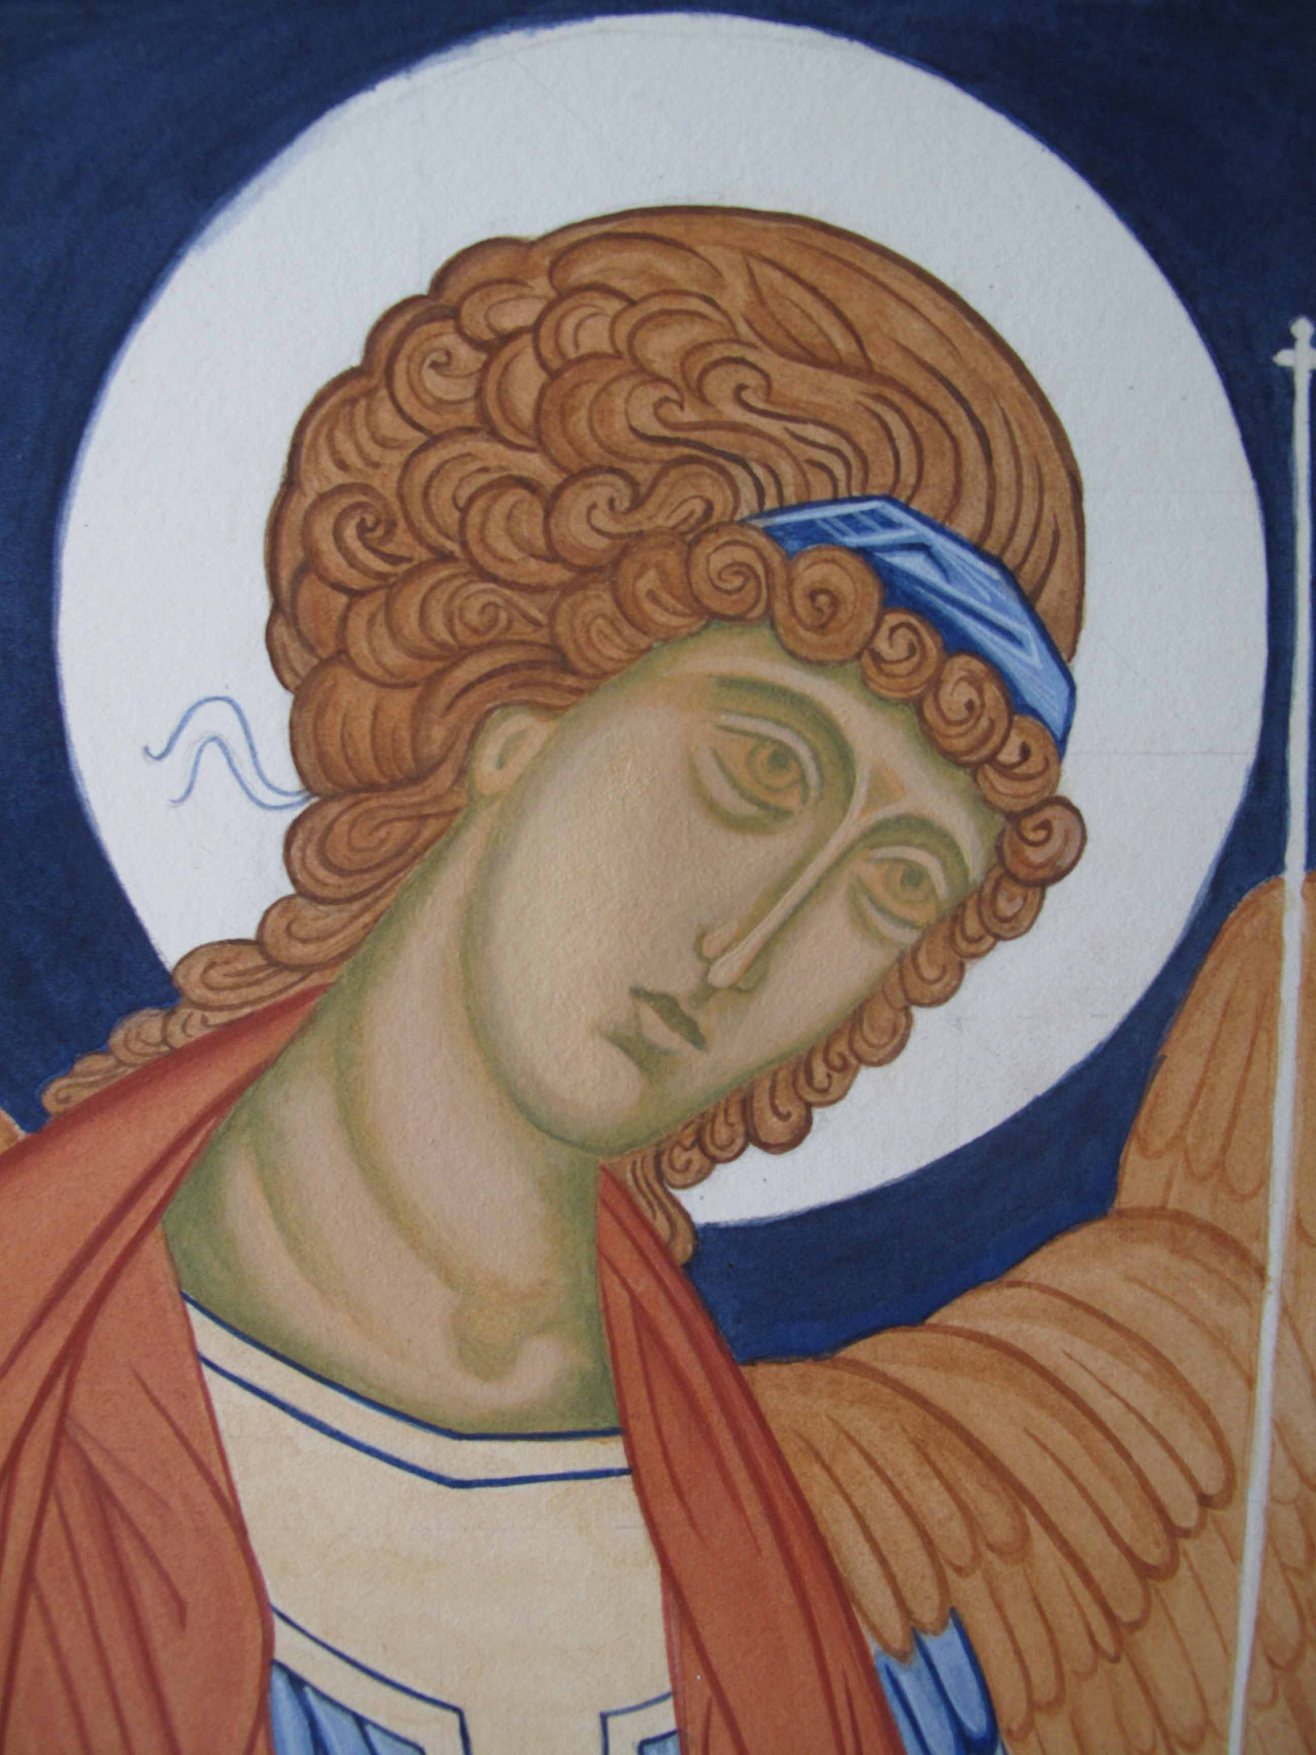
I’ve written about this triptych previously in this blog but for this evening, I wanted to include a sequence of work-in-progress photos of an icon which I painted on watercolour paper of Archangel Gabriel.

If you haven’t got a gessoed board ready prepared, some heavy 300-400gsm+ smooth hot pressed watercolour paper is a really beautiful surface to work on. If you can find cotton content paper then it will be archival and long lasting in the right conditions.

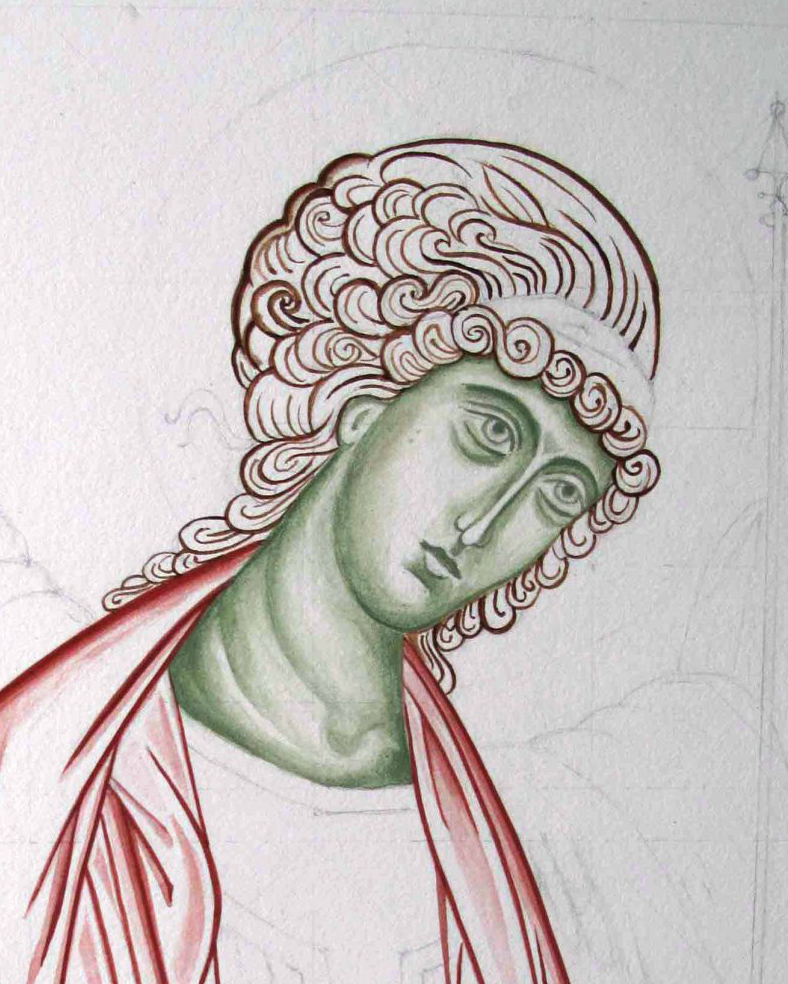
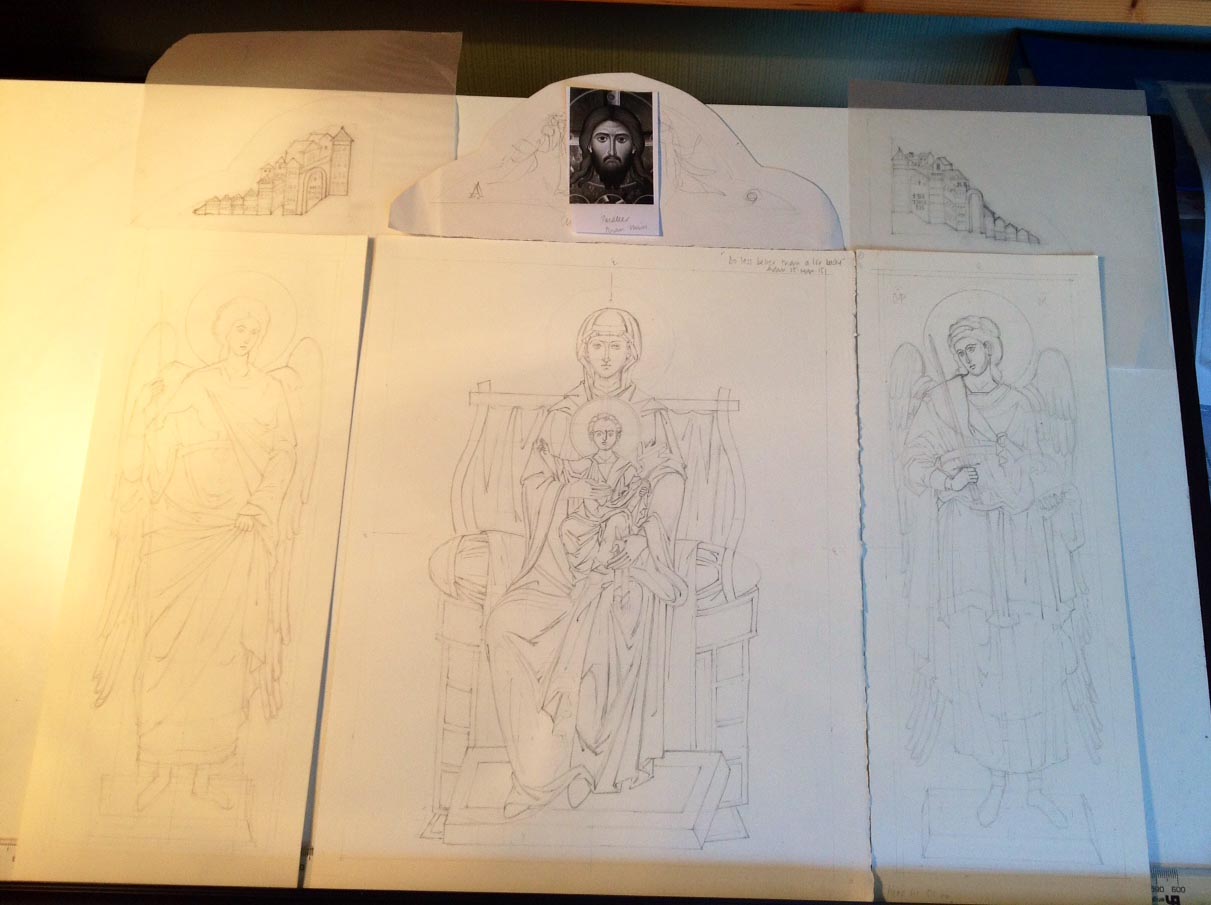
You will see from this photo that I’ve used a pencil grid to help draw the image – don’t hesitate to use all the help you can get as you go along. Turning the master image upside down to refer to also helps you to tune into the areas of light and shade, angles/directions, hard and soft edges and so on.

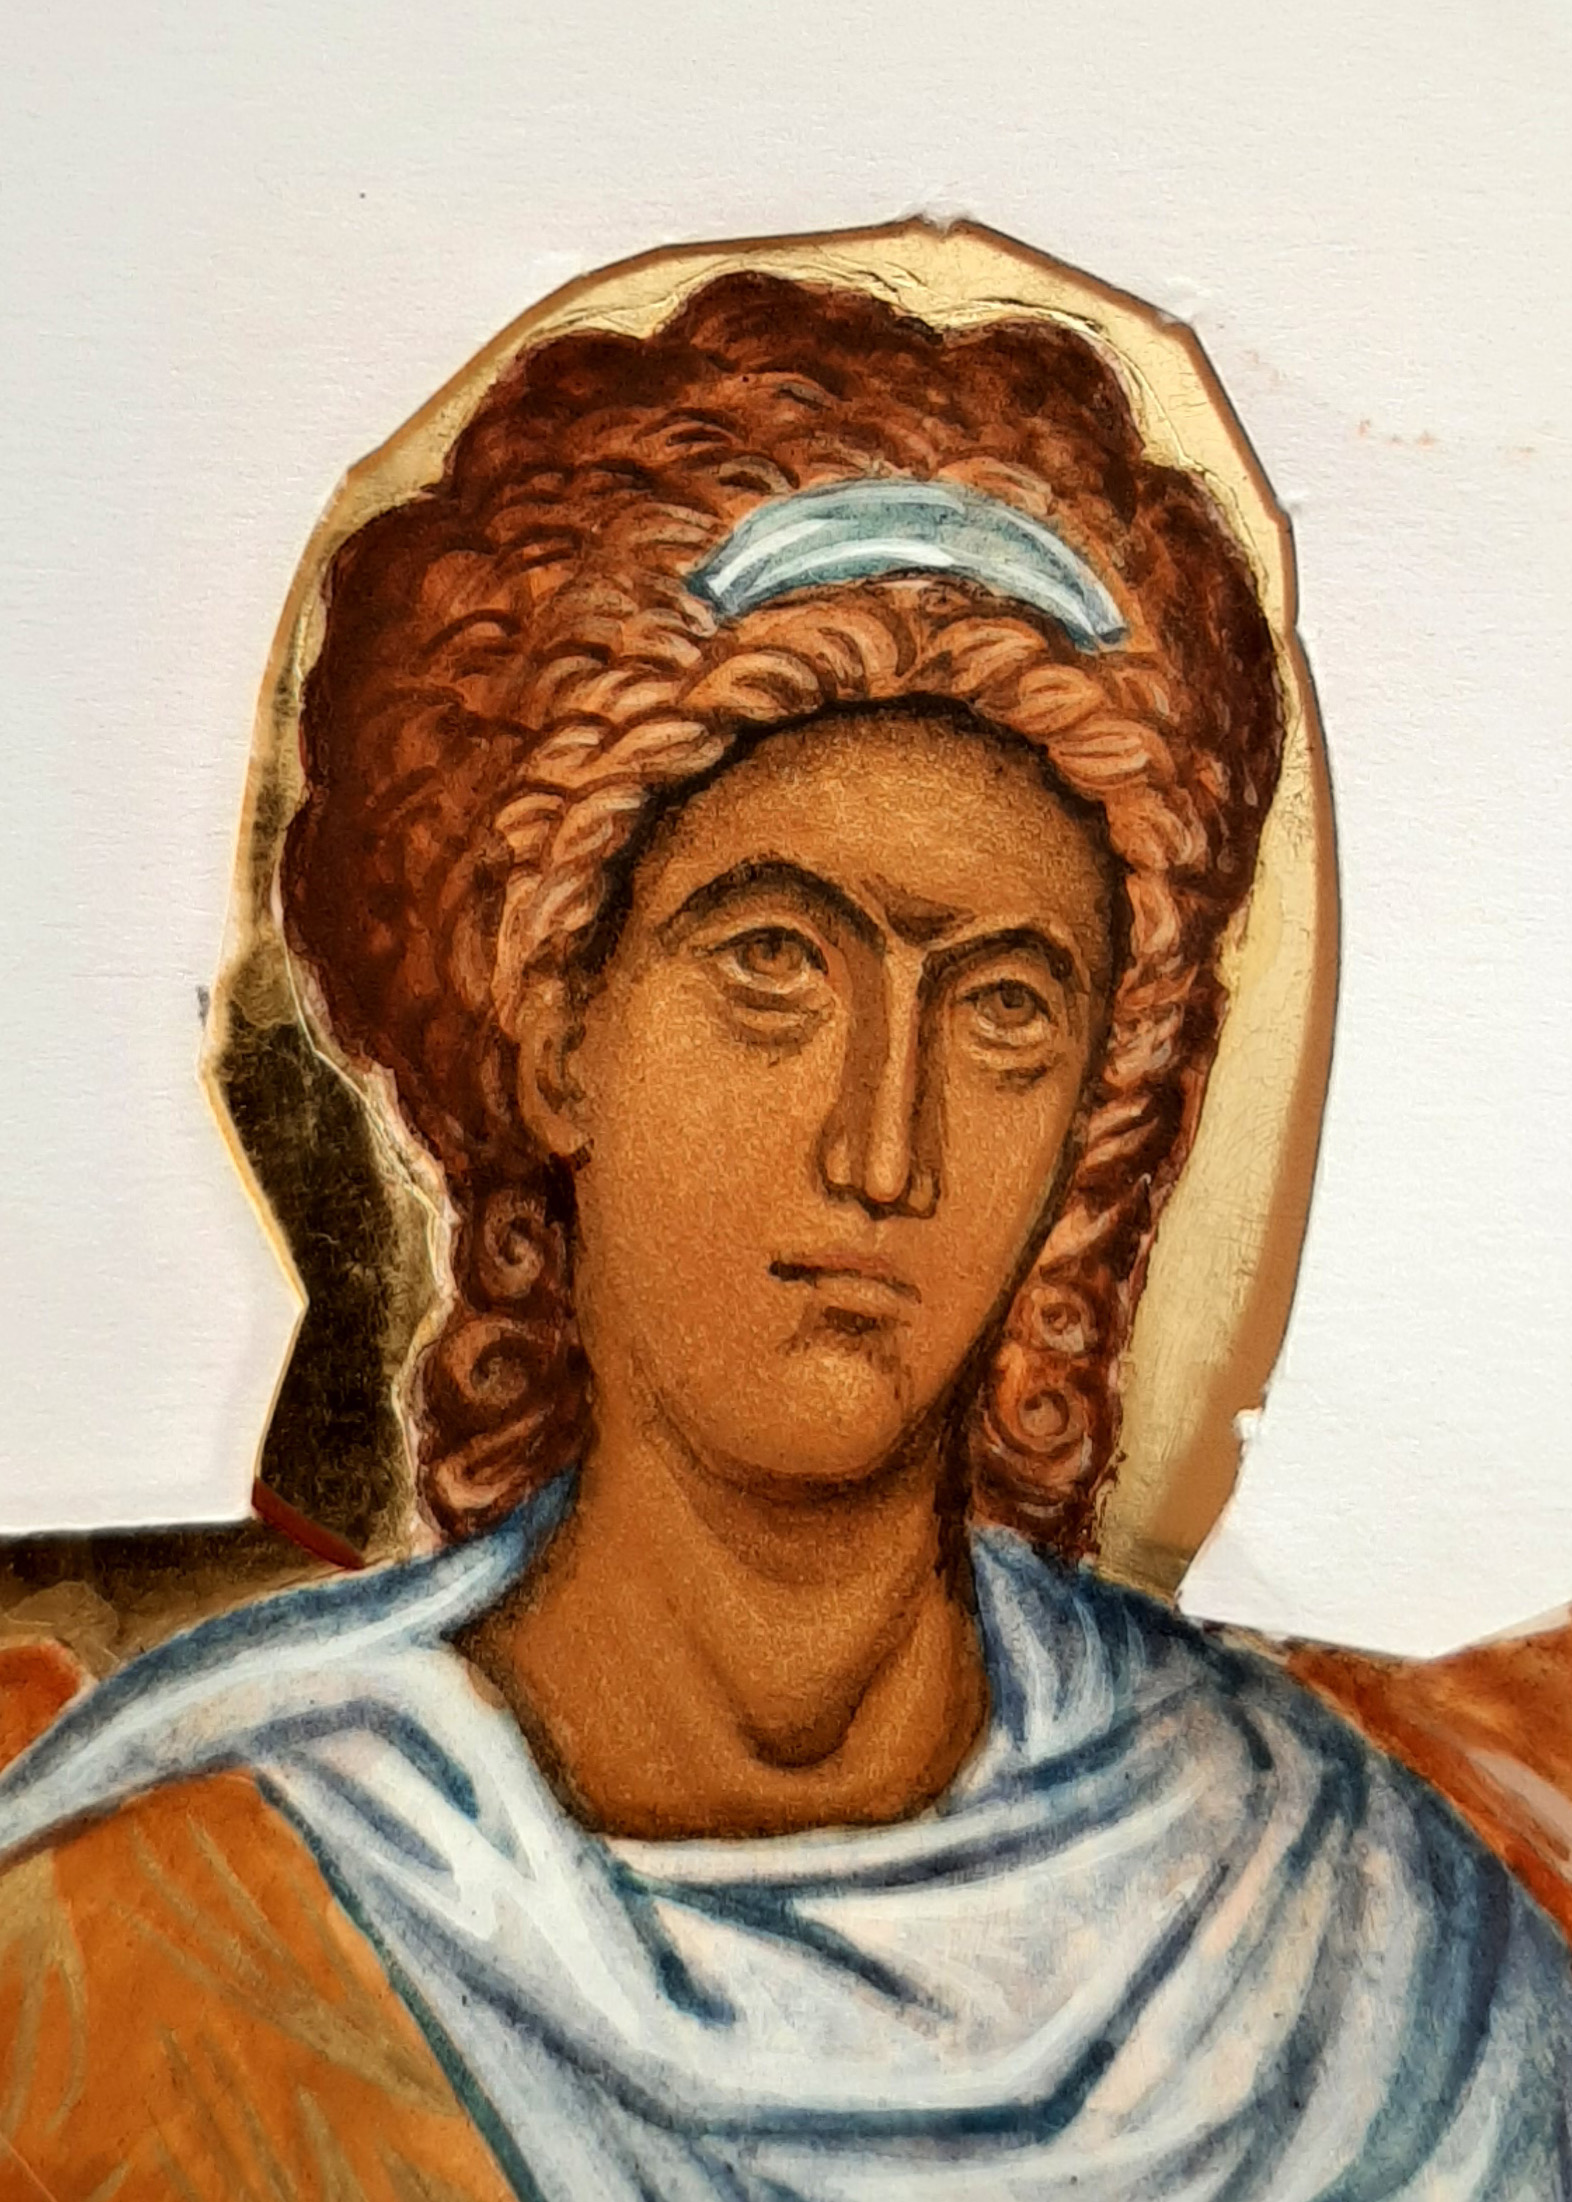
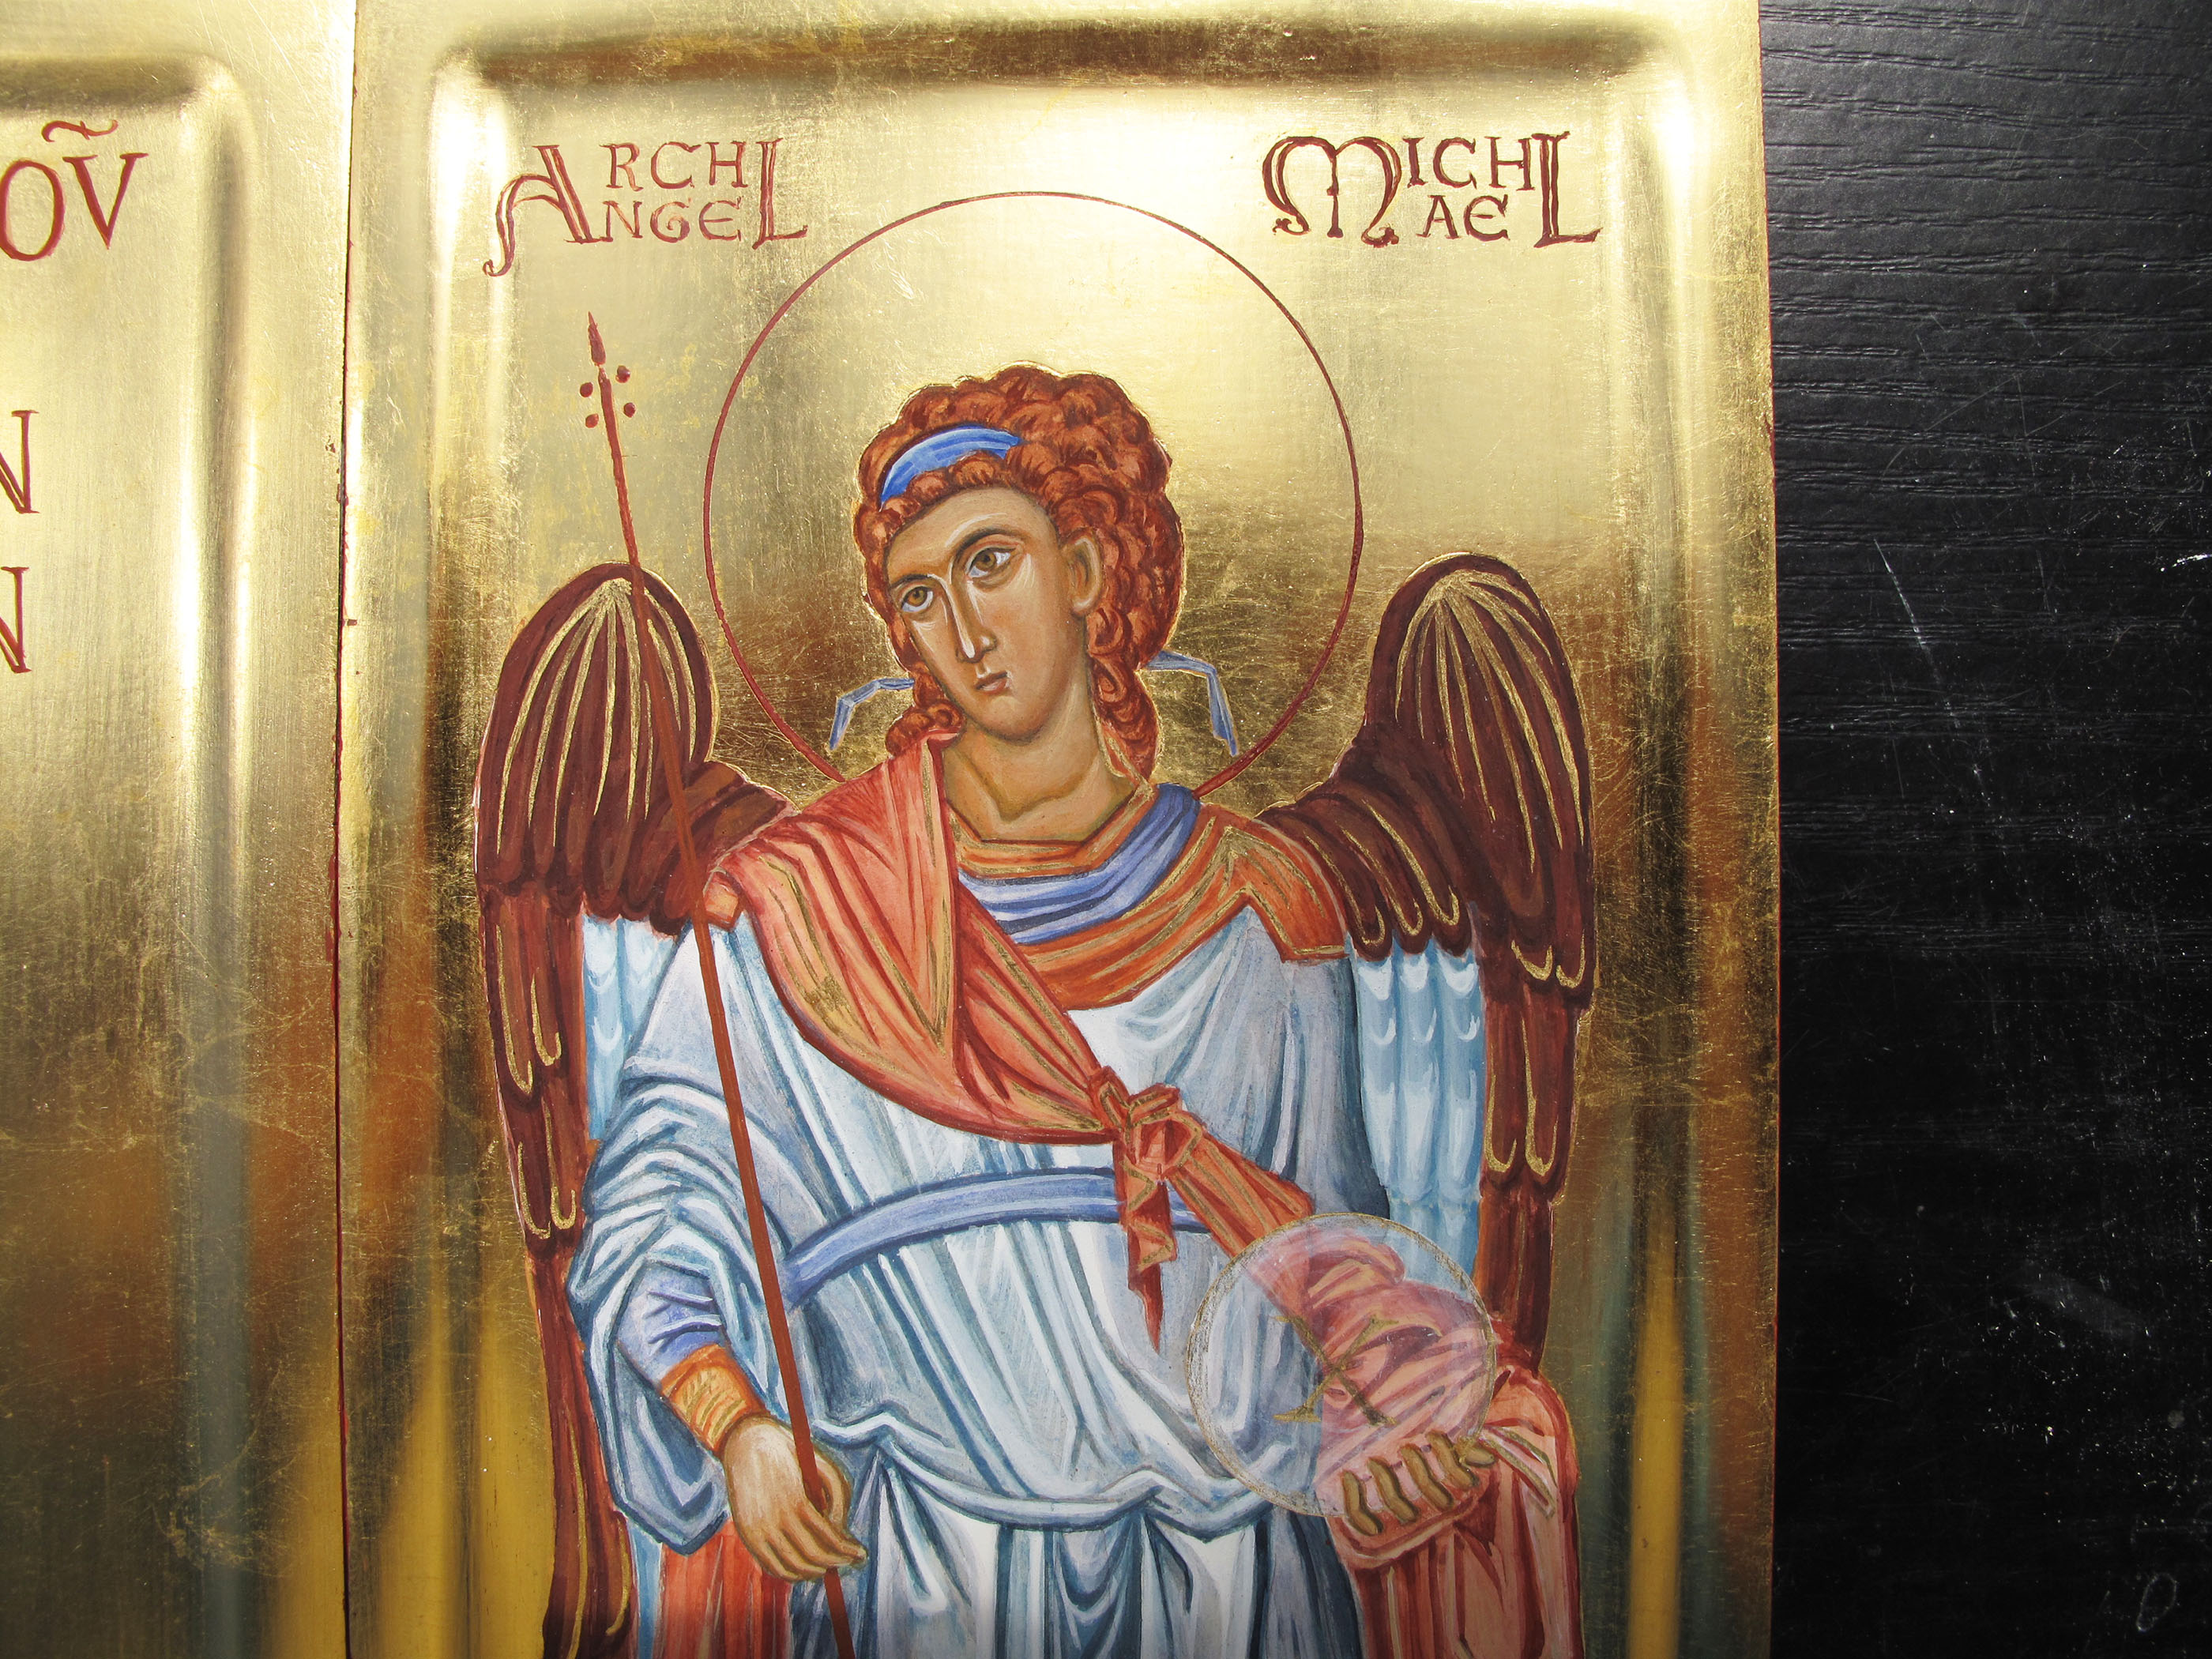
I have under-painted the face in the pigment Terre Verte. You could also use Yellow Maimeri and ivory black to get a different green.

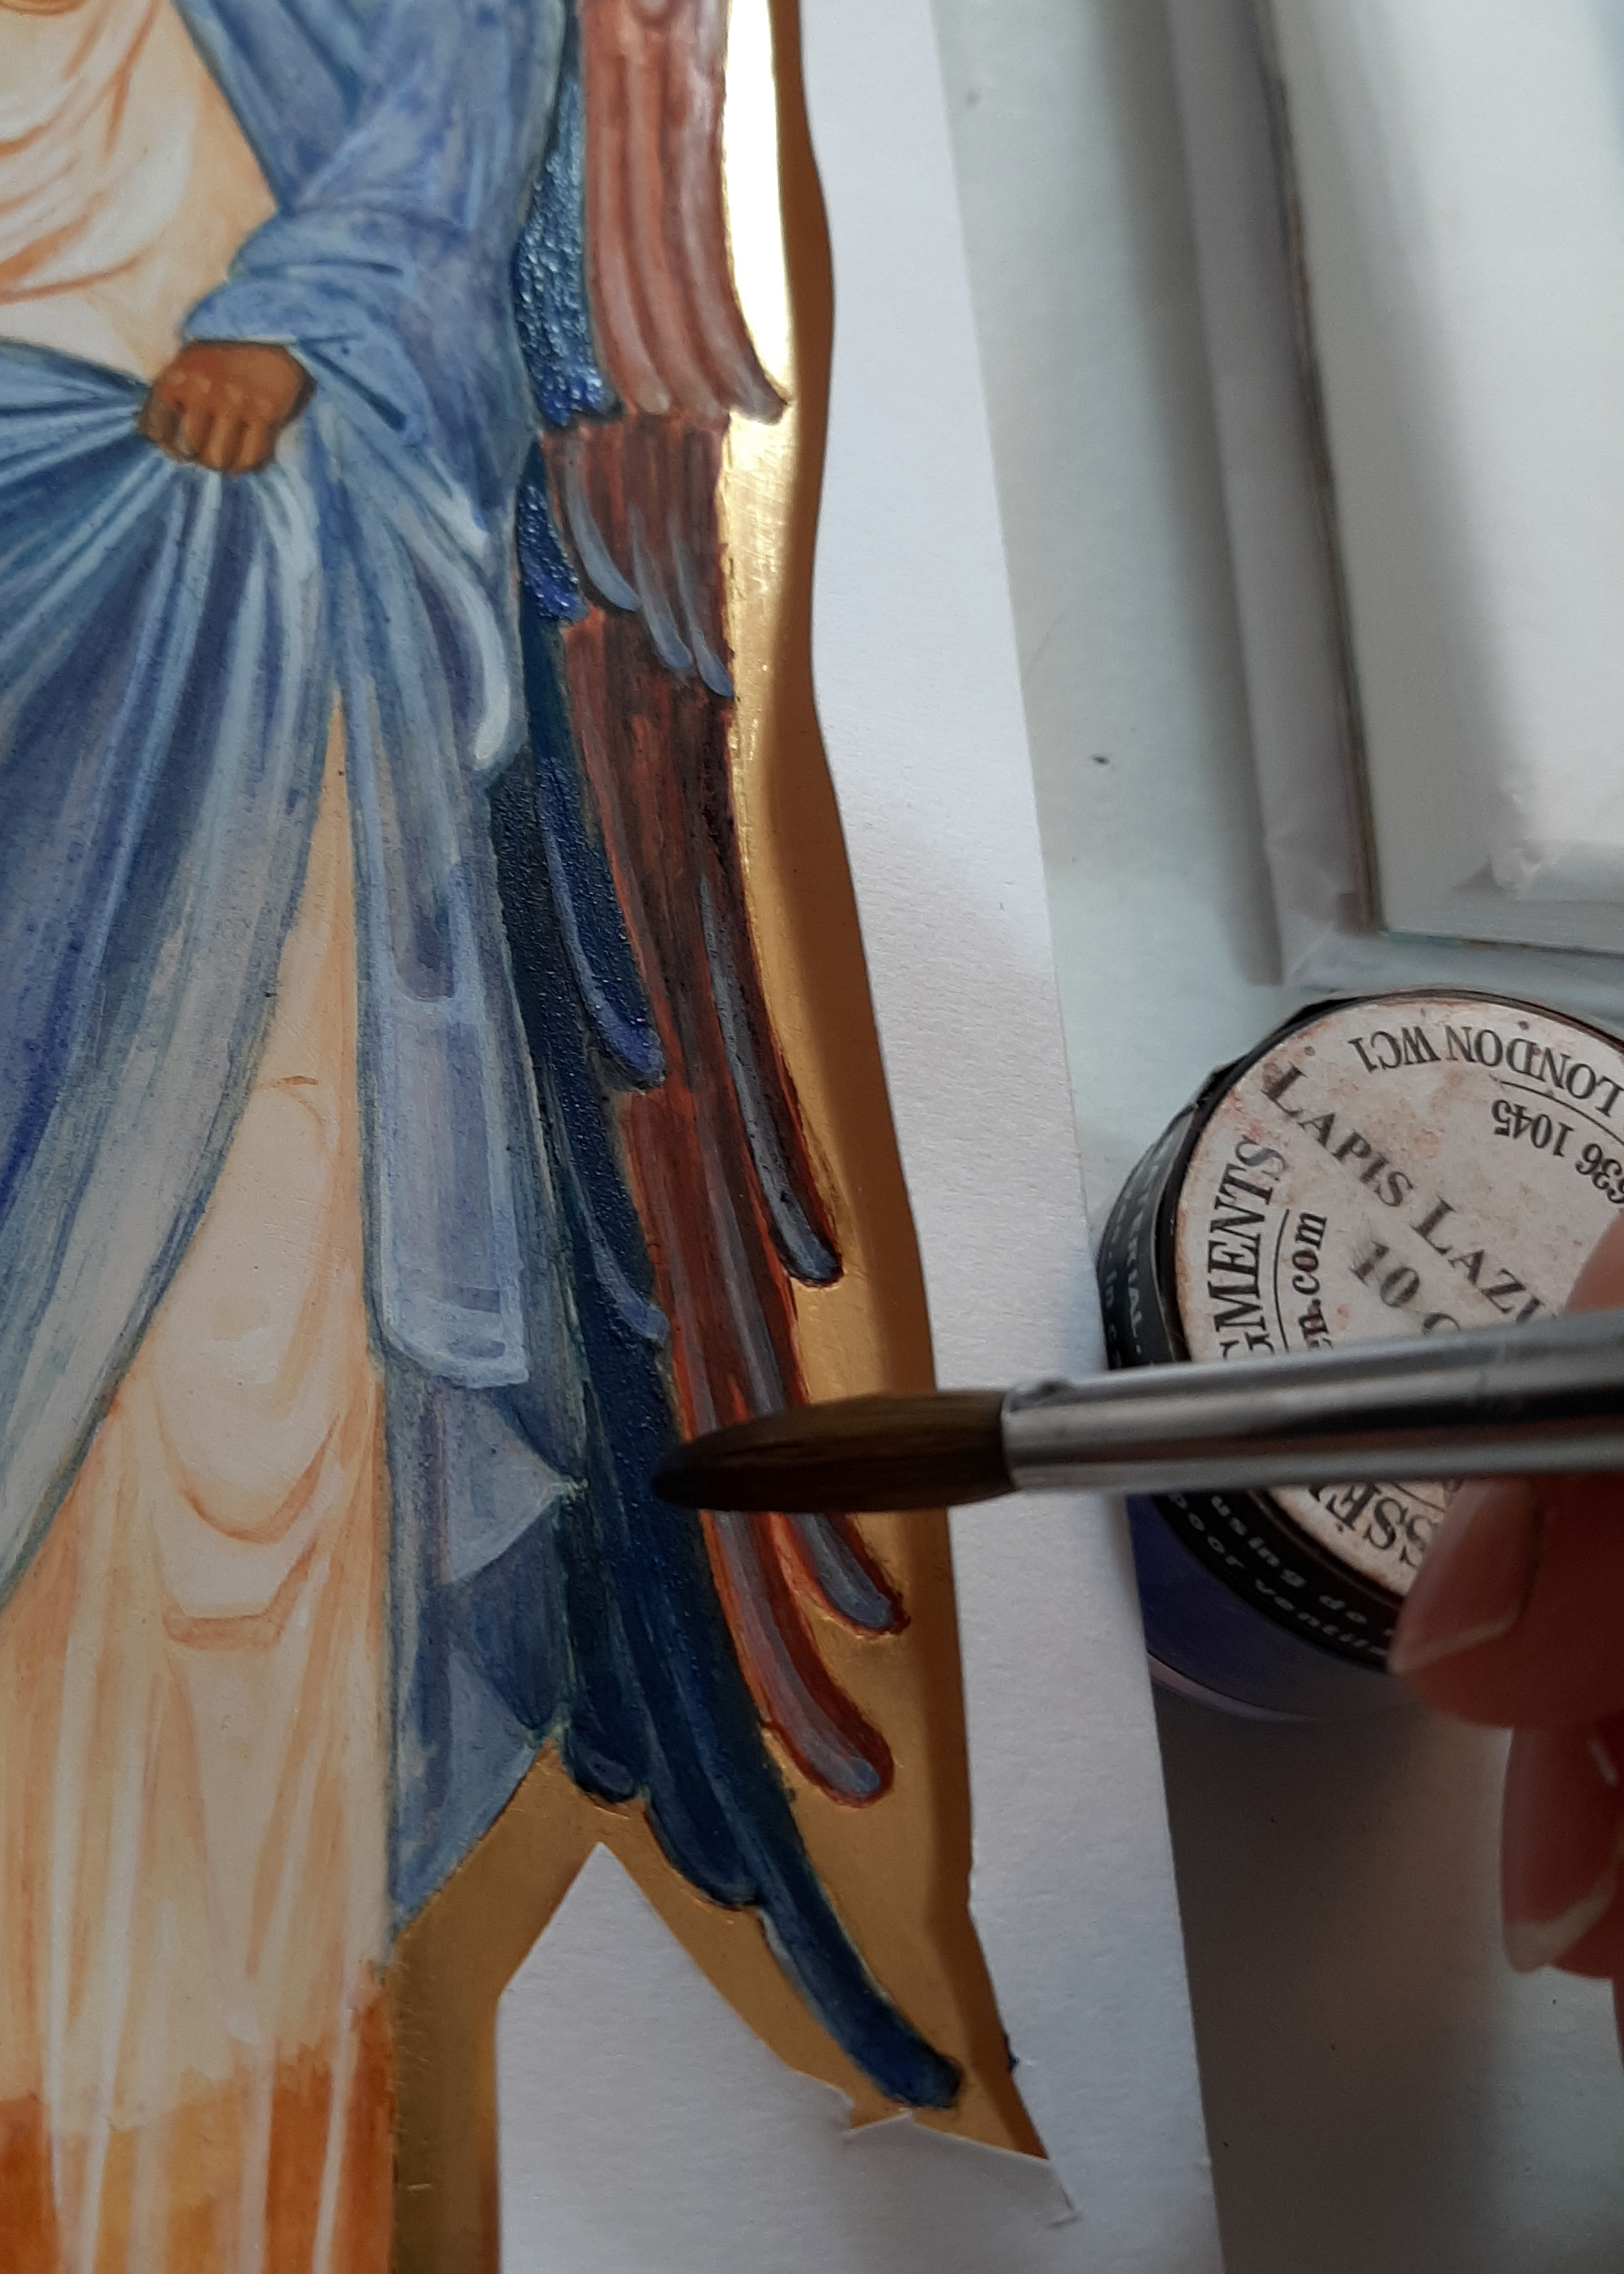
I have used a mix of English Red Deep and French Ochre Havanna for the hair, wings and robes.

This is a thin wash of Yellow Ochre Maimeri and a touch of Red Ochre light for the membrane over the skin. The red ochres are really strong pigments so you will only need a diluted drop of it for warmth.

Adding the facial highlights in thin layers of Yellow ochre Maimeri and titanium white
Building up very thin layers to model the face
Adding shell gold to the wings

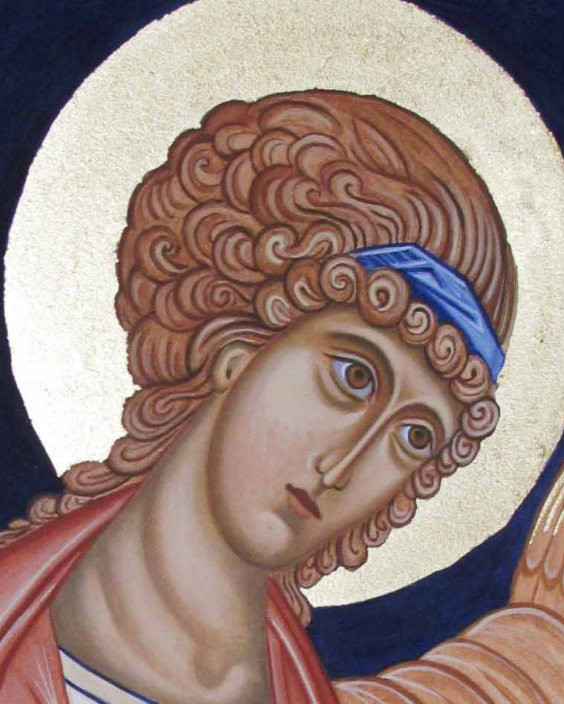
You can see this icon completed and framed together with a few other icons here on my Etsy shop page.

Final details of the red line around the halo and ribbons to denote listening

And finally to close this post on the Triptych – here it is complete in the UK and ready to fly to Australia – with my Aussie sis joining in a wee family gathering!

Triptych in UK – sister in Aus!
Sisters!

In the meantime, trusting you all into the care of our celestial helpers.

As always, thanks for reading,

Ronnie

Face up to the detail

This icon is of Archangel Raphael, one of a pair of standing angels which are based on the frescos of Chora in Istanbul, painted high up in the dome. As I mentioned in my last post, I was not too pleased with the expression.

To make a start adjusting the features, I covered the face with four or five glazes of French Ochre Havanna. This helps to return to the point where you make the first glazes over the underpainting.

Then, taking Ochre Avana and a very small amount of raw umber, deepen the hair, brow and jaw line.

I also decided to deepen the colour of the wings with a few more glazes of lapis lazuli to send them back so to speak.

In the photos below, I have added more layers of light glazes for the facial highlights. Somewhere along the line, the gaze of the angel moved to a different direction. The tiniest detail makes all the difference.

To summarise – the hair is deepened with red ochre and a touch of black. The right eye brow has been lowered and softened. The brow has been adjusted to remove the central highlight and instead bring the highlight towards the viewer. The highlights below the eyes adjusted. The nose is still a work in progress but the shape fits better with the face. The mouth has a warmth and the chin is less pointed.

I’m so glad I worked on these faces! It’s easy to leave things as they are when you have already put so much time into the icon but egg tempera is a wonderfully versatile medium and revives easily. Painting over faces with glazes is a straightforward way to make the adjustments that you know are needed. Another thing that helps is to take a photo of the face, turn it to black and white and print it off. That way, you can see clearly what isn’t working and what needs to be done.

Here’s the finished icon complete with the ribbons which symbolise Divine Listening.

The finished icon can be seen here .

As ever, thanks for reading!

Ronnie 🙂

Always we begin again

I recently unwrapped a pair of standing angel icons which I painted three years ago for the exhibition ‘A Street of Angels’ in York at Blossom Street Gallery. I remember thinking that the faces weren’t quite right but time had run out as we were relocating up to Scotland and so they went on display, got packed away afterwards and that was that.

Life has taken quite a turn since and I don’t get much time to paint icons however I have committed to revisiting and finishing off all the icons that had things that I considered weren’t quite right. I thought that it would be worth sharing how I get along with this exercise as it is a bit of an adventure!

Here are the two icons before I started work on them. It was Archangel Raphael’s expression that I thought needed most work. It’s hard to tell from these photos but the blending was a bit heavy handed and if I was to refresh one, then I should work on them both for consistency.

First thing was to ‘wake up’ the surface with several coats of an egg glaze. Using the tempera mix, I made a glaze with about 1 drop of egg to 10 drops of water. I also made a protective paper cover for the gilding and taped it down. Looking at these photos, the faces don’t seem so bad, but they were just not properly finished.

I let the glazes settle for a few days, then using the wonderful pigment French Ochre Havanna, I applied three or four glazes over the face. This pigment is warm and a great one to calm down clumsy highlights. These faces are fairly small, about 2cm from hairline to chin, so I used fine brushes for the details.

Applying glazes over the entire face.

Glazes of French Ochre Havanna even out the skin tones and deepen the gold mid tones. I also applied a few washes of English Red Ochre Light over the hair to deepen the mid-tones so I could tidy up the modelling. I’ve found that leaving the glazes to dry overnight means less likelihood of making holes in it when applying the next layers.

I’m putting on the darker tones here, with a 1010 kolinsky sable brush. I’ve mixed some English yellow ochre, raw umber and ivory black. I also used Ochre Avana which is another really versatile pigment. I have deepened the hair line and then used a thin egg glaze to feather and blend away the hard lines next to the brow. To get the highlights, I used Yellow Maimeri and titanium white, but I also added a small amount of French Havanna to keep the highlights a warm gold. I mix small quantities in this ceramic palette which comes with a lid – perfect to stop them drying out and keep the cats off!

Painting on the first layer of face highlights

I find that taking photos of my work as I go along helps as I can zoom in and see exactly where I need to tidy up. The other thing I do now is to add very thin glazes of ochre havanna as it helps with blending especially after I have been remodelling.

I added highlights in thin, thin layers, softened and shaped the eyebrows, moved the brow highlights to the right, eased back the highlights on the right of the neck, added vermillion to the nose tip, upper lip, under the chin and inner eye. Added white highlights to the eyes, with the sides of the eyes a grey mixed with black and white. Added a very thin glaze of vermillion to warm the cheeks. Then added the hair highlights back and added the ribbons which I had missed altogether. The finished face is on the left. I’m happy with this as the expression is much kinder! You can see the finished icon in my Etsy shop.

I hope that this is helpful in some way with your own icon painting. Thank you to everyone who has followed this blog during the quiet years, but I will go through the same process with Archangel Raphael in my next post.

Thanks as ever for reading and your patience!

Ronnie

Just a little triptych please? No rush.

tryptich icon by ronnie cruwys

Tryptic of Blessed Virgin Enthroned with the Christ Child surrounded by Archangels Michael and Raphael

I’m ‘Number 5’ in a family of six and we straddle the globe from USA to Australia with me here in the UK. We all ask each other favours every now and then, but I think this has to be the slowest request ever to turn around for my dear sister Anne! It was nine years ago that she asked me to paint her a ‘little triptych’ – I was still a brunette back then!

Aidan has suggested that if you are asked to paint an icon that you know nothing about – just go ahead and do it, and learn as you go. This is what has happened here. Saying yes to this request has drawn me into the world of icons, leaving the day job behind. I was relieved when Aidan accepted that these could be part of my set diploma pieces of standing and seated figures, which has meant that I have been able to learn as I go with Aidan’s guidance.

Dylan Hartley, Simon Morris, Ronnie Cruwys with triptych

Right to left: Dylan Hartley, Simon Morris, Ronnie Cruwys

Today I went to collect the finished icon from the workshop where Dylan Hartley made the oak boards, hand-carved the kivotos and gessoed it for me and where Simon Morris of Smith York Fine Art Printers has photo-scanned it, spending hours getting the studio lighting just right so as to reduce the glare from the gilding. Simon has scanned all the icons on this website as well as the printing for my street drawings over at Drawing the Street.

I have written a little about this triptych before in an earlier post when I began work on it here  and as I began to paint here. Further notes on painting the garments here.

Virgin and Child

Blessed Mother and Christ Child

As always with a finished icon, you see so many places which could do with revisiting. Faces and hands are my  weak spots. Feet too, but the slippers help!

The icon will be up in the PSTA Diploma Show in London next week, then will be part of the ‘Spirit Matters’ exhibition in Cornelissen’s window from 25th October to 16th November. From there it will make its way to Australia  where it will be part of Anne’s prayer corner in her home. We all have a lot to be thankful for but especially me with such a loving and supportive family and this sister in particular – I’m so glad she asked!

Thanks for reading,

Ronnie

anne and Ron

Sisters!

Drawing Heavenly Bodies: Virgin and Child Enthroned with attendant Archangels Raphael and Michael

pencil drawing of icon of virgin and child enthroned

Cartoon of the Virgin and Child Enthroned

Hello icon friends,

The summer before I embarked on the icon diploma course, I asked Aidan if there were any practical steps I could take to help my ability as a student icon painter. His answer was immediate: ‘Learn to draw!’ So I signed up to a really good local drawing class with David Brammeld and a year later Drawing the Street was born, not long before I was accepted on the Diploma course.

Drawing is becoming a way of life for me and I am always exploring ways to develop. There are many online classes and one which I have found refreshing and energetic is Sketchbook Skook

In the meantime, there is so much to learn with icon painting that I thought that I could share my cartoons of the figures for the triptych I’m working on, which might help you get started with your own icon studies.

You should be able to save these drawn images to your computers and print them off on A4.

The four images of the Angels of Chora are all borrowed from Aidan’s library. I hope to be able to credit the photographer in an update to this post.

Meanwhile, happy drawing!

Ronnie

pencil drawing of angel of Chora

Archangel Michael after one of the Angels of Chora

pencil drawing of Archangel Raphael

Archangel Raphael line drawing after one of the angels of Chora

Now for the full size images:

Virgin and Child Enthroned line drawing low res

angel of chora pencil drawing

Full length drawing of Archangel Michael taken from an angel of Chora

pencil drawing of Archangel Raphael

Archangel raphael full length line drawing

Image of Angel of Chora

Angel of Chora image courtesy of Aidan Hart’s image library

image of Angel of Chora

Angel of Chora images all courtesy of Aidan Hart’s image library.

Angel of chora

Angel of Chora images all courtesy of Aidan Hart’s image library.

angle of Chora black and white

Angel of Chora – images all courtesy of Aidan Hart’s image library.

Angels of Chora

Archangel in Monochrome

Face of Archangel Raphael in a monochrome study

Warmest greetings icon friends!

Our summer visitors have all gone home, my dissertation for the icon diploma has been handed in (more on that in another post) and our icon classes resumed last week with Aidan Hart in time to celebrate the feast of St Michael and All Angels.

Having spent a couple of months away from the paintbrush, I felt I would benefit from painting a monochrome. Besides, I had already stretched some 300gsm watercolour paper (Fabriano Artistico hot pressed), and had the images already prepared in outline.

painting the lines of st Michael in monochrome

First lines applied on Archangel Michael in English Red Light pigment

These are the same images of the Angels of Chora which I am using in my triptych (see previous post).  I haven’t painted the faces on any of the figures in the triptych yet, so these monochromes have been helpful in getting me back in the painting groove.

Modelling icon garments

Building up the layers of pigment to model the garments.

archangels Raphael and Michael

Background added of pure azurite pigment

I really enjoy painting monochromes. It’s relaxing not having to think about colour and to simply concentrate on the form, looking at the areas of light and shade. I also wanted these studies to stand on their own, so I gilded the haloes and garment highlights.

If ever you feel daunted by the prospect of painting an icon, this is a really good place to start.

I love the deep blue-greys of the Chora angel backgrounds. They give a wonderful feeling of a heavenly sky. It is quite a challenge to match colours, for one thing, even if you know that the colour used was azurite, this can vary according to the quality of the stone and where it was mined. For these studies, I applied over a dozen washes of azurite – the pigment which I ground from a small rock bought from Burslem Lapidary shop, then a few washes of Indigo from Cornelissens.

I used acrylic gold size, applied in two layers, then after ten minutes or so, I applied some transfer gold leaf (from Wrights of Lymm) once it had gone tacky. If you add a pinch of red pigment to the size, it helps to give some depth to the background as well as show you where you’ve painted.

gold transfer leaf

Adding gold leaf to Archangel Michael’s halo

After applying the gold leaf to the halo, I then used a compass with a dip pen attachment to draw a circle to frame it. This is fiddly and I haven’t mastered it at all yet and ended up with a line thicker than I intended.

thick line around halo

Halo line a bit too thick.

I had used a sheet of cardboard over the image to protect the face/paper from getting a compass puncture mark right in the middle of Raphael’s brow. The thickness of the card had a knock-on effect of dislocating my circle by a few millimetres – I will try a sheet of acetate cut to size next time.

Here are the finished studies. They are not the best photographs but hopefully give you an idea of the end result.

monochrome archangel Michael

Complete study of  Archangel Michael

Archangel raphael

Complete study of Archangel Raphael in monochrome

That’s all for now.

Many thanks for reading. Ronnie

PS Aidan has recently been filmed whilst painting an icon and has been included as part of Simon Schama’s Face of Britain series.

PPS Prints and cards of Archangels Michael and Raphael are now available from Smith York Printers.

More on the Triptych: Azurite on Archangels Raphael and Michael

azupainting icon with azurite pigment

Azurite blue pigments on the icon of Raphael and Michael

This is a very short post as I am not long back from the icon course. Tomorrow I am meeting my American family, then we are all heading up to Scotland for a week. It will be a while before I can post again so here are a few pictures of work in progress taken during our latest icon session.

angels egg tempera

Figures of Archangel Raphael and Michael, building up washes and highlights.

TRIP 5a

Adding indigo to low lights increases depth in the fabric.

Trip 6

Adding a background and wings

wrapping up on day 3

Wrapping up on day 3

details on the cloth

details on the cloth

That’s it for now – good night all and thanks for reading.

Ronnie

Triptych begins

Bole and water gilding a triptych

Gilding a Triptych

Hello Icon Friends,

I’ve begun work on a triptych for my sister Anne, in Australia. She made a lighthearted requests some 7 or 8 years ago, saying how much she would love to have one of those icons that ‘open out’. I never forgot her wish and it was wonderful when Aidan confirmed that standing and seated figures were part of the curriculum so my triptych could be included in the course work.

triptych treated with cuprinol

Treating the oak with Cuprinol

Dylan Hartley, in Ironbridge hand-made the quarter-sawn oak panels and gessoed them ready for me to sand. With the great benefit of hindsight, I should have asked him to treat them with Cuprinol in the workshop so they could be covered evenly on all sides – but it was only when I thought about posting the boards to Australia that I realised they would need to be treated due to their strict import regulations. A few days after I had applied the treatment and varnished the oak, the boards warped but the gesso was unharmed – no cracks.

sketch drawings for triptych

Planning the triptych layout: Upper panels include the Holy Face in the Mandilion, with Bethlehem and the New Jerusalem either side.

Anne had told me what she had in mind for this triptych: Arhcangel Raphael (the Shining One who Heals) and Archangel Michael, the Warrior, either side of the Blessed Virgin and Child. Aidan introduced me to the magnificent angels of Chora to adapt to fit the side panels – the original wall paintings fit in tapered panels set within a domed ceiling.

angel of chora

Detail of one of the Angels of Chora

Next stage was to prepare the gessoed panels by sanding in sequence through the grades of sandpaper from 80 grit to 1200 grit to prepare for water gilding. it took the best part of three full days to sand and bole the boards ready for gilding.

sanding the gesso

Sanding off the scratches and bumps in the gesso

sanding gesso

Sanding back too far

With all the irregular surfaces and curves covered in gesso, it was difficult to sand back enough to articulate the shapes without also revealing some of the linen scrim. As soon as I saw the scrim, I avoided the area and only smoothed it with the finer grades of sandpaper. It eventually covered (almost) under 13 layers of bole.

bole on triptych

Bole applied to triptych

It is very fiddly to apply layers of bole around narrow spaces so this time I masked the whole area out with masking fluid with a little added pigment.

masking gesso

Masking out the gesso before applying the bole

Before removing the masking fluid, I scored the edges to avoid lifting the bole.

Removing masking fluid

Removing masking fluid by scoring a clean edge with a sharp blade.

More on gilding in the next post – with a few tips on what not to do!

Thanks for reading,

Ronnie