Icon Diploma Student

Learning to see with the eye of the heart

Posts tagged ‘Aidan HArt Icons’

Triptych begins

Bole and water gilding a triptych

Gilding a Triptych

Hello Icon Friends,

I’ve begun work on a triptych for my sister Anne, in Australia. She made a lighthearted requests some 7 or 8 years ago, saying how much she would love to have one of those icons that ‘open out’. I never forgot her wish and it was wonderful when Aidan confirmed that standing and seated figures were part of the curriculum so my triptych could be included in the course work.

triptych treated with cuprinol

Treating the oak with Cuprinol

Dylan Hartley, in Ironbridge hand-made the quarter-sawn oak panels and gessoed them ready for me to sand. With the great benefit of hindsight, I should have asked him to treat them with Cuprinol in the workshop so they could be covered evenly on all sides – but it was only when I thought about posting the boards to Australia that I realised they would need to be treated due to their strict import regulations. A few days after I had applied the treatment and varnished the oak, the boards warped but the gesso was unharmed – no cracks.

sketch drawings for triptych

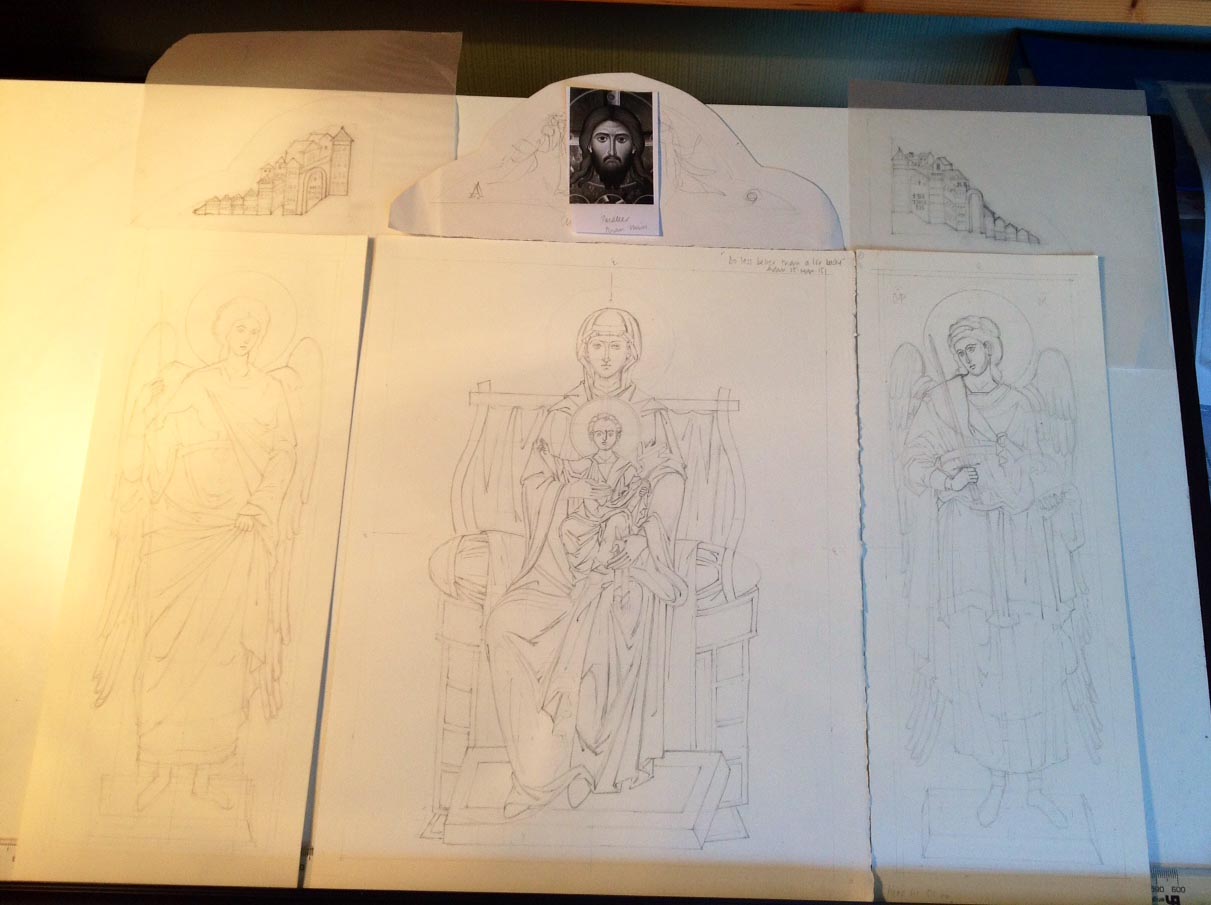
Planning the triptych layout: Upper panels include the Holy Face in the Mandilion, with Bethlehem and the New Jerusalem either side.

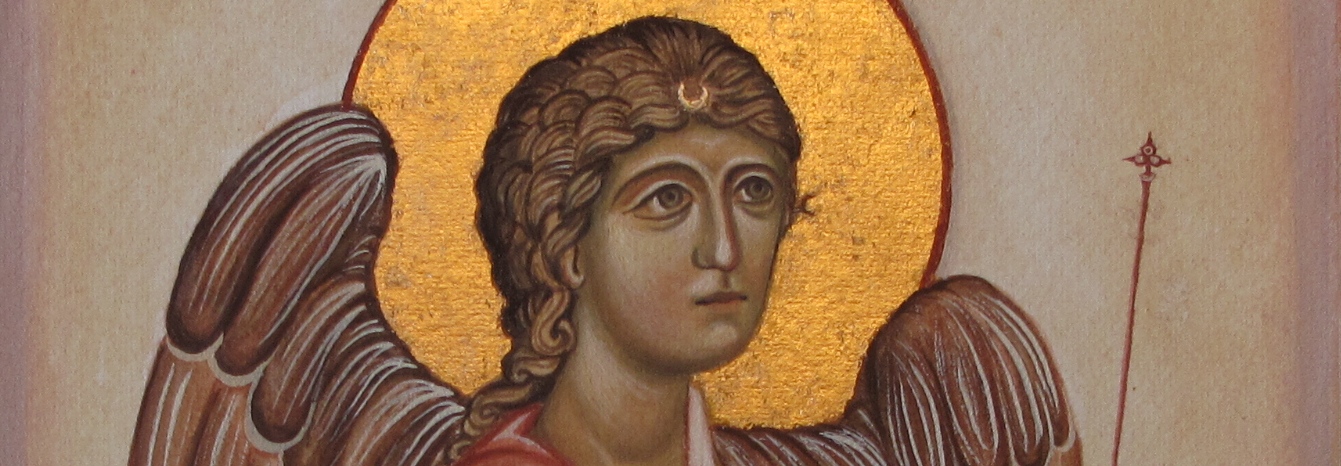
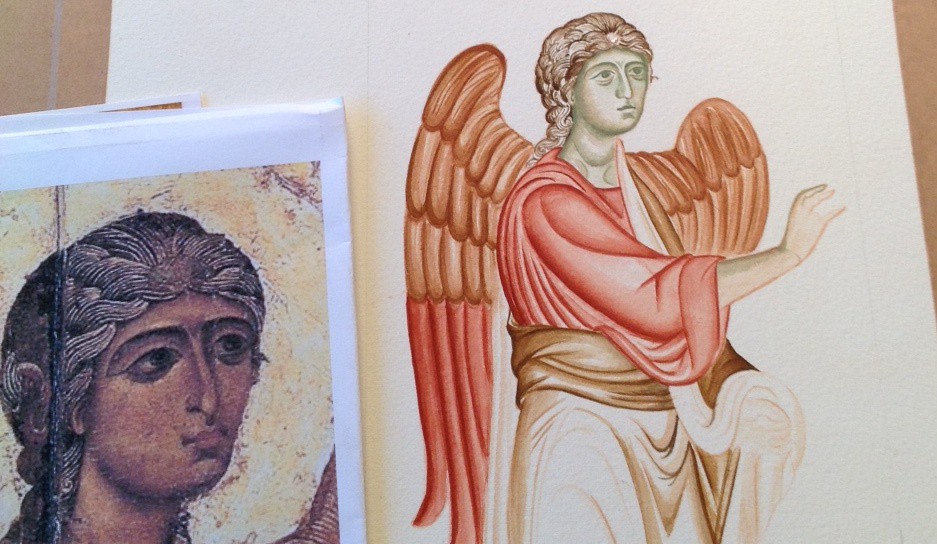
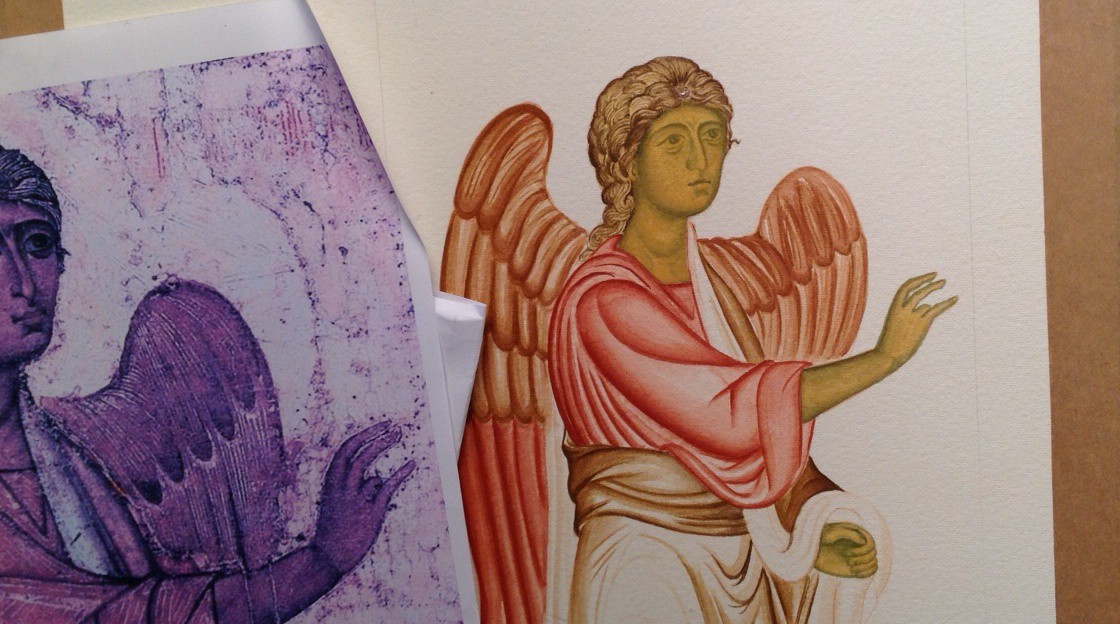
Anne had told me what she had in mind for this triptych: Arhcangel Raphael (the Shining One who Heals) and Archangel Michael, the Warrior, either side of the Blessed Virgin and Child. Aidan introduced me to the magnificent angels of Chora to adapt to fit the side panels – the original wall paintings fit in tapered panels set within a domed ceiling.

angel of chora

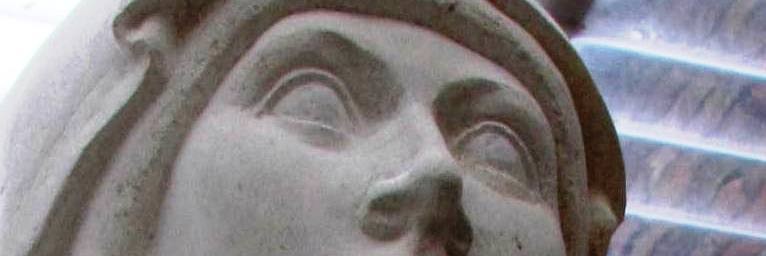
Detail of one of the Angels of Chora

Next stage was to prepare the gessoed panels by sanding in sequence through the grades of sandpaper from 80 grit to 1200 grit to prepare for water gilding. it took the best part of three full days to sand and bole the boards ready for gilding.

sanding the gesso

Sanding off the scratches and bumps in the gesso

sanding gesso

Sanding back too far

With all the irregular surfaces and curves covered in gesso, it was difficult to sand back enough to articulate the shapes without also revealing some of the linen scrim. As soon as I saw the scrim, I avoided the area and only smoothed it with the finer grades of sandpaper. It eventually covered (almost) under 13 layers of bole.

bole on triptych

Bole applied to triptych

It is very fiddly to apply layers of bole around narrow spaces so this time I masked the whole area out with masking fluid with a little added pigment.

masking gesso

Masking out the gesso before applying the bole

Before removing the masking fluid, I scored the edges to avoid lifting the bole.

Removing masking fluid

Removing masking fluid by scoring a clean edge with a sharp blade.

More on gilding in the next post – with a few tips on what not to do!

Thanks for reading,

Ronnie

Sanding for St Hilda of Whitby

Icon board

Highlight surface scratches on a gessoed icon board by rubbing in red ochre pigment

St Hilda of Whitby

St Hilda (c614-680) showing adjustments I need to make to head and shoulders

My homework for the next diploma session, is an icon of St Hilda, referring to an image painted by Aidan Hart. The icon can be seen further below and also on his website Aidan Hart Icons. During my childhood, Whitby was a favourite seaside destination from our home in York. The sight of the ruined abbey looming over the cliffs was a vivid landmark against what was often a cloudswept sky. This dramatic photograph courtesy of Mark Davis Photography shows how the abbey forms such a striking silhouette against the east coast sky.

Whitby abbey

Photo of Whitby Abbey by  Mark Davis Photography  http://www.mark-davis-photography.com/yorkshire/whitby-and-the-east-coast/

To think that St Hilda founded an an abbey and community in this wild landscape is remarkable and gives an insight into the strength of her character.

Icon by Aidan Hart of St Hilda of Whitby

St Hilda of Whitby by Aidan Hart

For this icon, I am using a flat plywood board.  I will oil gild the halo so the sanding only needs to be taken as far as 600 grit sandpaper. If you over-sand the gesso, the paint won’t stick.  I’m using an icon board which I gessoed last summer which I also sanded up to 120 grit paper. With hindsisght, I should have sanded it right up to 600 grit, as it is much easier to work outside in the warm than indoors in a UK January! Sanding gessoed boards is a dusty process so be prepared. Put a few sheets of newspaper over your worksurface and have your vacuum cleaner and a dust mask to hand. You will also need a medium sized dry paintbrush to brush the gesso dust out of the sandpaper, a cork sanding block and all the different grades of sandpaper to hand. Looking back on Dylan Hartley‘s notes which he gave us at our gessoing session last year (click here for a pdf copy SANDING ICON BOARDS by Dylan Hartley), Dylan reminds us that you should choose a place to sand where there is raking light ideally with one main light source. This helps to show up anomalies and scratches. The first sanding is done with 80 grit paper, then work up through 120, 180, 220, 320, 400 and 600 grades. It is important to use these in sequence and ensure that any grooves left by the gesso brushing are smoothed away.

Sandpaper

Splitting sandpaper sheets and filing them by grade

In the UK, sandpaper is sold in sheets about A4 size. I hadn’t realised until Aidan showed us, that if you fold and tear the paper in half lengthwise, then tear these strips into three, you can get six pieces ready to wrap around your block. Given that you go through sandpaper very quickly, it is worth spending time folding, tearing and filing the different sized papers into envelopes which does helps the flow of work.

brusgh off clogged sandpaper

Keep brushing off clogged sandpaper

It is really important to brush the sandpaper often – as soon as you have sanded the board a few times, lift the block and brush. You can also vacuum up the clogged paper to save dust clouds forming. The whole process is a bit of a faff as my glasses steam up when I wear a dust mask and they get covered with dust! Rubbing in a pinch of red ochre with cotton wool is a really effective way of seeing where the scratches are hiding. Even with good raking light, it is easy to miss a scratch until you start painting – and they are difficult to disguise later.

red ochre pigment on gesso

Identifying scratches in gesso by using red ochre pigment

Looking closely at the photo above, you can also see the horizontal marks made from clogged up sandpaper.

finished icon board

Icon board finished to 600 grit paper ready for painting and oil gilding

That’s the board now ready for me to trace on the drawing. More on that next time. Thanks for reading!   Ronnie

PS To see a demonstration by Dylan Hartley gessoing icon boards – there is a clip on You Tube here

An Archangel for Christmas

Archangel Gabriel on Watercolour Paper.

egg tempera painting

Archangel Gabriel on watercolour paper

Christmas greetings icon friends!

A few lines to say thank you for your companionship during my first year of icon painting. It has been lovely to have your quiet support and interest encouraging me to keep on posting and writing up notes etc!

There are a few more video clips of Aidan Hart’s in-class demonstrations over on You Tube and I have written up some supporting notes to go with them. These are not direct transcripts, simply notes to help as you try out the various stages of painting.

https://www.youtube.com/watch?v=N3a6puiMDuQ Aidan Hart demonstrates underpainting for the Membrane Technique Click here for Notes

https://www.youtube.com/watch?v=XaSi-WVHGaY Aidan Hart demonstrates applying flesh membrane to icon bust Click here for Notes

https://www.youtube.com/watch?v=Hr4R8BzMpPc Shadows and highlights on garments using membrane technique Click here for Notes

https://www.youtube.com/watch?v=CiFkJrsDS1s Aidan Hart demonstrating halos

https://www.youtube.com/watch?v=mFG-XxPqiSI Aidan Hart demonstrates painting Mandilion hair

https://www.youtube.com/watch?v=QbwE0QY1aOw Aidan Hart demonstrates painting garments Click here for Notes

I have enjoyed the monochrome icon studies on watercolour paper and thought I would have another go at the Archangel Gabriel based on the Annunciation of Ustyug. I stretched some Fabriano Artistico paper and painted using the membrane technique. The colours are much softer on paper – lines are not quite as crisp unless you go over them several times. However, it is a great way of practicing if you haven’t got a board prepared.

1 Angel gabriel study

Underpainting: the face is in Terre Verte and a touch of Yellow Ochre Maimeri, garments and wings in a mix of English red ochre, French ochre Sahara and Avana.

Yellow ochre Maimeri eith titanium white and red ochre light

Membrane applied to flesh parts.

Building up the hair and facial highlights.

4 Angel Gabriel study

Highlights added to wings and sleeves

Preparing to gild

Preparing to gild using Roberson’s gilders size – applied over the halo which has undercoat in red ochre.

Gilding the halo

Gilding the halo. Applying final facial highlights

9 Complete Angel Gabriel study

Finished angel with halo, staff and lettering.

It is a better attempt than my last one but there is a long way to go before I become fluent and produce anything nearly as elegant as the original. All the same, it comes with my very best wishes for a happy, peaceful and blessed Christmas wherever you are in the world. Thanks for reading.

Happy Christmas, Ronnie

PS…Some years later and I did revisit some of the finer details on Archangel Gabriel’s face – around the upper lip. I am now happy with this and it is listed here in my Etsy shop

Supplementary Notes for the Membrane Technique

Sketching the tiny Loch Lomond sea plane while we waited our turn

Sketching the tiny Loch Lomond sea plane out in the Autumn sunshine while we awaited our turn.

Hello Icon friends,

I have just returned from a wonderful short break in Scotland where my husband and I enjoyed our mutual birthday treats of a trip in a seaplane over some of the Scottish west coast. It was spectacular!

I have written up my class notes (7 pages) to share them here Class notes for the membrane technique as I will soon be picking up the brush to continue with the highlights on my mandilion. Notes are easy to refer to whilst working and I can add further comments as I go along.

They are supplementary to Aidan’s comprehensive book – Techniques of Icon and Wall Painting which is very clear in the sequence of work.

Thats all for now and thanks for reading.

Ronnie

Gilding Demonstrations with Aidan Hart

icon diploma students

Sanding our icon boards

In this session, Aidan explained and demonstrated the two different techniques for gilding icons: water and oil gilding.

Two of our fellow students were absent due to close family bereavements so this time round I have filmed the demonstrations as gilding is quite tricky and this way, we can all refer back to the demonstrations later.

The following clips capture parts of the different stages of both gilding processes. The videos are pretty basic but if we watch them a few times and then read Aidan’s instructions in his book, they may help us on our way to mastering these techniques!

Homework notes etc will be on the next post.

I hope that the top link below leads to the overall play list, and the others to the individual clips.

http://www.youtube.com/playlist?list=PLFzuzMtzpZZhjM1ldgGDlyFm9rF7221rW

1 Aidan Hart applying shellac for oil gilding:  http://youtu.be/7DrT1bbu0Lk

2 Aidan Hart applying bole for water gilding 1: http://youtu.be/J-dj_XkzKi0

3 Aidan Hart applying bole for water gilding 2: http://youtu.be/y4F7h21qVBI

4 Aidan Hart applying bole for water gilding part 3: http://youtu.be/H7068I-OvI4

5 Sand sand sanding the boards!: http://youtu.be/BcaoYeJTH0Q

6  Aidan Hart applying gold leaf for water gilding  https://www.youtube.com/watch?v=0etKCemxQYg

7 Aidan Hart burnishing gold (water gilding) http://youtu.be/9KBi92P3euM

8 Aidan Hart faulting water gilding  http://youtu.be/s6CoUJoLKYs

9 Laying size for oil gilding  http://youtu.be/gSaqvVm-xJQ

10  Removing gold from gesso  http://youtu.be/7R-c4UMFMUA

11 Oil gilding flat board  http://youtu.be/JVdI7PXZ14A

12 oil gilding kivotos  http://youtu.be/NSxTfUPISJM

13 Grinding Azurite pigment http://youtu.be/y-FHvAxwg9w

Part Two – Our Lady of Lincoln


Our Lady of Lincoln

Our Lady of Lincoln

Greetings Icon friends and my very best wishes for a very happy Eastertide!

After the visit to York Minster, I felt I had to see the work that Aidan Hart, our icon diploma teacher, has been steadily sculpting in the heart of the Shropshire countryside. Aidan has been commissioned to carve in stone a 1.9 metre (6.2 feet) high statue of Our Lady of Lincoln for a chapel at the east end of Lincoln Cathedral. Work is fast approaching completion and to see this magnificent creation in its cradle so to speak, is a rare privelege indeed and again, it’s an experience to be shared.

folds of Our Lady's cloak under Aidan's watchful eye.

Martin Earle carving the folds of Our Lady’s cloak under Aidan’s watchful eye.

It was quite something to witness our fellow icon diploma student Martin Earle, hard at work on this magnificent sculpture too! Martin, I am most impressed – you have nerves of steel!

Aidan has written a fascinating article about this sculpture for the Orthodox Arts Journal  and there is a little more on his website here.

I was really excited to be able to see this work being carved in-situ and have no doubt that you would like to catch a glimpse through these images too.

Romanesque style folds of her garments

Our Lady of Lincoln showing the Romanesque style folds of her garments

Note the characteristic sweep of the drapery echoing that of the Romanesque carving of Our Lady of York Minster.

Drapery folds on Our Lady of York Minster

Drapery folds on Our Lady of York Minster

I dont want to steal the sheer delight of seeing this work in real life – but Our Lady looks utterly beautiful.

Our Lady of Lincoln

Our Lady of Lincoln

The expression on Our Lady’s face is so inviting and open; she seems to draw you towards her from over the fields and beyond.

Our Lady of Lincoln in Shropshire

Our Lady of Lincoln in Shropshire

I couldn’t resist distracting the workers with a photo call!

Jeremy Schrecker, Aidan Hart and Martin Earle

Jeremy Schrecker, Aidan Hart and Martin Earle

Meet Jeremy Schrecker, http://www.schrecker.co.uk/index.html a sculptor who is working in the barn alongside Aidan and Martin – please do have a look at his website. Such talent secreted away in the most unexpected places.

Thanks for letting me visit Aidan and Martin and thank you for reading!