Icon Diploma Student

Learning to see with the eye of the heart

Archive for ‘January, 2015’

Gilders’ Punch Tools

Cropped image of Annunciation from French manuscript

‘The Annunciation’ detail of an illumination I painted in 2004 – based on a French or Flanders manuscript, 12th C (original size approx 150 x 100mm)

Over ten years ago, I attended a series of workshops run by Patricia Lovett on gilding and traditional egg tempera painting skills. Patricia is enthusiastic, highly skilled and a natural teacher and part of our learning was to paint our own illuminations based on good quality examples of manuscripts. It was a wonderful introduction to the world of gilding on vellum and Patricia still runs these workshops from time to time, from her home in Kent.

I am particularly drawn to manuscripts of the Romansque period such as the one above, the original which is kept in the British Library and can be seen in The Illuminated Page by Janet Backhouse. For anyone interested in manuscripts, it is a wonderful  book. I bought my copy in the Blake Head Bookshop, Micklegate, York in 1997. The shop has long gone which is a great loss, but the book is a favourite and still available.

Having leafed through this book many times, I would often wonder how certain things were done, such as how a gilded background was tooled. Having spent long hours last summer learning to gild icons (see my earlier posts) it is really quite a challenge to get the smooth mirror gold shine of water gilding. For the example above, I used the tip of a gilders pointed pencil burnishing tool. Looking back on it now, it is fairly crude, but I was pleased with how the tiny indents sparkled when catching the light.

To see a startlingly impressive example of tooled gilding, from a later period (c.1395–1399) I would highly recommend a visit to the National Gallery in London, to see the Wilton Diptych.

Image of the WIlton Diptych

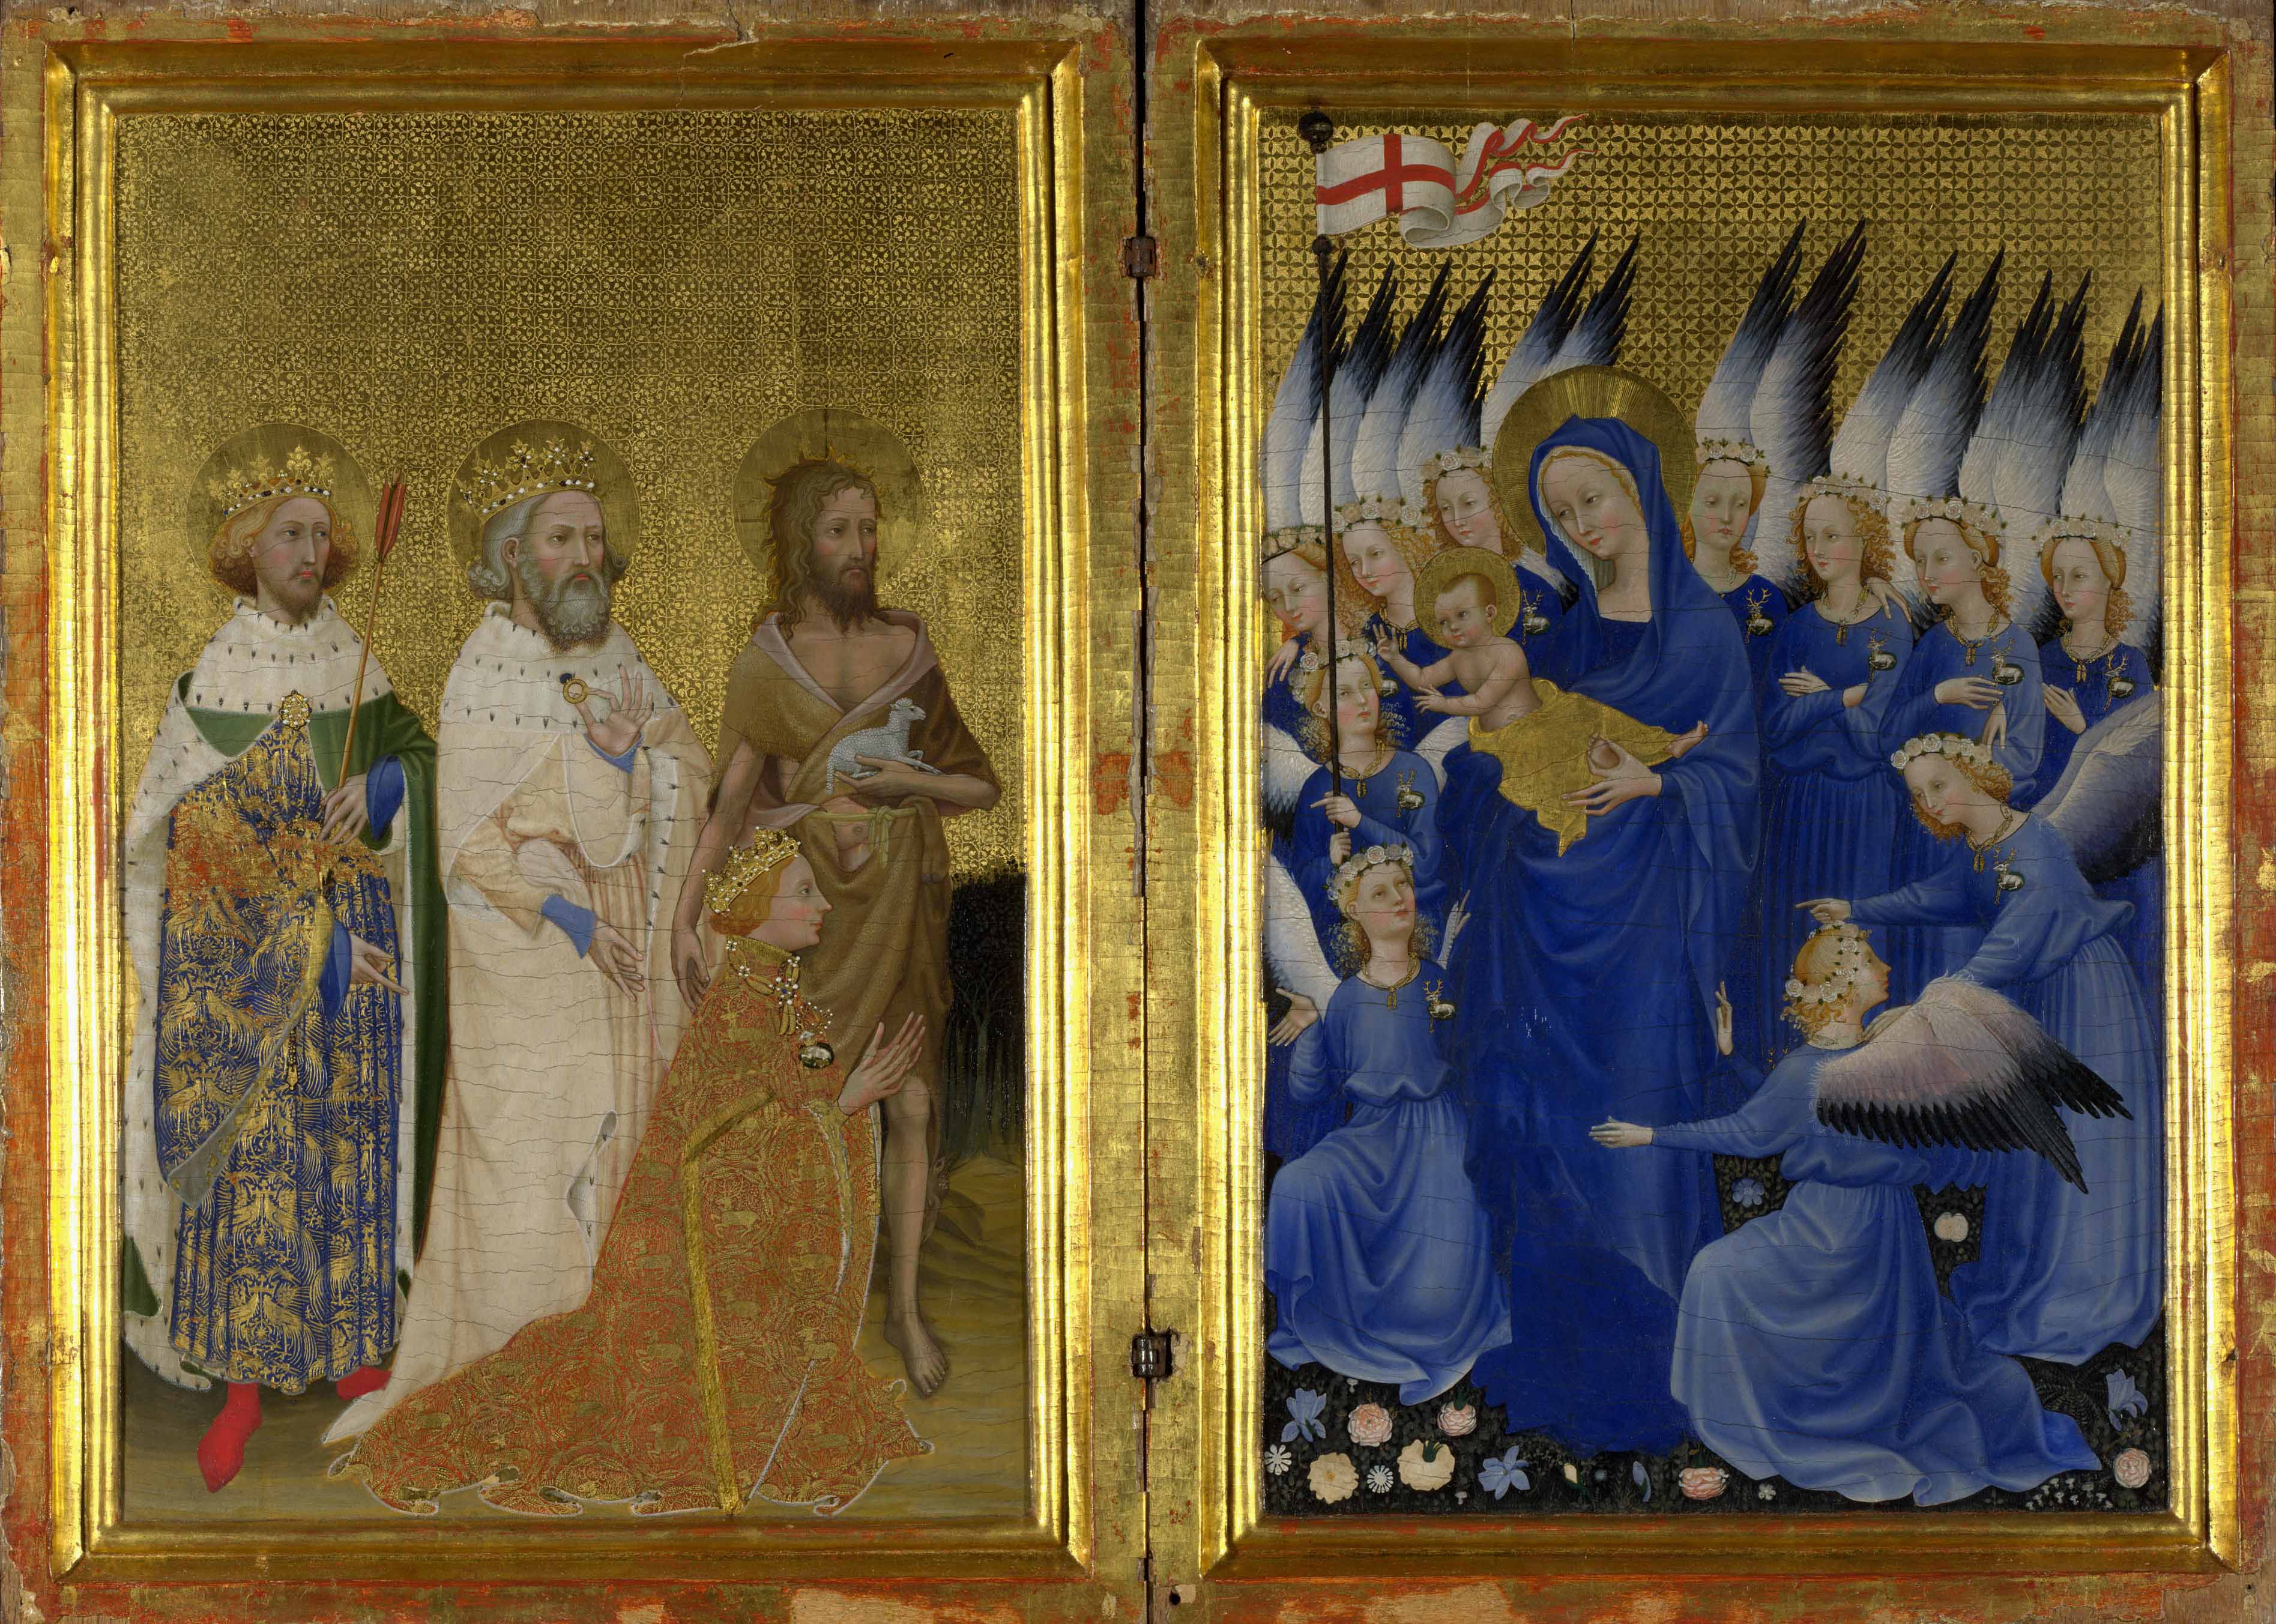
Image of the WIlton Diptych courtesy of http://en.wikipedia.org/wiki/Wilton_Diptych

detail of Wilton Diptych tooling

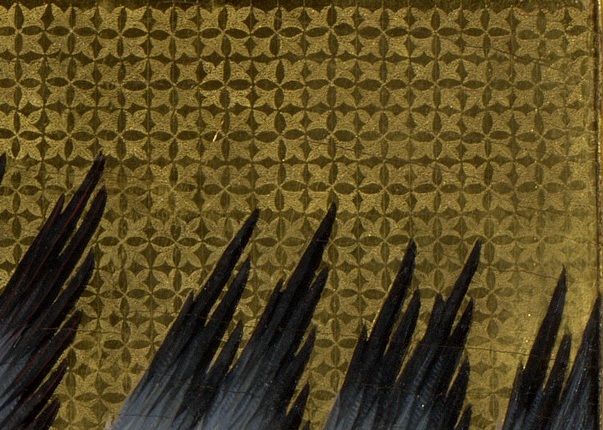
Detail of background tooling on the above image of the WIlton Diptych

detail of tooled gilded background

Tooled background of the second panel of the WIlton Diptych

Crown detail Edward Confessor

Detail of crown of King Edward the Confessor from the Wilton Diptych

It has puzzled me as to the tools that might have been used to do this exquisite work and have googled high and low for anything that might be suitable. I discovered a blog by the classical realist painter Jerry Berg who described some of the tools which he had bought from a shop in Florence.

gilders punch tools

Gilders’ punch tools courtesy of Jerry Berg’s blog

Jerry gave an example of how the tool worked and I think that this might be worth investigating. So, this morning I was delighted to receive Cosimo Tasinari’s four page catalogue in the post which I have scanned for you here: Cosimo Tassinari Firenze Italy

gilders punch tools

Gilders punch tools courtesy of Jerry Berg’s blog

Contact details: Piero P. Fantechi, Ditta Cosimo Tassinari, Piazza S. Maria Novella 2r, Florence, 50123 Italy.      Ph: 0039 055-287-869    Fax: 0039 055-287-869      tassinari@infinito.it

Gilding, Tooling, and Stamping Supplies; Type – Hand Engraved Brass; Bookbinding Tools; Dies; Stamps and Rollers, Typeholders; Steel punchers for icons-gesso. Will cut tools to your design; hand-engraved seals made. English spoken.

I usually don’t like shopping but I would love a visit to this shop!

Hope this is useful and thanks for reading.

Ronnie

Sanding for St Hilda of Whitby

Icon board

Highlight surface scratches on a gessoed icon board by rubbing in red ochre pigment

St Hilda of Whitby

St Hilda (c614-680) showing adjustments I need to make to head and shoulders

My homework for the next diploma session, is an icon of St Hilda, referring to an image painted by Aidan Hart. The icon can be seen further below and also on his website Aidan Hart Icons. During my childhood, Whitby was a favourite seaside destination from our home in York. The sight of the ruined abbey looming over the cliffs was a vivid landmark against what was often a cloudswept sky. This dramatic photograph courtesy of Mark Davis Photography shows how the abbey forms such a striking silhouette against the east coast sky.

Whitby abbey

Photo of Whitby Abbey by  Mark Davis Photography  http://www.mark-davis-photography.com/yorkshire/whitby-and-the-east-coast/

To think that St Hilda founded an an abbey and community in this wild landscape is remarkable and gives an insight into the strength of her character.

Icon by Aidan Hart of St Hilda of Whitby

St Hilda of Whitby by Aidan Hart

For this icon, I am using a flat plywood board.  I will oil gild the halo so the sanding only needs to be taken as far as 600 grit sandpaper. If you over-sand the gesso, the paint won’t stick.  I’m using an icon board which I gessoed last summer which I also sanded up to 120 grit paper. With hindsisght, I should have sanded it right up to 600 grit, as it is much easier to work outside in the warm than indoors in a UK January! Sanding gessoed boards is a dusty process so be prepared. Put a few sheets of newspaper over your worksurface and have your vacuum cleaner and a dust mask to hand. You will also need a medium sized dry paintbrush to brush the gesso dust out of the sandpaper, a cork sanding block and all the different grades of sandpaper to hand. Looking back on Dylan Hartley‘s notes which he gave us at our gessoing session last year (click here for a pdf copy SANDING ICON BOARDS by Dylan Hartley), Dylan reminds us that you should choose a place to sand where there is raking light ideally with one main light source. This helps to show up anomalies and scratches. The first sanding is done with 80 grit paper, then work up through 120, 180, 220, 320, 400 and 600 grades. It is important to use these in sequence and ensure that any grooves left by the gesso brushing are smoothed away.

Sandpaper

Splitting sandpaper sheets and filing them by grade

In the UK, sandpaper is sold in sheets about A4 size. I hadn’t realised until Aidan showed us, that if you fold and tear the paper in half lengthwise, then tear these strips into three, you can get six pieces ready to wrap around your block. Given that you go through sandpaper very quickly, it is worth spending time folding, tearing and filing the different sized papers into envelopes which does helps the flow of work.

brusgh off clogged sandpaper

Keep brushing off clogged sandpaper

It is really important to brush the sandpaper often – as soon as you have sanded the board a few times, lift the block and brush. You can also vacuum up the clogged paper to save dust clouds forming. The whole process is a bit of a faff as my glasses steam up when I wear a dust mask and they get covered with dust! Rubbing in a pinch of red ochre with cotton wool is a really effective way of seeing where the scratches are hiding. Even with good raking light, it is easy to miss a scratch until you start painting – and they are difficult to disguise later.

red ochre pigment on gesso

Identifying scratches in gesso by using red ochre pigment

Looking closely at the photo above, you can also see the horizontal marks made from clogged up sandpaper.

finished icon board

Icon board finished to 600 grit paper ready for painting and oil gilding

That’s the board now ready for me to trace on the drawing. More on that next time. Thanks for reading!   Ronnie

PS To see a demonstration by Dylan Hartley gessoing icon boards – there is a clip on You Tube here